Embark on a journey from seed to splendor and learn how to start your plant journey. In this guide, we will explore the process of planting seeds, from making shallow indentations to moving seedlings to a well-lit area.
Discover the stages of plant growth, from seed to sprout, vegetative, budding, flowering, and ripening stages. Find out the steps of planting a seed and learn how to properly handle roots when planting flowers. Starting a garden is an exciting and rewarding experience that allows you to transform a barren patch of land into a thriving oasis.

Table of Contents
So, let’s dive into the art of growing plants and unleash your gardening potential.
Understanding The Life Cycle Of A Plant
Embarking on the journey of creating a flourishing garden is both exciting and rewarding. As a home gardener, it’s essential to understand the life cycle of a plant and the different stages it goes through. This knowledge will help you make informed decisions about caring for your plants and ensure their overall success. In this article, we will dive into the stages of plant growth, explore the changes plants go through in each stage, and understand the importance of each stage in the plant’s journey.
The Stages Of Plant Growth: Seed, Sprout, Vegetative, Budding, Flowering, Ripening
Plants’ lives may be as short as a few weeks or months, but they go through distinct changes as they grow, just as people do. Understanding the stages of plant growth is crucial for any garden enthusiast. Let’s take a closer look at each stage:
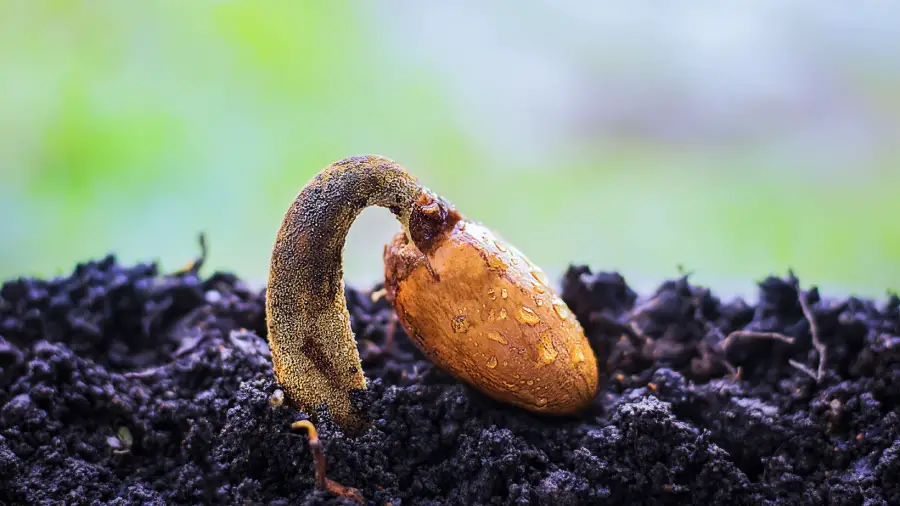
- Seed: The journey begins with a seed. Seeds are the dormant form of a plant and contain all the genetic information needed for growth. They require specific environmental conditions, such as appropriate moisture and temperature levels, to germinate and begin their transformation.
- Sprout: Once a seed germinates, it develops into a sprout. This stage is characterized by the emergence of the plant’s first leaves and roots. The sprout starts absorbing nutrients from the soil and begins its upward growth.
- Vegetative: In the vegetative stage, the plant focuses on building its structure and growing its leaves, stems, and roots. This stage is essential for establishing a strong foundation for the plant’s future growth.
- Budding: As the plant matures further, it enters the budding stage. During this phase, small buds start forming at the tips of the stems. These buds will eventually develop into flowers or other reproductive structures.
- Flowering: The flowering stage is one of the most visually appealing stages in a plant’s life cycle. The buds open up into colorful flowers, attracting pollinators like bees and butterflies. This stage is crucial for successful pollination and the production of fruits or seeds.
- Ripening: Lastly, the plant reaches the ripening stage. This stage is characterized by the maturation of fruits or seeds. Fruits become fully developed, and seeds are ready for dispersal, ensuring the continuation of the plant’s life cycle.
Exploring The Changes Plants Go Through In Each Stage
Understanding the changes plants go through in each stage of their growth is vital for providing the right care and support. In the seed stage, for example, the plant is entirely dependent on the surrounding conditions for germination. As it progresses to the sprout stage, the plant starts to generate its own energy through photosynthesis, enabling it to grow and develop.
During the vegetative stage, the plant focuses on expanding its leaf surface area, allowing it to capture more sunlight for photosynthesis. This stage lays the foundation for a healthy and robust plant. Moving on to the budding stage, the plant starts gearing up for reproduction and redirects its energy towards the development of flowers or reproductive structures.
In the flowering stage, the plant’s primary goal is successful pollination. It invests resources in producing brightly colored petals and attracting pollinators to facilitate the transfer of pollen. Finally, in the ripening stage, the plant shifts its energy towards the development and maturation of fruits or seeds.
Understanding The Importance Of Each Stage In The Plant’s Overall Journey
Each stage of a plant’s growth serves a purpose in its overall journey. From the seed stage, where the plant begins its life, to the sprout stage, where it establishes its foundation, and the vegetative stage, where it grows and expands its structure.
The budding and flowering stages are crucial for reproduction and ensuring the survival of the species. Without pollination and the production of fruits or seeds, the plant’s journey would come to an abrupt end. Finally, the ripening stage completes the cycle by allowing the plant to disperse its seeds, ensuring new generations of plants.
By understanding the importance of each stage, you can better appreciate the intricate journey plants go through and make informed decisions to support their growth and development.
Now that we have explored the life cycle of a plant and the significance of each stage, you are equipped with the knowledge to start your plant journey. Whether you are a seasoned gardener or just starting, understanding these stages will help you nurture your plants and witness their splendor as they thrive and blossom.
Starting Your Plant Journey: Planting From Seeds
Embarking on the journey of creating a flourishing garden is both exciting and rewarding. One of the most fundamental steps in this journey is starting your plants from seeds. Planting from seeds allows you to witness the entire life cycle of a plant, from a tiny seed to a thriving splendor. In this section, we will explore the essential techniques for successfully planting seeds and nurturing their growth. So, let’s dive in and learn how to bring your garden to life!
Preparing The Soil For Seed Planting
The first step in planting seeds is to prepare the soil. Properly preparing the soil sets the foundation for healthy seedling development. Here are the key steps to follow:
- Clear any debris or weeds from the planting area.
- Loosen the soil with a garden fork or tiller to ensure good drainage and aeration.
- Add organic matter, such as compost or well-rotted manure, to enrich the soil with nutrients.
- Level the soil surface with a rake to create a smooth bed for seed planting.
Making Shallow Indentations And Sowing The Seeds Evenly
Once the soil is prepared, it’s time to make shallow indentations and sow the seeds evenly. Follow these steps:
- Using your finger or a small tool, create shallow indentations in the soil according to the recommended planting depth for the specific seed.
- Place the seeds in the indentations, ensuring they are evenly spaced apart.
- Cover the seeds with a thin layer of soil or vermiculite, following the recommended planting depth.
Proper Watering Techniques For Seed Germination
Watering plays a crucial role in seed germination. Adequate moisture is essential for seeds to sprout and establish roots. Here are the proper watering techniques to follow:
- After sowing the seeds, lightly water the soil surface to moisten it.
- Avoid overwatering, as it can lead to waterlogged soil and rotting seeds.
- Monitor the soil moisture levels regularly and water when the top inch of soil feels dry.
- Use a watering can with a fine nozzle or a misting spray bottle to prevent displacing the seeds or compacting the soil.
Providing The Right Conditions For Seedlings’ Growth
As the seeds germinate and seedlings emerge, it’s important to provide the right conditions for their growth. Follow these steps:
- Place the seedlings in a well-lit area, such as under fluorescent lights or in a sunny window.
- Maintain a consistent temperature between 65-75°F (18-24°C) to promote healthy growth.
- Adjust the light source’s height to ensure the seedlings receive proper light intensity without becoming leggy.
- Rotate the containers regularly to prevent the seedlings from leaning towards the light source.
By following these techniques for planting seeds and nurturing their growth, you are on your way to witnessing the transformation from tiny seeds to magnificent plants. Stay tuned for the next sections where we will explore the various stages of plant growth and other essential tips for a successful garden.
Nurturing Your Seedlings: Care And Maintenance
Once your seeds have sprouted and the seedlings have emerged, it’s time to shift your focus to nurturing their growth through proper care and maintenance. This crucial stage sets the foundation for the future health and productivity of your plants, so it’s important to pay attention to their needs. Here are the key aspects to consider:
Transferring Seedlings To A Well-lit Area For Optimal Growth
As your seedlings grow, they require sufficient light to develop strong stems and healthy leaves. Transferring them to a well-lit area is essential for their optimal growth. Place your seedlings in a spot where they can receive direct light, such as near a south-facing window or under fluorescent lights. This will help them establish a sturdy structure and prepare them for the final transplant.
Managing Water And Nutrient Requirements Of Young Plants
Watering your seedlings appropriately is crucial for their survival. Keep the soil consistently moist but avoid overwatering, as it can lead to root rot and other issues. Check the soil moisture regularly by inserting your finger about an inch deep and water when it feels dry. Additionally, provide your seedlings with a balanced liquid fertilizer to ensure they receive the necessary nutrients for healthy growth. Follow the instructions on the fertilizer package for proper dosage and application.
Protecting Seedlings From Pests And Diseases
Pests and diseases can wreak havoc on your delicate seedlings, so it’s crucial to take preventive measures to keep them safe. First, practice good hygiene by regularly cleaning your gardening tools to avoid spreading diseases. You can also use physical barriers like row covers or netting to protect your seedlings from pests such as insects and birds. Lastly, consider using organic pest control methods like neem oil or insecticidal soap to control any infestations that may occur.
Tips For Thinning And Transplanting Seedlings
Thinning your seedlings is an important step to ensure proper airflow, light penetration, and healthy root development. Once your seedlings have grown a few inches tall, thin them out by removing the weaker or overcrowded ones. This will give the remaining seedlings enough space to grow and prevent competition for resources. When it comes to transplanting, handle the seedlings gently to avoid damaging their delicate root system. Dig a hole in the prepared soil, carefully transfer the seedling, and water it thoroughly to help it establish in its new location.
Cultivating Plants: From Vegetative To Flowering Stage
Embarking on the journey of creating a flourishing garden is both exciting and rewarding. Whether you’re a seasoned gardener or just starting out, understanding the different stages of plant growth is essential in ensuring the success of your plants. From seed to sprout, then through vegetative, budding, flowering, and ripening stages, each phase requires specific care and attention. In this article, we will focus on the transition from vegetative to flowering stage, discussing how to create ideal conditions for vegetative growth, how to recognize signs of plant readiness for flowering, how to promote flower development through proper care and maintenance, and how to deal with common issues that may arise during this crucial phase. So let’s delve into the fascinating world of plant cultivation and unlock the secrets to turning your garden into a breathtaking display of splendor.
Creating Ideal Conditions For Vegetative Growth
During the vegetative stage, plants prioritize developing strong roots and lush foliage. To support this growth, providing the ideal conditions is crucial:
- Provide ample sunlight or artificial grow lights, ensuring plants receive at least 14-16 hours of light per day.
- Maintain a consistent temperature range of 70-80°F (21-27°C) to promote optimal metabolism and photosynthesis.
- Ensure proper air circulation by placing fans or vents near the plants, preventing the formation of mold or mildew.
- Balanced nutrition is essential, so use a well-formulated organic fertilizer with a ratio of nitrogen (N), phosphorus (P), and potassium (K) suitable for vegetative growth.
By creating these ideal conditions, you will provide your plants with the best foundation for healthy vegetative growth.
Understanding The Signs Of Plant Readiness For The Flowering Stage
As your plants progress through the vegetative stage, they will eventually show signs of readiness to transition to the flowering stage. Here’s what to look for:
- Height growth slows down or stops completely.
- Branches start to stretch and develop multiple nodes.
- Pre-flowers, identifiable by their tiny pistils or calyx shapes, begin to appear at the nodes.
- Leaves may start changing shape, color, or texture, indicating hormonal changes in preparation for flowering.
By closely observing these signs, you can determine the perfect timing to initiate the flowering stage and maximize your plant’s potential.
Promoting Flower Development Through Proper Care And Maintenance
Once your plants have entered the flowering stage, it’s crucial to provide tailored care to support flower development. Follow these guidelines to promote robust and abundant blooms:
- Adjust the light cycle to 12 hours of uninterrupted darkness and 12 hours of intense light to trigger flowering hormones.
- Monitor humidity levels, keeping them around 40-50% to avoid mold or bud rot.
- Continue providing balanced nutrition, but switch to a fertilizer with a higher ratio of phosphorus (P) to encourage flower formation.
- Regularly inspect and prune your plants to remove any dead or damaged foliage, ensuring optimal airflow around the flowers.
By implementing these care and maintenance practices, you can enhance the flowering process and achieve beautiful, vibrant blossoms.
Dealing With Common Issues During The Transition Phase
Transitioning from the vegetative to flowering stage can sometimes come with challenges. Understanding and addressing these common issues will help ensure a smooth transition:
| Issue | Solution |
|---|---|
| Nutrient deficiencies | Regularly monitor nutrient levels and adjust fertilization accordingly. Use organic amendments or foliar sprays to supplement any deficiencies. |
| Excessive stretching or sparse foliage | Adjust lighting distance and intensity to prevent stretching. Consider pruning or training techniques to promote bushier growth. |
| Pests and diseases | Implement preventive measures such as regular inspection, proper sanitation, and using organic pest control methods. Act quickly at the first signs of infestation or disease. |
By promptly addressing these issues, you can mitigate potential setbacks and keep your plants thriving during this critical phase.
Reaping The Fruits Of Your Labor: Harvesting And Beyond
Unlock the secrets of successful plant growth with “From Seed to Splendor: Starting Your Plant Journey. ” Discover how to sow seeds, nurture seedlings, and guide plants through their growth stages to achieve a flourishing garden. This comprehensive guide will help you embark on a rewarding journey towards transforming a barren patch of land into a thriving oasis.
Identifying The Right Time For Harvest
When it comes to harvesting your plants, timing is everything. Harvesting at the right moment ensures that you enjoy the maximum flavor, aroma, and nutritional value. A good rule of thumb is to closely observe your plants and look for specific signs that indicate they are ready for harvest. Here are a few tips to help you identify the right time:
- Color: Notice the color changes in fruits and vegetables. Most vegetables are ready to be harvested when they reach their characteristic color, such as bright red tomatoes or vibrant green broccoli florets.
- Texture: Pay attention to the firmness or softness of your produce. For example, cucumbers should be firm and crisp, while avocados should yield slightly to gentle pressure.
- Size: Some plants, like zucchini or cucumbers, are at their peak when they are still small and tender. On the other hand, certain fruits, like apples or melons, should reach their full size before harvest.
- Smell: Fragrance can be a great indicator for harvest readiness. Some fruits, like peaches or strawberries, emit a strong and sweet aroma when they are ripe.
- Taste: Finally, the taste test is crucial. Sampling a small portion of your produce will tell you if it has reached optimal flavor.
Harvesting Techniques For Different Types Of Plants
Each plant has its own unique requirements and preferred harvesting methods. Here are some specific techniques for different plant types:
| Plant Type | Harvesting Technique |
|---|---|
| Leafy Greens (lettuce, spinach, kale) | Harvest by picking individual leaves or cutting the outer leaves, allowing the inner leaves to continue growing. |
| Root Vegetables (carrots, beets, radishes) | Carefully loosen the soil around the base of the plant and gently pull out the root vegetables. |
| Fruits (tomatoes, peppers, berries) | Use a sharp pair of scissors or shears to cut the fruits from the plant, leaving a small stem attached. |
| Herbs (basil, mint, parsley) | Harvest herbs by cutting the stems just above a set of healthy leaves, promoting new growth. |
Post-harvest Care And Storage Recommendations
To ensure the longevity and quality of your harvest, proper post-harvest care and storage are essential. Here are some recommendations to keep in mind:
- Remove any damaged or diseased produce before storage to prevent the spread of pathogens.
- Clean your fruits and vegetables gently using water or a mild vegetable wash to remove dirt and debris.
- Dry them thoroughly before placing them in storage to reduce moisture and minimize the risk of rot.
- Store different types of produce separately, as some fruits release ethylene gas that can accelerate the ripening process in others.
- Use appropriate storage containers, such as breathable bags or containers with ventilation, to maintain optimal humidity levels.
- Store perishable produce, like leafy greens or berries, in the refrigerator to extend their shelf life.
- For long-term storage, consider techniques like canning, freezing, or dehydrating to preserve your harvest.
Reflecting On The Joys And Lessons Of Your Plant Journey
As you savor the bounty of your harvest, take a moment to reflect on the joys and the lessons learned during your plant journey. Growing your own plants not only provides fresh and nutritious food but also offers countless rewards. You have witnessed the miracle of life from seed to splendor, nurturing tiny seeds into flourishing plants. You have learned patience, perseverance, and the value of caretaking. Celebrate the successes and learn from the challenges, knowing that each season presents new opportunities for growth. Your plant journey is an ongoing source of fulfillment and connection to nature, reminding you of the remarkable power of nurturing and cultivation.
Frequently Asked Questions On “from Seed To Splendor: Starting Your Plant Journey”
How Do You Start A Plant From A Seed?
To start a plant from a seed, make shallow indentations in the soil and sow the seed evenly. Lightly water the surface and keep the container in a warm area. As the seeds germinate, move them to a well-lit area.
What Are The Stages Of Plant Growth?
The stages of plant growth are seed, sprout, vegetative, budding, flowering, and ripening. Plants go through these changes as they grow.
What Are The Steps Of Planting A Seed?
To plant a seed, make shallow indentations in the soil, sow the seed evenly, lightly water the surface, and place the container in a warm area. Once the seeds germinate, move the seedlings to a well-lit area.
Do You Need To Break Up Roots When Planting Flowers?
When planting flowers, it is not necessary to break up every root. However, it is recommended to separate as many roots as possible and lightly prune any excessively long roots to fit in the planting hole. Teasing the root ball promotes better growth.
Conclusion
Embarking on the journey of starting your own plant collection is a fulfilling and rewarding experience. By understanding the process of starting from seeds, nurturing them through various growth stages, and providing the right conditions, you can witness the transformation from tiny seeds to splendid plants.
Remember to plant with care, provide proper lighting, and give them the attention they deserve. With patience and dedication, you can create a beautiful garden filled with lush greenery and vibrant blossoms. Start your plant journey today and watch your garden flourish into a captivating oasis.
(To get some Rooftop Gardening Ideas: https://bonsainurserybd.com/5-small-space-rooftop-garden-ideas/)