Lily

Lily: A Guide to the Enchanting Flower

Introduction

Lilies are some of the most captivating and beloved flowers, known for their elegant beauty and enchanting fragrance. With their vibrant colors and distinct shapes, lilies have been cherished in gardens and floral arrangements for centuries. In this comprehensive guide, we will delve into the fascinating world of lilies, exploring their various types, growing techniques, and essential care tips. Whether you’re an avid gardener or a flower enthusiast, join us as we unravel the allure of the magnificent lily.
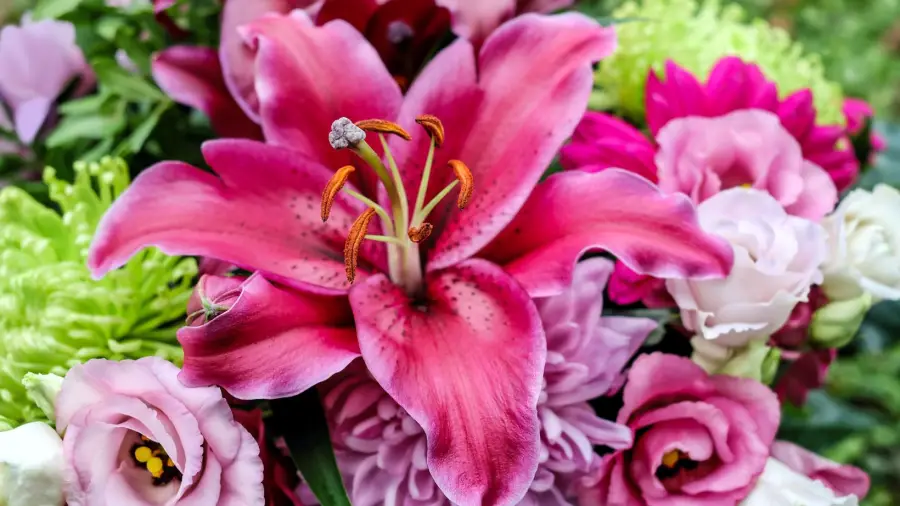
Lily

What are Lilies?

Lily, scientifically known as Lilium, is an herbaceous flowering plant that belongs to the Liliaceae family. These stunning flowers boast a trumpet-shaped, six-petal bloom, and they come in a wide array of colors, ranging from pristine white to deep crimson. Native to the temperate regions of the Northern Hemisphere, lilies are found in various parts of the world, including Asia, Europe, and North America.

Table of Contents

The Different Types of Lilies

Lilies encompass numerous species and hybrids, each possessing its unique characteristics and charm. Let’s explore some popular types of lilies:

1. Easter Lily (Lilium longiflorum)

The lily, particularly the Easter Lily, symbolizes purity, hope, and renewal. Its pure white, trumpet-shaped blooms are commonly associated with the Easter season, making it a cherished gift and a classic choice for religious celebrations.

2. Asiatic Lilies (Lilium asiatica)

Asiatic lilies are renowned for their vivid colors and striking appearance. They come in various shades, including vibrant oranges, pinks, and yellows. These lilies are early bloomers and add a cheerful touch to any garden.

3. Tiger Lily (Lilium lancifolium)

With its distinct reddish-orange color adorned with dark spots, the Tiger Lily is easily recognizable. It carries a sense of boldness and is admired for its wild beauty.

4. Daylilies (Hemerocallis)

Often confused with true lilies, daylilies are a separate genus, but their name stems from their lily-like appearance. They are known for their prolonged blooming period and come in an assortment of colors.

5. Casa Blanca Lily (Lilium ‘Casa Blanca’)

The Casa Blanca Lily exudes elegance with its large, pure white blossoms and sweet fragrance. The lily is a popular choice for weddings and formal occasions.

Cultivating Lilies: Planting and Growing Tips

Lilies are relatively easy to grow, and with the right care, they can thrive in various climates. Here are some essential tips to ensure successful lily cultivation:

1. Selecting the Right Location

Lilies prefer well-draining soil and require at least six hours of sunlight daily. Choose a location in your garden that receives ample sunlight and has fertile, loamy soil.

2. Planting Lilies

Plant lily bulbs during the fall, approximately 6 to 8 inches deep in the soil. If you’re planting multiple bulbs, space them at least 8 to 12 inches apart to allow sufficient room for growth.

3. Watering

Lilies require consistent moisture but should not be waterlogged. To ensure healthy growth, it’s essential to keep the soil around the lily evenly moist, particularly during the growing season. A layer of mulch can help retain moisture and regulate the soil temperature.

4. Fertilization

For optimal growth and abundant blooms, apply a balanced, slow-release fertilizer to the lily during the growing season. This will promote healthy development and vibrant flowers. Avoid fertilizers high in nitrogen, as they can lead to excessive foliage growth.

5. Supporting Tall Varieties

Some lily varieties can grow quite tall and may require support to prevent them from bending or breaking. Use stakes or cages to provide support as the plants grow.

6. Deadheading

Remove faded flowers regularly to encourage continuous blooming and prevent the plant from putting energy into seed production.

7. Overwintering

In colder climates, apply a layer of mulch over the lily bulbs in late fall to protect them from freezing temperatures.

Caring for Lilies: Common Challenges and Solutions

While lilies are generally low-maintenance, they can face certain challenges. Let’s explore some common lily issues and their solutions:

1. Pests and Diseases

Lilies can be susceptible to pests like aphids, mites, and slugs, as well as diseases like botrytis and lily mosaic virus. Use organic insecticides and fungicides, if necessary, and remove infected plants promptly.

2. Yellowing Leaves

Yellowing leaves may indicate overwatering or underwatering. For the best results, tailor your watering schedule to the specific needs of the lily and ensure adequate drainage in the soil.

3. Lily Beetle Infestation

The red lily beetle can be a significant problem for lily growers. Handpick and destroy these pests when spotted, and consider using neem oil as a natural deterrent.

4. Stunted Growth

Inadequate sunlight or poor soil quality can cause stunted growth in lilies. Ensure they receive enough sunlight and amend the soil with compost for better nutrition.

5. Wilting Flowers

Wilting flowers may result from high temperatures or insufficient watering. Provide shade during the hottest part of the day and ensure the soil remains consistently moist.

Lily Symbolism and Cultural Significance

Throughout history, lilies have held profound cultural significance and symbolism in various civilizations:

1. Ancient Egypt

In ancient Egypt, lilies were associated with rebirth and the afterlife. They often appeared in tombs and burial sites as symbols of resurrection.

2. Greek Mythology

Lilies were connected to Greek mythology, representing purity and the goddess Hera. According to legend, lilies grew from the milk of Hera, the queen of the gods.

3. Christianity

In Christianity, lilies are linked to the Virgin Mary and symbolize purity, chastity, and virtue. They are often featured in religious artwork and ceremonies.

4. Chinese Culture

In Chinese culture, lilies symbolize abundance, prosperity, and good luck. They are frequently used in celebrations and traditional festivals.

5. Victorian Era

During the Victorian era, lilies conveyed messages through the language of flowers. The color and type of lily carried specific meanings, allowing people to express sentiments discreetly.

Lily-care-guide

FAQs

Are lilies toxic to pets?

Yes, certain types of lilies, such as Easter lilies, tiger lilies, and daylilies, are toxic to pets, especially cats. Ingestion of these lilies can lead to severe health issues and, in some cases, be fatal. Keeping these plants out of reach of pets is essential to ensure their safety, especially when it comes to the lily varieties that are toxic to animals.

How do I store lily bulbs?

If you need to store lily bulbs temporarily, keep them in a cool, dry place. To maintain the well-being of the lily bulbs, steer clear of exposing them to direct sunlight or extreme temperatures. Plant the bulbs as soon as possible for the best results.

Can I grow lilies in containers?

Yes, lilies can be grown successfully in containers. When planting lilies, opt for a spacious pot with excellent drainage, and ensure to use a high-quality potting mix for the best results. Ensure the container receives sufficient sunlight and water the lilies regularly.

When is the best time to cut lilies for arrangements?

Cut lilies for floral arrangements when the buds are just beginning to open. This ensures the longest vase life and prevents premature wilting.

How can I encourage my lilies to bloom more?

For an abundance of blooms, make sure to regularly deadhead spent flowers on the lily plant. Additionally, provide adequate sunlight, water, and fertilization to support healthy growth and abundant blooming.

Can I grow lilies from seeds?

While it is possible to grow lilies from seeds, it can be a time-consuming process, and the resulting plants may not be identical to the parent plant. Most gardeners prefer growing lilies from bulbs for a more predictable outcome.

Conclusion

Lilies are undeniably a treasure among flowers, captivating hearts with their stunning beauty and rich symbolism. Whether adorning gardens, celebrations, or religious ceremonies, these enchanting blooms have left an indelible mark on cultures around the world. With the knowledge of their diverse types, cultivation techniques, and care, you can now embark on your journey of growing and appreciating the splendor of lilies. Embrace the allure of these delightful blossoms and witness the magic they bring to your life.

(To get some ideas you can check : https://bonsainurserybd.com/5-small-space-rooftop-garden-ideas/)

Roses

Roses 101: A Comprehensive Guide to Growing, Pruning, and Caring for Your Blooms 🌱🌹

Introduction

Roses are the epitome of beauty and elegance, enchanting gardeners and admirers for centuries. Cultivating these exquisite blooms may seem daunting, but fear not! This comprehensive guide, “Roses 101: A Comprehensive Guide to Growing, Pruning, and Caring for Your Blooms 🌱🌹,” is here to walk you through the entire process. Whether you’re a seasoned green thumb or a gardening novice, this article will provide you with valuable insights, expert advice, and practical tips to help your roses thrive. Let’s delve into the world of roses and unlock the secrets to growing, pruning, and caring for these magnificent flowers!

Roses

Roses 101: A Comprehensive Guide to Growing, Pruning, and Caring for Your Blooms 🌱🌹

Roses, with their mesmerizing fragrance and captivating colors, have become symbolic of love, passion, and beauty. But before we delve into the art of nurturing these blooms, let’s start with the basics.

Table of Contents

The Different Types of Roses

Roses come in an astonishing variety of types, each with its unique characteristics and growth requirements. Here are some popular rose types you can choose from:

  1. Hybrid Tea Roses: Known for their classic, high-centered blooms and long stems, hybrid tea roses are perfect for cutting and creating stunning floral arrangements.
  2. Floribunda Roses: These roses produce clusters of blooms and are cherished for their profuse flowering throughout the season.
  3. Climbing Roses: As their name suggests, climbing roses have long canes and are ideal for covering trellises, walls, and fences.
  4. Shrub Roses: Hardy and low-maintenance, shrub roses offer continuous blooms and are perfect for landscaping.
  5. Miniature Roses: Small in size but big in charm, miniature roses are perfect for containers and small gardens.
  6. Grandiflora Roses: A hybrid of hybrid tea and floribunda roses, grandiflora roses showcase the best of both worlds with large, clustered blooms.
  7. Old Garden Roses: These classic roses have a rich history and come in various types, such as Alba, Bourbon, Damask, and Gallica roses.

Remember that different rose types may require varying levels of care and attention. Research the specific needs of your chosen variety to ensure successful cultivation.

Selecting the Right Location

Like any living organism, roses need the right environment to thrive. Choosing the proper location for planting is crucial to their well-being.

  1. Sunlight Requirements: Roses are sun-loving plants and generally require at least 6-8 hours of direct sunlight daily. For your roses to flourish, select a spot in your garden that receives ample sunlight.
  2. Soil Quality: Well-draining soil with a pH level between 6.0 to 6.5 is ideal for roses. Amend the soil with organic matter to improve its texture and fertility.
  3. Air Circulation: Good air circulation prevents common rose diseases. Avoid planting roses too close together or near large structures that block airflow.
  4. Shelter from Harsh Winds: While roses adore sunlight, they don’t fare well in strong winds. Plant them in a location that offers some protection from harsh gusts.

Planting Your Roses

With the ideal location in mind, it’s time to get your hands dirty and plant those roses!

  1. Choosing Container Roses: If you opt for container-grown roses, select plants with healthy, robust roots and well-established stems.
  2. Bare-Root Roses: For bare-root roses, soak the roots in water for a few hours before planting to ensure proper hydration.
  3. Digging the Hole: When planting roses, dig a hole that is slightly wider and deeper than the root ball.
  4. Proper Spacing: Give your roses enough space to grow and flourish. Space them at least 2-3 feet apart, depending on the specific variety.
  5. Backfilling and Watering: Gently backfill the hole with soil and water thoroughly to eliminate air pockets around the roots.
  6. Mulching: Apply a layer of organic mulch around the base of the plant to retain moisture, regulate soil temperature, and prevent weed growth.

Watering and Feeding Your Roses

Proper watering and feeding are vital to a rose’s health and vitality. Here’s how to ensure your roses get the nourishment they need:

  1. Watering Schedule: Roses require consistent watering, especially during dry spells. To promote deep root growth in roses, ensure you water deeply at the base of the plant.
  2. Early Morning Watering: Water your roses early in the morning to allow the foliage to dry before evening, reducing the risk of fungal diseases.
  3. Fertilizing Roses: Feed your roses with a balanced fertilizer that is specifically formulated for roses. Apply fertilizers in spring and early summer.
  4. Compost and Organic Matter: Regularly add compost and organic matter to the soil to enhance its nutrient content and promote overall soil health.

Pruning Your Roses

Pruning is an essential aspect of rose care that helps maintain their shape, remove dead or diseased wood, and stimulate new growth.

  1. Timing: The best time to prune roses is in late winter or early spring before new growth appears.
  2. Tools: Use sharp and clean pruning shears to make clean cuts and reduce the risk of transmitting diseases.
  3. Pruning Techniques: Different rose types require different pruning techniques. Learn how to prune your specific rose variety to avoid any damage.
  4. Removing Dead Wood: Cut out any dead, damaged, or weak stems to encourage healthier growth.
  5. Shaping the Rosebush: Trim the rosebush to achieve the desired shape, promoting better airflow and sunlight penetration.

Dealing with Common Pests and Diseases

Roses, like any other plant, are susceptible to pests and diseases. Promptly identifying and addressing these issues will safeguard your roses’ health.

  1. Aphids and Thrips: These tiny insects feed on rose sap and can be controlled with insecticidal soaps or horticultural oils.
  2. Black Spot: This fungal disease causes black spots on leaves. Regularly inspect your roses and use fungicides as a preventive measure.
  3. Powdery Mildew: Powdery mildew presents as a white, powdery coating on leaves. Apply fungicides and ensure good air circulation.
  4. Spider Mites: These pests suck sap from leaves, leading to discoloration. Spray roses with water to dislodge them or use miticides.
  5. Japanese Beetles: Handpick these pests or use traps to keep their population in check.

Remember to choose organic pest control methods whenever possible to minimize chemical exposure.

Tips for Winter Care

As the winter chill sets in, it’s essential to provide your roses with some extra care to ensure their survival during the cold months.

  1. Winter Mulching: Apply a thick layer of mulch around the base of the plant to insulate the roots from freezing temperatures.
  2. Stop Fertilizing: Stop fertilizing your roses in late summer to discourage new growth, making the plants more resilient to winter conditions.
  3. Pruning for Winter: In late winter, remove any dead or diseased wood to prevent further damage during cold spells.
  4. Watering: Continue to water your roses in the winter, but reduce the frequency to prevent waterlogged soil.
Roses-care-guide

Frequently Asked Questions (FAQs)

Q: How often should I water my roses?

A: Roses generally need deep watering once or twice a week, depending on weather conditions. For optimal rose growth, make sure the soil remains moist without becoming waterlogged.

Q: Do roses require a lot of sunlight to bloom?

A: Yes, roses thrive in full sunlight. They require at least 6-8 hours of direct sunlight daily to produce healthy blooms.

Q: When is the best time to plant roses?

A: The ideal time to plant roses is in early spring, after the last frost, or in late winter before the growing season begins.

Q: How can I prevent diseases in my rose garden?

A: To prevent diseases, provide good air circulation, avoid overhead watering, and promptly remove any diseased plant material.

Q: How do I deadhead roses, and why is it essential?

A: Deadheading is the process of removing spent blooms. It promotes new growth, prevents seed formation, and encourages continuous flowering.

Q: Can I grow roses in containers?

A: Yes, many rose varieties are suitable for container gardening. Choose compact and miniature varieties for the best results.

Conclusion

With the knowledge gained from “Roses 101: A Comprehensive Guide to Growing, Pruning, and Caring for Your Blooms 🌱🌹,” you are well-equipped to embark on your rose-growing journey. Remember to choose the right rose type, provide the ideal growing conditions, and care for your roses diligently. Your efforts will be rewarded with stunning blooms and a garden filled with the timeless beauty and fragrance of roses. Happy gardening!

lantana

Lantana: The Vibrant and Versatile Flower

Introduction: Embracing the Beauty of Lantana

Lantana is a captivating flowering plant that has found its way into the hearts of gardeners and nature enthusiasts alike. Known for its vibrant, multi-colored flowers, lantana brings a touch of tropical charm to any landscape. Its hardiness, versatility, and ease of cultivation have made it a popular choice for gardens around the world. In this article, we will delve into the fascinating world of lantana, exploring its various species, cultivation techniques, and the many ways it can enhance our lives.

lantana

Lantana: Unveiling Its Diversity

Lantana is a genus that encompasses over 150 species, each boasting its unique attributes and charm. From the radiant Lantana camara to the delicate Lantana montevidensis, these plants vary in color, size, and growth habits. Let’s explore some of the most captivating lantana species and their distinct characteristics.

Lantana camara: The Classic Beauty

Lantana camara, commonly known as the “common lantana,” is one of the most widely recognized species. Its blooms come in a breathtaking array of colors, such as red, orange, yellow, and pink, which often change as the flowers age. This stunning color transformation has earned it the nickname “ham and eggs.” Additionally, Lantana camara attracts butterflies and hummingbirds, making it a delightful addition to butterfly gardens.

Lantana montevidensis: The Trailing Wonder

Lantana montevidensis, also called “trailing lantana” or “weeping lantana,” exhibits a cascading growth habit, making it ideal for hanging baskets or cascading over garden walls. Its small, lilac-colored flowers create a soft and elegant appearance, adding a touch of grace to any setting.

Lantana depressa: The Groundcover Champion

Lantana depressa, the “creeping lantana,” offers a low-growing and sprawling habit, making it an excellent choice for groundcovers. Its vibrant flowers bloom in hues of pink, purple, and white, brightening up any landscape with a carpet of color.

Lantana involucrata: The Wild Beauty

Lantana involucrata, known as the “wild lantana” or “button sage,” thrives in natural and wild landscapes. This native lantana species features clusters of delicate pink to lavender flowers, attracting a myriad of pollinators, including bees and butterflies.

Cultivating Lantana: Tips for Success

Successfully cultivating lantana requires an understanding of its growth requirements and optimal care practices. Whether you’re a seasoned gardener or a novice, these essential tips will ensure your lantana thrives in its environment.

Choosing the Right Location

Lantana thrives in full sunlight, so selecting a location with at least six to eight hours of direct sunlight daily is crucial. Ensure that the area has well-draining soil, as lantana does not tolerate waterlogged conditions.

Planting Lantana

When planting lantana, dig a hole twice as wide as the plant’s root ball and place it in the center. After planting the lantana, fill the hole with soil and gently tamp it down, ensuring that you water the plant thoroughly to aid in the establishment of its roots.

Watering and Fertilizing

Once established, lantana is relatively drought-tolerant and requires moderate watering. For lantana, it’s best to water deeply but infrequently to promote deeper root growth. Apply a balanced, slow-release fertilizer during the growing season to promote healthy blooms.

Pruning for Abundant Blooms

Regular pruning is essential to encourage bushier growth and more abundant blooms. Pinch back the tips of the stems to encourage branching and remove spent flowers to promote continuous flowering.

Lantana: Benefits Beyond Beauty

Lantana’s allure goes beyond its aesthetic appeal; it offers various benefits that extend to both gardeners and the environment.

Attracting Pollinators

Lantana’s nectar-rich flowers act as a magnet for pollinators like bees, butterflies, and hummingbirds. By including lantana in your garden, you play a vital role in supporting these essential pollinators.

Deer-Resistant Properties

Unlike many other flowering plants, lantana is relatively deer-resistant, making it an excellent choice for gardens in areas with deer populations.

Medicinal Uses

In traditional medicine, lantana has been used to treat various ailments, such as respiratory issues, skin infections, and inflammation. However, it’s crucial to note that some parts of the plant can be toxic if ingested, and caution should be exercised.

Lantana-flower

FAQs about Lantana

Q: Can I grow lantana indoors?

A: While lantana thrives outdoors in full sunlight, it can be challenging to grow it indoors due to its need for ample sunlight. However, you can try placing it near a sunny window to improve its chances of survival.

Q: Is lantana a perennial or an annual plant?

A: Lantana is typically considered a perennial in frost-free regions, where it can survive year-round. In colder climates, it behaves as an annual and needs to be replanted each spring.

Q: How do I propagate lantana?

A: Lantana can be propagated through seeds or cuttings. When dealing with lantana, gather seeds from mature flowers and sow them in well-draining soil. For cuttings, take a 4-6 inch cutting from a healthy plant, remove the lower leaves, and place it in a pot with a mix of soil and sand.

Q: Does lantana require special care during winter?

A: In regions with mild winters, lantana may continue to bloom, requiring minimal protection. However, in colder climates, it is best to bring potted lantana indoors or cover outdoor plants with mulch or burlap to protect them from frost.

Q: Are there any specific companion plants for lantana?

A: Lantana pairs well with a variety of plants, including salvia, verbena, and coreopsis. These combinations create eye-catching displays of color and attract a diverse range of pollinators.

Q: Is lantana invasive?

A: Some lantana species, particularly Lantana camara, can be invasive in certain regions. Check with your local authorities before planting it in your garden to ensure it is not considered an invasive species in your area.

Conclusion

Lantana’s versatility, beauty, and numerous benefits make it a treasured addition to any garden. From attracting pollinators to offering a splash of color all year round, lantana continues to captivate gardeners worldwide. By following proper cultivation techniques and understanding its unique characteristics, you can create a thriving lantana garden that will be the envy of the neighborhood. So why not embrace the beauty of lantana and add a touch of tropical charm to your landscape today?

(To get some idea about gardening : https://bonsainurserybd.com/gardening-ideas/)

Botanic Gardens

Botanic Gardens: Where Nature’s Beauty Blooms in Full Glory

Botanic Gardens are nature’s masterpieces, offering an oasis of tranquility amidst bustling urban landscapes. These carefully curated spaces showcase the diversity and magnificence of plant life, providing educational, recreational, and therapeutic benefits to visitors of all ages. In this article, we embark on a journey to explore the wonders of Botanic Gardens: Where Nature’s Beauty Blooms in Full Glory.

Botanic Gardens

What are Botanic Gardens?

Botanic Gardens are botanical institutions dedicated to the study, conservation, and display of various plant species. They serve as living museums, highlighting the beauty and ecological significance of plants while promoting environmental awareness and research.

A Brief History of Botanic Gardens

Botanic Gardens have a rich historical background dating back to ancient civilizations. The Hanging Gardens of Babylon, one of the Seven Wonders of the Ancient World, is considered one of the earliest botanical gardens. Later, during the Renaissance, medicinal herb gardens emerged, and the concept of botanical exploration grew during the Age of Exploration.

The Evolution of Modern Botanic Gardens

During the 18th and 19th centuries, botanic gardens became essential for plant taxonomy, medicinal plant studies, and the introduction of new crops. Today, these gardens have evolved to focus on conservation, education, and public engagement.

Botanic Gardens Around the World

Botanic Gardens can be found across the globe, each with its unique charm and regional flair. From the sprawling Kew Gardens in London to the tropical oasis of the Singapore Botanic Gardens, these havens of biodiversity continue to inspire and educate visitors.

The Importance of Plant Conservation

Botanic Gardens play a crucial role in plant conservation, acting as repositories for rare and endangered plant species. Through seed banks and ex situ conservation efforts, they contribute to safeguarding the planet’s botanical heritage.

Exploring Botanic Gardens: Where Nature’s Beauty Blooms in Full Glory

Venturing into a botanic garden is akin to stepping into a living canvas. The meticulous organization, thoughtfully designed landscapes, and diverse plant collections create a mesmerizing experience for visitors.

Prominent Features of Botanic Gardens

  1. The Glasshouses and Conservatories: These structures offer controlled environments that mimic diverse climates, allowing the cultivation of plants from around the world.
  2. Herb Gardens: Focusing on culinary, medicinal, or aromatic plants, herb gardens serve as sensory delights and educational resources.
  3. Rose Gardens: A symbol of love and beauty, rose gardens boast an array of vibrant colors and captivating fragrances.
  4. Japanese Gardens: Infusing Zen philosophy, these gardens feature tranquility, balance, and harmonious elements.
  5. Sculpture Gardens: Integrating art with nature, sculpture gardens showcase captivating sculptures amidst lush greenery.

Exploring the Flora: A World of Diversity

  1. Rare and Endangered Species: Botanic Gardens serve as sanctuaries for rare and endangered plants, offering hope for their survival.
  2. Native Plant Collections: Celebrating the flora of the region, native plant collections exhibit the beauty and importance of indigenous species.
  3. Tropical Rainforests: Some gardens recreate the allure of tropical rainforests, housing a profusion of exotic plants from far-flung corners of the world.
  4. Desert Habitats: Displaying the hardiness of desert plants, these gardens showcase the resilience of arid-adapted species.
  5. Aquatic Gardens: Featuring water lilies, lotuses, and other aquatic marvels, these gardens exhibit the beauty of plants that thrive in water.

Botanic Gardens: More Than Just Greenery

  1. Education and Research: Botanic Gardens serve as living classrooms, offering workshops, seminars, and research opportunities for students and scientists.
  2. Environmental Awareness: By promoting sustainable practices and conservation initiatives, these gardens raise awareness about environmental issues.
  3. Wellness and Therapeutic Benefits: The peaceful ambiance and lush green surroundings of botanic gardens have proven therapeutic effects, reducing stress and improving mental well-being.
Botanic-gardens-Bonsai

FAQs About Botanic Gardens: Where Nature’s Beauty Blooms in Full Glory

What is the best time to visit botanic gardens?

The best time to visit botanic gardens is typically during the spring and early summer when many plants are in full bloom.

Are botanic gardens suitable for children?

Yes, botanic gardens offer an excellent opportunity for children to connect with nature, learn about plants, and enjoy outdoor activities.

Can I bring my pets to botanic gardens?

While policies vary, most botanic gardens do not allow pets to ensure the safety of the plants and other visitors.

Do botanic gardens have guided tours?

Yes, many botanic gardens offer guided tours led by knowledgeable experts who provide valuable insights into the flora and garden history.

Are botanic gardens wheelchair accessible?

Most modern botanic gardens prioritize accessibility and offer wheelchair-friendly paths and facilities.

Are photography and sketching allowed in botanic gardens?

Yes, photography and sketching are usually allowed for personal use, but commercial or professional purposes may require permission.

Conclusion

Botanic Gardens: Where Nature’s Beauty Blooms in Full Glory are extraordinary places that blend art, science, and conservation to celebrate the wonders of the natural world. These havens of greenery and biodiversity offer a respite from urban life while inspiring awe and environmental consciousness. So, immerse yourself in the allure of botanic gardens and experience the magic of nature’s grandeur firsthand.

(To get some idea about gardening : https://bonsainurserybd.com/gardening-ideas/)

Cactus Care

Cactus Care 101: Your Ultimate Guide to Keeping Your Spiky Friends Thriving

In the world of Cactus Care, these fascinating plants are known for their unique spiky appearance and ability to thrive in arid environments. These hardy succulents come in a wide range of shapes and sizes, making them versatile additions to any indoor or outdoor space. Whether you’re a seasoned gardener or a novice plant enthusiast, this ultimate guide will equip you with the knowledge and skills needed to ensure your cacti stay healthy and vibrant.

Cactus Care

Choosing the Perfect Cactus for Your Space

Selecting the right cactus is the first step in successful cactus care. Consider the following factors when choosing a cactus:

  • Size Matters: Determine how much space you can dedicate to your cactus. Some species can grow quite large, while others are more suitable for small windowsills.
  • Light Requirements: Different cacti have varying light preferences. When it comes to Cactus Care, some cacti thrive in direct sunlight, while others prefer partial shade. Research your chosen species’ light needs to provide optimal conditions.
  • Temperature Tolerance: Cacti are generally hardy, but some species are more sensitive to extreme temperatures. Ensure your chosen cactus can withstand the climate in your area.
  • Watering Needs: Some cacti require more frequent watering, while others prefer a drier environment. Knowing your cactus’s watering needs is crucial for its well-being.

Table of Contents

Cactus Care 101: Your Ultimate Guide to Keeping Your Spiky Friends Thriving

Caring for cacti doesn’t have to be daunting. Follow these essential tips to ensure your spiky friends thrive:

1. Providing the Right Amount of Light

Cacti love sunlight, but not all of them require intense exposure. Place your cactus in a location that receives the right amount of light for its species. A south-facing window is ideal for cacti that prefer bright light, while those needing partial shade should be kept near an east or west-facing window.

2. Watering Wisely

In the realm of Cactus Care, overwatering stands as one of the most common mistakes. Let the soil dry out completely between watering, and never let your cactus sit in standing water. During the growing season, water sparingly, and reduce watering during the dormant period.

3. Choosing the Right Pot and Soil

Select a pot with drainage holes to prevent waterlogged soil. For proper Cactus Care, opt for a well-draining cactus mix or create your own by blending regular potting soil with sand and perlite. This mix will ensure adequate aeration for the roots.

4. Fertilizing Your Cactus

Feed your cactus with a balanced, diluted fertilizer during the growing season. However, be cautious not to over-fertilize, as cacti are not heavy feeders. When it comes to Cactus Care, a monthly or bi-monthly application should be sufficient.

5. Understanding Dormancy

Cacti go through a dormant period, usually in winter. During this time, they require less water and no fertilizer. Reduce watering and avoid disturbing the cactus during its rest phase.

6. Dealing with Pests and Diseases

Keep a close eye on your cacti for any signs of pests or diseases. In the realm of Cactus Care, common issues encompass mealybugs, spider mites, and root rot. If you spot any problems, take prompt action to prevent them from spreading.

7. Pruning and Propagation

Pruning your cactus can encourage new growth and maintain its shape. Use clean, sharp scissors or pruning shears to remove dead or unhealthy parts. Additionally, you can propagate your cactus by taking cuttings and allowing them to root before planting.

8. Protecting from Extreme Temperatures

In areas with harsh winters, it’s essential to protect your cactus from freezing temperatures. Consider moving them indoors or providing insulation around the pots.

9. Repotting Your Cactus

As your cactus grows, it may outgrow its current pot. When repotting, choose a slightly larger container and refresh the soil. Be careful when handling the spiky plant during this process.

10. Creating an Ideal Humidity Level

Most cacti prefer low humidity, but some species do well in higher humidity environments. Research your cactus’s needs to provide the ideal humidity level.

11. Cactus Companion Plants

Pairing your cacti with suitable companion plants can enhance the aesthetics of your garden. Choose drought-tolerant plants that complement the cacti’s appearance.

12. Protecting Your Cactus from Pets

Some pets may be curious about your cactus and try to interact with them. Ensure your cacti are placed in areas inaccessible to pets to prevent any accidental damage.

13. Common Myths and Misconceptions

There are various myths and misconceptions surrounding cactus care. Learn to differentiate between fact and fiction to provide the best care for your spiky friends.

14. Cacti in Different Climates

Cacti can thrive in various climates, from desert to tropical regions. Discover how to adapt your care routine based on your location.

15. Cactus Conservation Efforts

Some cactus species are endangered or threatened in their natural habitats. Explore the importance of cactus conservation and how you can contribute to preserving these unique plants.

If you’re new to cactus care, starting with beginner-friendly species is recommended. Learn about some popular choices that are easier to care for.

17. Cacti as Feng Shui Elements

Discover the role of cacti in Feng Shui and how they can bring positive energy and balance to your living spaces.

18. Cacti and Medicinal Uses

Some cactus species have medicinal properties and are used in traditional remedies. Explore the potential health benefits of certain cacti.

19. Cacti in Art and Culture

Cacti have been a subject of fascination in art and culture for centuries. Uncover the symbolism and representation of cacti in various artistic forms.

20. Cactus Craft and DIY Projects

Get creative with your cacti by incorporating them into DIY projects and crafts. From arrangements to home decor, there are numerous fun and artistic ways to showcase your spiky friends.

21. Troubleshooting Common Issues

Address common problems faced by cactus enthusiasts, such as etiolation, sunburn, and wilting, with practical solutions.

22. Cactus Photography Tips

Capture the beauty of your cacti with stunning photographs. Learn useful tips and techniques for photographing cacti in their best light.

23. Cacti in Mythology and Folklore

Delve into the mythical and folklore aspects of cacti, exploring the stories and beliefs associated with these extraordinary plants.

24. Cactus Exhibitions and Events

Stay connected with the cactus community by attending exhibitions, workshops, and events dedicated to these intriguing plants.

25. Cactus Online Communities and Resources

Connect with fellow cactus enthusiasts online and access valuable resources for furthering your knowledge and passion for cactus care.

Cactus Care 101

FAQs

Q: How often should I water my cactus?

A: The frequency of watering depends on the cactus species and environmental conditions. Generally, allow the soil to dry out completely between waterings, and water sparingly during the dormant period.

Q: Can I use regular potting soil for my cactus?

A: Regular potting soil retains too much moisture for cacti. Use a well-draining cactus mix or create a mixture of potting soil, sand, and perlite.

Q: How do I know if my cactus is getting enough sunlight?

A: Cacti that are receiving enough sunlight will appear healthy, with vibrant colors and compact growth. If the cactus becomes elongated or pale, it might need more light.

Q: Can I propagate my cactus from cuttings?

A: Yes, many cacti can be propagated from cuttings. As part of proper Cactus Care, allow the cutting to callus for a few days before planting it in well-draining soil.

Q: Are cacti safe for pets?

A: While most cacti are not toxic to pets, the spines can cause injury. Keep cacti out of reach of curious pets to avoid accidents.

Q: How can I protect my cactus from pests?

A: Regularly inspect your cacti for signs of pests. If you spot any, isolate the affected plant and treat it with a mild insecticidal soap.

Conclusion

Caring for cacti can be a rewarding and enjoyable experience. With the right knowledge and attention to detail, you can create a thriving cactus collection that adds beauty to your living spaces. Remember to tailor your care routine to suit the specific needs of each cactus species and take the time to appreciate the unique qualities of these extraordinary plants.

(To get some ideas you can check : https://bonsainurserybd.com/5-small-space-rooftop-garden-ideas/)

Sunflower

Sunflower Splendor: Unraveling the Secrets of the Majestic Sunflower

Introduction

Sunflowers, with their vibrant petals and imposing height, have long captured the hearts of nature enthusiasts and art lovers alike. They symbolize joy, loyalty, and a strong connection with the sun. But beyond their stunning beauty, sunflowers hold a treasure trove of secrets that make them one of the most fascinating plants on Earth. In this article, we embark on a journey to unravel the secrets of the majestic sunflower, exploring its history, cultivation, symbolic meanings, and health benefits.

Sunflower

Sunflower Splendor: Unveiling the History

The captivating history of sunflowers dates back thousands of years. These iconic flowers originated in North America and were cultivated by Native American tribes for various purposes, including food, medicine, and religious rituals. The seeds of the sunflower have been used as a valuable food source and a source of oil for centuries.

The sunflower was introduced to Europe in the 16th century, and it quickly gained popularity among European explorers and traders. Artists like Vincent van Gogh immortalized the sunflower in their paintings, further adding to its allure. Today, sunflowers continue to charm people worldwide with their timeless appeal.

Table of Contents

Sunflower Symbolism: Unraveling its Meanings

Sunflowers have been revered for their symbolic meanings across cultures and civilizations. They are often associated with happiness, loyalty, and vitality. The way these majestic flowers follow the sun’s path throughout the day has led to their association with loyalty and devotion.

In some cultures, sunflowers are seen as a representation of spiritual enlightenment and the search for truth. Their towering appearance has also linked them to the idea of reaching for the sky and achieving great heights.

Cultivating Sunflower Splendor: Tips for Success

Growing sunflowers can be a rewarding experience, whether you’re an avid gardener or a first-time cultivator. To cultivate Sunflower Splendor in your garden, follow these essential tips:

  1. Selecting the Right Variety: Choose from the wide variety of sunflowers available, ranging from dwarf species for containers to giant varieties for a dramatic effect.
  2. Location and Sunlight: Sunflowers thrive in full sun, so ensure they receive at least 6-8 hours of direct sunlight daily.
  3. Soil and Fertilization: Well-drained soil enriched with organic matter is ideal for sunflowers. Before sowing the seeds, ensure to fertilize the soil with a well-balanced fertilizer.
  4. Planting Time: Sunflowers are warm-season plants, so wait until the last frost has passed before planting the seeds.
  5. Watering: While sunflowers are relatively drought-resistant, regular watering is crucial during their early growth stages.
  6. Supporting Tall Varieties: If you’re growing tall sunflower varieties, provide adequate support to prevent them from bending or breaking.
  7. Harvesting Sunflower Seeds: Allow the flower heads to dry on the stalks before harvesting the seeds for consumption or to replant for the next season.

Sunflower Splendor in Art and Culture

The allure of sunflowers extends beyond gardens and fields; they have also left an indelible mark in the world of art and culture. From ancient civilizations to modern times, artists and writers have drawn inspiration from these radiant blooms.

In ancient mythology, sunflowers were associated with deities representing the sun and were often used as symbols of worship. In more recent history, sunflowers found their way into literature, where they were employed as metaphors for various emotions and themes. Notably, Vincent van Gogh’s series of sunflower paintings have become iconic representations of the flower’s beauty.

The Science Behind Sunflowers’ Heliotropism

One of the most intriguing aspects of sunflowers is their heliotropism, the phenomenon where they turn their face to follow the sun’s movement. This behavior is most prominent in young sunflowers and is critical for their growth and survival.

The heliotropic movement is facilitated by a specialized region in the stem, called the pulvinus, which consists of cells sensitive to light. These cells respond to light by pumping water in and out, causing the sunflower to move east to west during the day and reset at night to face east again.

Sunflower Splendor: Nutritional and Health Benefits

Sunflowers, apart from their captivating beauty, offer a myriad of nutritional and health benefits. The sunflower seeds, in particular, are a powerhouse of nutrients, packed with healthy fats, protein, and fiber. Incorporating sunflower seeds into your diet can promote heart health by reducing bad cholesterol levels and contribute to improved digestion due to their fiber content. Additionally, these seeds are a rich source of vitamin E, an antioxidant that protects the body’s cells from oxidative damage caused by free radicals. Embracing the goodness of sunflowers can be a flavorful way to enhance your overall well-being.

Sunflower seeds, often referred to as kernels, are not only a delicious snack but also a rich source of nutrients. They are abundant in healthy fats, protein, fiber, vitamins, and minerals. Some of the key health benefits of sunflower seeds include:

  1. Heart Health: The presence of monounsaturated and polyunsaturated fats in sunflower seeds can promote cardiovascular health by reducing bad cholesterol levels.
  2. Antioxidant Properties: Sunflower seeds are packed with vitamin E, an antioxidant that helps protect cells from oxidative damage.
  3. Weight Management: Despite their calorie content, sunflower seeds can help with weight management when consumed in moderation due to their high fiber content, promoting a feeling of fullness.
  4. Skin Health: Vitamin E in sunflower seeds can contribute to healthy and radiant skin by protecting it from the harmful effects of UV rays and pollution.
  5. Improved Digestion: The fiber in sunflower seeds aids in digestion and can help alleviate constipation.
  6. Bone Health: Sunflower seeds contain essential minerals like magnesium and phosphorus, supporting bone health and preventing bone-related conditions.
sunflower-splendor

Sunflower Splendor FAQs

As we delve deeper into the enchanting world of flowers, the sunflower takes center stage with its vibrant hues and graceful stature. In this journey of exploration, we have unraveled the captivating history, symbolism, and health benefits of the sunflower. But before we conclude, let’s address some common questions that may arise about this majestic flower. So, let’s clear any doubts and shed more light on the Sunflower Splendor through these frequently asked questions :

Q: How long do sunflowers bloom?

A: The blooming period of sunflowers varies depending on the species and growing conditions, but it generally lasts for several weeks, usually from late summer to early fall.

Q: Can I grow sunflowers in containers?

A: Yes, you can grow dwarf sunflower varieties in containers or pots as long as they receive sufficient sunlight and proper care.

Q: Are sunflower seeds safe for consumption?

A: Sunflower seeds are safe for consumption and can be a nutritious addition to your diet. However, like any food, they should be consumed in moderation.

Q: How do I harvest sunflower seeds?

A: To harvest sunflower seeds, wait until the flower heads have dried on the stalk. Then, cut the head off and rub it over a container to release the seeds.

Q: Do sunflowers require a lot of water?

A: Sunflowers are relatively drought-resistant, but they still need regular watering, especially during their early growth stages.

Q: Can sunflowers grow in partial shade?

A: While sunflowers prefer full sun, some varieties can tolerate partial shade. However, they may not reach their maximum height and could have fewer flowers.

Conclusion

Sunflower Splendor: In conclusion, the sunflower remains an emblem of splendor and fascination, captivating people across cultures with its golden radiance and remarkable symbolism. From its ancient origins and historical significance to its enduring presence in art and literature, the sunflower’s allure stands the test of time. Whether you admire its towering presence in fields or revel in the deliciousness of sunflower seeds, the majestic sunflower continues to be a symbol of joy, loyalty, and spiritual enlightenment. So, let the sunflower’s brilliance brighten your days and remind you of the profound connection between nature and the human spirit. Embrace the Sunflower Splendor and unlock the secrets of this resplendent flower, allowing it to inspire and bring delight to your life.

Whether you’re a seasoned gardener or a nature enthusiast, cultivating sunflowers can be a delightful and rewarding experience. So, why not plant a few sunflower seeds and witness their splendor firsthand?

Vegetable-Gardening

10 Game-Changing Vegetable Gardening Hacks to Unlock Your Green Thumb

Are you passionate about gardening? Do you dream of having a thriving vegetable garden that yields bountiful harvests? If so, you’re in the right place! In this article, we will share with you 10 game-changing vegetable gardening hacks that will help you unlock your green thumb and achieve incredible results in your garden. Whether you’re a seasoned gardener or just starting out, these tips and tricks will enhance your gardening skills and transform your vegetable patch into a flourishing oasis of fresh produce. So, let’s dive in and discover how you can take your vegetable gardening to the next level!

Vegetable-Gardening

Hacking Your Way to a Thriving Vegetable Garden

1. Start with the Right Soil

The foundation of a successful vegetable garden lies in the soil. It’s essential to create a nutrient-rich environment that promotes healthy plant growth. Begin by testing your soil’s pH level using a home testing kit or by sending a sample to a local agricultural extension office. Most vegetables prefer a slightly acidic to neutral pH range of 6.0 to 7.0. If your soil is too acidic, you can add lime to raise the pH, and if it’s too alkaline, you can amend it with sulfur or organic matter to lower the pH. Additionally, enrich the soil with compost or well-rotted manure to improve its structure and fertility.

When it comes to vegetable gardening, starting with the right soil sets the foundation for success. Choosing a nutrient-rich soil composition tailored to the needs of your plants is crucial. Conduct a soil test to determine its pH level and make any necessary adjustments to create an optimal environment. Incorporate organic matter, such as compost or well-rotted manure, to improve soil structure and fertility. By providing your vegetables with the ideal soil conditions, you’ll be giving them a head start in their growth journey and maximizing your chances of a thriving and productive garden.

2. Embrace Companion Planting

Companion planting is a gardening technique where specific plants are grown together to benefit one another. By strategically placing compatible plants next to each other, you can deter pests, enhance pollination, and maximize space utilization. For instance, planting marigolds alongside your tomatoes can repel nematodes and ward off aphids. Similarly, interplanting basil with your peppers can improve their flavor and growth. Research different companion plants for your vegetables and experiment with combinations to reap the rewards of this symbiotic gardening practice.

Embracing companion planting is a game-changing strategy in vegetable gardening. By strategically pairing compatible plants, you can unlock a range of benefits for your garden. For instance, planting marigolds alongside your vegetables can naturally repel pests, while interplanting herbs like basil can enhance the flavor and growth of neighboring crops. Companion planting also promotes pollination and maximizes space utilization in your garden. By harnessing the power of these plant partnerships, you’ll create a harmonious and productive vegetable garden that thrives with the help of nature’s cooperative relationships.

3. Practice Succession Planting

Succession planting involves sowing seeds or transplanting seedlings at staggered intervals to ensure a continuous supply of fresh produce throughout the growing season. By planting new crops as others are harvested, you can optimize your garden’s productivity and avoid gluts or shortages. This technique works particularly well with fast-growing vegetables like lettuce, radishes, and beans. Plan your planting schedule and make regular plantings every few weeks to extend your harvest and enjoy a steady stream of homegrown goodness.

Practice succession planting to ensure a continuous harvest throughout the vegetable gardening season. By staggering your plantings, you can enjoy a steady supply of fresh produce. As one crop is harvested, you can promptly fill the vacant space with new plantings. This technique is particularly effective with fast-growing vegetables like lettuce, radishes, and beans. By carefully planning your planting schedule and consistently sowing seeds or transplanting seedlings, you’ll extend your harvest and make the most of your garden’s potential. Say goodbye to gluts and shortages, and say hello to a consistent abundance of homegrown goodness from your vegetable garden.

4. Make Use of Raised Beds

Raised beds offer numerous advantages for vegetable gardening. They provide better drainage, allow for easier weed control, and enable you to create a custom soil mix tailored to the needs of your plants. Raised beds also warm up faster in spring, which extends the growing season and enables earlier plantings. Construct your raised beds using untreated lumber or recycled materials, ensuring they are of a manageable width for easy access from all sides. Fill them with a blend of quality topsoil, compost, and organic matter to create a fertile and well-draining environment for your vegetables.

Making use of raised beds is a transformative approach in vegetable gardening. Raised beds offer a range of benefits that contribute to the success of your garden. They provide improved drainage, allowing excess water to flow away more efficiently and preventing waterlogged soil. Additionally, raised beds make weed control easier, as the defined boundaries help keep unwanted plants at bay. You have the freedom to customize the soil mix, tailoring it to the specific needs of your plants. Raised beds also warm up faster in the spring, extending the growing season and enabling earlier plantings. With raised beds, you’ll create an optimal environment for your vegetables, unlocking their full potential and setting the stage for a flourishing and abundant garden.

5. Implement Mulching Techniques

Mulching is an uncomplicated yet incredibly effective technique that provides numerous benefits for your vegetable garden. Applying a layer of organic mulch, such as straw, shredded leaves, or grass clippings, around your plants helps to suppress weeds, retain moisture, regulate soil temperature, and prevent soil erosion. Mulch also breaks down over time, adding valuable nutrients to the soil and improving its structure. Remember to replenish the mulch as needed throughout the season to maintain its effectiveness and keep your plants healthy and happy.

Implementing mulching techniques is a game-changer in vegetable gardening. By applying a layer of organic mulch around your plants, you can unlock a host of benefits. Mulch helps suppress weeds, reducing competition for nutrients and moisture. It acts as a natural insulator, regulating soil temperature and protecting plant roots from extreme heat or cold. Mulch also retains moisture, reducing the frequency of watering and preventing soil erosion. As the mulch breaks down over time, it enriches the soil with valuable nutrients, enhancing its fertility. By incorporating mulching into your gardening routine, you’ll create a healthier, more resilient garden that thrives with minimal effort.

6. Install Drip Irrigation

Watering your vegetable garden efficiently is crucial for its success. Instead of relying on hand watering or overhead sprinklers, consider installing a drip irrigation system. Drip irrigation delivers water directly to the base of each plant, minimizing water waste through evaporation and ensuring that the roots receive a consistent and adequate water supply. This method also helps prevent leaf diseases by keeping foliage dry. With the use of a timer, you can easily automate your watering schedule and save time while promoting optimal plant growth.

Installing drip irrigation is a transformative step in vegetable gardening. This efficient watering system delivers water directly to the base of each plant, ensuring that the roots receive a consistent and adequate water supply. Drip irrigation minimizes water waste through evaporation and runoff, making it a sustainable choice for your garden. With the use of a timer, you can easily automate your watering schedule, saving you time and effort. This method also keeps the foliage dry, reducing the risk of leaf diseases. By installing drip irrigation, you’ll optimize water usage, promote healthier plants, and enjoy the convenience of a well-maintained garden.

7. Protect Your Plants from Pests

Dealing with pests can be a frustrating challenge in vegetable gardening. However, there are several natural and eco-friendly ways to protect your plants without resorting to harmful chemicals. Introduce beneficial insects like ladybugs, lacewings, and praying mantises to your garden, as they feed on common pests like aphids and caterpillars. You can also create physical barriers using mesh netting or row covers to prevent pests from reaching your plants. Additionally, companion planting, as mentioned earlier, can play a significant role in deterring pests naturally.

Protecting your plants from pests is a critical aspect of successful vegetable gardening. By implementing effective pest management strategies, you can safeguard your precious crops without relying on harmful chemicals. Introduce beneficial insects, such as ladybugs and praying mantises, which naturally prey on common garden pests. Utilize physical barriers like mesh netting or row covers to create a barrier against pests. Companion planting can also play a significant role in deterring pests, as certain plants emit natural repellents. By taking proactive measures to protect your plants, you’ll promote a healthy and thriving garden, free from the devastating impact of pests.

8. Utilize Vertical Gardening

If you have limited space in your garden or want to maximize your yield, vertical gardening is the way to go. Growing vegetables vertically not only saves space but also increases air circulation and sunlight exposure, leading to healthier plants. Install trellises, stakes, or cages to support climbing vegetables like tomatoes, cucumbers, and beans. Make use of hanging baskets or vertical planters for herbs and salad greens. With vertical gardening, you can transform even the smallest of spaces into a lush and productive vegetable garden.

Utilizing vertical gardening techniques is a game-changer in vegetable gardening, especially when space is limited. Vertical gardening involves growing plants vertically, utilizing structures like trellises, stakes, or cages. By training your vegetables to grow upwards, you not only maximize space but also improve air circulation and sunlight exposure for healthier plants. This method is particularly beneficial for vining crops like tomatoes, cucumbers, and beans. Hanging baskets or vertical planters can also be used for growing herbs and salad greens. With vertical gardening, even the smallest of spaces can be transformed into a lush and productive vegetable garden, unlocking the full potential of your growing area.

9. Practice Regular Pruning and Maintenance

Pruning and maintaining your vegetable plants are essential for their overall health and productivity. Remove any dead or diseased foliage to prevent the spread of diseases and improve airflow. Pinch off suckers on tomato plants to redirect the energy towards fruit production. Regularly inspect your plants for signs of pests or nutrient deficiencies and take appropriate action. By staying on top of maintenance tasks, you can ensure that your vegetable garden remains in top shape and continues to thrive.

Practicing regular pruning and maintenance is a key aspect of successful vegetable gardening. By keeping your plants well-maintained, you can ensure their overall health and productivity. Regularly remove any dead or diseased foliage to prevent the spread of diseases and improve airflow around the plants. Pinch off suckers on tomato plants to redirect the energy towards fruit production. Stay vigilant and inspect your plants regularly for signs of pests or nutrient deficiencies, taking appropriate action when needed. By staying proactive with pruning and maintenance tasks, you’ll create an environment where your vegetable garden can thrive and flourish, yielding an abundance of healthy and flavorful produce.

10. Keep Learning and Experimenting

Gardening is a continuous learning process, and there is always room to grow and improve your skills. Stay curious, read gardening books and articles, join online forums or local gardening clubs, and learn from experienced gardeners. Experiment with new varieties of vegetables, try different growing techniques, and keep a journal to track your successes and failures. Each season presents an opportunity to expand your knowledge and discover new ways to unlock your green thumb.

To truly unlock your green thumb in vegetable gardening, it’s essential to embrace a mindset of continuous learning and experimentation. Treat each season as an opportunity to expand your knowledge and discover new techniques. Stay curious and seek out gardening books, articles, and online resources to deepen your understanding. Join gardening forums or local clubs to connect with experienced gardeners and learn from their wisdom. Experiment with new vegetable varieties, growing methods, and innovative practices. Keep a journal to track your successes and failures, allowing you to fine-tune your approach. By embracing a learning mindset and being open to experimentation, you’ll continuously evolve as a gardener and unlock new levels of success in your vegetable garden.

FAQs

Q: What is the recommended frequency for watering my vegetable garden?

A: The watering schedule for your vegetable garden is influenced by factors such as weather conditions, soil type, and the specific needs of your plants. As a general guideline, aim to provide about 1 inch of water per week, either through rainfall or supplemental irrigation. However, it’s crucial to monitor the soil moisture levels and adjust your watering schedule accordingly.

Q: Should I use chemical fertilizers in my vegetable garden?

A: While chemical fertilizers can provide quick and concentrated nutrients to your plants, they are not the only option. Organic fertilizers, such as compost, well-rotted manure, and seaweed extract, offer a more sustainable and environmentally friendly approach. They improve soil health, promote beneficial microbial activity, and nourish your plants naturally.

Q: How can I protect my vegetable garden from extreme weather conditions?

A: Extreme weather conditions like heatwaves, frost, or heavy rains can have a significant impact on your vegetable garden. Consider using shade cloths or row covers to protect your plants from excessive heat or sun. During frost, cover your plants with blankets or fabric to prevent damage. Proper drainage and raised beds can help mitigate the effects of heavy rain and prevent waterlogging.

Q: What are some common pests in vegetable gardens and how can I control them naturally?

A: Common pests in vegetable gardens include aphids, caterpillars, slugs, and snails. To control them naturally, you can introduce beneficial insects like ladybugs and praying mantises. You can also use organic pest control methods like handpicking, using insecticidal soap or neem oil, and creating physical barriers with netting or row covers.

Q: Can I grow vegetables indoors?

A: Yes, you can grow vegetables indoors with the help of grow lights and proper ventilation. Choose compact varieties suitable for container gardening, provide them with adequate light, moisture, and nutrients, and ensure good air circulation. Leafy greens, herbs, and cherry tomatoes are some popular choices for indoor vegetable gardening.

Q: What should I do with leftover vegetables from my garden?

A: If you have an abundance of vegetables from your garden, there are several things you can do. Share them with friends, family, or neighbors. Preserve them through canning, freezing, or drying. Donate them to local food banks or community organizations. You can also incorporate them into delicious recipes or experiment with pickling and fermenting techniques.

Conclusion

Unlocking your green thumb and achieving a thriving vegetable garden is within your reach. By implementing these 10 game-changing vegetable gardening hacks, you’ll set yourself up for success and enjoy a bountiful harvest of fresh, homegrown produce. Remember to start with the right soil, embrace companion planting, and practice succession planting. Make use of raised beds, mulching techniques, and drip irrigation for optimal growth. Protect your plants from pests, utilize vertical gardening, and maintain your garden regularly. And most importantly, keep learning and experimenting. Happy gardening!

Spider Plant

Spider Plant: A Guide to Growing and Caring for Chlorophytum comosum

Welcome to our comprehensive guide on spider plants! In this article, we will delve into the world of Chlorophytum comosum, commonly known as the spider plant. With its graceful arching leaves and air-purifying qualities, the spider plant has become a popular choice among houseplant enthusiasts. Whether you are a seasoned gardener or a beginner looking to add some greenery to your home, this guide will provide you with all the information you need to successfully grow and care for spider plants.

Spider Plant
Spider Plant

Spider Plant: An Overview

The spider plant (Chlorophytum comosum) is a species of perennial flowering plant in the family Asparagaceae. Native to tropical and southern Africa, spider plants have long, slender leaves that can reach lengths of up to 16 inches (40 cm). The plant gets its name from the long, arching leaves that resemble the legs of a spider.

Spider plants are known for their adaptability and resilience, making them an excellent choice for both indoor and outdoor cultivation. They are often grown as houseplants due to their ability to tolerate a wide range of light conditions and their air-purifying qualities.

Spider Plant: Key Characteristics

Before diving into the details of growing and caring for spider plants, let’s take a closer look at some key characteristics of this fascinating plant:

Arching Leaves

One of the most distinctive features of the spider plant is its arching leaves. The leaves grow in a fountain-like arrangement, cascading gracefully over the sides of the container. The narrow, pointed leaves are typically green with a white or creamy stripe down the center, although there are also variegated varieties with additional splashes of yellow or light green.

Air-Purifying Qualities

Spider plants are renowned for their air-purifying qualities. They have been shown to effectively remove harmful volatile organic compounds (VOCs) from the air, such as formaldehyde, xylene, and toluene. This makes them an excellent choice for improving indoor air quality, particularly in spaces with limited ventilation.

Easy Propagation

Spider plants are incredibly easy to propagate, making them a favorite among plant enthusiasts. They produce long, arching stems called runners that eventually develop baby spider plants, also known as spiderettes or plantlets, at their tips. These spiderettes can be easily rooted in water or planted directly into potting soil, giving you the opportunity to expand your spider plant collection or share them with friends and family.

Low Maintenance

If you’re looking for a low-maintenance plant, you can’t go wrong with a spider plant. They are highly adaptable and can tolerate a wide range of light conditions, from bright, indirect sunlight to low light. Spider plants are also forgiving when it comes to watering, as they can withstand periods of drought. However, they prefer to be kept evenly moist, so regular watering is recommended.

Growing Spider Plants: A Step-by-Step Guide

Now that we have familiarized ourselves with the key characteristics of spider plants, let’s explore the step-by-step process of growing and caring for these beautiful plants:

Step 1: Choosing the Right Location

Spider plants have the ability to flourish in various light conditions, although they have a preference for bright, indirect sunlight. Find a location in your home that receives bright, filtered light, such as near a north or east-facing window. To prevent leaf scorching, it is advisable to refrain from exposing the spider plant to direct sunlight.

Step 2: Selecting the Right Container

Choose a container that has drainage holes to prevent waterlogged soil. Spider plants prefer to be slightly root-bound, so you don’t need a large pot. A 6-8 inch (15-20 cm) pot is usually sufficient for an average-sized spider plant.

Step 3: Preparing the Potting Soil

Spider plants thrive in well-draining potting soil. You can either purchase a pre-made potting mix suitable for indoor plants or create your own by combining equal parts of peat moss, perlite, and vermiculite. This mixture provides excellent drainage while retaining enough moisture for the plant’s roots.

Step 4: Planting the Spider Plant

Fill the container with the prepared potting soil, leaving enough space for the root ball. Carefully remove the spider plant from its nursery container, taking care not to damage the roots. Place the plant in the center of the container and backfill it with additional soil, gently firming it around the roots.

Step 5: Watering the Spider Plant

Water the spider plant thoroughly after planting to settle the soil and ensure good root-to-soil contact. Allow the top inch (2.5 cm) of soil to dry out between waterings, and be careful not to overwater, as this can lead to root rot. Spider plants exhibit greater tolerance towards being underwatered rather than overwatered.

Step 6: Providing Adequate Humidity

Spider plants appreciate moderate humidity levels, so consider placing a small tray of water near the plant or misting the leaves regularly. This will help create a more favorable environment for the plant’s growth.

Step 7: Fertilizing the Spider Plant

During the growing season (spring and summer), it is recommended to nourish your spider plant with a balanced, water-soluble fertilizer on a monthly basis. Follow the instructions on the fertilizer packaging for the appropriate dilution rate. Exercise caution to avoid over-fertilization, as it may result in fertilizer burn.

Step 8: Pruning and Maintenance

Prune yellow or brown leaves as they appear to maintain the plant’s appearance. You can also trim back excessively long or leggy stems to encourage bushier growth. Spider plants are generally pest-free, but if you notice any signs of infestation, such as webbing or small insects, treat the plant with an appropriate insecticide or horticultural soap.

Step 9: Propagating Spider Plants

As mentioned earlier, spider plants are incredibly easy to propagate. Wait until the spiderettes develop roots of their own, then carefully detach them from the mother plant. You can either place them in a jar of water until they develop more roots or plant them directly into potting soil. Keep the new plants in a warm, humid environment until they establish themselves.

Frequently Asked Questions (FAQs)

How often should I water my spider plant?

Spider plants thrive when the soil is consistently moist, but it’s important to avoid waterlogging. Water them when the top inch (2.5 cm) of soil feels dry to the touch. It’s better to be underwater than overwater, as spider plants are more tolerant of drought than excessive moisture.

Can spider plants tolerate low light conditions?

Yes, spider plants are adaptable and can tolerate low-light conditions. However, they will thrive and produce more vibrant foliage if placed in bright, indirect sunlight. To prevent leaf scorching, it is best to steer clear of direct sunlight for your spider plant.

Are spider plants safe for pets?

Yes, spider plants are considered non-toxic to cats and dogs. However, some pets may be attracted to the long, dangling leaves, and excessive chewing can cause mild gastrointestinal upset. If you notice your pet showing interest in the plant, consider hanging it out of reach or placing a barrier around it.

How do I prevent my spider plant from producing spiderettes?

Spider plants naturally produce spiderettes as a way to propagate themselves. If you want to prevent the plant from producing spiderettes, you can snip off the long stems before they develop baby plants. However, keep in mind that this will prevent the plant from reproducing, and you won’t be able to propagate new spider plants from the mother plant.

Why are the leaves of my spider plant turning brown?

Brown leaves on a spider plant can be caused by various factors, including underwatering, overwatering, low humidity, or direct exposure to sunlight. Evaluate your watering routine and adjust it accordingly, ensuring that you’re neither overwatering nor allowing the plant to dry out completely. Increase humidity levels by misting the leaves or placing a tray of water nearby. If the plant is receiving direct sunlight, move it to a spot with bright, indirect light.

Can spider plants be grown outdoors?

Yes, spider plants can be grown outdoors in mild to warm climates. They are typically grown as perennials in USDA hardiness zones 9-11. If you live in a region with frost or cold winters, it’s best to grow spider plants indoors or bring them indoors during the colder months.

Do spider plants require any special soil mix?

Spider plants thrive in well-draining potting soil. A suitable soil mix can be created by combining equal parts of peat moss, perlite, and vermiculite. This blend ensures proper drainage while retaining sufficient moisture for the roots of the plant.

How long do spider plants typically live?

With adequate care, spider plants have the potential to thrive for multiple years. They are long-lived perennials and can continue to thrive and produce spiderettes for many years.

Can I use spider plants to purify the air in my home?

Yes, spider plants are known for their air-purifying qualities. They can effectively remove harmful volatile organic compounds (VOCs) from the air, such as formaldehyde, xylene, and toluene. Adding spider plants to your indoor space can help improve air quality and create a healthier environment.

Conclusion

In conclusion, spider plants (Chlorophytum comosum) are versatile, low-maintenance plants that add beauty and health benefits to any indoor or outdoor space. With their arching leaves, air-purifying qualities, and easy propagation, spider plants have become a popular choice among plant enthusiasts. By following the step-by-step guide provided in this article and providing them with the right conditions, you can enjoy the beauty of spider plants and reap the rewards of their air-purifying properties. So go ahead, bring some greenery into your life with a spider plant!

gardening ideas

Gardening Ideas: Creating a Lush and Beautiful Garden

Welcome to the world of gardening! If you’re looking for inspiration and creativity to transform your outdoor space into a lush and beautiful garden, you’ve come to the right place. In this article, we will explore a wide range of gardening ideas that will help you bring life and vibrancy to your surroundings. Whether you’re a seasoned gardener or just starting out, these ideas will provide you with the guidance and inspiration you need to create a stunning garden that reflects your personal style.

gardening ideas

Gardening Ideas for a Stunning Garden

Embrace Container Gardening

If you have limited space or want to add a touch of greenery to your patio or balcony, container gardening is a fantastic option. By using various containers such as pots, hanging baskets, or window boxes, you can create a visually appealing garden without the need for a large yard. Choose a variety of plants that thrive in containers, such as colorful annuals, herbs, or even small fruit trees. Remember to select containers that complement your overall design and consider the different heights and textures of the plants for an eye-catching display.

Table of Contents

Grow Your Own Vegetables

Growing your own vegetables is an incredibly rewarding experience like no other. Not only does it provide you with a fresh and healthy food source, but it also allows you to connect with nature and enjoy the fruits of your labor. Start by creating a dedicated vegetable patch in your garden or even consider building raised beds for easier maintenance. Choose a variety of vegetables that suit your taste and climate, from leafy greens like lettuce and spinach to delicious tomatoes, peppers, and root vegetables. Don’t forget to provide them with proper sunlight, water, and nutrients to ensure optimal growth.

Create a Butterfly-Friendly Garden

Invite the beauty of butterflies into your garden by creating a butterfly-friendly space. These delicate creatures are not only mesmerizing to watch but also play a vital role in pollination. Planting a variety of nectar-rich flowers will attract butterflies and provide them with a food source. Some popular choices include lavender, milkweed, coneflowers, and butterfly bushes. Additionally, consider incorporating host plants, such as parsley or dill, to provide a habitat for butterfly eggs and caterpillars. With careful planning, you can create a captivating garden that becomes a haven for these delightful creatures.

Add Vertical Interest with Trellises and Arbors

If you’re looking to add height and vertical interest to your garden, trellises and arbors are your secret weapons. These structures not only provide support for climbing plants but also create a visually striking focal point in your garden. Consider planting vines like clematis, honeysuckle, or jasmine that will gracefully climb and cover the trellises or arbors. The interplay between the lush greenery and the architectural elements will give your garden a sense of depth and charm.

Incorporate Water Features

Nothing adds tranquility and serenity to a garden quite like the sound of flowing water. Incorporating a water feature, such as a small pond, fountain, or birdbath, can transform your garden into a peaceful oasis. Not only will it create a soothing ambiance, but it will also attract birds, butterflies, and other wildlife to your garden. Choose a water feature that suits the size and style of your garden, ensuring proper maintenance and circulation to keep the water fresh and clean.

Embrace Sustainable Gardening Practices

As gardeners, it’s essential to embrace sustainable practices that help preserve and protect our environment. Consider implementing eco-friendly techniques such as composting, using organic fertilizers, and conserving water. Composting allows you to turn kitchen scraps and yard waste into nutrient-rich soil, reducing the need for chemical fertilizers. Using organic fertilizers ensures that your plants grow healthily without harming beneficial insects and soil microorganisms. Additionally, implementing water-saving techniques like mulching and drip irrigation can significantly reduce water consumption in your garden.

Frequently Asked Questions (FAQs)

FAQ 1: What are some low-maintenance gardening ideas?

Creating a low-maintenance garden is an excellent option for those with busy lifestyles or limited time. Now, let’s explore a few ideas to consider:

  • Choose native plants that are well-adapted to your local climate and require minimal care.
  • Implement efficient irrigation systems, such as drip irrigation, to reduce water waste.
  • Incorporate mulch to suppress weeds and retain moisture in the soil.
  • Opt for perennial plants that come back year after year, reducing the need for replanting.
  • Use self-watering containers or invest in a timed irrigation system for potted plants.

FAQ 2: What are some ways to attract pollinators to my garden?

Attracting pollinators is crucial for the health and productivity of your garden. Here are some tips to attract pollinators:

  • Include a diverse selection of flowering plants that offer nectar and pollen throughout the entire season.
  • Avoid using pesticides and insecticides that can harm pollinators.
  • Provide a water source like a shallow dish with rocks for bees and butterflies to drink from.
  • Create habitats like butterfly gardens or bee houses to encourage nesting and reproduction.
  • Avoid removing weeds completely, as they often serve as a food source for pollinators.

FAQ 3: Can I grow vegetables in containers?

Yes, you can absolutely grow vegetables in containers. Container gardening allows you to enjoy homegrown vegetables even if you have limited space. Here are some tips for successful vegetable container gardening:

  • Choose containers that are large enough to accommodate the root system of the vegetables.
  • Select a well-draining potting mix specifically formulated for container gardening.
  • Provide adequate sunlight for your vegetable plants, ensuring they receive at least 6-8 hours of direct sunlight.
  • Water your container vegetables regularly, keeping the soil evenly moist but not waterlogged.
  • Fertilize your plants with a balanced organic fertilizer to provide them with the necessary nutrients.

FAQ 4: How do I prevent pests and diseases in my garden?

Preventing pests and diseases is an essential aspect of maintaining a healthy garden. Now, let’s explore some preventive measures you can take:

  • Practice proper sanitation by removing fallen leaves and debris that can harbor pests and diseases.
  • Choose disease-resistant plant varieties and ensure proper spacing between plants for good air circulation.
  • Attract beneficial insects like ladybugs and lacewings that naturally control pests.
  • Use organic pest control methods such as neem oil, insecticidal soaps, or companion planting.
  • Regularly inspect your plants for any signs of pests or diseases and take immediate action if necessary.

FAQ 5: How do I design a small garden space?

Designing a small garden requires careful planning to make the most of the available space. Here are some design tips for small gardens:

  • Opt for vertical gardening by using trellises, hanging baskets, or wall-mounted planters to maximize space.
  • Choose compact or dwarf varieties of plants that won’t overwhelm the area.
  • Utilize raised beds or containers to create separate areas for different plants or themes.
  • Incorporate mirrors or reflective surfaces to create an illusion of a larger space.
  • Use a limited color palette and focus on textures and layers to add depth and interest.

FAQ 6: How often should I water my garden?

The watering frequency for your garden depends on various factors such as plant types and environmental conditions. However, a general guideline is to water deeply and infrequently rather than shallowly and frequently. This encourages deep root growth and ensures that the water reaches the plant’s root zone.

Assess the moisture level of the soil by inserting your finger into the soil up to the second knuckle. If the soil feels dry at that depth, it indicates that watering is needed. Provide enough water to moisten the soil to a depth of 6-8 inches for most plants. However, be cautious not to overwater, as it can lead to root rot and other issues.

In times of hot and dry weather, it may be necessary to increase the frequency of watering.

Additionally, container plants tend to dry out faster than plants in the ground, so monitor their moisture levels closely. Remember to water in the early morning or late afternoon to reduce water loss due to evaporation.

Conclusion

Gardening is a delightful and rewarding hobby that allows you to connect with nature, beautify your surroundings, and enjoy the satisfaction of nurturing plant life. By incorporating these gardening ideas into your outdoor space, you can create a lush and beautiful garden that reflects your personal style and provides a haven for birds, butterflies, and other wildlife.

Remember to experiment, have fun, and adapt the ideas to suit your specific needs and preferences. Gardening is a journey of discovery, and with each season, you’ll learn and grow as a gardener. So grab your gardening tools, put on your sun hat, and embark on this green adventure!

Bonsai-Trees-Poisonous-to-Cats

Are Bonsai Trees Poisonous to Cats?

Bonsai trees have captivated people around the world with their miniature beauty and unique aesthetic appeal. These meticulously pruned and shaped trees offer a sense of tranquility and bring nature’s beauty indoors. However, if you are a cat owner and considering bringing a bonsai tree into your home, you may have concerns about the potential toxicity of these plants to your feline companion. In this article, we will explore whether Are Bonsai Trees Poisonous to Cats or not and provide some insights on keeping your pets safe in a bonsai-filled environment.

Bonsai-Trees-Poisonous-to-Cats

Introduction

Cats are naturally curious creatures, and their exploratory nature often leads them to investigate plants in the house. As a responsible pet owner, it is crucial to be aware of the potential risks associated with certain plants, including bonsai trees. While not all bonsai trees are poisonous to cats, some species can pose a threat if ingested.

Table of Contents

Understanding Bonsai Trees

Bonsai trees are not a specific species of tree; rather, they are regular trees that are carefully cultivated and pruned to create a miniature version of their larger counterparts. The art of bonsai originated in China and later spread to Japan, where it gained significant popularity. These trees require special care and attention to maintain their small size and distinctive shape.

Common Bonsai Tree Species

There are numerous bonsai tree species, each with its unique characteristics and requirements. Some popular bonsai tree species include:

  1. Ficus Bonsai
  2. Juniper Bonsai
  3. Jade Bonsai
  4. Japanese Maple Bonsai
  5. Pine Bonsai
  6. Azalea Bonsai

Potential Toxicity of Bonsai Trees

When it comes to the toxicity of bonsai trees, it is essential to consider the specific species you have in your home. While some bonsai trees are non-toxic to cats, others can be potentially harmful or even toxic if ingested. Toxicity levels can vary based on the specific part of the tree, such as leaves, stems, or bark.

Types of Toxins Found in Bonsai Trees

Bonsai trees may contain various toxins that can be harmful to cats. Some common toxins found in certain bonsai tree species include:

  1. Calcium oxalate crystals: These crystals are present in plants like Ficus bonsai and can cause oral irritation, drooling, and difficulty swallowing if ingested.
  2. Terpenoids: Certain bonsai tree species, such as juniper, produce terpenoids, which can cause digestive issues, vomiting, and diarrhea in cats.
  3. Alkaloids: Some bonsai tree species, like azaleas, contain alkaloids that are toxic to cats and can lead to symptoms such as weakness, tremors, and abnormal heart rate.

Symptoms of Bonsai Tree Poisoning in Cats

If your cat has ingested a toxic bonsai tree or a part of it, you should watch for the following symptoms:

  1. Drooling and excessive salivation
  2. Vomiting
  3. Diarrhea
  4. Loss of appetite
  5. Lethargy
  6. Difficulty breathing
  7. Seizures (in severe cases)

If you notice any of these symptoms, it is crucial to seek immediate veterinary attention for your cat.

Preventive Measures for Cat Owners

To ensure the safety of your cat, consider the following preventive measures when keeping bonsai trees in your home:

  1. Research bonsai tree species: Before bringing a bonsai tree into your home, thoroughly research the species to determine its toxicity level to cats.
  2. Place bonsai trees out of reach: Position your bonsai trees in a location that is inaccessible to your cat, such as high shelves or enclosed display cases.
  3. Use deterrents: Apply cat-safe deterrents, such as bitter-tasting sprays, on the leaves and branches of bonsai trees to discourage your cat from chewing on them.
  4. Supervise interaction: When your cat is in the same room as the bonsai tree, supervise their interaction to prevent any potential accidents or ingestion.
  5. Provide alternative chewing options: Offer your cat safe and suitable chewing alternatives, such as catnip toys or dental treats, to redirect their chewing behavior.
Are Bonsai Trees Poisonous to Cats

Safe Alternatives for Indoor Plants

If you are concerned about the potential toxicity of bonsai trees, you may opt for alternative indoor plants that are known to be safe for cats. Some cat-friendly indoor plants include:

  1. Spider Plant (Chlorophytum comosum)
  2. Boston Fern (Nephrolepis exaltata)
  3. Areca Palm (Dypsis lutescens)
  4. Bamboo Palm (Chamaedorea seifrizii)
  5. African Violet (Saintpaulia)
  6. Calathea (Calathea spp.)

Creating a Pet-Friendly Bonsai Environment

If you are determined to have bonsai trees in your home while keeping your cat safe, consider the following steps:

  1. Choose non-toxic bonsai tree species: Opt for bonsai tree species that are known to be non-toxic to cats, such as the money tree (Pachira aquatica) or the ponytail palm (Beaucarnea recurvata).
  2. Secure the bonsai tree: Ensure that the bonsai tree is securely placed in its container or pot to prevent accidental tipping or dislodging.
  3. Separate the bonsai area: Create a designated area for your bonsai trees where your cat’s access can be restricted, such as using baby gates or indoor fencing.
  4. Regularly clean fallen leaves: Cats may be tempted to play with or chew on fallen leaves, so make it a habit to clean up any fallen foliage promptly.
  5. Consult a veterinarian: If you have concerns about specific bonsai tree species or your cat’s behavior around them, consult with a veterinarian for guidance.

Conclusion

In conclusion, while not all bonsai trees are poisonous to cats, some species can pose a threat if ingested. It is crucial for cat owners to research the specific bonsai tree species and take preventive measures to ensure their feline friends remain safe. By understanding the potential risks and implementing necessary precautions, you can create a harmonious environment where your beloved cat and bonsai trees coexist peacefully.

Frequently Asked Questions (FAQs)

Can cats get sick from chewing on bonsai leaves?

Yes, certain bonsai tree species contain toxins that can cause illness in cats if ingested.

Are all bonsai tree species toxic to cats?

No, not all bonsai tree species are toxic to cats. Some species are considered safe for feline companions.

What should I do if my cat ingests a part of a bonsai tree?

If you suspect that your cat has ingested a part of a bonsai tree and is showing symptoms of poisoning, seek immediate veterinary attention.

Are there any bonsai tree species that are safe for cats?

Yes, some bonsai tree species, such as the money tree or the ponytail palm, are known to be non-toxic to cats.

How can I train my cat to avoid bonsai trees?

You can use deterrents, provide alternative chewing options, and supervise your cat’s interaction with bonsai trees to train them to avoid them.