What is the difference between gardening soil and potting soil

What is the difference between gardening soil and potting soil

https://www.pexels.com/photo/person-holding-a-green-plant-1072824/

Have you ever found yourself standing in the garden center, staring at bags of soil and wondering which one to choose? You’re not alone. The world of gardening can be confusing, especially when it comes to gardening soil vs. potting soil.

While they might look similar, these two soil types serve very different purposes. Choosing the wrong one could mean the difference between thriving plants and wilting disappointment. But don’t worry! Understanding the key differences between gardening soil and potting soil can transform your green thumb game and help your plants flourish.

In this blog post, we’ll dig deep into the world of soils, exploring the unique characteristics of gardening and potting soil. We’ll compare their compositions, discuss when to use each type, and provide tips on choosing the right soil for your specific plant needs. By the end, you’ll be well-equipped to make informed decisions and give your plants the perfect foundation to grow and thrive.

Understanding Gardening Soil

https://www.pexels.com/photo/soils-for-plants-on-table-5830992/

Understanding Gardening Soil

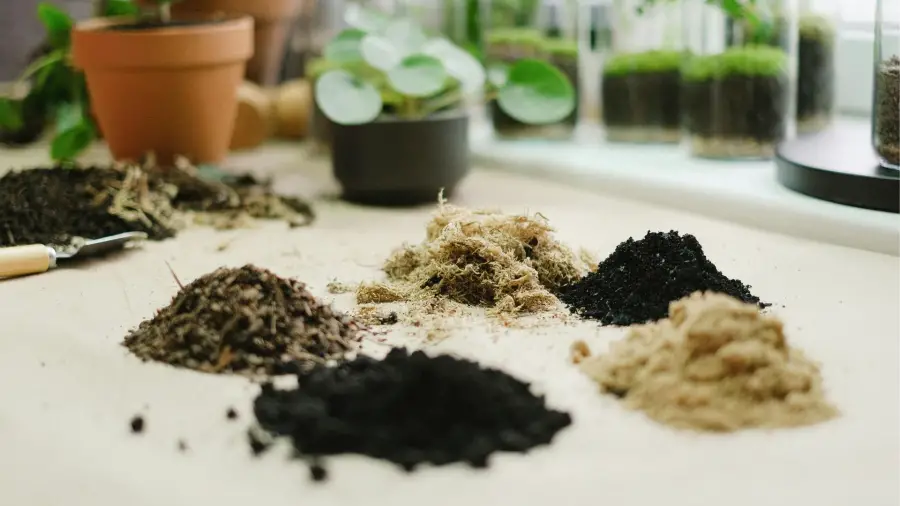
Composition of gardening soil

Gardening soil, also known as garden soil or topsoil, is a complex mixture of organic matter, minerals, and microorganisms. It typically contains:

  • Sand, silt, and clay in varying proportions
  • Decomposed organic materials (humus)
  • Beneficial microorganisms
  • Essential nutrients for plant growth
ComponentPercentage
Sand40-60%
Silt20-40%
Clay10-20%
Organic5-10%

Benefits for outdoor plants

Gardening soil offers several advantages for outdoor plants:

  • Retains moisture while allowing excess water to drain
  • Provides essential nutrients for plant growth
  • Supports beneficial microorganisms that improve soil health
  • Offers stability for root systems

Ideal uses in the garden

Gardening soil is best suited for:

  • In-ground gardens and flower beds
  • Raised garden beds
  • Amending existing soil in outdoor spaces
  • Large outdoor containers and planters

Drainage properties

The drainage properties of gardening soil are crucial for plant health. Well-draining soil:

  • Prevents waterlogging and root rot
  • Allows oxygen to reach plant roots
  • Helps maintain proper soil temperature

Now that we’ve explored gardening soil, let’s move on to understanding potting soil and how it differs from garden soil.

Exploring Potting Soil

https://www.pexels.com/photo/woman-in-green-crew-neck-t-shirt-planting-7048421/

Exploring Potting Soil

Key ingredients in potting soil

Potting soil, also known as potting mix, is a specialized blend designed for container plants. It typically contains:

  • Peat moss or coconut coir
  • Perlite or vermiculite
  • Composted bark
  • Sand
  • Fertilizers

These ingredients work together to create an ideal growing environment for potted plants.

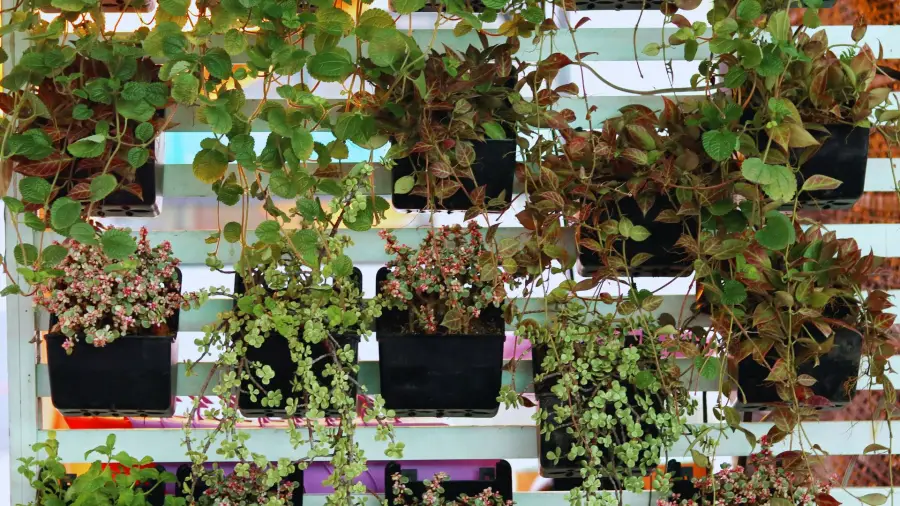
Advantages for container plants

Potting soil offers several benefits for plants grown in containers:

  1. Improved aeration
  2. Better drainage
  3. Balanced nutrient content
  4. pH-adjusted for optimal growth
AdvantageDescription
AerationAllows roots to breathe
DrainagePrevents waterlogging
NutrientsProvides essential elements
pHOptimized for nutrient uptake

Lightweight nature

The lightweight composition of potting soil is crucial for container gardening. It:

  • Reduces strain on containers and shelving
  • Makes it easier to move pots around
  • Allows roots to penetrate and grow easily

Water retention capabilities

Potting soil excels at balancing moisture levels:

  • Retains enough water for plant roots
  • Drains excess water to prevent root rot
  • Reduces the frequency of watering

Sterility and disease resistance

One of the key advantages of potting soil is its sterility:

  • Free from weed seeds
  • Devoid of harmful pathogens
  • Reduces the risk of soil-borne diseases

Now that we’ve explored the characteristics of potting soil, let’s compare it with gardening soil to understand their distinct uses and benefits.

Comparing Soil Types

https://www.pexels.com/photo/harvested-sugar-beets-in-muddy-field-29688997/

Comparing Soil Types

Now that we’ve explored gardening soil and potting soil individually, let’s delve into their key differences to help you make an informed choice for your plants.

Texture and consistency differences

Gardening soil and potting soil have distinct textures and consistencies:

  • Gardening soil: Dense, heavy, and compacts easily
  • Potting soil: Light, fluffy, and well-draining
Soil TypeTextureConsistencyWater Retention
Gardening SoilDenseHeavyHigh
Potting SoilLightFluffyModerate

Nutrient content variations

The nutrient profiles of these soils differ significantly:

  1. Gardening soil:
    • Rich in natural organic matter
    • Slower release of nutrients
    • May require additional fertilization
  2. Potting soil:
    • Pre-mixed with balanced nutrients
    • Often contains slow-release fertilizers
    • Designed for optimal plant growth in containers

pH levels and adjustability

pH levels play a crucial role in plant health:

  • Gardening soil: pH varies based on local conditions; may need adjustment
  • Potting soil: Typically pre-adjusted to a neutral pH (6.0-7.0)

Cost comparison

When considering which soil to use, cost is an important factor:

  1. Gardening soil:
    • Generally less expensive
    • Available in bulk quantities
    • Cost-effective for large outdoor areas
  2. Potting soil:
    • More expensive per volume
    • Sold in smaller bags
    • Higher cost justified by convenience and specialized formulations

Next, we’ll explore how to choose the right soil for your specific plant needs.

Choosing the Right Soil for Your Plants

https://www.pexels.com/photo/top-view-of-green-succulent-plant-in-soil-28905701/

Choosing the Right Soil for Your Plants

Now that we’ve compared gardening soil and potting soil, let’s focus on selecting the best soil for your plants. Understanding which soil to use is crucial for the health and growth of your plants.

Factors to consider

When choosing between gardening soil and potting soil, consider:

  1. Plant type
  2. Growing location (indoor vs outdoor)
  3. Container size
  4. Drainage requirements
  5. Nutrient needs

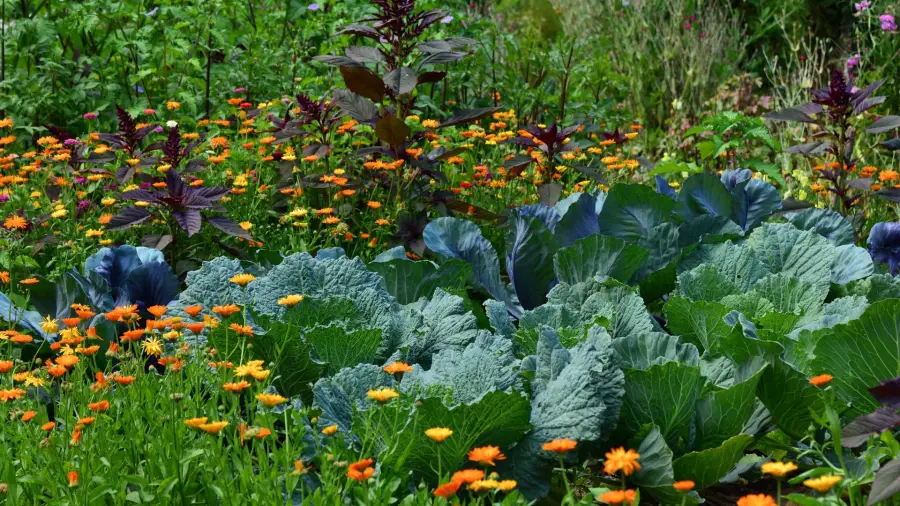
Best plants for gardening soil

Gardening soil is ideal for:

  • Outdoor plants
  • In-ground gardens
  • Large containers
Plant TypeExamples
VegetablesTomatoes, peppers, carrots
ShrubsHydrangeas, roses, azaleas
TreesFruit trees, ornamental trees

Ideal plants for potting soil

Potting soil works best for:

  • Indoor plants
  • Container gardens
  • Small to medium-sized pots
Plant TypeExamples
HouseplantsSpider plants, pothos, ficus
HerbsBasil, mint, thyme
SucculentsAloe vera, echeveria, jade

Mixing soil types for optimal results

For some plants, combining gardening soil and potting soil can provide the best of both worlds. This approach:

  1. Improves drainage
  2. Enhances nutrient retention
  3. Provides better aeration

Next, we’ll explore ways to enhance soil performance for even better plant growth.

Enhancing Soil Performance

https://www.pexels.com/photo/person-holding-green-plant-in-a-clay-pot-5830962/

Enhancing Soil Performance

Now that we’ve explored the differences between gardening soil and potting soil, let’s dive into how to enhance their performance for optimal plant growth.

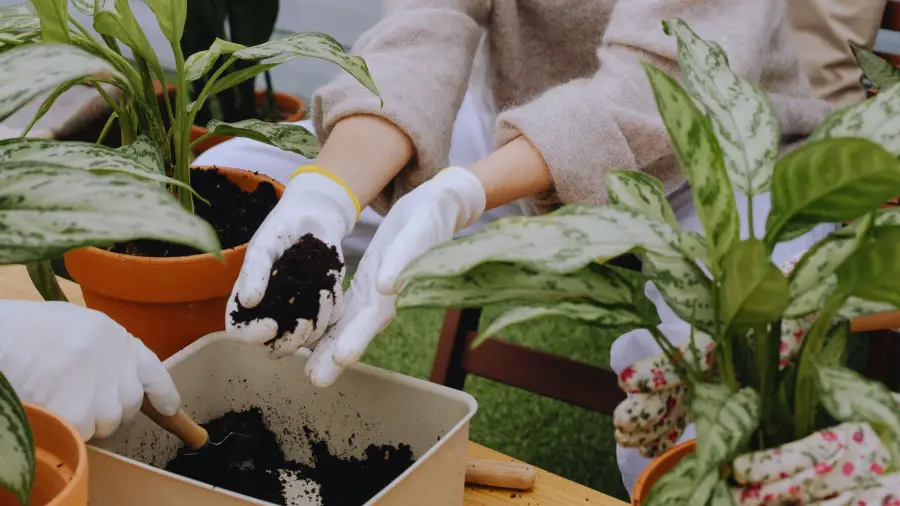
Amendments for gardening soil

To improve gardening soil, consider adding organic matter such as compost, well-rotted manure, or leaf mold. These amendments enhance soil structure, increase nutrient content, and improve water retention. Here’s a list of common amendments:

  • Compost
  • Well-rotted manure
  • Leaf mold
  • Peat moss
  • Vermiculite

Boosting potting soil quality

While potting soil is pre-mixed, you can still enhance its quality. Add perlite or vermiculite to improve drainage and aeration. Slow-release fertilizers can provide long-term nutrition for container plants.

DIY soil mixing techniques

Creating your own soil mix allows for customization based on plant needs. Here’s a simple recipe for a general-purpose potting mix:

IngredientProportion
Peat moss or coco coir1 part
Compost1 part
Perlite or vermiculite1 part
Sand1/2 part

Adjust the ratios based on your plants’ specific requirements.

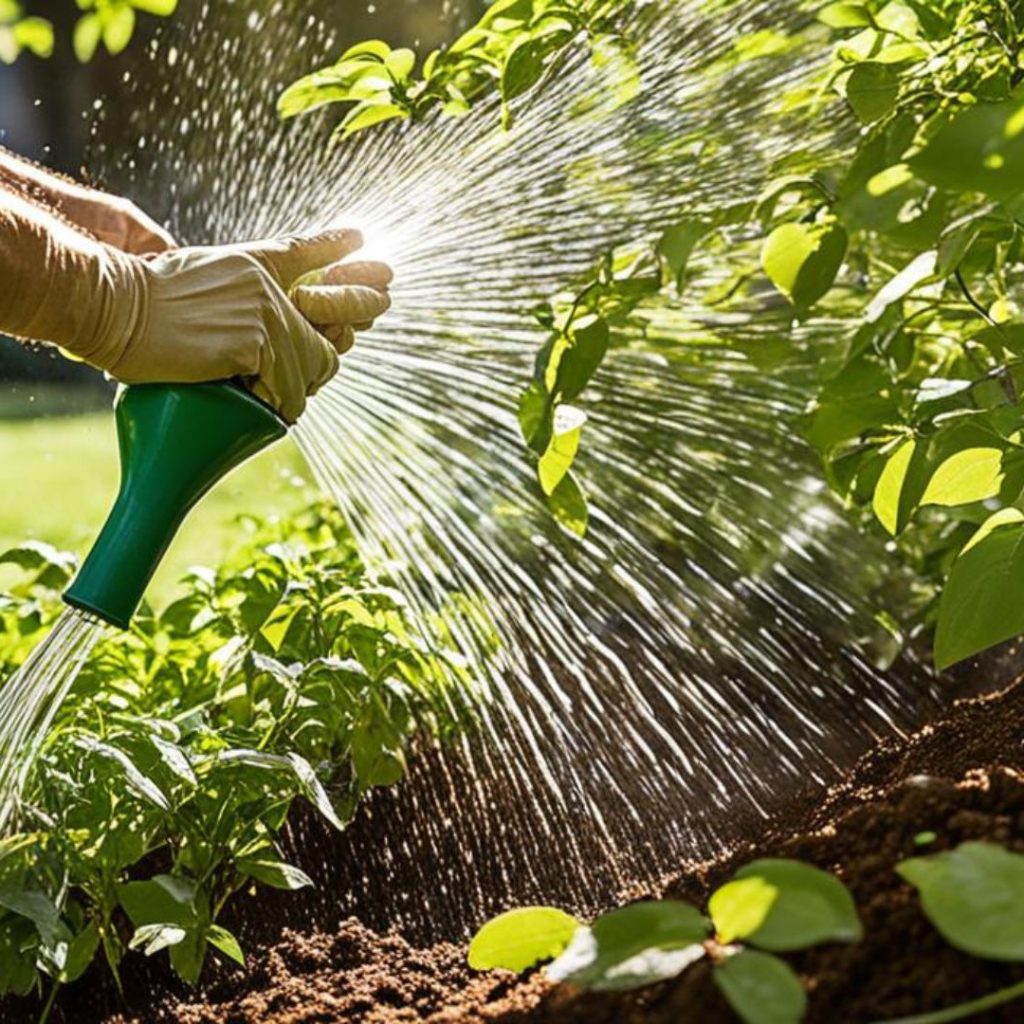
Importance of proper soil maintenance

Regular soil maintenance is crucial for both gardening and potting soil. Test pH levels annually and adjust as needed. For outdoor gardens, rotate crops to prevent nutrient depletion. In containers, repot plants periodically to refresh the soil and provide room for root growth.

https://www.pexels.com/photo/aerial-view-of-lush-garden-pathway-and-pond-29712127/

Gardening soil and potting soil each have unique characteristics that make them suitable for different applications. While gardening soil is ideal for outdoor use in garden beds and landscapes, potting soil is specifically formulated for container plants. Understanding these differences is crucial for successful plant growth and maintenance.

When selecting soil for your plants, consider their specific needs and growing conditions. Whether you choose gardening soil or potting soil, remember that proper soil management and enhancement techniques can significantly improve plant health and overall garden success. By using the right soil type and implementing best practices, you’ll create an optimal environment for your plants to thrive.

Chinese Elm Tree

Chinese Elm Tree Care: Tips for Healthy Growth

Welcome to the world of Chinese Elm trees! These trees are loved for their beauty and toughness. They are a favorite among gardeners. I’ll share key tips to help your tree grow well and look great all year.

Learning how to care for these trees is crucial. Things like soil type and sunlight are very important for their health. Let’s explore the best ways to keep these beautiful trees strong and healthy.

Introduction to Chinese Elm Trees

The Chinese Elm tree is a fascinating species known for its unique characteristics. These trees grow fast, making them great for gardeners looking for quick results. They can grow up to 40 to 60 feet tall, making a big impact.

They are also very adaptable. They can live in different climates and soil types. This makes them perfect for many environments.

The benefits of Chinese elm trees are truly amazing. Their branches have a beautiful shape, adding to the tree’s look. The leaves change colors with the seasons, making the tree a year-round beauty.

Adding a Chinese Elm to your garden does more than just look good. It also helps the environment. The trees provide a home for birds and insects. By planting one, you’re choosing beauty and helping nature.

Understanding the Chinese Elm Tree

The Chinese elm tree, known as Ulmus parvifolia, is a species that grows well in many places. It’s interesting to see where this tree lives naturally. It’s found mainly in China, Korea, and Japan, near rivers, in forests, and even in cities.

Knowing how to care for this tree is important if you want to plant one. Chinese elms like soil that drains well and can handle different pH levels. They do best in soil that’s a bit acidic to neutral.

These trees can survive without much water but grow better with regular watering during the growing season.

“The adaptability of the Chinese elm is a testament to its enduring nature.”

The climate affects the health of the Chinese elm. It can handle both hot and cold weather well. This makes it a good choice for many climates. It grows in USDA hardiness zones 4 to 9, making it versatile for gardeners in different areas.

To keep a Chinese elm healthy, mimic its natural environment in your garden. By doing so, you can have trees that add beauty and shade to your outdoor space.

Chinese Elm Tree Care: Essential Tips for Healthy Growth

Caring for a Chinese elm tree means knowing what it needs for soil and sunlight. With the right care, these trees can grow well and look great in any garden.

Soil Requirements

The chinese elm tree soil requirements focus on well-drained, slightly acidic to neutral soil. Good soil is key for strong roots and health. When planting, I mix in organic matter to improve drainage and fertility.

Sunlight Exposure

Knowing how much sunlight a chinese elm tree needs is important. They do best in full sun to partial shade. I place them where they get at least six hours of direct sunlight daily. This sunlight keeps their leaves vibrant and helps them grow strong.

Soil TypeDrainagepH Level
Well-drained loamy soilExcellent6.0 – 7.0 (slightly acidic to neutral)
Clay soilPoor6.5 – 7.5 (neutral to slightly alkaline)
Sandy soilGood5.5 – 6.5 (acidic to neutral)

By paying attention to these details, my Chinese elm trees stay healthy and add beauty to my garden for many years.

Watering Your Chinese Elm Tree

Proper watering is key for your Chinese Elm tree’s health. Knowing the right techniques helps with strong growth and fighting off bad conditions. I’ve learned watering strategies that keep my tree healthy and bright.

Chinese Elm Tree Care Watering Techniques

For watering your Chinese Elm tree, being consistent is important. Here are the strategies I use:

  • Water deeply rather than often; this helps roots grow deep.
  • Check soil moisture by sticking your finger in about an inch deep. If it feels dry, it’s time to water.
  • Water in the morning or late afternoon to cut down on evaporation.
  • Use a soaker hose or drip irrigation for slow, steady moisture.

Following these tips helps me keep moisture right, avoiding too much water that can cause problems.

Signs of Underwatering and Overwatering

It’s crucial to know the signs of underwatering to keep my Chinese Elm tree healthy. Here are the signs I watch for:

  • Leaves that look droopy mean the tree needs water.
  • Brown edges on leaves show the tree lacks moisture.

But, too much water can harm your tree too. Signs of overwatering I watch for include:

  • Leaves turning yellow, especially the lower ones.
  • Root rot, which smells bad and can be at the tree’s base.

Knowing these signs helps me adjust my watering, making sure my Chinese Elm tree thrives.

Fertilizing Your Chinese Elm Tree

Proper fertilization is key for a healthy Chinese Elm tree. It’s important to know the best fertilizers and when to use them. I’ll share some tips to help your tree grow well.

Best Types of Fertilizers

Look for balanced fertilizers with nitrogen, phosphorus, and potassium. Here are top picks for fertilizing your Chinese Elm tree:

  • Slow-Release Fertilizers: These release nutrients slowly, so you don’t have to feed your tree as often.
  • Liquid Fertilizers: These are fast-acting and great for adjusting your tree’s diet quickly.
  • Organic Fertilizers: Made from natural stuff, they help the soil and feed your tree.

Fertilizing Schedule

It’s important to have a fertilizing plan for your trees. Here’s a simple schedule:

Time of YearFertilizing ActionType of Fertilizer
Early SpringInitial applicationSlow-release fertilizer
Mid-SummerSupplemental feedingLiquid fertilizer
Late SummerFinal feedingOrganic fertilizer

Stick to this plan to help your Chinese Elm tree grow strong and green. Good fertilization gives it the nutrients it needs for healthy growth.

Chinese Elm Tree Problems

Looking after my Chinese Elm tree means knowing about common problems. These issues can really affect its health. By spotting pests and diseases early and acting fast, I can keep my tree healthy.

Common Pests and Diseases

Chinese elm trees face many pests and diseases that can slow their growth and harm them. Some of the most common ones include:

  • Aphids: These small, soft-bodied insects can infest the leaves, stunting growth and causing yellowing.
  • Scale Insects: These pests attach themselves to the bark and sap, leading to weakened branches.
  • Spider Mites: Often found on the undersides of leaves, they may cause wilting and webbing.
  • Dutch Elm Disease: This serious fungal disease can kill the tree if not managed promptly.

How to Resolve Issues

When dealing with chinese elm tree problems, acting quickly is key. Here are some steps I can take to tackle these issues:

  1. Aphids: Introduce beneficial insects like ladybugs to reduce the population naturally or use insecticidal soap.
  2. Scale Insects: Regularly inspect for these pests and treat with horticultural oil to suffocate them.
  3. Spider Mites: Increasing humidity can help deter these mites. For severe infestations, apply miticides as needed.
  4. Dutch Elm Disease: Promptly remove infected branches and apply fungicides to protect remaining healthy tissue.

By keeping an eye out and acting fast, I can handle these common pests and diseases. This way, my Chinese Elm tree will stay healthy and thrive for many years!

Pruning Tips for Chinese Elm Trees

Pruning is key for keeping Chinese elm trees healthy and looking great. By using the right pruning techniques, I can help them grow better and make my garden more lively. Pruning helps with healthy growth and stops diseases, making it a must for gardeners.

The best time to prune is in late winter or early spring, before new growth starts. This lets me shape the tree without causing stress. I remove dead or sick branches and thin out crowded spots to improve air flow and sunlight.

  • Thinning cuts: Removing entire branches at their start to keep the tree’s natural shape.
  • Head cuts: Cutting branches short to encourage more growth, great for young trees.
  • Reduction cuts: Cutting the tree shorter while keeping its natural look.

It’s crucial to use sharp, clean tools to avoid hurting the tree and spreading diseases. When pruning, I check the tree’s health and growth to make the right changes. With careful pruning, I can keep my Chinese elm tree healthy and beautiful.

Chinese Elm Bonsai Care

Caring for Chinese Elm bonsai is an art that brings immense satisfaction. The first step in my journey of chinese elm bonsai care starts with the bonsai pot selection. It’s essential to choose a pot that not only complements the beauty of the tree but also provides proper drainage. A well-draining pot allows excess water to escape, preventing root rot, which is a common issue for bonsai enthusiasts. I recommend opting for pots that have drainage holes and are made from materials such as terracotta or ceramic, as these promote healthy root growth.

Next, once my Chinese Elm is settled in its new home, I focus on shaping and styling techniques. Regular pruning is crucial to maintaining the desired shape and encouraging new growth. I often use wire to guide branches into my preferred positions, allowing for creative styling that showcases the elegant form of the tree. When shaping, it’s important to remain patient and attentive. Over time, the tree will develop a beautiful structure, revealing its unique character as a delightful indoor plant.

Through mindful chinese elm bonsai care, I find my tree becomes not just a plant but a manifestation of my creativity and dedication. By following these simple tips on bonsai pot selection and styling techniques, anyone can embark on a fulfilling bonsai journey that highlights the stunning beauty of the Chinese Elm.

FAQ

What are the common problems I might encounter with a Chinese Elm tree?

Chinese Elm trees can face issues like pests (aphids) and diseases (Dutch Elm disease). It’s important to watch your tree for any signs of trouble.

How do I care for a Chinese Elm bonsai?

Taking care of a Chinese Elm bonsai means picking the right pot for good drainage. You also need to water it right and shape it regularly to make it look great.

What is the best way to water my Chinese Elm tree?

Water your Chinese Elm tree regularly but deeply. Keep the soil moist, not soaked. Adjust how much you water based on the weather.

Are there any pros and cons to planting a Chinese Elm tree?

Chinese Elm trees grow fast and are tough. But, they can get pests and diseases. Knowing this helps decide if it’s right for your garden.

How should I care for my Chinese Elm tree outdoors during winter?

In winter, make sure your Chinese Elm tree is well-watered before the ground freezes. Also, mulch around its base to protect the roots from the cold.

What type of fertilizers should I use for my Chinese Elm tree?

Use balanced fertilizers with all the nutrients your tree needs. Apply them seasonally for the best growth.

How do I know if I am overwatering or underwatering my Chinese Elm?

Underwatering can cause wilting leaves and dry soil. Overwatering leads to yellow leaves and root rot. Watching for these signs helps me water it right.

When is the best time to prune my Chinese Elm tree?

Prune your Chinese Elm tree in late winter or early spring. This is before new growth starts. It helps with healthy growth and keeps the tree’s shape.

Best Tools And Accessories

Best Tools And Accessories for Successful Container Gardening

The essential tools for successful container gardening include quality potting soil, trowels, pruning shears, and watering cans. Containers with proper drainage also top the list.

Container gardening demands precision and care, requiring specific tools to ensure the health and growth of plants in a confined space. Gardeners must select the right containers to accommodate plant roots and provide adequate drainage while maintaining soil nutrient levels.

Best Tools And Accessories: Essential tools such as a sturdy trowel for transplanting, sharp pruning shears for maintenance, and a reliable watering can for hydration are crucial for thriving container gardens. Accessories like gloves protect hands, and pot feet elevate containers for better drainage and prevent surface staining. With the right tools and accessories, even the smallest spaces can transform into lush, productive gardens, offering a rewarding experience for green thumbs of all levels.

Introduction To Container Gardening

Container gardening offers the flexibility to grow a variety of plants in any space. It’s ideal for urban dwellers with limited outdoor areas. The benefits of growing plants in containers are numerous. You can control soil quality and avoid soil-borne diseases. Containers also prevent weed growth and minimize pest problems. With proper care, container plants can thrive, providing beauty and fresh produce even on small balconies or patios.

Understanding the basics is key to success. Choose containers with drainage holes and pick the right soil mix for your plants. Regular watering and fertilization will keep your container garden healthy and productive. With the right tools and accessories, such as watering cans, nutrient mix, and pruning shears, you’ll find container gardening both enjoyable and rewarding.

Choosing The Right Containers

Choosing the right container is crucial for your plants. Materials vary, each with unique benefits and drawbacks. Plastic containers are lightweight and cost-effective, but can degrade in sunlight. Conversely, terracotta pots offer a classic look and excellent breathability but are heavier and fragile.

Size and drainage are also key. Large pots retain more moisture and have space for growth, while small pots dry out faster and are easier to move. Ensure each container has adequate drainage holes to prevent root rot. Without proper drainage, even the best soil and care won’t keep plants healthy.

Material Pros Cons
Plastic Lightweight, Affordable Less durable, Poor insulation
Terracotta Classic aesthetic, Breathable Heavy, Breakable
Metal Durable, Modern look Can overheat, Rust potential
Wood Natural insulation, Sturdy Can rot, Requires maintenance

Best Tools And Accessories: Essential Tools For Container Gardeners

Trowels and hand forks are vital for planting and transplanting in container gardens. Their size makes them ideal for small spaces and precise work. Gardeners rely on them for adding or removing soil and weeding around plants.

Pruning shears help maintain plant health by removing dead or overgrown branches. Gloves protect hands from thorns, dirt, and moisture. They ensure a safe and comfortable gardening experience.

Consistent watering is key to a thriving garden. Watering cans give control over the amount of water you dispense, while hose attachments can help in reaching distant containers and providing a gentle shower to delicate plants.

Best Soil Mixes For Containers

Choosing the right soil is crucial for container gardening success. Potting soil is designed for pots and containers. It’s lightweight and well-draining. Garden soil is heavier and may compact in containers, leading to poor root growth.

To create a nutrient-rich mix, consider soil amendments. Compost adds organic matter, improving soil structure and fertility. Perlite or vermiculite can enhance soil aeration and water retention. Regular feeding with a balanced fertilizer keeps plants healthy and productive.

Plant Selection And Arrangement

Selecting plants that thrive in your local climate is crucial for container gardening. Use native species or those adapted to similar conditions. This ensures healthy growth and reduces maintenance.

Designing your container layout involves more than just aesthetics. Consider the sunlight, water requirements, and growth patterns of each plant. This strategy helps in creating a harmonious and flourishing garden.

Fertilizing And Plant Care

Successful container gardening thrives with the right fertilizer use. Different plants need specific nutrients. A balanced N-P-K ratio is key for healthy growth. Organic options like compost are great for slow-release feeding. Synthetic fertilizers offer quick nutrient boosts. Pick one that suits your plants’ needs.

Consistent watering keeps plants in peak condition. Containers dry out faster than ground soil. Use a watering can with a long spout for easy reach. Self-watering planters can be a time-saver. Always check soil moisture before watering.

Accessories To Enhance Container Gardens

Pot feet and risers are essential for drainage and air flow beneath containers. They prevent waterlogging and protect decks and patios from stains. Using these accessories also makes it easier to clean under pots.

Decorative mulches serve a dual purpose. They retain moisture and add a visual appeal to container gardens. Plant supports, such as stakes and trellises, provide stability for tall plants and vines. They are vital for ensuring plants grow upright and healthy.

Maintaining A Healthy Container Garden

Effective pest and disease management is crucial for a thriving garden. Use organic pesticides to keep plants healthy. Regularly check leaves for signs of illness.

For seasonal upkeep, replace soil annually and move sensitive plants indoors during cold months. This keeps your garden fresh and ready for each season.

Innovative Container Gardening Tips

DIY Container Ideas inspire gardeners to repurpose items creatively. Old buckets, wooden crates, and even colorful tin cans become plant homes. Drill drainage holes to keep roots healthy. Mix and match containers for a playful look.

Vertical Gardening with Containers maximizes space and adds dimension. Use hanging baskets, wall-mounted planters, or stackable pots. Ensure each plant gets enough light and water. This approach is perfect for small patios or balconies.

Storage Solutions For Gardening Tools

Effective storage is key for keeping small gardening tools organized. Use magnetic strips to hang metal items like pruning shears.

Pegboards with hooks offer flexible storage for items of varying sizes. Labelled bins and baskets can help categorize and retrieve tools quickly.

Consider a DIY caddy for portable tool collection. Utilize over-the-door shoe organizers for small pots, gloves, and markers.

Frequently Asked Questions

How Do You Make A Successful Container Garden?

To ensure a thriving container garden, choose the right containers, use quality potting mix, ensure proper drainage, select compatible plants, and maintain consistent watering and feeding.

What Is The Rule Of Thumb For Container Gardening?

Choose the right-sized container for your plants, ensuring adequate room for growth. Ensure proper drainage to prevent root rot. Use high-quality potting soil tailored for container plants. Regularly water and feed your plants appropriate nutrients. Place containers in suitable light conditions for the plants selected.

How Can I Make My Container Garden Look Good?

Choose plants with varied heights and textures for visual interest. Use quality potting mix and ensure proper drainage. Regularly deadhead spent flowers to promote new growth. Arrange pots in groups for a cohesive look. Select containers that complement your plants' colors and styles.

What Is Needed For A Container Garden?

For container gardening, you'll need containers, potting soil, plants, water, and sunlight.

Conclusion

Choosing the right tools and accessories can significantly enhance your container gardening experience. Equipped with the best items, from ergonomic trowels to self-watering pots, you’re set for success. Remember, quality tools not only ease the job but also help your plants thrive.

So gear up, get planting, and watch your garden flourish!

Vertical Gardening

The Benefits of Vertical Gardening: Maximizing Space And Beauty

Vertical gardening enhances space utilization and elevates aesthetic appeal. It transforms walls and fences into vibrant, living tapestries.

Embracing vertical gardening offers a lush solution for space-constrained gardeners eager to infuse nature into their surroundings. This innovative approach turns any blank vertical plane into a canvas for botanical creativity, encouraging a burst of greenery in areas where traditional gardens might not flourish.

With cities becoming denser, and private outdoor space at a premium, vertical gardens present an ingenious way to cultivate plants, herbs, and vegetables. Not only do they beautify urban environments, but they also contribute to improved air quality and biodiversity. Ideal for balconies, patios, or even indoor spaces, vertical gardening makes horticulture accessible to everyone, regardless of their square footage. By embracing this upward growth, garden enthusiasts can enjoy the dual benefits of a bountiful harvest and a stunning visual display.

Introduction To Vertical Gardening

Vertical gardening transforms the way we utilize space in urban areas. It is a creative solution for city dwellers with limited ground area. This approach maximizes vertical surfaces to grow plants and enhance urban beauty.

City residents are increasingly embracing vertical gardens. These green spaces can turn a bland wall into a vibrant living piece of art. They are not only aesthetically pleasing but also contribute to environmental health. The concept is straightforward: grow upwards, not outwards.

Vertical gardens use various structures such as trellises, panels, and modular systems. They allow for the cultivation of flowers, herbs, and even vegetables. This method is perfect for balconies, patios, and rooftops. It brings nature into the heart of the city.

Space Efficiency

Vertical gardening offers a clever solution for small spaces. Urban dwellers can enjoy lush gardens without the need for large plots of land. This method transforms balconies, patios, and even walls into productive green spaces.

Compared to traditional gardening, the vertical approach uses less ground area. This means more greenery in less space. It’s ideal for city homes with limited outdoor areas. Vertical gardens can turn a tiny spot into a vibrant oasis.

Aesthetic Enhancement

Vertical gardening elevates the visual appeal of any space. Unique designs are possible with vertical gardens. They allow for creative expression in urban areas. Walls and balconies transform into living art.

Gardens can integrate seamlessly with modern architecture. They complement existing structures. Natural beauty blends with the built environment. This creates harmony between nature and human design.

Environmental Impact

Vertical gardens enhance air quality by increasing oxygen levels. Plants absorb carbon dioxide and release oxygen, cleansing the air we breathe. This greenery acts as a natural filter, trapping pollutants and particulates.

Effective water management is inherent to vertical gardening. These systems often include integrated irrigation that minimize water use. Excess water gets recirculated, reducing overall consumption. Conservation efforts are maximized with these gardens.

Health And Well-being

Vertical gardening boosts mental health and mood. Being close to greenery helps reduce stress. It also increases feelings of happiness and calm.

Working in a garden improves physical fitness. It helps burn calories and strengthens muscles. Gardening activities, like planting and weeding, are good for the heart and body.

Agricultural Productivity

Vertical gardening boosts crop yields with its unique approach. Plants thrive with ample sunlight and airflow. This method encourages healthy growth and more produce per square foot. Urban growers find this method highly efficient.

Pest and disease control is simpler with vertical gardens. Elevation keeps many pests at bay. It also reduces plant disease spread. This results in healthier plants and reduced need for chemicals.

Technological Innovations

Vertical gardening systems are transforming urban landscapes. Smart gardening solutions like hydroponics and aeroponics are now more accessible. These systems allow for efficient water use and higher yield crops. They are ideal for small spaces, such as balconies or rooftops. With these innovations, anyone can grow fresh produce at home.

Recent advancements include self-watering planters and automated nutrient delivery systems. These features make maintenance simple and less time-consuming. LED grow lights support plant growth without natural sunlight. Such technological innovations are making vertical gardens more efficient and appealing.

Case Studies

Vertical gardening is transforming cities worldwide. Many places now enjoy more green spaces with these gardens. They are not only beautiful but also smart ways to use small areas.

One story comes from Tokyo, Japan. A city school used a vertical garden to teach kids about nature and science. The garden is full of local plants and vegetables. It helps clean the air around the school.

Another success is in London, UK. An office building has a vertical garden on its walls. It cuts down on the building’s heat and gives workers a lovely view.

From these cases, we learn that vertical gardens are great for education and can make buildings cooler. They show us how to live better in busy cities.

Getting Started With Your Vertical Garden

Select plants that thrive upright. Succulents, ferns, and climbing vegetables are ideal. They need minimal soil and water. This makes them perfect for vertical setups.

Creating a vertical garden requires sturdy structures. Consider trellises, wall planters, or stacked pots. These can be bought or DIY projects. Ensure they can support the weight of plants and soil.

Maintenance And Care

Vertical gardening ensures efficient use of space. Keep plants thriving with consistent watering and adequate sunlight.

Regularly check for pests and disease. Trim and prune as necessary to maintain plant health and garden aesthetics.

Fertilize soil to replenish nutrients. Use organic compost for a sustainable approach.

Issue Solution
Plants drying out Increase watering frequency
Excessive leaf yellowing Check nutrient levels
Pest infestation Apply natural repellents

Future Of Vertical Gardening

Vertical gardening reshapes our view on urban living. It brings green spaces to concrete jungles. City dwellers can grow fresh produce despite limited space. This method supports sustainable living in busy cities.

With vertical gardens, high-rise buildings transform into living ecosystems. They become sources of fresh air and reduced heat. This trend is essential for ecological balance in urban settings.

Smart integration of vertical gardens in architectural designs is on the rise. It turns buildings into aesthetic and functional structures. These gardens offer thermal insulation and energy savings.

Urban planners see vertical gardening as a key to city expansion. It allows for more green spaces without sacrificing valuable floor space. This trend is crucial for the future of urban development.

Frequently Asked Questions

What Are The Benefits Of Vertical Gardens?

Vertical gardens enhance space utilization, beautify areas, improve air quality, and increase biodiversity. They also offer thermal insulation and noise reduction.

What Is One Of The Advantages Of Growing Plants Vertically?

One advantage of growing plants vertically is efficient space utilization, allowing for more greenery in smaller areas.

What Is The Science Behind Vertical Gardening?

Vertical gardening optimizes space use and supports plant growth by using vertical surfaces for cultivation, improving air quality and biodiversity.

What Are The Results Of Vertical Gardening?

Vertical gardening optimizes space use, boosts aesthetic appeal, and enhances air quality. It allows for efficient water usage and increases plant health by improving air circulation.

Conclusion

Vertical gardening truly transforms the way we view and utilize space in urban settings. It offers not only aesthetic enhancement but also practical benefits like improved air quality and increased biodiversity. By adopting this innovative approach, you can turn any small area into a lush, productive green space.

Embrace vertical gardening to make the most of limited spaces while adding a touch of nature’s beauty to your environment.

Start Your Own Herb Garden

How to Start Your Own Herb Garden: Fresh Flavors at Your Fingertips

Starting your own herb garden offers easy access to fresh flavors. Choose a sunny spot, select your pots and herbs, and begin planting.

Embarking on the journey of creating a personal herb garden can transform your culinary experiences and green your living space. Imagine plucking fresh basil for your homemade pesto or sprinkling aromatic cilantro over a sizzling pan of fajitas—all from the comfort of your home.

Start Your Own Herb Garden: This endeavor doesn’t require extensive space or advanced gardening skills. With a few well-chosen pots, suitable soil, and a sprinkle of care, herbs can thrive on a sunny windowsill or a small balcony. By focusing on herbs that you love and use often, you’ll tailor your garden to your taste buds and kitchen needs. This guide will help you cultivate a lush mini garden that promises a bounty of fresh herbs right at your fingertips.

Start Your Own Herb Garden: Choosing The Right Location

Select a spot that gets plenty of sunshine since herbs thrive in well-lit environments. Aim for a site that enjoys at least six hours of sunlight daily. This will ensure your herbs develop full flavor and healthy growth.

Easy access is key for maintenance and harvesting. Choose an area close to your kitchen or with a clear path. This makes it simpler to snip fresh herbs as you cook.

Examine the soil before planting. It should be rich and well-draining. Perform a simple test by squeezing a handful of soil. It should hold its shape briefly then crumble when poked. If the soil is too dense, amend it with organic matter to improve texture and nutrients.

Planning Your Herb Garden Layout

Designing an herb garden layout is pivotal for aspiring gardeners eager to infuse their meals with homegrown freshness. Strategic placement ensures your herbs thrive, providing a bounty of aromatic flavors right outside your door.

Designing For Space Efficiency

Maximize your gardening area by using vertical planters or hanging pots. This approach is perfect for small spaces. Utilize corners and walls to hang planters, and consider using stackable containers for a multi-level effect.

Companion Planting Considerations

Some herbs thrive together, while others don’t. Plant basil near tomatoes to enhance growth, but keep mint away from parsley to avoid stunting. Group plants with similar water and sunlight needs to simplify care and boost your garden’s overall health.

Selecting Your Herbs

Starting an herb garden brings fresh flavors and aromatic delights to your kitchen. Choose herbs that you love to cook with, such as basil, cilantro, parsley, and rosemary. These popular herbs are easy to grow and add incredible taste to a variety of dishes.

For those with a taste for the unusual, exotic herbs like lemongrass or Thai basil might be tempting. Research each plant’s needs carefully, as some may require special soil or climate conditions. Always ensure they receive appropriate light and water to thrive.

Herb Light Water Special Care
Basil Full Sun Regular Prune for bushiness
Cilantro Full Sun Regular Harvest before flowering
Parsley Partial Sun Regular Soil rich in nutrients
Rosemary Full Sun Light Well-drained soil

Getting The Timing Right

Kickstart your herb garden by planting in optimal seasons. Most herbs thrive when sown in spring. Yet, some can be planted in fall for early spring harvest. Perennial herbs like rosemary and thyme survive winters, returning each year. Annuals, like basil and cilantro, need warm weather and must be replanted annually. Biennials, such as parsley, span two seasons before needing replanting.

Research each herb’s lifecycle for a flourishing garden. Knowing whether an herb is annual, biennial, or perennial guides planting times. This ensures healthy growth and abundant flavors right at your fingertips.

Soil Preparation And Planting

To ensure healthy growth in your herb garden, focus on creating the perfect soil mix. Use a blend of peat moss, perlite, and compost to provide nutrients and improve drainage. This combination helps the roots breathe and grow strong.

For planting techniques, spacing is key. Allow enough room between plants for air to circulate. This prevents moisture-related diseases. Dig holes just deep enough for the root ball and water gently after planting.

Watering And Maintenance

Proper watering ensures your herb garden thrives. Use a drip irrigation system to provide a steady water supply. Aim for soil that is moist, but not soaked. Water early in the morning to reduce evaporation and prevent mildew.

Mulch your herbs to conserve moisture and reduce weeds. A layer of organic mulch like straw or wood chips can be effective. This also helps in maintaining soil temperature and preventing erosion. Regularly check for and remove any weeds to avoid competition for nutrients.

Optimizing Herb Growth

Regular pruning boosts herb yield and quality. Snip off the tops to encourage bushy growth. Ensure to cut right above a leaf pair, as new stems will sprout from there. Keep plants productive with these simple cuts.

Natural pest control keeps herbs healthy. Introduce beneficial insects, like ladybugs, to combat pests. Plant companion flowers to attract these helpers. Use organic sprays only when needed, and always follow the label instructions.

Harvesting And Preserving Your Herbs

To ensure peak flavor, harvest your herbs in the morning when their oils are concentrated. Snip leaves or stems before the plants flower for optimal taste.

For drying, hang herbs in small bundles in a warm, airy room. Once dry, store them in airtight containers away from light. This method preserves their flavors for months.

Expanding Your Herb Garden

Expanding your herb garden is both rewarding and practical. Propagate your favorite herbs to multiply your bounty. Cuttings from stems or dividing roots can lead to new growth. Always use clean scissors and pots for this process. Rooting hormone can help but is not necessary.

Consider hydroponic systems for year-round growth. These systems allow herbs to grow in water with added nutrients. No soil means less mess and fewer pests. Many kits are available that make setup easy. They often include grow lights, simplifying the cultivation of herbs indoors.

Method Benefits
Cuttings Cost-effective, easy to share
Dividing Quickly increases plant count
Hydroponics Year-round growth, no soil needed

Enjoying The Harvest

Creating herb-infused oils and vinegars is simple and rewarding. Start by choosing fresh herbs from your garden. Wash and dry them thoroughly. Next, pick a high-quality oil or vinegar as your base. For oils, olive or avocado work well. For vinegars, white or apple cider are great choices.

Place the herbs into clean, dry bottles. Pour the oil or vinegar over the herbs until completely submerged. Seal the bottles and let them sit in a cool, dark place. A few weeks is enough for the flavors to infuse. Once ready, strain the mixture and pour into fresh bottles. Use these flavorful liquids to enhance your cooking. They make perfect dressings, marinades, or dipping sauces.

Turning Green To Green

Starting an herb garden can be profitable. Fresh herbs are in demand for their vibrant flavors and culinary uses. Selling these can turn a hobby into a source of income. First, understand the market needs. Restaurants, local markets, and health-conscious consumers often seek quality herbs. Pricing your products competitively is crucial. It must reflect quality and production costs.

Marketing is key to success. Create eye-catching packaging. Use social media to reach potential customers. Share engaging content about your herbs and their uses. Consider setting up a stall at local markets or partnering with food establishments. These strategies can help build a loyal customer base. It will ensure a steady stream of sales for your homegrown herbs.

Troubleshooting Common Problems

Dealing with Disease in herb gardens requires attention and care. Regularly inspect leaves for spots or decay. Use organic fungicides for early signs of disease. Isolate affected plants to prevent spread.

For Managing Over or Undergrowth, pruning is key. Trim herbs to encourage bushy growth. Do not let herbs flower unless collecting seeds. For undergrowth, ensure adequate light and nutrients. If growth is sparse, consider a nutrient-rich fertilizer.

Problem Solution
Yellow Leaves Check water and nutrient levels
Slow Growth Ensure enough sunlight and space
Leggy Plants Prune to promote fuller growth

Frequently Asked Questions

How To Start An Herb Garden For Beginners?

Choose a sunny spot, select easy-to-grow herbs like basil and mint, use quality potting mix, ensure proper drainage, and water regularly.

What Month Should You Start An Herb Garden?

Start your herb garden in early spring, typically in March or April, depending on your local climate.

Is Selling Fresh Herbs Profitable?

Yes, selling fresh herbs can be profitable due to their high demand in culinary, medicinal, and aromatic markets.

What Is The Best Layout For An Herb Garden?

The best layout for an herb garden features full-sun perennials at the back and shorter, shade-tolerant herbs in front. Ensure good drainage and space for growth.

Conclusion

Starting your own herb garden is a rewarding journey into the world of gardening. With the right approach, you can enjoy a range of fresh flavors right at your fingertips. Remember to choose the right spot, use suitable soil, and provide adequate care.

Embrace the process and soon you’ll be adding home-grown herbs to your favorite dishes. Happy gardening!

Perennial Favorites

Perennial Favorites: Timeless Plants for Year-Round Beauty

Perennial favorites enhance gardens with their enduring beauty and resilience. These plants offer year-round visual interest and adaptability.

Garden enthusiasts and landscapers alike treasure perennials for their ability to provide consistent beauty throughout the seasons. These botanical wonders are not only aesthetically pleasing but also practical, requiring less maintenance and care than annual counterparts. They establish strong root systems that allow them to thrive year after year, often becoming more robust with each passing season.

Ideal for creating a sustainable and dynamic garden, perennials such as peonies, lavender, and salvia are celebrated for their vibrant blooms and foliage that maintain allure regardless of the time of year. Choosing the right perennials means you can enjoy a garden that’s alive with color and texture from January to December, making every day a display of nature’s finest work.

The Charm Of Perennials

Perennials bring charm to gardens with their ability to bloom again each year. These plants offer beauty across seasons. Their resilience provides color and life even when most flowers have faded.

Choosing the right perennials can create a garden that shines year-round. These plants are cost-effective as they don’t require yearly replanting. Their hardiness means less work for gardeners. Perennials are eco-friendly, supporting local wildlife through the seasons.

Perennial Seasonal Interest
Peonies Spring blooms, lush summer foliage
Hostas Summer flowers, robust leaves
Sedum Late summer to fall flowers
Ornamental Grasses Winter texture, movement

Selecting The Right Varieties

Selecting the right varieties for your garden ensures year-round beauty. First, assess your garden’s conditions such as sunlight, soil type, and climate. Plants thrive when matched with their ideal environment.

Consider color schemes and textures to create visual interest. Combine plants with varied leaf shapes and flower colors. For instance, pair silver-leaved Lavender with the vibrant Echinacea. This contrast highlights each plant’s features.

A table of plant characteristics can guide your choices:

Plant Sunlight Soil Type Color Texture
Lavender Full sun Well-drained Purple Silver foliage
Echinacea Full sun to part shade Rich, well-drained Pink Spiky blooms

Choose plants with different blooming times for a garden that delights all year.

Landscaping With Perennials

Timeless plants enhance your garden year-round. Perennial favorites are key to landscaping. They provide enduring beauty and minimal maintenance. To create a vibrant garden, consider the height, color, and bloom time of your plants.

Start with taller perennials at the back. Then, layer with medium-sized plants. Finally, place shorter varieties at the front. This approach ensures visibility for all plants. It also offers a continuous bloom.

Color coordination is vital. Choose plants with complementary colors. Or, opt for a monochromatic scheme. This creates harmony in your garden.

Select perennials with different bloom times. This strategy provides a season-long display. Your garden will have constant interest and color. Remember to mix evergreens with deciduous plants. This ensures year-round structure and texture.

Seasonal Highlights

Spring Bloomers dazzle with vibrant colors after winter’s retreat. Tulips and daffodils lead the parade, their petals a sign of warm days ahead.

Summer Showstoppers like coneflowers and daylilies thrive in the heat. Their blooms are magnets for butterflies and bees, adding life to gardens.

Autumn Performers such as asters and sedums offer a final flourish. Their rich hues mirror the changing leaves, bidding the warm weather farewell.

Winter Wonders bring cheer to chilly days. Hellebores and evergreens stand strong, their resilience a testament to nature’s endurance.

Caring For Your Perennial Garden

To ensure your perennials thrive, focus on soil quality and watering. Use well-draining soil to prevent root rot. Water deeply but infrequently to encourage strong root development. This method helps plants withstand dry periods better.

Regular pruning keeps plants healthy. Remove dead flowers and leaves to promote new growth. Cut back perennials in fall or early spring to maintain shape and size. This care prevents diseases and improves airflow around plants.

Perennials For Special Purposes

Attracting wildlife is easy with the right perennials. Choose plants like Coneflowers and Lavender to invite bees and butterflies. These blooms not only add beauty but also support local ecosystems.

Low maintenance options are key for busy gardeners. Plants such as Daylilies and Hostas require minimal care. They thrive with just basic watering and occasional pruning.

For drought-tolerant picks, consider Sedum or Russian Sage. These hardy plants withstand dry conditions and still produce stunning displays.

Combining Perennials With Other Plants

Perennials shine alongside other plants in gardens. Annuals and bulbs bring splashes of color. They fill gaps between flowering seasons. Pair them with perennials for a full season of blooms.

Shrubs and trees offer structure. They also provide backdrops for perennials. Consider height and texture when combining these plants. It will ensure visual harmony in your garden.

Groundcovers are excellent companions. They cover bare soil and reduce weed growth. Some can even enhance the soil’s health. Pair them with perennials for a lush, low-maintenance garden.

Overcoming Common Challenges

Dealing with pests is crucial for healthy plants. Regularly inspect plants for signs of insects. Use organic pesticides to keep them safe. Maintaining cleanliness around plants reduces pest infestations.

Addressing diseases starts with choosing resistant varieties of plants. Proper watering techniques prevent many common diseases. Prune affected areas promptly to prevent spread.

Managing weeds ensures your plants get more nutrients and space. Mulch around plants to suppress weed growth. Regular weeding sessions keep gardens clean and tidy.

Perennial Favorites Spotlight

Peonies bloom with large, showy blossoms. Their delightful fragrance fills the garden. These plants offer elegance throughout the growing season.

Lavender thrives in tough conditions. It fills spaces with its calming aroma. This hardy plant brings beauty and resilience to any garden.

Sedum stands out for its adaptability. It can grow in poor soil with little water. Its toughness makes it a garden staple for year-round interest.

Extending The Blooming Season

Succession planting keeps gardens colorful all year. Plan by selecting plants with different bloom times. Start with early bloomers like crocuses and follow with summer perennials such as coneflowers. End the season with asters that bloom into fall.

Deadheading for re-blooms is a simple trick. Remove spent flowers to encourage new growth. Many plants, like roses and salvias, will bloom again if deadheaded promptly. This practice not only extends blooming but keeps plants looking neat.

Innovative Ideas For Perennial Gardens

Explore themed gardens to bring a touch of magic into your landscape. Imagine a fairy-tale-inspired garden, where every plant tells a story. Or create a sensory garden with perennials that engage all your senses.

Vertical gardening elevates the beauty of perennials. Use trellises or wall planters to grow upwards. This technique is perfect for small spaces. It adds a new dimension to your garden.

With these ideas, your garden will be a year-round retreat.

Resource Guide For Perennial Gardeners

Creating a perennial garden brings joy throughout the year. Choose plants that flourish in various seasons. A diverse selection ensures a colorful garden.

Local nurseries often offer expert advice and quality plants. Plant swaps are great for variety and community.

Plant Season
Peonies Spring
Black-eyed Susan Summer
Asters Fall
Hellebores Winter

Frequently Asked Questions

What Are The Longest Blooming Perennials?

The longest blooming perennials include Black-eyed Susan, Coneflowers, and Coreopsis. These plants can flower from early summer to frost.

What Is The Best Plant For All Year Round?

The best plant for all-year-round interest is the evergreen perennial. These plants maintain their foliage throughout the seasons and offer consistent beauty in any garden setting.

What Is The Best Flower To Plant That Comes Back Every Year?

Peonies are an excellent choice for a flower that returns each year, known for their stunning blooms and resilience.

Is There A Perennial Flower That Blooms All Summer?

Yes, daylilies (Hemerocallis) are perennial flowers that bloom throughout the summer season.

Conclusion

Embracing perennial plants offers a sustainable, stunning solution for year-round garden beauty. These hardy favorites ensure a vibrant landscape through every season. By choosing the right perennials, your garden will thrive and transform, continuing to enchant for years to come.

So, plant once and enjoy endless beauty with these reliable, timeless selections.

DIY Garden Projects

DIY Garden Projects: Easy And Affordable Ideas for Your Outdoor Space

DIY garden projects can transform your outdoor space without breaking the bank. Discover creative and budget-friendly ideas to enhance your garden’s appeal.

Gardens offer a sanctuary of beauty and tranquility, and personalizing this space doesn’t have to be costly. Whether you have sprawling lawns or a modest balcony, there are numerous DIY projects to suit your needs and budget. From upcycling old furniture into charming planters to crafting a cozy fire pit for evening gatherings, the possibilities are endless.

These projects not only add character and charm to your garden but also provide a satisfying sense of accomplishment. Perfect for weekend warriors and gardening enthusiasts alike, these easy-to-follow ideas are designed to create a stunning outdoor haven that reflects your style and creativity. Let’s dive into some garden projects that will make your neighbors green with envy, all while keeping your wallet happy.

DIY Garden Projects: Transform Your Outdoor Space

Embarking on DIY garden projects breathes new life into your outdoor space. Take time to evaluate the area available for enhancements. Think about the sunlight, shade, and soil conditions in your garden. These factors are crucial for choosing the right projects. Consider using recycled materials to add character and sustainability.

Begin with a simple plan. Sketch out your ideas to visualize the transformation. Small changes can have a big impact. For example, a fresh coat of paint on a fence or a homemade birdhouse adds charm. Personal touches make your space unique. Remember, the goal is to create a haven that reflects your personality and style.

Budget-friendly Garden Bed

Creating a garden bed is both simple and cost-effective. You will need several key materials to get started:

  • Lumber or repurposed wood
  • Soil for planting
  • Nails or screws
  • Drill or hammer
  • Landscape fabric (optional)

Follow these steps to build your garden bed:

  1. Cut wood to preferred size.
  2. Assemble the frame with nails or screws.
  3. Place the bed in a sunny spot.
  4. Line with landscape fabric to prevent weeds.
  5. Fill with soil and plant your seeds!

DIY Vegetable Garden Tips

Selecting vegetables that thrive in your climate is critical for a bountiful harvest. Research local plant hardiness zones to guide your choices. Opt for varieties known for resilience and shorter growing seasons if needed. Consider consulting with local gardening groups for personalized advice.

Constructing raised beds can be done using simple materials like wood, bricks, or cinder blocks. Start by measuring the desired length and width for your garden space. Ensure the height is sufficient for root growth, typically 12-18 inches. Secure the structure with screws or adhesive for a lasting build. Fill with a mix of compost, soil, and proper drainage material to promote healthy plant development.

Constructing A Brick Fire Pit

Choose a level area away from structures for your fire pit. Ensure it’s clear of low-hanging branches. A safe distance prevents fires from spreading. Select a spot that’s at least 10 feet from your home or other buildings.

Before starting, check your local fire codes. Some areas require a permit. Always have a fire extinguisher or water source nearby for safety.

Gather bricks, mortar, and a trowel to build your fire pit. You’ll also need a shovel for the foundation. Safety gloves and glasses are a must. A level helps keep your bricks even.

Backyard Campout Setup

Planning a backyard campout is exciting! First, make sure you have all essential items. A tent, sleeping bags, and flashlights are must-haves. Don’t forget marshmallows for roasting!

Fun games keep everyone happy. Try shadow puppets or a scavenger hunt. These activities make camping special for your family.

Pergola Building Basics

Designing your pergola starts with envisioning its purpose. Consider the size and shape that best fits your garden. Think about the direction of sunlight throughout the day. This will impact where you place your pergola. Choose materials that match the look of your space and ensure durability.

For material selection, wood like cedar and redwood are popular for their natural resistance to rot and pests. Pressure-treated lumber is a cost-effective option with similar benefits. Metal or vinyl can offer a different look and minimal maintenance.

Construction tips: Anchor your pergola securely to avoid any movement. Use galvanized or stainless steel hardware for longevity. Pre-drill to prevent wood splitting and apply a sealant for weatherproofing. Regular maintenance will keep your pergola looking great for years.

Decorative Flower Pot Ideas

Transform old items into unique flower pots with a touch of creativity. Old boots, teapots, or even drawers can become eye-catching planters. Just ensure they have proper drainage.

Personalize pots with paint for a custom look. Use stencils or tape for designs. Choose outdoor or acrylic paints for best results. Seal with a clear coat to protect your masterpiece.

Oversized Planter Projects

Large plants make your garden look great. You can create big planters yourself. It’s fun and saves money. Use old barrels, buckets, or wooden boxes. Just make sure they have holes at the bottom. This helps the water run out. Fill them with soil and big, beautiful plants. Your garden will stand out with these eye-catching planters.

Pallet Planting Innovations

Pallet gardens are a creative way to beautify your outdoor space. Seek out unused pallets from local stores or warehouses. Ensure they are safe for use by checking for an HT stamp, which means they are heat-treated, not chemically treated.

Once you have your pallets, sand them down to avoid splinters. Apply a coat of paint or a sealer to protect the wood. Now, you’re ready to design your garden!

Choose a vertical or horizontal layout based on your space. For vertical gardens, secure the pallet against a wall. If horizontal, lay it flat on the ground. Consider herbs, succulents, or annuals for planting. They thrive in the compact spaces between the slats. Remember to line the pallet with landscape fabric to hold soil and plants in place.

Affordable Backyard Makeover Strategies

Transform your backyard without spending a fortune. Design planning need not be expensive.

Sketch your dream space using free online tools. Find inspiration with online galleries or gardening books.

Look around your home for items to repurpose. Old furniture can become plant stands. Unused containers turn into flower pots.

Be creative with materials. Use pallets for a vertical garden. Paint tires for eye-catching planters.

Remember, a little goes a long way. Focus on high-impact areas like entryways or patios. Even small changes can refresh your space.

Frequently Asked Questions

How To Make Your Garden Nice On A Budget?

Revitalize your garden with these budget-friendly tips: Choose native plants, utilize cuttings, embrace DIY projects, incorporate mulch, and repurpose items creatively.

How To Create An Outdoor Living Space On A Budget?

Create a budget-friendly outdoor living space by repurposing pallets for furniture, using plants for decor, and incorporating DIY lighting. Opt for affordable accessories and second-hand finds to personalize your area. Utilize sales and discount stores for cushions and outdoor rugs to complete the look.

How To Landscape A Backyard On A Budget?

Plan your design with free online tools. Opt for native plants that thrive locally. Repurpose materials for unique features. DIY your projects where possible. Seek out plant swaps to save on costs.

How Do You Make A Simple Beautiful Garden?

To create a simple beautiful garden, select easy-care plants and arrange them in well-defined beds. Add a mix of perennials, annuals, and shrubs. Use mulch to suppress weeds and retain moisture. Install a focal point like a bench or birdbath.
Regularly maintain the area for lasting beauty.

Conclusion

Transform your outdoor space with these simple DIY garden projects. They’re not only cost-effective but also add charm and functionality to your yard. Whether you’re crafting a cozy fire pit or growing a lush vegetable garden, each project promises to enhance your outdoor living.

Dive into gardening today and enjoy the rewards of a beautiful, personalized space.

Create a Pollinator Paradise

How to Create a Pollinator Paradise: Attracting Bees, Butterflies, And Birds

Creating a pollinator paradise involves planting native flowers and providing water sources. Ensure a variety of plants bloom across seasons to sustain bees, butterflies, and birds.

Gardening enthusiasts and nature lovers alike understand the importance of fostering an environment where pollinators thrive. A vibrant garden brimming with life not only looks stunning but also plays a crucial role in supporting local ecosystems. By selecting a diverse array of native plants, one can ensure a year-round food supply for these vital creatures.

Create a Pollinator Paradise: A well-designed pollinator paradise includes flowers of various shapes, colors, and blooming periods, alongside fresh water sources for sipping. Remember, minimizing pesticide use and offering shelter can significantly enhance the habitat’s appeal to buzzing bees, flitting butterflies, and chirping birds. Crafting such a haven not only benefits the environment but also enriches our outdoor experience with the lively dance of pollinators.

Create a Pollinator Paradise: Setting The Stage For Pollinators

Pollinators play a key role in our ecosystems. They help plants to grow, breed, and produce food. By carrying pollen from one flower to another, they not only aid in plant reproduction but also contribute to genetic diversity. This process leads to a wide variety of fruits and vegetables that we enjoy.

Their numbers are declining due to habitat loss, disease, and pesticides. Many species of bees, butterflies, and birds are struggling to survive. Creating a garden that supports these creatures can have a positive impact. It provides them with food, shelter, and a place to reproduce.

By planting a variety of native flowers, providing water, and avoiding harmful chemicals, we make our gardens safe havens. These actions can lead to a thriving pollinator community. This community supports our environment and food supply.

Choosing The Right Plants

Choosing plants native to your region supports local wildlife greatly. These plants are well-adapted to your soil and climate. They need less water and care than non-natives. Most importantly, they provide the best food and habitat for local pollinators.

Flower diversity is key to attracting a variety of pollinators. You want a range of flower colors, shapes, and blooming times. This ensures that food is available for different species throughout the seasons.

Flower Color Pollinator Attracted
Blue and Purple Bees
Red and Yellow Butterflies
Bright Colors Birds

Remember, group the same plants together. Large clusters make it easier for pollinators to find and use them.

Designing Your Pollinator Garden

Creating a vibrant pollinator garden starts with thoughtful layout and color choices. Group plants in clusters to make it easy for pollinators to move from one flower to another. Include plants of varying heights to add depth and shelter.

A diverse color palette will attract a wide range of pollinators. Use bright colors like yellow, purple, and blue to draw bees. Butterflies prefer red, orange, and pink. By planning for a succession of blooms, your garden will offer resources throughout the seasons.

Season Blooming Plants
Spring Crocus, Lilac
Summer Coneflowers, Black-eyed Susans
Fall Asters, Sunflowers

Remember to avoid pesticides and provide natural shelters. These steps ensure a safe haven for your winged visitors.

Beyond Flowers: Providing Habitat

Creating a habitat for pollinators goes beyond planting flowers. Bees, butterflies, and birds need shelter for protection and nesting. Install bee hotels, birdhouses, and dense shrubs to provide safe nesting sites.

Another key element is access to water. A shallow water source like a birdbath or a garden dish can attract more pollinators. Add stones or floating wood for insects and birds to land on. This ensures they stay hydrated and help your garden thrive.

Avoiding Chemical Warfare

Pesticides can harm bees, butterflies, and birds. These chemicals kill unwanted bugs but also the helpful ones. Our gardens need these creatures to grow and thrive. It’s crucial to understand the harm of pesticides.

There are natural pest control alternatives. These methods keep pests away without hurting pollinators. For example, companion planting uses certain plants to deter pests. It’s a smart way to protect your garden naturally.

  • Plant marigolds to keep beetles away.
  • Garlic and chives can repel aphids.
  • Lavender wards off moths and fleas.

By choosing these alternatives, you can create a safe haven for pollinators. Your garden will be a paradise for them and for you too!

Seasonal Considerations

Offering year-round support to pollinators is key. Plant different flowers that bloom at various times. This ensures food is always available.

Leave some garden areas untidy during fall and winter. Dead leaves and stems shelter insects. Many birds feed on these insects.

Garden Extras For Pollinators

Bee blocks and butterfly houses offer safe nesting sites. These structures mimic natural habitats. You can easily hang them in your garden.

Feeding stations provide consistent food sources. They are vital for attracting diverse pollinators. Salt licks offer essential minerals. Butterflies and bees need these for their health.

Item Purpose Benefits
Bee Blocks Nesting for Bees Safety, Encourage Colony Growth
Butterfly Houses Shelter for Butterflies Protection, Lifecycle Support
Feeding Stations Food for Pollinators Attract Variety, Sustain Populations
Salt Licks Minerals for Insects Health, Attract Butterflies

Maintaining Your Pollinator Paradise

Regular checkups are key to a thriving garden. They help spot any issues early, such as pests or diseases. It’s good to inspect your garden weekly.

Adapting and evolving your garden means making small changes. Try new plants that might do better or attract more bees and butterflies. Remember, each change helps your garden grow.

Community And Education

Building a pollinator-friendly community starts with involving neighbors and friends. Share seeds, plants, and knowledge to expand habitat for bees, butterflies, and birds. Organize plant swaps or garden tours to inspire others.

Engage as a citizen scientist to monitor and support pollinators. Participate in local wildlife counts or photographic surveys. Your observations help scientists protect these vital creatures. Young learners can join in, fostering a love for nature and science.

Understanding your local rules is key to creating a pollinator-friendly garden. Check with your city or county government about any plant restrictions. Some areas may have guidelines on certain species of plants or require permits for garden structures.

Protecting visitors is just as important as attracting pollinators. Make sure paths are clear and stable to prevent trips and falls. Choose plants that are safe for both humans and animals, avoiding those that are toxic or harmful.

Frequently Asked Questions

How Do You Attract Bees Butterflies And Other Pollinators?

Plant native flowers in variety, ensure continuous blooms, group plants together, provide water sources, and avoid pesticides to attract pollinators.

How To Layout A Pollinator Garden?

Choose native plants that attract pollinators. Include diverse flower shapes and colors. Ensure continuous blooms throughout seasons. Provide water sources and shelter. Minimize pesticide use.

What Can We Do To Help And Protect Pollinators Like Bees And Butterflies?

To protect pollinators like bees and butterflies, plant diverse native flowers, provide water sources, create shelters, and avoid pesticides.

How To Create A Bee And Butterfly Garden?

Choose diverse native plants that bloom at various times. Group similar flowers together. Provide water sources and avoid pesticides. Include flat-topped and tubular blooms to attract different pollinators.

Conclusion

Creating a pollinator paradise enriches your garden and supports vital ecosystems. By choosing the right plants and maintaining a friendly habitat, you invite the beauty of bees, butterflies, and birds into your space. Start small and watch as your garden becomes a vibrant haven for these essential creatures.

Embrace the journey of nurturing nature, and enjoy the flutter and buzz of a healthier world right in your backyard.

Wildlife-Friendly Garden

Creating a Wildlife-Friendly Garden: Habitat Tips for Birds And Butterflies

To create a wildlife-friendly garden, incorporate native plants and water sources to attract birds and butterflies. Ensure the habitat offers shelter, food, and space for raising their young.

Gardening enthusiasts often seek to transform their outdoor spaces into sanctuaries for local wildlife, including the flutter of butterflies and the melody of birds. Establishing a haven for these creatures not only bolsters biodiversity but also brings a sense of connection to nature.

A well-planned garden can provide crucial habitats for various species, contributing to their conservation while enhancing the beauty of your surroundings. This introduction to creating a wildlife-friendly garden will cover the essential elements such as plant selection, water features, and shelter that invite these winged visitors. By following these guidelines, even a modest backyard can become a vibrant ecosystem, supporting wildlife and offering endless enjoyment to the observer.

Introduction To Wildlife-friendly Gardening

Creating habitats for birds and butterflies brings life to your garden. These creatures need food, water, and shelter to thrive. By planting native flowers and shrubs, you provide natural food sources. A water feature or birdbath can offer clean drinking water. Shelter comes from trees, hedges, and birdhouses. Together, these elements create a haven for winged visitors.

Diverse plant species attract a variety of birds and butterflies. Each species prefers different plants and flowers. To attract a wide range, include many plant types in your garden. Pesticide-free practices keep these animals safe. Birds and butterflies are not only beautiful but also crucial for pollination and pest control.

Choosing Native Plants

Native species play a crucial role in garden ecosystems. They support local wildlife more effectively than non-native plants. Birds and butterflies depend on these plants for nourishment and habitat.

Choosing the right plants will make your garden a haven for these creatures. Flowering natives like coneflowers and milkweed are top picks. They provide nectar and caterpillar host sites.

Shrubs and trees such as dogwoods and serviceberries offer shelter and food. They bear fruits that serve as vital food sources in different seasons.

Remember, a diverse plant selection attracts a variety of birds and butterflies. Each species has unique needs, and a mix of plants will meet them.

Providing A Water Source

Water features are essential for a wildlife-friendly garden. They attract a variety of birds and butterflies. Birdbaths, small ponds, and dripping fountains serve as ideal water sources. These features provide places for wildlife to drink and bathe.

Keep water clean to ensure the health of garden visitors. Regularly change water in birdbaths. Scrub them with a stiff brush to remove algae and dirt. For ponds, consider a filtration system to maintain water clarity. Clean water is vital for a healthy habitat.

Incorporating Shelter And Cover

Gardens can be safe havens for birds. Choose natural shelters like bushes and trees. These provide excellent cover for nesting and protection from predators. Artificial shelters also help. Install birdhouses that mimic natural environments. Place them at varied heights to attract different bird species. Ensure they are secure and away from threats.

Butterflies prefer sheltered spots for safety against weather and predators. Create shaded areas with plants they love. Butterfly houses can also offer a cozy refuge. Place them near nectar-rich flowers for easy access to food.

Feeding The Fliers

Selecting the Right Feed involves choosing seeds that attract a variety of birds and butterflies. Sunflower seeds, thistle seeds, and sugar-water mixtures are great. These feeds appeal to different species like hummingbirds and finches.

For Feeding Stations and Their Placement, it’s key to position them near natural shelters like bushes or trees. This placement helps protect the birds from predators. Ensure feeders are visible from the sky to attract more birds. Stations should be high enough to deter pests.

Designing For Nesting And Breeding

Proper nesting box placement is key to attract birds. Choose sheltered locations to guard against predators and harsh weather. Ensure boxes have proper ventilation and drainage. Different species prefer various heights and orientations; research is vital.

Use natural materials like twigs and grasses to encourage nest building. Leave these materials in your garden to make it easy for birds.

For butterflies, provide host plants for caterpillars. This ensures a place for them to feed and transform into butterflies.

Pesticide-free Gardening

Chemicals harm birds and butterflies. They destroy the very insects these creatures need to survive. Organic alternatives help protect their food sources. Ladybugs and lacewings eat pests. No need for harsh sprays.

Choose plants that naturally repel unwanted insects. Marigolds and lavender are great options. They keep your garden looking beautiful too. Beneficial nematodes work underground. They attack soil-dwelling pests.

Organic Solution Target Pest
Neem Oil Aphids, mites
Garlic Spray Various insects
Beneficial Insects Pests like aphids

Remember, healthy soil equals healthy plants. This makes them less prone to pest attacks. Compost and mulch are key. They enrich the soil and keep plants strong.

Seasonal Considerations

To prepare your garden for winter, start by planting native shrubs. These plants provide shelter and food for birds and butterflies. Next, add a layer of mulch to protect plant roots from freezing temperatures. Also, clean and refill bird feeders regularly.

For year-round support, consider installing a water feature like a birdbath or a small pond. This attracts various wildlife, especially during dry months. Leave some garden areas a bit wild to offer natural hiding spots. Planting flowers that bloom at different times of the year ensures continuous food supply.

Garden Maintenance For Habitats

Regular pruning keeps plants healthy. Trim branches and remove dead foliage to encourage new growth. This attracts birds and butterflies seeking food and shelter. Use clean tools to prevent disease spread.

Cleaning is crucial for a wildlife-friendly garden. Discard any rubbish and leave leaf litter for creatures to hide. Compost organic waste to create a natural fertilizer.

Focus on long-term habitat management. Plan garden changes with wildlife in mind. Keep habitats safe and inviting year-round. This approach will ensure a thriving ecosystem in your garden.

Community Involvement And Education

Creating a wildlife-friendly garden enriches local ecosystems. One key element is community involvement. By encouraging neighbors, a collective effort can blossom. Start by inviting nearby residents to discuss garden plans. Share the vision of a thriving habitat for birds and butterflies.

Organize informative workshops on native plants and sustainable practices. These events can spark interest and foster a sense of community stewardship. Offering to share resources like books, tools, and seeds can also remove barriers for beginners.

Engaging the community leads to wider areas of habitat and a greater impact on local wildlife. Remember, a single garden is good, but a community of gardens is better for creating a safe haven for wildlife.

Certifying Your Wildlife-friendly Garden

Certifying your garden as wildlife-friendly brings numerous rewards. Begin by contacting a wildlife organization that provides official recognition. They will offer a set of specific guidelines to follow.

These steps often include providing food sources, water access, shelter, and safe areas for raising young. Documentation of these features in your garden may be required.

Once approved, your garden will gain official status. This recognition often comes with a certificate or sign to display. It indicates your commitment to conserving nature.

Benefits include supporting local ecosystems and contributing to biodiversity. Your garden will also serve as a learning environment for the community. This can inspire others to create their own wildlife-friendly spaces.

Frequently Asked Questions

How Do You Create A Bird Friendly Garden?

To create a bird-friendly garden, plant native vegetation, install a water feature, provide nesting areas, avoid pesticides, and offer safe shelters.

What Are The Three Things All Wildlife Needs To Survive In A Landscape?

All wildlife needs food, water, and shelter to survive in a landscape.

How To Make A Wild Bird Habitat?

Create a wild bird habitat by planting native vegetation, providing water sources, adding shelters like birdhouses, avoiding pesticides, and ensuring safe windows to prevent collisions.

How To Make Your Yard Wildlife Friendly?

To make your yard wildlife-friendly, plant native vegetation that provides food and shelter. Install a water feature like a birdbath or pond. Set up birdhouses and nesting sites. Avoid using pesticides to keep the area safe for all creatures. Leave some areas of your garden undisturbed to offer natural habitat spots.

Conclusion

Transforming your garden into a sanctuary for birds and butterflies is both rewarding and beneficial. By implementing the tips discussed, you’ll enhance biodiversity right in your backyard. Start small, perhaps with native plants or a water feature, and gradually expand.

Remember, each step you take makes a significant difference to local wildlife. Let’s nurture nature together and enjoy the thriving habitat we can create.

From Yard to Table

From Yard to Table: Growing Your Own Vegetables for Fresh, Flavorful Meals

Grow your own vegetables to enjoy fresh, flavorful meals straight from your backyard. Transform your garden into a source of daily culinary inspiration.

Cultivating a vegetable garden offers a plethora of benefits, from the joy of connecting with nature to the satisfaction of harvesting your own produce. Imagine stepping outside to gather ingredients, knowing they’re as fresh as possible, and then bringing them to your kitchen to create wholesome, tasty dishes.

From Yard to Table: This isn’t just a dream for those with sprawling yards; even small spaces can yield a bounty of homegrown delights. By nurturing your own vegetables, you not only ensure a supply of fresh ingredients but also gain control over what goes into your food, reducing your exposure to harmful pesticides. Get ready to embark on a journey of flavor that’s good for your palate and the planet.

From Yard to Table: Seeding Your Aspirations

Choosing the right vegetables is vital for a successful garden. Pick plants that suit your climate and soil. Leafy greens, like spinach and kale, grow well in most regions.

Tomatoes, peppers, and cucurbits thrive in warmer climates. Ensure your choices match your cooking preferences for delicious home-cooked meals.

Understanding timing and seasonality is crucial for vegetable gardening. Each plant has a preferred growing season. Cool-season vegetables include broccoli and peas. They should be planted in early spring or fall.

Warm-season veggies, such as corn and cucumbers, need hot weather to flourish. Plant these after the last frost date in your area.

Soil And Space: Foundations Of A Healthy Garden

Proper soil preparation is key to a bountiful vegetable garden. Start with testing the soil to know what nutrients it needs. Mix in compost or well-rotted manure to improve fertility. Ensure good drainage to prevent waterlogging.

For those with limited space, vertical gardening is a great solution. Use trellises, hanging baskets, or stackable planters to grow upwards. Herbs and leafy greens do well in small spaces. Even a sunny windowsill can support a mini garden.

Planting Techniques For Success

Growing your own vegetables starts with choosing the right planting technique. Direct sowing involves planting seeds straight into the garden soil. This method works well for root crops and leafy greens.

Transplanting is another approach where young plants are started indoors and moved to the garden later. It’s ideal for tomatoes and peppers. Both methods need proper spacing to ensure plants get enough light and nutrients.

Vegetable Direct Sow Transplant Spacing (inches)
Carrots Yes No 3-4
Lettuce Yes Optional 8-10
Tomatoes No Yes 24-36

Watering Wisdom

Smart watering keeps plants healthy. Use a soaker hose to deliver water slowly. This method helps roots grow deep. It also saves more water than sprinklers.

Collect rainwater in barrels. This is good for plants and the planet. Use a watering can for small gardens. It’s easy to control and doesn’t waste water.

Group plants by their water needs. This way, each plant gets just the right amount. Drip irrigation is great for this. It sends water directly to the roots.

Natural Pest Control

Identifying common pests is key to protecting your garden. Look for holes in leaves, which suggest insects might be eating them. Small bugs like aphids, caterpillars, and beetles are often the culprits.

Organic remedies are safe and effective for managing pests. Neem oil and soapy water spray are great options. They help keep pests away without harming your plants. Always test a small area first to ensure your plants stay safe.

Fertilizing Fundamentals

Choosing the right fertilizer is a key step to a bountiful garden. Organic options provide nutrients slowly and improve soil health. Chemical fertilizers offer quick nutrient release but may not be sustainable. Balanced N-P-K values are crucial for vegetable growth. N-P-K stands for nitrogen, phosphorus, and potassium.

Composting turns kitchen and yard waste into rich soil amendment. Start with equal parts browns and greens. Browns are dry leaves or straw. Greens are kitchen scraps or fresh plant material. Regular turning and moisture ensure healthy decomposition. Homemade compost is free and full of nutrients.

Harvesting And Handling

Picking vegetables at the right time is key. Look for bold colors and firm texture. Gently twist or snip fruits from plants. Use both hands to avoid damage. Handle with care to prevent bruising.

Store veggies properly for lasting freshness. Keep roots in damp sand and greens in cool, moist areas. Most vegetables stay fresh in crisper drawers of refrigerators. Some, like tomatoes and onions, do best at room temperature. Check storage guidelines for each type.

Vegetable Room Temperature Refrigerator
Tomatoes Yes No
Onions Yes No
Leafy Greens No Yes
Root Vegetables No Store in Damp Sand

From Garden To Kitchen

Grow your own veggies and make delicious meals! Start with easy dishes like stir-fried greens or simple salads. Use fresh herbs to boost flavor. Kids love snacking on cherry tomatoes!

Keep your veggies longer by freezing or canning. Make pickles or jams. Dry herbs for year-round use. This saves money and keeps food tasty.

Sustainable Practices For The Eco-conscious Gardener

Embracing crop rotation is key for healthy gardens. This practice keeps soil nutrients balanced and prevents pest infestations. Start by dividing your garden into sections. Each year, plant different vegetables in each section. This simple step promotes biodiversity and ensures soil vitality.

To reduce food waste, grow what you eat often. Preserve surplus veggies through canning or freezing. Share excess with neighbors or donate to food banks. These actions minimize waste and support your community.

Year 1 Year 2 Year 3
Tomatoes Leafy Greens Root Vegetables
Peppers Cucumbers Legumes
  • Label frozen veggies with dates.
  • Use vegetable scraps for compost.
  • Plan meals around harvest times.

Community And Urban Gardening

Community and urban gardening brings neighbors together. Gardens thrive on shared spaces like rooftops or parks. Local workshops teach gardening skills. All ages can learn to plant and tend veggies.

Sharing gardens means sharing the harvest. Extra produce can go to food banks. Many gardens have harvest festivals or swap meets. Here, gardeners trade veggies and stories.

Activity Benefit
Joining a garden club Learn from experienced growers
Attending workshops Gain hands-on gardening knowledge
Volunteering Help gardens flourish
Donating produce Support community members in need

Frequently Asked Questions

What Are Easy Vegetables To Grow For Beginners?

Growing vegetables can be simple for beginners. Start with tomatoes, lettuce, radishes, cucumbers, and bell peppers. These require minimal care and yield a bountiful harvest.

How Does Home Gardening Improve Meal Quality?

Home gardening ensures the freshest produce for your meals. Vegetables straight from your yard are richer in flavor and nutrients than store-bought ones due to reduced transport and storage time.

What Are The Benefits Of Growing Your Own Vegetables?

Growing your own vegetables offers numerous benefits. It provides fresh produce, saves money on groceries, ensures organic eating, and offers a rewarding hobby that can improve mental health.

How Much Space Is Needed For A Vegetable Garden?

A small vegetable garden can start in just a few square feet. Use containers or raised beds if space is limited. Plan according to the size and number of plants you wish to grow.

Conclusion

Embarking on the journey of growing your own vegetables reaps rich rewards. Not only does it enhance the taste of your meals, but it also promotes a healthier lifestyle. Embrace the satisfaction of harvesting fresh produce right from your backyard.

Start small, stay consistent, and enjoy the burst of flavors in your home-cooked dishes. Let every seed you plant bring you closer to nature and nourish your family with love and freshness.