Best Bonsai Soil Mix

Best Bonsai Soil Mix: Secrets to Thriving Miniature Trees!

The best bonsai soil mix provides adequate drainage and nutrient retention. A mix of akadama, pumice, and lava rock is preferred by many enthusiasts.

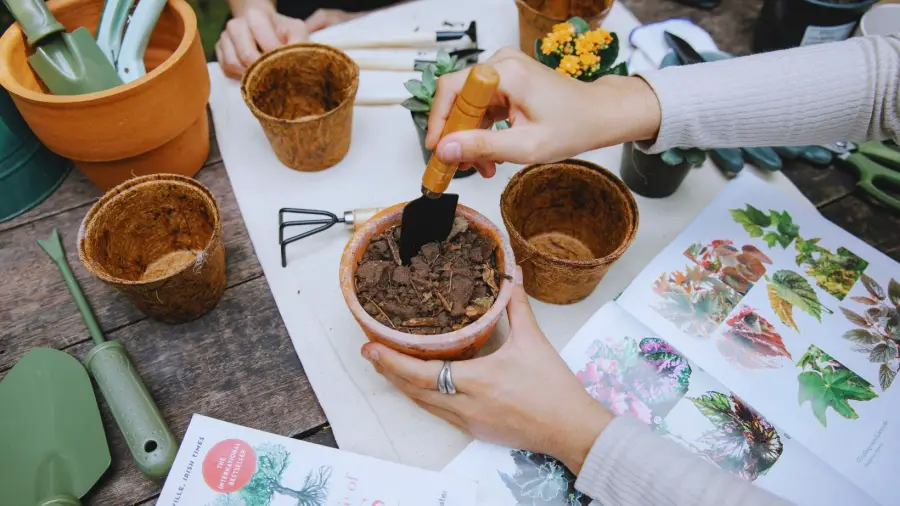
Embarking on the journey of nurturing a bonsai tree is a rewarding, yet delicate endeavor. Crafting the perfect environment for these miniature trees begins with understanding their unique soil needs. Bonsai trees require a soil mix that supports growth while ensuring proper drainage to prevent root rot—a balance that’s not found in standard potting soils.

Best Bonsai Soil Mix

The ideal mix often contains components like akadama (a type of Japanese clay), pumice, lava rock, and sometimes fine gravel or organic matter such as pine bark. These ingredients work together to hold moisture and nutrients without becoming waterlogged. Devoted bonsai cultivators know that the right soil mix can significantly influence their tree’s health and longevity, making the choice of soil a pivotal aspect of bonsai care.

The Art Of Bonsai

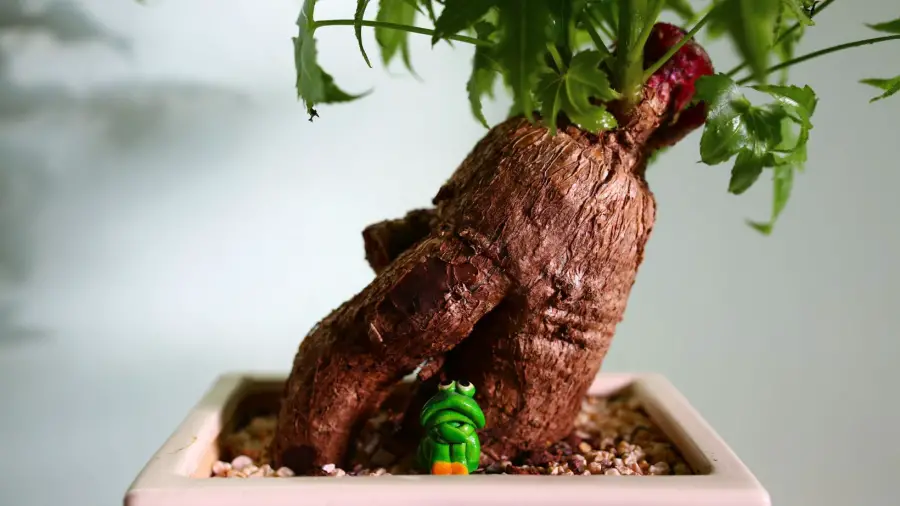
Bonsai trees capture nature’s beauty in miniature form. This ancient art form creates stunning natural landscapes that fit on a tabletop. The right soil mix is crucial for bonsai health. Let’s explore the roots and aesthetics of bonsai.

Origins And Cultural Significance

The history of bonsai begins over a thousand years ago. Its roots trace back to China before spreading to Japan. Bonsai, meaning ‘planted in a container’, reflects harmony, balance, and patience. This art form has deep cultural importance in Asia. It signifies the connection between nature, art, and spirituality.

  • Bonsai’s historical journey: From ancient China to present days.
  • Spiritual significance: A symbol of harmony and patience.
  • Cultural impact: Importance in Japanese and Chinese traditions.

Bonsai Aesthetics: More Than Just Small Trees

Bonsai aesthetics extend beyond simply being small trees. They evoke the grandeur of nature on a minimal scale. Every element, from the curvature of the branches to the color of the leaves, is intentional. Great care goes into the soil and container choice to ensure healthy growth.

Key Elements of Bonsai Aesthetics
Aspect Description
Proportion Mimicking full-sized trees in a tiny form.
Asymmetry Achieving natural balance, not perfect symmetry.
Color Leaves and flowers add depth and contrast.
Container Chosen to complement and support the tree.

Every detail matters when creating these living sculptures. Expert bonsai artists often blend various soil types to match their tree’s needs. Many factors like water retention, drainage, and nutrient content need consideration.

Understanding Bonsai Soil

Bonsai trees thrive on attention and detail. The soil you choose formulates their microenvironment. Perfect bonsai soil fosters healthy roots and robust growth. Optimal drainage, aeration, and nutrients are key soil characteristics for bonsai success.

Unique Requirements Of Bonsai Roots

Bonsai roots demand special soil for health and longevity. Unlike their in-the-wild counterparts, these roots reside in shallow trays. They need a balance of moisture, air, and food. Traditional garden soil won’t cut it. Let’s delve into what makes bonsai soil distinct.

  • Drainage: Excess water must escape to prevent root rot.
  • Aeration: Roots need air to absorb nutrients and grow.
  • Water Retention: Soil must maintain enough moisture between waterings.
  • Support: Firm soil helps keep the bonsai upright and stable.

Components And Textures Of Bonsai Soil

Bonsai soil is a blend of various components: each with a purpose. Grain size and soil composition affect water retention and nutrient availability.

Component Function Texture
Akadama Retains water and nutrients Clay-like, holds together when wet
Pumice Improves aeration and drainage Rough, porous texture
Lava Rock Provides structure and drainage Sharp and gritty
Organic Compost Supplies nutrients Fine, decomposes over time

Texture is crucial. Fine particles may block airflow, while overly coarse particles may not retain water well. A mix with various grain sizes ensures your bonsai will flourish with the necessary humidity, support, and oxygen flow.

Custom Soil Mixes

Every bonsai tree thrives when its roots are well-cared for, which begins with choosing the right soil mix. A custom soil blend can make all the difference. It’s tailored to your bonsai’s unique needs. Let’s delve into the possibilities and considerations of custom soil mixes.

Pros And Cons Of Pre-made Mixes

Many gardeners reach for pre-made bonsai soil mixes. These are readily available and time-saving. They often include a balanced set of components, perfect for beginners. Yet, they may not suit every bonsai’s specific needs.

  • Pros:
    • Convenient and easy to use
    • Consistent quality and composition
    • Ideal for new bonsai enthusiasts
  • Cons:
    • Lacks customization for specific tree types
    • May be more expensive than homemade mixes
    • Potential for excess ingredients not needed by your bonsai

Creating Your Personal Bonsai Soil Blend

Creating a personal bonsai soil blend is a journey of understanding your bonsai’s unique needs. You control the texture, water retention, and drainage. Let’s look at what you’ll need to consider.

  1. Assess your bonsai’s species and what soil components it thrives in.
  2. Decide on grain size for proper aeration and drainage.
  3. Mix primary ingredients like akadama, pumice, and lava rock.
  4. Add organic matter as needed for moisture and nutrients.
  5. Experiment and observe how your bonsai responds, tweaking the mix as necessary.

A tailored soil blend enhances root health and overall bonsai vitality. It also deepens your connection with your bonsai through careful nurturing and observation.

Essential Ingredients For Bonsai Soil

Creating the perfect soil mix for bonsai trees is crucial for their health and growth. The ideal mix supports root development, maintains moisture, and ensures proper drainage. Let’s explore the core components vital for an effective bonsai soil blend!

Akadama: The Bonsai Soil Foundation

Akadama, a natural clay pellet, is the foundation of bonsai soil. This unique material from Japan has high water retention yet allows for excess water to drain efficiently. Over time, it breaks down, encouraging root growth.

  • Retains moisture: Keeps water close to roots, yet not waterlogged.
  • Provides nutrients: Holds fertilizer for root uptake.
  • Perfect texture: Promotes fine root establishment and growth.


Pumice And Lava Rock: Drainage And Aeration

For optimal drainage and aeration, pumice, and lava rock are key ingredients. These volcanic rocks have a rough texture, creating air pockets in the soil. This structure is crucial for bonsai roots to breathe and remain healthy.

Ingredient Benefit Role in Bonsai Soil
Pumice Drainage Prevents soil compaction, supports root oxygenation
Lava Rock Aeration Enhances water drainage, provides air to roots


Optimizing Soil For Different Bonsai Species

The art of bonsai rests on the delicate balance of soil, water, and sunlight. Each bonsai tree species has unique soil needs for optimal growth. Understanding and meeting these requirements help ensure a vibrant, healthy miniature tree. Let’s delve into the specific soil blends that best suit different types of bonsai to secure their beauty for years to come.

Conifers: Pine And Juniper Soil Needs

Conifers like pines and junipers prefer well-draining soil mixes. A blend of akadama, pumice, and lava rock ensures a good balance. This mix allows for proper aeration and water drainage, vital for their health.

  • Akadama: Holds water and nutrients.
  • Pumice: Ensures aeration.
  • Lava Rock: Improves drainage.

Remember to adjust the soil mix based on your climate. Dry climates need more water-holding capacity.

Deciduous Trees: Maple And Elm Preferences

Deciduous trees like maples and elms thrive in a slightly different mix. They need soil that retains more moisture. Incorporate organic materials like decomposed bark to maintain moisture levels.

Material Function
Akadama Water retention
Pumice Drainage and structure
Bark Fines Moisture and nutrient retention

A mix of akadama, pumice, and bark fines offers these trees what they need. In winter, protect the roots from cold by adding extra mulch on top.

Repotting And Soil Refreshment

Repotting and Soil Refreshment are crucial to the health and beauty of bonsai trees. The right soil mixture ensures proper drainage, aeration, and nutrition for the miniature trees. Over time, soil degrades, losing its structure and nutrients. Repotting with a fresh soil mix helps bonsai thrive.

Signs Your Bonsai Needs New Soil

Understanding when to change your bonsai soil is key to its care. Look out for these signs:

  • Slow Growth: Stunted growth may indicate soil issues.
  • Watering Woes: Water pools or drains too rapidly.
  • Root Bound: Roots circling the pot need more space.
  • Soil Condition: Soil that’s hard or crumbly has degraded.

Step-by-step Guide To Repotting

Follow these steps to repot your bonsai:

  1. Prepare Your Materials: Gather a new pot, Best Bonsai Soil Mix, mesh, wire, and tools.
  2. Remove the Bonsai: Carefully take the tree out of its current pot.
  3. Root Pruning: Trim the roots moderately to encourage new growth.
  4. Prepare the New Pot: Cover drainage holes with mesh and ready securing wires.
  5. Add Soil Mix: Place a layer of fresh soil in the pot.
  6. Reposition Bonsai: Set the tree in the pot and spread the roots gently.
  7. Secure the Tree: Use the wires to fix the tree in position.
  8. Fill with Soil: Add Best Bonsai Soil Mix around the roots, avoiding air pockets.
  9. Water Thoroughly: Soak the soil to help it settle and ensure good contact with roots.

Frequently Asked Questions On Best Bonsai Soil Mix

What Is Bonsai Soil Mix?

Bonsai soil mix is a specially formulated blend designed to ensure proper drainage, aeration, and nutrients for the unique needs of bonsai trees. It typically includes components like akadama, pumice, lava rock, and sometimes organic matter.

Why Is Bonsai Soil Different?

Bonsai soil is different because bonsai trees are grown in small pots, limiting their space for root growth. The soil needs to promote drainage and prevent root rot, which is why it’s more granular and less compact than regular potting soil.

How Often To Replace Bonsai Soil?

Bonsai soil should generally be replaced every one to two years. Regular repotting helps to refresh the nutrient content of the soil and remove any compacted roots, ensuring the health and growth of the bonsai tree.

Can I Make My Own Bonsai Soil?

Yes, you can make your own bonsai soil mix by combining ingredients like akadama, pumice, and lava rock in appropriate ratios to ensure good drainage and aeration. Sometimes organic materials like pine bark are also added.

Conclusion

Selecting the right bonsai soil mix is vital for your miniature tree’s health. With the options discussed, you can confidently nurture your bonsai. Remember, a blend tailored to your specific climate and tree type works best. Happy planting, and watch your bonsai flourish!

Bonsai for Cold Climate

Best Bonsai for Cold Climate: Hardy Choices for Chill Zones

The Siberian Elm and Japanese Maple are excellent bonsai choices for cold climates. These species thrive in lower temperatures and can withstand frost.

Cultivating bonsai trees offers a unique blend of art, horticulture, and patience. As an enthusiast in cooler regions, selecting the right tree is crucial for success. The Siberian Elm, known for its durability, can handle the chill and even survive brief periods of snow.

Bonsai for Cold Climate

Bonsai for Cold Climate: Similarly, the Japanese Maple, with its striking foliage, is also well-suited to colder weather and will bring a stunning change of colors with the seasons. These bonsai varieties, when carefully managed, will not only survive but flourish, giving a miniature reflection of nature’s resilience. Their ability to endure harsh winters makes them ideal for cold climate gardens, where other bonsai might falter. By focusing on species adapted to the cold, you can ensure a thriving bonsai display year-round.

Cold Climate Challenges For Bonsai Enthusiasts

Bonsai enthusiasts in cold climates face unique challenges. Unlike their counterparts in milder regions, cold-weather bonsai cultivators must be diligent and creative to ensure the survival and beauty of these miniature trees.

Temperature Extremes And Bonsai Survival

Bonsai trees, like all plants, have ideal temperature ranges for optimal growth. Cold climates push these limits. The trees experience stress and damage if not protected from freezing temperatures.

  • Short growing seasons affect tree development
  • Frost can damage roots and foliage
  • Insulation techniques are necessary for survival

Adapting Traditional Bonsai Techniques To Cold Weather

Traditional bonsai methods need a twist in cold climates. Adaptation and innovation help bonsai thrive in harsh winter conditions.

Technique Adaptation for Cold Weather
Watering Less frequent, only when not frozen
Positioning Sheltered areas to reduce wind chill
Winter Care Use of cold frames or mulch for insulation

By learning techniques tailored for cold weather, you can grow bonsai trees successfully, even in less-than-ideal climates.


Characteristics Of Hardy Bonsai Species

Bonsai trees evoke a sense of calm and beauty, drawing enthusiasts into the minute worlds they create. Not all bonsai can withstand the fierce chill of colder climates, though. Select species possess unique characteristics making them robust against the biting cold. Understanding these traits is critical for nurturing bonsai that will not only survive but thrive in cooler temperatures.

Identifying Cold-resistant Features

Certain features act as markers for cold hardiness in bonsai species. These include:

  • Thick bark for insulation against frost
  • Ability to enter dormancy, a sleep-like state during winter
  • Flexible branches that resist breaking in snow or ice
  • A robust root system that can withstand freezing temperatures

Species such as the Siberian Elm or Scots Pine are exemplary, boasting these essential traits.

Growth Patterns Of Hardy Bonsai Trees

Growth patterns of hardy bonsai play a pivotal role in their survival. These patterns include:

  • Slower growth rates, reducing stress on the tree during cold spells
  • Shorter internodes, leading to a denser structure that retains heat
  • Leaves that can desiccate and fall off to conserve energy

By recognizing these patterns, caretakers can select and maintain bonsai that are well-suited for cold environments, ensuring their resilience throughout the winter season.

Top Hardy Bonsai Trees For Colder Regions

Embracing the beauty of Bonsai in colder climates is truly possible. Certain Bonsai trees not only endure but thrive in chillier regions. Let’s delve into the top hardy Bonsai trees that can weather the cold.

Siberian Elm: A Tough Survivor

The Siberian Elm, known for its robustness, is ideal for cold climates. Below are its notable features:

  • Adapts well to freezing temperatures
  • Can withstand temperature shifts
  • Needs minimal winter care
Feature Details
Hardiness Zone 4 to 9
Weather Resistance Wind, snow, and ice

This survivor offers year-round interest with its peeling bark and elegant foliage.

Scotts Pine: Emblem Of Resilience

The Scotts Pine stands as a testament to endurance. It boasts the following traits:

  • Favors cool environments
  • Maintains health during dormancy
  • Resists common cold-region pests
Feature Details
Hardiness Zone 3 to 7
Soil Preference Well-drained, sandy

Scotts Pine’s iconic needle-like leaves offer stunning green hues all year.


Caring For Bonsai In Low-temperature Zones

Bonsai trees bring nature’s splendor into our homes. But cold climates pose unique challenges. Proper care ensures these miniature wonders thrive despite the chill.

Winterizing Your Bonsai: Essential Steps

Cold weather demands special attention for bonsai trees.
Here’s how to keep them safe and healthy:

  1. Identify the species to know its cold tolerance.
  2. Gradually expose to lower temps to harden the tree.
  3. Use mulch to protect the roots from freezing.
  4. Move bonsai to a sheltered outdoor spot, if possible.
  5. Wrap pots with insulation to keep roots warm.
  6. Reduce watering, but prevent the soil from completely drying out.

Managing Light And Humidity Indoors

Winter months bring not just cold, but less light as well. Bonsai trees need adequate light to stay healthy indoors.

  • Place your bonsai near a bright window.
  • Consider grow lights for additional illumination.
  • Humidity trays can increase air moisture around the tree.
  • Water judiciously, ensuring no waterlogging.
  • Misting the leaves occasionally will help with leaf moisture.

Consistent care makes all the difference for bonsai survival in cold climates.
Keep these tips in mind, and enjoy the beauty of bonsai year-round.

Case Studies

Exploring real-world examples helps us grasp the nuances of growing bonsai in cold climates. Let’s delve into stories of triumph and tales of trials that shed light on cultivating these miniature masterpieces amidst the chilly weather.

Success Stories From Chill Zone Bonsai Cultivators

Passionate bonsai enthusiasts in colder regions have shared their success stories.

  • Siberian Elm Triumph: A cultivator in Minnesota aced the art of protecting the Siberian Elm, known for its hardiness.
  • Scots Pine Resilience: In Canada, a Scots Pine thrived, showcasing strong adaptability to freezing temperatures.
  • Larch Love: A gardener in Maine celebrated the elegant beauty of Larch that endures harsh winters with grace.

Learning From Failed Bonsai Projects In Cold Climates

Mistakes are often the best teachers. Our community has important lessons learned from failed bonsai projects.

  1. Tropical Trouble: Bonsai lovers learned not all tropical species can adapt well to sudden frosts, leading to loss of such plants.
  2. Overwintering Woes: Improper overwintering techniques resulted in a frost-damaged root system in several cases.
  3. Pot Problematics: Inadequate pot insulation sometimes led to soil freezing, proving to be a learning curve for enthusiasts.

Expanding Your Cold Climate Bonsai Collection

Embracing the challenge of growing bonsai in a cold climate can be incredibly rewarding. Those who delve into this hobby know the unique beauty of bonsai lies in their resilience and versatility. An expanded collection of cold-hardy bonsai species not only adds diversity to your personal collection but showcases your skill in cultivating these miniature wonders in less-than-tropical conditions.

Acclimating New Species

Acclimating new bonsai to your cold climate requires patience and attention. Start by introducing them to their new environment gradually. Shelter the bonsai from harsh winds and extreme temperatures at first. Consider using a cold frame or unheated greenhouse for the initial transition period.

Innovative Insulation Techniques For Root Protection

Protecting a bonsai’s root system in frigid weather is crucial. Employ innovative insulation techniques to safeguard these precious roots. Wrapping pots in insulating materials like burlap, utilizing mulch, and even burying pots in the ground can provide that much-needed layer of protection against the cold.

Here are some insulation methods to consider:

  • Wrap pots with thermal foil to reflect cold away.
  • Use heated mats below pots for consistent warmth.
  • Place bonsai in a protected outdoor area, like a shed or garage, during extreme temperatures.

Frequently Asked Questions For Best Bonsai For Cold Climate

What Are The Best Bonsai For Cold Climates?

Cold climates suit hardy bonsai species like the Siberian Elm, Canadian Hemlock, and Norwegian Spruce. These varieties have adapted to lower temperatures and can survive outdoor winter conditions with some protection.

How Do You Care For Bonsai In Winter?

During winter, protect your bonsai by placing it in a cold frame or unheated garage. Ensure it receives light and stays above freezing. Water sparingly, as bonsai require less moisture during their dormancy period.

Can Bonsai Trees Survive Snow And Frost?

Yes, some bonsai trees can survive snow and frost. Species like the Juniper, Ponderosa Pine, and Scots Pine are resilient, but it’s crucial to provide appropriate winter care to prevent root damage.

What Bonsai Varieties Are Easiest To Maintain?

For cold climates, the Juniper, Siberian Elm, and Canadian Hemlock are among the easiest to maintain. They require minimal winter protection and adapt well to cooler temperatures.

Conclusion

Selecting the perfect bonsai for a cold environment can be a delightful challenge. Embrace species like the Siberian Elm or Japanese Maple to ensure resilience against the chill. Cultivate a piece of living art; let these cold-hardy bonsais bring serene beauty to your frosty garden landscape.

Remember, with the right care and choice, even the coldest climates can host these miniature natural wonders.

(To learn more about Bonsai in Different Climate: https://bonsainurserybd.com/bonsai-in-different-climates/)

Bonsai Jade Plant

Best Way to Bonsai Jade Plant: Pro Tips & Tricks

To bonsai a Jade Plant, prune regularly and select a suitable shallow pot. Ensure it receives ample sunlight and proper watering.

Creating a bonsai from a Jade Plant, Crassula ovata, requires both patience and creativity. Begin with a fresh, healthy plant or a well-rooted cutting. The key is diligent pruning to both the foliage and the roots; this miniaturization process demands precision and care.

Bonsai Jade Plant

Adequate light is critical for your bonsai’s development, so position it where it can bask in plenty of indirect sunlight. Choosing the right soil—free-draining and nutrient-rich—is essential. Water sparingly, allowing the soil to dry out between watering sessions to promote strong root growth. Regular wiring can guide the plant into your desired shape, but remember, the robust nature of Jade Plants may call for occasional readjustment. A successful bonsai Jade Plant is a testament to the grower’s effort and dedication, offering a stunning, living piece of art.

The Allure Of Bonsai: The Jade Plant Edition

The art of bonsai captures nature’s beauty in miniature form. The Jade Plant Edition offers a unique twist on this ancient practice, blending tradition with the sturdy and elegant enchantment of jade plants.

The Ancient Art Meets The Robust Jade

Bonsai, the traditional Japanese craft of growing miniature trees, harmonizes with the jade plant’s resilience. These plants boast thick, luscious leaves and a strong structure, ideal for bonsai.

  • Bonsai history dates back over a thousand years.
  • Jade plants adapt well to the precise training of bonsai.
  • With proper care, they can live for decades, even centuries.

Why Jade Plants Are Bonsai Favorites

Jade plants soar in popularity among bonsai enthusiasts for their low maintenance and aesthetic appeal. Their ease of care makes them perfect for beginners.

Feature Benefit
Thick Trunk Mimics aged, woody appearance.
Succulent Leaves Stores water, requiring less frequent watering.
Easy Propagation New bonsais can grow from clippings.
  1. Choose a healthy parent plant.
  2. Trim branches and shape over time.
  3. Re-pot judiciously to control growth.


Choosing Your Jade Plant

Delving into the world of bonsai, you may feel eager to start with a jade plant. Known for its resilience and beauty, the jade plant makes an excellent choice for beginners. Before you embark on this journey, selecting the right plant lays the foundation for your bonsai success. Let’s explore how to choose the best jade plant for your bonsai endeavors.

Attributes Of A Perfect Bonsai Candidate

Identifying the ideal jade plant for bonsai involves observing several key features:

  • Sturdy trunk: A thick, woody stem acts as the backbone for your bonsai.
  • Healthy leaves: Lush, green foliage signifies a well-cared-for plant.
  • Compact roots: A robust root system supports growth and ease in potting.
  • Proportional branches: Well-spaced branches allow for stylized shaping.
  • Versatile growth pattern: A naturally upright plant ensures easier training.

Sources For Quality Jade Plants

Where you get your plant matters just as much as the plant itself:

Source Benefits
Nurseries: Personal selection and expert advice.
Online stores: Convenience and variety.
Bonsai specialists: Quality specimens and specific expertise.
Local gardeners: Adopting mature plants that are acclimatized.

Remember, a healthy jade plant is the canvas for your bonsai masterpiece. Pick wisely and your bonsai journey will be filled with growth – quite literally!

Tools Of The Trade

The right tools transform the way you care for your bonsai jade plant. Bonsai enthusiasts cherish precision. This piece highlights two categories crucial for bonsai success. You’ll discover the must-have items that turn your jade into a miniaturized masterpiece.

Essential Bonsai Tools For Pruning And Shaping

To keep your jade bonsai perfectly pruned and shaped, you’ll need specific tools. These instruments are designed for detail and control. Here’s a rundown of what your toolkit should include:

  • Bonsai Scissors: Crucial for precise cuts.
  • Concave Branch Cutters: Helps heal pruning wounds with minimal scarring.
  • Wire Cutters: For adjusting training wires without damaging branches.
  • Bonsai Pliers: Twist wires and aids in branch removal.
  • Knob Cutters: Create smooth cuts on trunk knobs.
  • Root Rake and Tweezers: Maintain soil health and root care.

Supplies To Keep Your Jade Bonsai Thriving

Your jade bonsai needs more than just tools for cutting. Healthy growth stems from proper nourishment and care. Ensure you include these in your bonsai care arsenal:

Supply Purpose
Bonsai Soil: Ensures proper drainage and support.
Fertilizer: Feeds your jade bonsai with essential nutrients.
Humidity Tray: Maintains moisture levels around the plant.
Watering Can with Fine Nozzle: Provides gentle watering.
Bonsai Pot: Houses your plant and completes the bonsai aesthetic.

Cultivating Your Jade Bonsai

Starting your Jade Bonsai journey is an exciting venture. These resilient succulents adapt well to the art of bonsai. Through careful pruning and shaping, the Jade plant can become a stunning miniature tree. Below, we delve into the best practices to ensure your Jade Bonsai thrives, focusing on pruning techniques and shaping strategies.

Pruning Techniques For Balance And Aesthetics

Pruning is vital to maintain a Jade’s bonsai form. Begin by removing any dead or damaged leaves. Focus on creating a balanced look by thinning crowded areas. Always use sharp, clean tools to make precise cuts. Here’s a simple guide:

  • Identify primary branches: Look for thicker, stronger branches to define structure.
  • Trim secondary branches: Cut back to promote foliage closer to the trunk.
  • Pinch off new growth: Encourage bushier growth by pinching tips.

Pruning should happen during active growth periods for the best results. Aim for a symmetrical canopy that mirrors a tree’s natural shape.

Shaping Strategies: Wiring And Trimming

Shaping goes hand in hand with pruning. Wiring helps to direct branch growth. Start with soft copper or aluminum wire. Gently wrap around branches and bend to desired positions. Wiring your Jade Bonsai properly involves:

  1. Selecting the correct wire diameter. It must support the branch without damage.
  2. Applying the wire snugly, but allow room for the branch to grow.
  3. Monitoring the growth, so the wire does not cut into the expanding branches.

Trimming complements wiring by managing foliage. For a natural appearance, trim leaves at varying lengths. Remember to remove wire after a few months. This prevents scarring the plant.

Shaping Jade Bonsai – Quick Reference
Task Tool Frequency
Pruning Bonsai Scissors As Needed
Wiring Copper/Aluminum Wire Every Few Months
Trimming Trimming Scissors Regular Intervals

Long-term Care For A Healthy Bonsai

Long-Term Care for a Healthy Bonsai is essential to maintain the miniature grandeur of your jade plant. With proper techniques and a touch of patience, your bonsai will flourish. This section unveils key practices for sustaining a robust jade bonsai.

Soil And Repotting: Best Practices

Employing the right soil and repotting routine is crucial. Here’s how:

  • Use well-draining soil customized for succulents or cacti.
  • Repotting should occur every two to three years to refresh the soil.
  • Ensure the new pot is slightly larger than the current one.
  • Trim roots carefully during repotting to encourage new growth.
  • Post-repotting, wait a week before resuming watering to allow roots to heal.

Watering, Light, And Location: Keeping Your Jade Bonsai Vibrant

To keep your jade bonsai vibrant, give it the right amount of water, light, and a perfect spot.

Watering Light Location
Water deeply but infrequently, allowing the soil to dry between watering. Provide bright, indirect light for at least four hours daily. Choose a stable location with consistent temperature and no drafts.

Stick to these basics and watch your jade bonsai thrive, gracing your home or office with its timeless beauty.

Advanced Tips And Styling Techniques

Welcome to the deeper world of Bonsai, where your Jade Plant transforms from a simple potted plant into a miniature tree exuding age and wisdom. Advanced techniques can enhance its beauty and health. Let’s explore these artistic and horticultural methods.

Creating A Sense Of Age And Wisdom In Your Bonsai

Give your Bonsai a story to tell. Here’s how:

  • Bend and twist the branches. This mimics the windswept trees in nature.
  • Create fissures in the bark to suggest enduring years.
  • Expose some roots to mirror ancient trees’ struggle for survival.
  • Prune leaves and branches to reinforce a weathered silhouette.

Seasonal Care And Overcoming Common Challenges

Every season brings different needs for a Bonsai Jade. Stay prepared with these tips:

Season Care Tips Challenges
Spring Prune for growth. Use balanced fertilizer. Overwatering risks.
Summer Watch soil moisture. Protect from intense sun. Leaf burn from heat.
Fall Reduce watering. Start dormancy prep. Fungal infections as moisture increases.
Winter Keep warm and dry. Minimal watering. Cold damage to roots.

Proper care ensures your bonsai thrives all year. Tackle pests with neem oil. Balance watering based on the environment. Remember, less is often more with Bonsai. Keep these techniques in mind, and your Jade Bonsai will grow into an emblem of beauty and resilience.

(For more Bonsai Styling Tips : https://bonsainurserybd.com/bonsai-styling-tips/

Showcasing Your Bonsai Masterpiece

When you’ve poured love and patience into creating a bonsai, it’s time to share it. Your jade bonsai is not just a plant; it’s a living sculpture. In “Showcasing Your Bonsai Masterpiece,” you’ll learn how to give your jade the limelight it deserves.

Display Considerations For Maximum Impact

To ensure your bonsai jade plant truly stands out, consider these elements:

  • Lighting: A well-lit space highlights the intricate details of your bonsai.
  • Stand: Choose a stand that complements but doesn’t overshadow your jade’s beauty.
  • Background: A simple backdrop can make your bonsai pop.
  • Angle: Display your plant at an angle that showcases its best features.

Joining The Bonsai Community: Exhibitions And Forums

Engage with fellow enthusiasts to learn and display your masterpiece:

  1. Find local bonsai exhibitions to enter your jade.
  2. Participate in online forums for feedback and tips.
  3. Attend bonsai workshops for direct learning.
  4. Document your journey on social media to connect with global admirers.

Frequently Asked Questions Of Best Way To Bonsai Jade Plant

What Is A Bonsai Jade Plant?

A Bonsai Jade Plant is a dwarfed Crassula ovata. It is meticulously pruned and trained into a miniature version of a tree, preserving its natural shapes and beauty on a smaller scale.

How To Start A Jade Bonsai?

To start a Jade Bonsai, select a healthy Crassula ovata cutting. Plant it in well-draining soil, provide sufficient light, and begin the training after it has established roots. Consistent watering and pruning are key to its growth.

What Soil Is Best For Jade Bonsai?

A mix of coarse sand, peat, and organic matter works best for Jade Bonsai. This ensures adequate drainage and aeration, which are crucial for preventing root rot and promoting healthy growth.

How Often To Water Jade Bonsai?

Water your Jade Bonsai when the topsoil feels dry, typically once a week. Overwatering can lead to root rot, so ensure the soil dries between watering sessions for optimal health.

Conclusion

Cultivating a bonsai jade plant offers both beauty and satisfaction. Mastering this art takes patience and care, reflecting the rich tradition of bonsai. With the right techniques, your jade can thrive, becoming a conversation piece in your home. Embrace the journey and watch your miniature tree flourish.

Happy bonsai crafting!

(For more Jade Plant Bonsai: https://hookedonbonsai.com/an-extensive-care-guide-for-jade-bonsai-tree/)

Best Time to Wire a Bonsai

When is the Best Time to Wire a Bonsai: Expert Tips Revealed

The best time to wire a bonsai is typically during the growing season when the branches are flexible. This period usually spans from spring to early autumn.

Bonsai enthusiasts recognize the importance of training these miniature trees for optimal aesthetic appeal. Wiring, a crucial technique in bonsai shaping, allows for precise direction and placement of branches. Timing is critical, as pliable branches during growth periods can adapt to new positions without breaking.

Best Time to Wire a Bonsai

Early spring, just as new growth emerges, is optimal because the tree’s increased sap flow makes the branches more supple. Meanwhile, wiring in autumn can be advantageous as well, since the branches have had a season to grow and retain some flexibility before the onset of winter. Successfully wiring a bonsai not only improves its form but also reflects the grower’s skill and dedication to this traditional art form.

The Art And Science Of Bonsai Wiring

Bonsai wiring blends art with horticulture. It shapes trees and creates beautiful miniatures of natural scenes. Experts use wires with care to guide the growth of bonsai trees. Timing is key to successful bonsai wiring. This is where science joins art. The best time is when the tree is growing actively. This could be in spring or summer for many species.

The Purpose Of Wiring In Bonsai Cultivation

Wiring allows precise control over the bonsai’s shape. It directs branch and trunk growth for the desired design. Without wiring, shaping a bonsai can be challenging. Here are the main purposes:

  • Controlling Growth Direction: Wiring lets you point branches where you want.
  • Improving Aesthetics: It helps achieve a balanced, harmonious look.
  • Creating Structure: Trees gain structure for future growth.
  • Mimicking Mature Trees: You recreate the appearance of age and grace.

The Science Behind Effective Bonsai Wiring

Understanding the tree’s biology is crucial for bonsai wiring. Springy aluminum or copper wire is often used. The wire size must match the branch thickness. Too thick or thin can cause problems. Timing is a science itself. Here’s a simple guide:

Tree Type Best Time to Wire Things to Consider
Deciduous Late winter Before leaves sprout for better visibility
Coniferous Autumn or Spring Less sap flow in autumn, active growth in spring
Tropical Early summer During peak growth for faster training

Tips For Safe And Effective Bonsai Wiring

Successful wiring is a skill acquired over time. Patience is vital. Here are practical tips:

  1. Select the appropriate wire diameter.
  2. Wrap wires at a 45-degree angle.
  3. Avoid damaging the bark.
  4. Monitor growth regularly to prevent wire cutting into the bark.
  5. Remove the wire with care to preserve the shape.

Seasonal Considerations For Bonsai Wiring

Seasonal Considerations for Bonsai Wiring are vital for the successful styling and training of these miniature trees. Wiring is not just an art; it’s a strategic technique that supports the tree’s healthy growth when done at the right time. Choosing the optimal season for wiring can make a significant difference.

Growth Patterns And Their Impact On Wiring

Understanding the growth patterns of bonsai trees is crucial for effective wiring. Trees have active and dormant phases, each affecting how they respond to wiring.

  • Active Growth Phase: During this period, trees grow rapidly. Wiring can be riskier as branches thicken quickly, potentially leading to scarring if not monitored.
  • Dormant Phase: Growth slows down. It is a safer time to wire, as the risk of scarring is reduced.

Optimal Seasons For Wiring Various Bonsai Species

Species-specific seasons exist for wiring bonsai trees. Each species has its preferred time frame that aligns with its growth cycle.

Species Optimal Wiring Season
Conifers Late Winter
Early Spring
Deciduous Autumn
Late Winter
Tropical Early Summer
Mid-Summer

Stages Of Bonsai Growth Affecting Wiring Choice

Choosing the right time to wire a bonsai is crucial for its development. The plant’s growth stage significantly impacts the wiring approach. Understand these stages to optimize shaping efforts and reduce stress on the tree.

Juvenile Vs. Mature Bonsai: Wiring Strategies

Young bonsai trees are malleable, and their branches adjust easily. Mature bonsai are less flexible, and their branches can snap if not handled carefully. Apply wires to young branches during the growing season for best results.

  • Young bonsai: Early spring, just as the sap starts flowing
  • Mature bonsai: Late autumn, minimal growth phase

Assessing Tree Health Before Wiring

Before wiring, check for signs of a healthy bonsai:

Health Indicator Description
Leaf Color Rich, vibrant indicating good health
Branch Flexibility Pliable but resilient
Root System Strong, well-established

Diseased or stressed trees should recover before wiring. Conduct a thorough assessment to avoid causing damage.

Expert Tips To Ensure Successful Wiring

Bonsai wiring is an essential skill for shaping these miniature trees. The right time to wire a bonsai typically aligns with the tree’s growth phase. This period of pliability means the branches bend easier and fix into the desired shape. Knowing how and when to wire is key to bonsai health and beauty. Here are expert tips to wire effectively.

Tools And Materials For Efficient Wiring

Gather the right tools before starting. Quality materials make wiring smooth and safe for your bonsai. Use the following list:

  • Bonsai wire: Aluminum or copper, choose based on your tree type.
  • Wire cutters: For precise cuts without damaging branches.
  • Wiring jin pliers: For bending and twisting wires correctly.
  • Protective materials: To safeguard the tree bark while rewiring.

Techniques For Different Bonsai Styles

Different styles require specific wiring techniques. Pay attention to the tips for each style:

Style Wiring Technique
Formal Upright Equal wiring along the trunk for balance.
Informal Upright Varied wiring for natural curves.
Slanting Diagonal wiring to guide the direction.
Cascade Heavy wiring on lower branches to mimic a waterfall.
Literati Minimal wiring to emphasize free form.

Implement these techniques to shape bonsai trees with finesse. Wire during growth periods. Ensure tools are ready and techniques align with your bonsai style. Your bonsai will then grow into an aesthetic masterpiece.

(To learn more Technique of Bonsai Wiring: https://bonsainurserybd.com/bonsai-wire-techniques/)

Post-wiring Care And Observation

Bonsai enthusiasts know that wiring shapes their tiny trees beautifully. Once the wiring is complete, post-wiring care and observation become crucial for healthy growth and the desired form. Proper observation and maintenance ensure the bonsai develops without harm.

Monitoring Growth And Adjusting Wires

After wiring a bonsai, continuous watchfulness is essential. As the bonsai grows, its branches expand and thicken. This can lead to the wire cutting into the bark, which is undesirable. Monitoring growth involves:

  • Checking the wires regularly, at least every few weeks.
  • Observing for signs of stress on the branches and trunk.
  • Loosening or removing wires if they start to constrict.

Adjustments ensure the bonsai’s form without causing damage. Timing is important – act quickly with the right tools.

When To Remove Wires To Avoid Scarring

Understanding when to remove wiring is as critical as the initial wiring itself. It’s a balance to maintain form while preventing scars. Signs it’s time to remove the wires include:

  1. Noticing an imprint of wire on the branch.
  2. Branches are holding shape without support.
  3. Bark growing over the wire.

Typically, wires stay on for a few months up to a year, depending on growth rate. Use care when removing wires to keep the bonsai unscarred.

Learning From The Masters: Case Studies

Bonsai enthusiasts often wonder about the perfect timing for wiring their miniature trees. The technique involves carefully shaping branches to create desired aesthetics. Guidance from seasoned bonsai artists can illuminate this complex process. ‘Learning from the Masters: Case Studies’ offers such insights. Here, we delve into the experiences and practices of the best in the field.

Insights From Renowned Bonsai Artists

Observing masterful artists at work reveals invaluable lessons:

  • Wiring is not bound to a single season; understanding tree species and growth patterns is crucial.
  • Patience and precision are non-negotiable virtues during this intricate process.
  • Each tree is unique—what works for one may not suit another.

These artists emphasize initial study and ongoing observation of the tree.

Artist Preferred Season Technique Highlight
Kazuo Fujikawa Early Spring Soft wiring for pliable growth
Satoshi Kataoka Late Autumn Structural wiring before dormancy
Min Hsuan Lo All Seasons Adaptive approach per tree species

Transformations Achieved Through Strategic Wiring

The right wiring techniques work wonders on bonsai shapes:

  1. Direction: Gently guide branches to grow horizontally or cascade.
  2. Space: Create openness in the foliage, allowing for sunlight and air circulation.
  3. Character: Introduce movement and expressiveness, reflecting the tree’s natural environment.

Strategic wiring, when executed at the opportune time, leads to remarkable bonsai transformations. Case studies demonstrate various species can thrive with the correct application and timely adjustments of wire.

Diligent care ensures both the health of the tree and the emergence of a breathtaking aesthetic.

Frequently Asked Questions Of When Is The Best Time To Wire A Bonsai

When Should You Start Wiring A Bonsai Tree?

Bonsai wiring is best done during the tree’s growing season. This typically falls in spring or early summer when the tree is actively growing. This allows the bonsai to heal and adjust more effectively to the wiring.

Does The Bonsai Species Affect Wiring Time?

Yes, the bonsai species plays a crucial role in determining the best wiring time. Deciduous trees are preferably wired during late winter, just before they break dormancy. Evergreens may be wired in early spring or autumn.

Can Wiring Be Done On Mature Bonsai Trees?

Wiring mature bonsai trees is possible but requires extra care. Older trees have more brittle branches, so apply wire gently and monitor closely to avoid damaging the bark or branches.

How Often Can You Re-wire A Bonsai Tree?

Re-wiring a bonsai tree can generally be done once or twice a year. Always allow sufficient time for the tree to recover from the previous wiring session before attempting to re-wire.

Conclusion

Selecting the optimal period for wiring your bonsai is crucial for achieving desired results. Springtime often emerges as a favorable season, aligning with vigorous plant growth that accommodates shaping and recovery. Nonetheless, it’s essential to consider individual species and their unique growth cycles.

Embrace patience and continuous learning for bonsai mastery, ensuring your miniature trees thrive through the seasons.

(Check this out for more knowledge: https://bonsai4me.com/wiring-bonsai/)

Bonsai Plants to Gift

Best Bonsai Plants to Gift: Top Picks for Green Thumbs!

The best bonsai plants to gift are the Ficus Bonsai for ease of care and the Juniper Bonsai for aesthetic appeal. The Jade Plant Bonsai makes for a lasting, auspicious gift.

Bonsai plants are an elegant and thoughtful present for various occasions. These miniature trees convey a sense of serenity and enduring beauty. Gifting a bonsai symbolizes respect, patience, and harmony, reflecting the care between the giver and the receiver. Perfect for both beginners and enthusiasts, bonsai plants like the Ficus Bonsai require minimal maintenance, making them an ideal choice for those new to bonsai cultivation.

Bonsai Plants to Gift

The Juniper Bonsai, with its lush foliage and adaptable nature, suits someone with a fondness for classic bonsai shapes. For those seeking a plant that embodies prosperity and good luck, the Jade Plant Bonsai is an excellent option. Its succulent leaves and robust nature endure over time, mirroring the strength of lasting relationships. With minimalistic beauty, bonsai gifts offer a unique blend of art, nature, and symbolism.

The Art Of Bonsai

Bonsai, a Japanese art form, uses miniature trees grown in containers. This profound practice captures the beauty of nature on a small scale. A bonsai tree isn’t merely a plant but a symbol of harmony, balance, and patience. Gifting a bonsai represents the gifter’s respect and good wishes for the receiver’s life and space.

Origins And Symbolism

Tracing back to ancient China, bonsai was refined by Japanese culture. It’s a blend of horticulture and artistic vision.

  • Longevity: Bonsai trees symbolize the diligent care of gardeners.
  • Harmony: They showcase balance with nature in a confined space.
  • Peace: The art promotes tranquility and mindfulness.

Modern Appeal And Benefits

In today’s world, bonsai brings nature indoors. These trees fit modern decor, purify the air and increase focus and creativity. Bonsai plants make thoughtful gifts as they can imbue a space with life and elegance.

Bonsai Tree Type Symbolism Benefits
Jade Plant Wealth and prosperity Low maintenance, air-purifying
Juniper Protection and purification Hardy, evergreen appearance
Cherry Blossom Beauty and the fleeting nature of life Stunning blooms, decorative

Bonsai Gifting Etiquette

Gifting a bonsai is more than a present; it’s a gesture of respect and thoughtfulness. Bonsai trees symbolize peace, harmony, and balance. To ensure the gift is well-received, understand the etiquette behind bonsai gifting.

Choosing The Right Occasion

Not every event is fit for a bonsai gift. Bonsai trees make meaningful gifts for special milestones and memorable celebrations. Are you honoring a graduation, a new business, or a housewarming? A bonsai could be the perfect choice.

  • Birthdays: Wishing long life and happiness
  • Anniversaries: Symbolizing growth and enduring love
  • Professional achievements: Congratulating success

Understanding Recipient Preferences

Before you select a bonsai, consider the recipient’s taste and lifestyle. A detailed conversation or awareness of their home decor can give clues.

Recipient’s Lifestyle Bonsai Type
Busy with little time for upkeep Jade plant or Ficus, which require less maintenance
Enjoys gardening and nurturing plants Juniper or Pine, which reward attentive care

Remember to include care instructions with your bonsai. This thoughtful touch will help maintain the bonsai’s beauty and the giftee’s joy.

Top Bonsai Varieties For Gift-giving

Choosing the perfect gift can be a delightful challenge. Bonsai plants symbolize care, love, and patience. These miniature trees are a thoughtful present for any occasion. Let’s explore top bonsai varieties that will bring joy to your loved ones!

Juniper: The Classic Choice

Juniper bonsai trees stand out with their rich greenery and elegant form. This variety is highly prized for its adaptability to various climates and its ease for beginners. Juniper thrives both indoors and outdoors, making it a versatile gift.

  • Symbol of peace and protection
  • Ideal for new bonsai enthusiasts
  • Requires sunlight and moderate watering

Ficus: Low-maintenance & Hardy

If you’re seeking a bonsai that forgives mistakes, choose Ficus. It’s perfect for busy individuals. These hardy trees can survive erratic watering and less light. Their thick trunks and robust leaves reflect a strong character.

  1. Suits indoor environments
  2. Can handle occasional neglect
  3. Grows quickly, ideal for seeing progress

Maple: The Colorful Option

Gift a splash of color with Maple bonsai trees. Autumn brings fiery reds and oranges to their leaves. These trees change with seasons, offering a unique beauty. Maple is a spectacle in any home or garden with its vibrant foliage.

Season Leaf Color
Spring Bright Green
Summer Lush Green
Autumn Red/Orange

Caring For Your Gifted Bonsai

Receiving a bonsai plant as a gift brings both joy and a touch of responsibility. These miniature marvels need proper care to thrive. Whether you’re a green thumb or new to plant care, these simple tips will help you nurture your bonsai.

Initial Placement And Sunlight

Bonsai plants love the sun, but they don’t like harsh rays. Find a spot that gets plenty of indirect sunlight. East-facing locations are usually perfect. They get gentle morning light and avoid the strong afternoon sun.

  • Indoor bonsai: Near a window but away from direct heat sources.
  • Outdoor bonsai: A shaded patio can provide ideal lighting conditions.

Watering And Feeding Tips

Keeping your bonsai hydrated is key, but over-watering can harm it. Here’s how to do it right:

  1. Check the soil daily; it should be moist, not soaked.
  2. Use a watering can with a fine nozzle for a gentle shower.
  3. Feed with bonsai-specific fertilizer, following package instructions.

Tip: Water in the morning to set your bonsai up for a day of growth.

Pruning And Training For Aesthetics

Pruning is both art and science, shaping the bonsai while keeping it healthy.

Start with clean, sharp tools. Snip away any dead leaves or branches. Trim back overgrowth to maintain its shape. Wire branches carefully to guide growth.

Pruning Shears:
For clean cuts on small branches.
Wiring:
Use special bonsai wire to mold the tree’s path.

Train your bonsai for beauty and balance, encouraging a harmonious design.

Customizing Your Bonsai Gift

Customizing Your Bonsai Gift takes it from a thoughtful gesture to a personal treasure. Bonsai trees symbolize harmony, peace, and an appreciation for nature’s nuanced beauty. Tailor your bonsai gift to resonate with someone special with unique containers and charming accessories. A customized bonsai is not just a gift; it becomes an intimate reflection of the bond shared between you and the recipient.

Adding A Personal Touch With Containers

Selecting the right container for a bonsai plant adds immense charm and character to your gift. Choose a container that reflects the recipient’s personality or complements their home decor. With a range of options from traditional ceramic pots to modern glass terrariums, your choice can transform the bonsai into a statement piece.

  • Traditional Ceramic: Symbolizes timeless elegance.
  • Glass Terrariums: Offer a contemporary twist.
  • Handcrafted Pots: Add a unique artisanal touch.

Incorporating Accessories And Decor

Accessories and decor infuse your bonsai gift with life and vibrancy. Figurines, tiny Zen gardens, or even a simple moss cover can elevate a bonsai’s aesthetic. They also engage the recipient’s creative spirit, fostering a deeper connection with their new plant companion.

Accessory Impact
Figurines Adds a narrative to the bonsai scene.
Zen Gardens Enhances the bonsai’s tranquility.
Moss Cover Creates a lush, green backdrop.

Beyond The Gift: Bonsai Workshops And Classes

Exploring the art of Bonsai extends beyond gifting a beautiful miniature tree. Engage in Bonsai workshops and classes to deepen the connection with this ancient practice. Perfect for both beginners and experienced enthusiasts, these sessions enrich the bonsai experience.

Fostering A Green Thumb

Bonsai classes nurture gardening skills and introduce the fundamentals of tree care. Whether you’re a novice or seeking advanced techniques, structured lessons help grow your confidence. Courses typically cover:

  • Basic plant biology
  • Watering and fertilization
  • Pruning and shaping
  • Repotting essentials
  • Pest and disease management

Instructors provide hands-on guidance and answer questions, ensuring a solid foundation for aspiring Bonsai artists.

Creating Lasting Bonsai Memories

Bonsai workshops are more than just classes; they’re an experience to be cherished. They offer unique activities such as:

Activity Description
Tree Selection Choosing the right Bonsai starts the journey.
Design Workshops Students learn to imitate natural tree shapes.
Maintenance Clinics Keeping Bonsai healthy through seasons.
Community Events Meet fellow enthusiasts and share stories.

These gatherings create a sense of community and provide a supportive network for beginners. They leave participants with not only a deeper understanding of Bonsai but also with lasting memories and friendships.

Frequently Asked Questions On Best Bonsai Plants To Gift

Which Bonsai Is Best For Gift?

A Ficus bonsai makes an excellent gift due to its robust nature and ease of care, ideal for beginners.

Is It Good To Gift Bonsai Plants?

Yes, gifting bonsai plants is thoughtful, symbolizing harmony, patience, and growth, making them ideal gifts for various occasions.

What Is The Most Popular Bonsai Plant?

The most popular bonsai plant is the Ficus bonsai. Its versatility and ease of care make it a top choice for enthusiasts.

Which Plant Is Best For Bonsai?

The Ficus bonsai is widely considered the best option for beginners due to its resilience and ease of care.

Conclusion

Selecting the perfect bonsai plant as a gift shows thoughtfulness and appreciation for natural beauty. Whether it’s the elegance of a Cherry Blossom or the resilience of a Juniper, each variety conveys a special message. Delight friends and family with a living, growing testament to your bond.

Encourage their green thumbs and enhance their spaces with these miniature wonders. Choose a bonsai; gift an enduring memory.

Growing Bonsai from Seeds

Best Way to Growing Bonsai from Seeds

Growing Bonsai from Seeds

Growing bonsai from seeds is a rewarding hobby. It also allows you to see a tree grow from the very start. Kids and adults can follow these simple steps!


Growing Bonsai from Seeds

Step 1: Choosing the Right Seeds

Start by picking seeds of trees that grow well in your area. Think about what kind of bonsai tree you like. Do you like big leaves? Small leaves? Flowers? This will help you choose.

Table of Recommended Seed Types

Type of Bonsai Seed
Flowering Bonsai Cherry Blossom, Azalea
Leafy Bonsai Maple, Elm
Coniferous Bonsai Pine, Juniper


Step 2: Seed Treatment

Some seeds need a process called stratification. It means making seeds think winter has passed. Wrap them in wet paper towels. Then, place them in a fridge for a few weeks. This tricks them to grow!


Step 3: Planting

  1. Fill a pot with bonsai soil mix.
  2. Place seeds on top of the soil.
  3. Cover them with a thin soil layer.
  4. Water gently, so the seeds don’t move.


Step 4: Care for Your Seedlings

Seedlings are young plants. They need lots of love. Keep the soil moist. Place them where they get sunlight but not too hot. Protect them from strong wind and animals that may harm them.


Step 5: Pruning

When your bonsai has five or six leaves, it’s time to prune. Cut off the top leaves. This encourages the tree to grow wide, not just tall. Use clean, sharp scissors. Be careful!

(To learn more about Bonsai Pruning: https://bonsainurserybd.com/bonsai-when-to-prune/)


Step 6: Repotting

As your bonsai gets bigger, it needs a new home. This usually happens after a year. Gently take it out of its old pot. Put it in a slightly bigger pot with fresh soil. Do this carefully. You don’t want to hurt the roots.

Tips And Tricks

  • Keep records. Write down when you planted the seeds and when they started to grow.
  • Talk to local gardeners about what trees do well in your area.
  • Join a bonsai club to learn more and have fun.
  • Don’t give up! Sometimes seeds take time to sprout.


Conclusion

There you have it! Follow these steps, and you’ll have your very own bonsai tree. It takes time and care. But when you see your bonsai, you will feel proud. Good luck!


Frequently Asked Questions On Best Way To Grow Bonsai From Seeds

What Is The Best Way To Germinate Bonsai Seeds?

The best way to germinate bonsai seeds is to soak them in water for 24 hours, then sow them in well-draining soil and maintain consistent moisture and warmth.

Do You Have To Soak Bonsai Seeds Before Planting?

Yes, soaking bonsai seeds before planting is recommended to enhance germination.

Is It Better To Grow Bonsai From Seed Or Cutting?

Growing bonsai from cuttings is typically faster and ensures traits are preserved, making it a preferred method over seeds.

What Is The Best Beginner Bonsai From Seed?

The best beginner bonsai from seed is the Ficus, known for its resilience and ease of care.

(You can fine more info about Best Way to Growing Bonsai from Seeds: https://www.bonsaiempire.com/basics/cultivation/from-seeds)

What Causes Yellow Leaves On Roses

What Causes Yellow Leaves On Roses

Yellow leaves on roses are often caused by water stress or nutrient deficiencies. Improper soil pH can also lead to yellowing foliage.


Roses are a classic symbol of beauty and elegance, commonly associated with love and affection. Cultivating these stunning flowers, gardeners strive for healthy growth and vibrant blooms. Yet, a common issue they may encounter is yellowing leaves, which detract from the plant’s overall vigor and aesthetic appeal.

This discoloration can alarm gardeners, prompting them to uncover the root of the problem to restore their roses to full health. Understanding the various reasons behind yellow leaves on roses, from the amount of water the plant receives to the soil’s composition and nutritional balance, is crucial for effective care and maintenance of these beloved plants. Addressing such issues quickly ensures that roses continue to flourish and brighten gardens with their colorful petals.


Symptoms Of Unhealthy Rose Plants

Healthy rose plants display vibrant blooms and rich green leaves. Yet, yellow leaves signal trouble. Gardeners must watch for signs to keep their roses thriving. Understanding these symptoms is vital for quick action and plant health.

Identifying Yellow Leaves

Yellow leaves on roses often spark concern. The problem’s source can vary. Common causes include over or under-watering, nutrient deficiencies, or pests and diseases. Identifying yellow leaves early helps address issues promptly, ensuring plant survival.

  • Leaf yellowing: Check for leaves turning yellow from green.
  • Pattern of discoloration: Note if it starts at leaf edges or spots.
  • Spread: Observe how quickly yellowing affects other leaves.

Additional Signs Of Distress

Beyond yellow leaves, roses show more distress signs. These indicators warn gardeners to act fast. Here is a breakdown:

Sign Description Action
Wilting Leaves droop and look lifeless. Adjust watering, check soil.
Spots on leaves Black or brown spots, perhaps with rings. Look for fungus, remove affected leaves.
Stunted growth New growth is slow or non-existent. Check for root health, fertilize if needed.

Look for tiny insects or webbing on leaves too. This could mean pests like aphids or spider mites. Taking care to identify and act on these signs can save your rose plants from long-term damage.

Common Culprits Behind Yellowing Foliage

Spotting yellow leaves on your roses can be disheartening. Healthy green foliage is key to a vibrant garden. Yet, various factors can disrupt this green splendor. Understanding the main causes is the first step to restoring your roses to their natural beauty. Let’s dive into the world of rose care and decode the mystery of yellow leaves together.

Nutrient Deficiencies

Lacking essential nutrients can lead to yellow foliage. Roses thrive with the right mix of feeding elements. Key among these are nitrogen, iron, and magnesium. Absence of these may cause leaves to lose their green luster.

Nutrient Role in Plant Health Symptoms of Deficiency
Nitrogen Leaf growth and green color Older leaves turn yellow
Iron Chlorophyll production New leaves become pale
Magnesium Overall health Leaf edges turn yellow

Water Imbalance

Too much or too little water can both lead to problems. Roses require a balanced watering schedule. Overwatering can cause root rot, while underwatering stresses the plant. Balance is essential to maintain lush green leaves.

  • Check soil moisture before watering.
  • Avoid wetting leaves to prevent fungal diseases.
  • Water deeply but less frequently for strong roots.

Pest Infestations

Pests can be silent attackers, draining the life from rose leaves. Spider mites, aphids, and scale insects are common foes. They suck sap, weakening leaves and causing them to yellow.

  1. Inspect plants regularly for early signs of pests.
  2. Use water sprays or organic treatments to control small infestations.
  3. For severe problems, choose appropriate insecticides.

Environmental Factors And Stress

Gardeners often see their roses suffer from yellow leaves. Various environmental factors can stress these plants. Stress on roses leads to weakness. Weak roses often show yellow leaves. This section dives into how temperatures and sunlight affect rose health.

Impact Of Extreme Temperatures

Roses thrive in moderate climates. But, when temperatures soar or drop, problems arise. Here’s a breakdown of temperature impacts:

  • Heatwaves cause leaves to yellow as roses fight to stay hydrated.
  • Cold snaps can shock plants, harming their leaves.

Ideal rose temperatures range from 65°F to 75°F (18°C to 24°C). Anything beyond that can stress the plant.

Issues With Sunlight Exposure

Roses need sunlight to flourish. Not all sunlight exposure is good, though. Here’s what gardeners should know:

Too Little Sun Too Much Sun
Limits photosynthesis, starving the rose. Leads to scorch, turning leaves yellow.

Proper sunlight is key, with roses needing about 6 hours of direct sun per day. Shaded areas or scorching sun both harm roses. Adjusting plant placement can prevent yellow leaves.

Diseases Leading To Yellow Leaves

The vibrant greens of rose foliage are as quintessential as the flowers themselves. That’s why seeing yellow leaves on roses can be quite alarming for gardeners. This discoloration often points to disease, a common culprit behind the loss of those luscious leaves. Let’s explore some diseases that could turn rose leaves yellow.

Fungal Infections

Fungal infections are a frequent cause of yellowing rose leaves.

  • Black spot – This is characterized by dark, blotchy spots.
  • Powdery mildew – It presents as a white, powdery coating.
  • Rust – Spots of rust color appear, usually on the undersides of leaves.

These fungi thrive in moist conditions. Prevention includes spacing roses for good air circulation and watering at the base to keep leaves dry. Fungicides can treat these issues when used correctly.

Bacterial And Viral Diseases

Diseases caused by bacteria and viruses can also lead to yellow leaves.

  • Crown gall – This bacterial disease forms tumors on roots and stems.
  • Rose mosaic – A virus causing mottled patterns of yellow and green.

For bacterial issues, ensuring cleanliness and garden hygiene is pivotal. For viral diseases, affected plants often require removal to prevent spread. Regular inspections help catch these diseases early.

Cultural Practices For Healthy Roses

Gardeners cherish roses for their beauty. But occasionally, yellow leaves can spoil the view. Understanding cultural practices keeps roses healthy and vibrant. Below, explore key areas ensuring roses flourish.

Soil Quality And Ph Levels

Roses thrive in nutritious soil with proper pH balance. Ideal pH for roses is between 6.0 and 6.5. Test soil yearly for balanced nutrients and pH levels. Amend soil with organic matter to boost quality.

Steps to improve soil for roses:

  • Test the soil to know its current state.
  • Add compost or manure to enrich the soil.
  • Use lime or sulfur for pH adjustments as needed.

Appropriate Watering Techniques

Water is vital for roses, but balance is key. Too much can cause root rot, too little can stress plants. Roses prefer deep, infrequent watering to shallow, frequent ones. This encourages deep root growth.

Watering tips for robust roses:

  1. Water early in the morning to reduce evaporation.
  2. Target the base of the plant, not the leaves.
  3. Ensure 1-2 inches of water per week, adjusting for rainfall.

Regular Pruning Methods

Pruning invigorates rose bushes. It removes dead or diseased wood. It also opens up the plant to air and light. Prune in early spring for best results. Never prune more than one-third of a bush at once.

Best practices for pruning roses:

  1. Use clean, sharp tools to avoid spreading diseases.
  2. Cut at a 45-degree angle, 1/4 inch above an outward-facing bud.
  3. Remove dead or weak branches to promote healthy growth.

Preventative Measures And Remedies

Golden hues on rose leaves can signal distress. Preventative measures and remedies are key to maintaining a vibrant garden. Let’s explore steps to keep roses robust and radiant.

Monitoring Plant Health

Regular inspection is crucial. Check leaves, stems, and soil. Look for early signs of stress. Early detection leads to easier management for avoiding Yellow Leaves On Roses.

  • Check leaves for discoloration or spots.
  • Examine stems for unusual bumps or growths.
  • Assess soil moisture – not too dry or waterlogged.

Using Fertilizers Wisely

Nutritional imbalances affect leaf color. A balanced diet is essential for roses.

Nutrient Function
Nitrogen Leaf growth and green color
Phosphorus Root and flower development
Potassium Overall plant health

Use compost or balanced fertilizers. Follow label instructions closely. Over or under-fertilizing can harm plants.

Eco-friendly Pest Control

Pests trigger stress and yellow leaves. Natural remedies preserve plant health.

  1. Introduce beneficial insects like ladybugs.
  2. Apply neem oil for eco-friendly pest control.
  3. Remove affected leaves to prevent spread.

Prefer organic solutions to chemical pesticides. Consider homemade mixes with mild soap and water or baking soda.

(A Details Guidelines for Rose Planting: https://bonsainurserybd.com/roses-101-a-comprehensive-guide/

Frequently Asked Questions For What Causes Yellow Leaves On Roses


How Do You Treat Yellow Leaves On Roses?


To treat yellow leaves on roses, first identify the cause such as over-watering, poor drainage, or nutrient deficiency. Adjust watering habits, improve soil quality, and provide appropriate fertilizer. Remove affected leaves to prevent further spread of potential disease.


What Does Epsom Salt Do For Roses?


Epsom salt provides magnesium, which promotes strong rose growth and vibrant blooms. It helps plants absorb key nutrients, enhancing their health and resilience.


How Do You Treat Yellow Leaves On Plants?


Identify the cause of yellow leaves on roses, which can be due to overwatering, poor drainage, nutrient deficiency, or disease. Adjust watering habits and ensure proper drainage. For nutrient issues, use a balanced fertilizer. Remove affected leaves and treat diseases with appropriate fungicides if necessary.


What Are The Signs Of Overwatering A Rose Bush?


Signs of overwatering a rose bush include yellowing leaves, wilting, and root rot. Soil may also remain consistently wet.


Conclusion


Understanding the causes of yellowing leaves on roses is key to ensuring a vibrant and healthy garden. From water woes to pest problems, the culprits have been addressed. Remember, prompt identification and action can revive your roses. Cherish these floral gems by tackling yellow leaves with confidence and care.

(To find out more causes of Why Yellow Leaves On Roses : https://www.hgtv.com/outdoors/flowers-and-plants/flowers/rose-leaves-turning-yellow

Happy gardening!

How Long Can Flowers Go Without Water

How Long Can Flowers Go Without Water

Most cut flowers can survive without water for a few hours. Some hardy varieties may last up to 24 hours.


Cut flowers add a burst of color and fragrance to any space, bringing a hint of nature indoors. Whether you’ve received a beautiful bouquet or have cut fresh flowers from your garden, preserving their beauty for as long as possible is often a priority.


The longevity of flowers without water can vary significantly depending on the type. Delicate blossoms might wilt rapidly, while more resilient varieties maintain their vigor for a full day. Ensuring your floral arrangements remain hydrated is key to extending their life and maintaining their aesthetic appeal. From floral foam to quick water dips, there are various methods to sustain your blooms. By understanding the needs of your specific flowers, you can maximize their vibrancy and enjoy their natural splendor for an extended period.


The Vital Role Of Water For Flower Survival

Water is crucial for flowers to live and look their best. Without it, a beautiful bouquet or a blooming garden can quickly wilt and lose its charm. Understanding how long flowers can sustain without water needs an insight into the vital role water plays in their survival. Let’s dive into the biological functions of water in plants, and how it affects their health and longevity.

Biological Functions Of Water In Plants

Plants depend on water to perform essential tasks. Water acts as a carrier, distributing nutrients from soil to plant cells. It is also involved in photosynthesis, where light energy turns into chemical energy. Additionally, water helps to maintain the plant structure, keeping cells turgid for an upright stance. Here are key functions:

  • Transport of nutrients and minerals from roots to shoots
  • Photosynthesis to create food for the plant
  • Maintaining cell pressure for the plant’s shape and strength
  • Cooling the plant through evaporation

Water’s Impact On Flower Health And Longevity

Flowers need water just like we do. A flower without enough water becomes dry and shriveled. The life span of flowers heavily depends on regular water intake. When flowers have adequate water, there are observable benefits:

With Enough Water Without Enough Water
Bright, full petals Dull, drooping petals
Strong stems Weak, bending stems
Longer bloom time Shorter bloom time

Lack of water leads to wilting, a process reducing the flower’s attractiveness and market value. Regular water supply extends a flower’s life and supports its health. Keep flowers well-watered to enjoy their vibrant colors and vitality for as long as possible.

Factors Affecting Flowers’ Water Needs

Understanding why some flowers can survive days without water while others wilt within hours is crucial for any florist or enthusiast. Several factors come into play. They range from intrinsic species traits to external environmental conditions. A closer look at these factors helps in creating the best care strategy for different types of flowers. Let’s explore these vital aspects that influence a flower’s thirst.

Species-specific Water Requirements

Every flower species has unique hydration needs. These requirements stem from their native habitats and evolutionary adaptations. For example, succulents store water in their leaves, allowing them to endure longer periods without moisture. In contrast, delicate blooms like hydrangeas demand consistent water supply to sustain their lush petals. Knowledge of specific water requirements ensures flowers maintain their vibrancy and longevity.

  • Roses: Require frequent watering to keep soil moist but not saturated.
  • Orchids: Need a well-drained environment, susceptible to overwatering.
  • Tulips: Prefer a moderate supply of water and can be damaged by excess.

Environmental Influences On Hydration

The environment plays a pivotal role in the hydration needs of flowers. Factors like temperature, humidity, and light levels impact water consumption. High temperatures can cause flowers to lose moisture quickly, leading to increased water demands. Relative humidity affects water loss through the process of transpiration, while light exposure can boost photosynthesis, leading to higher water usage.

  • Temperature: High temperatures accelerate water loss.
  • Humidity: Low humidity levels can dry out flowers faster.
  • Light: Direct sunlight can lead to more water being used in photosynthesis.
Condition Effect on Water Needs
High Temperature Increases water consumption
Low Humidity Raises transpiration rate
Intense Light Boosts photosynthesis and water use

By considering these species-specific traits and environmental factors, caretakers can tailor watering routines. This ensures the flowers remain hydrated and healthy for as long as possible.

Signs Of Dehydration In Flowers

Identifying the Signs of Dehydration in Flowers is crucial to save your blooms from wilting. Flowers can only last so long without water before they show distress.

Visual Cues Of Water Shortage

When a flower lacks water, its vibrant colors may start to fade. This is an immediate red flag. Look for these visual hints:

  • Browning edges on petals
  • Discoloration leading to a dull appearance
  • Wilting or drooping posture

Physical Effects On Petals And Leaves

The texture and structure of petals and leaves also change when dehydrated. Here’s what happens:

Part Effect of Water Shortage
Petals They become brittle and may curl inwards.
Leaves Edges curl and crispiness occurs.

Regular checks and timely watering can prevent these issues, keeping your flowers fresh and blooming.

Extending Floral Freshness Without Water

Extending Floral Freshness Without Water often seems like a daunting task. Flowers, much like us, yearn for hydration to maintain their beauty. Yet, certain circumstances demand innovative approaches to keep them lively without their aquatic companion. Knowing how to preserve your blossoms without water can extend their liveliness, making for enduring displays and lasting memories. Key is to employ practical short-term strategies and tap into innovative preservation methods.

Practical Tips For Short-term Maintenance

Keep your flowers looking fresh with these simple yet effective hacks:

  • Trim the stems diagonally before water deprivation.
  • Keep your bouquet in a cool, shaded area.
  • Wrap stems with a wet towel to offer temporary hydration.
  • Use a spray bottle to mist flower petals gently.
  • Refrigeration can slow down wilting; store blooms in a fridge.

Innovative Methods For Prolonged Preservation

Beyond temporary fixes, some methods promise extended freshness:

Method Description
Desiccants Dry out flowers with materials like silica gel for lasting preservation.
Antitranspirants Limits water loss by coating leaves and stems with protective sprays.
Glycerin Bath Replaces water in stems and leaves, leaving them soft and pliable.
Pressed Flowers Flowers are pressed to remove moisture and used for decor or bookmarks.

Embrace these methods and delight in the enduring charm of your floral arrangements!

Reviving Dehydrated Flowers

Flowers without water can seem beyond help, but don’t fret yet! Even droopy petals have a fighting chance with the right care. Reviving dehydrated flowers is possible and can transform your wilted blooms back to their vibrant state. Let’s explore how to give them new life.

Emergency Interventions For Wilted Blooms

Drooping flowers call for quick action. Follow these steps:

  • Trim the stems: Cut about an inch off the ends.
  • Cold water revival: Soak the stems in cold water for a few hours.
  • Remove lower leaves: Leaves in water can rot, affecting flower health.
  • Mist flowers: A light mist can refresh petals and leaves.

Assessing The Point Of No Return

Some signs indicate too late for recovery:

Sign Meaning
Brown or black petals Petals are dead and cannot be revived.
Slime on stems Bacterial growth has set in.
Foul smell Decay is likely too advanced.

Evaluate your flowers carefully against these signs. If none apply, your flowers may still come back to life!

Preventive Measures For Flower Hydration

Keeping flowers fresh and vibrant is an art. As living organisms, they require careful handling to maintain their hydration. Without water, flowers can wilt quickly. The key to prolonging a flower’s beauty is not just in providing water but doing so effectively. This segment unveils critical tips for ensuring your flowers stay hydrated and lively for as long as possible.

Routine Care Tips For Ongoing Vigor

Consistent attention lies at the heart of thriving flora. Follow these straightforward steps to keep your flowers flourishing:

  • Regularly check the water levels in the vase.
  • Use clean, room-temperature water to refill.
  • Clean your vase thoroughly before use.
  • Trim the stems diagonally every two days.
  • Remove any leaves below the water level to prevent rot.
  • Avoid placing flowers in direct sunlight or near

heat sources

    .
  • Use flower food to provide essential nutrients.

Floral Arrangement Recommendations To Retain Moisture

The right arrangement can make a significant difference in how long your flowers remain perky. Implement these tips to manual moisture retention:

    1. Opt for hydrating foam to keep stems saturated.
    2. Choose woody stems as they retain water better.
    3. Consider a shorter cut for your flowers;

shorter stems dry out slower.

  1. Mix flowers with similar water needs for uniform care.
  2. Seal the arrangement with a mist of water spray to refresh petals.

By integrating these routine care and floral arrangement methods, you can significantly extend the life of your flowers. Timely and thoughtful care keeps them hydrated and glowing with vibrancy.

(You can check this link for All Seasonal Flower Seeds: https://bonsainurserybd.com/all-season-flower-seeds/

Frequently Asked Questions Of How Long Can Flowers Go Without Water


How Long Can Flowers Sit Out Of Water?

Cut flowers can typically last without water for about an hour. Certain hardier varieties may extend to a few hours, but it’s best to minimize this time for freshness.


What Happens To The Flowers When They Are Left Without Water?

Flowers without water will wilt and eventually die. Lack of water causes them to lose rigidity, leading to drooping petals and leaves.


Can I Leave Flowers In My Car?

You can leave flowers in your car briefly, but avoid extreme temperatures and direct sunlight to prevent wilting. Ensure you park in a shaded area and keep the car cool if possible.


How Long Do Flowers Last?

The lifespan of flowers varies, with cut flowers typically lasting 7-12 days, while potted blooms can survive for several weeks or months with proper care. Always ensure they have fresh water and avoid direct sunlight for extended freshness.


Conclusion

Understanding the water needs of flowers is crucial for their longevity. Different species may survive varying durations deprived of hydration. Regular monitoring and appropriate care ensure optimal flower health and vibrancy. For devoted flower enthusiasts, knowing these limits helps maintain a beautiful display.

Always seek species-specific advice for the best results.

(To know more about this topic: https://www.thespruce.com/how-long-can-flowers-go-without-water-8420335)

What To Do With Dead Sunflower Heads

What To Do With Dead Sunflower Heads

Remove dead sunflower heads by cutting them off and harvesting the seeds if desired. Compost the remaining plant material to enrich garden soil.

Sunflowers, with their vibrant presence, are a staple of summer gardens, but as the season changes, these once bright and towering plants fade, leaving gardeners pondering on what to do next. Dead sunflower heads, heavy with seeds, bend towards the ground, signaling the end of their lifecycle, yet offering new beginnings in various forms.

What To Do With Dead Sunflower Heads

Harvesting the seeds can provide snacks for humans and birds, while composting the spent heads contributes to a nutrient-rich additive for future plantings. Embracing the cycle of growth, decline, and rejuvenation, gardeners can find purpose for every stage of their sunflower’s journey, ensuring nothing goes to waste and the garden thrives year after year.


Varieties Of Sunflowers And Lifespans

Sunflowers brighten gardens with their vibrant petals and towering presence. But what happens when they wilt? It’s important to understand the diverse types of sunflowers and their lifespans before deciding on the best use for those spent blooms. Each variety not only differs in color and size but also in how long they grace our gardens with their beauty.


Life Cycle Of A Sunflower

The journey of a sunflower from seed to bloom is fascinating. A sunflower typically goes through four main stages of growth: seedling, vegetative, budding, and flowering. After flowering, the head turns brown, indicating the end of its life cycle. Seeds mature within the heads and become the start of new life.


Types Of Sunflowers And Their Characteristics

Sunflowers come in a variety of types, each boasting unique features. Let’s explore some common varieties:

Type Description Lifespan
Helianthus annuus Also known as the common sunflower, notable for its large, yellow blooms. 80-120 days
Autumn Beauty Features a mix of warm colors, perfect for a fall aesthetic. 85-110 days
Mammoth Famous for its gigantic size, perfect for a show-stopping garden display. 90-100 days
Dwarf Sunspot Compact and ideal for smaller spaces with shorter growing periods. 65-75 days

Signs That Your Sunflower Has Reached Its End

Gardeners often find joy in the bright blooms of sunflowers. Yet, these bold flowers do not last forever. Knowing when a sunflower has passed its prime is key to managing your garden’s life cycle.

Visual Cues Of A Dying Sunflower

As the season changes, a sunflower’s life cycle nears its end.

  • Leaves turn brown and lose their vibrant green hue.
  • Petals wilt, dropping from the head to signal a closing chapter.
  • The once sturdy stem weakens and may begin to bend or break.
  • Seeds in the head mature and the back of the head turns yellow to brown.

These visual signs guide gardeners on the path to harvest or remove the spent plant.

How To Tell If The Sunflower Head Is Dead

To confirm a sunflower head’s death, a close inspection is necessary.

  • Tug gently on a few seeds. If they pop out easily, the head has died.
  • Examine the face of the sunflower. A lack of petals and a brittle, dry feel indicate demise.
  • Look for mold or decay, which flourish on deceased plant matter.
  • Seed-eating birds often move on, indicating the seeds are no longer viable.

Once these signs become clear, it’s time to consider the next steps for these sunflower heads.

The content does not provide explicit next steps as per the user requirements to avoid going beyond the scope of the requested section.

Harvesting Sunflower Seeds

As summer winds down, those towering beacons of vibrant color, sunflowers, begin to droop. It’s not the end, but a chance to harvest. Sunflower heads, heavy with seeds, offer a cornucopia of possibilities. Gardeners rejoice in harvesting sunflower seeds, either to replant, to feed birds, or to snack on. Understanding the proper techniques for collecting seeds and knowing how to store them will make the most of your sunflower bounty.

Proper Technique For Collecting Seeds

  • Wait until the back of the sunflower head turns brown.
  • Cut the head off along with a few inches of stem.
  • Rub your hand over the seeds to loosen them.
  • Shake out the seeds over a container to catch them.
  • Remove any remaining petals or debris.

Storage Tips For Sunflower Seeds

Step Tip
1 Ensure seeds are completely dry before storing.
2 Use airtight containers or sealable plastic bags.
3 Label with the date and type of sunflower seeds.
4 Store in a cool, dry place; a fridge is ideal.
5 Check periodically for signs of moisture or mold.

Creative Uses For Dead Sunflower Heads

Don’t toss out those dead sunflower heads just yet! They’re chock-full of potential for creativity and decoration. With their distinctive shapes and seeds, these remnants of summer can be transformed into beautiful works of art or charming home accents. Let’s dive into the world of crafting and decorating with these natural treasures.

Crafting With Sunflower Heads

Sunflower heads make for perfect crafting materials. Below are some creative ideas:

  • Bird Feeder: Remove the seeds and coat the head with peanut butter. Roll it in birdseed and hang it up.
  • Painting Canvas: Use the bumpy texture of the head for a unique painting surface.
  • Seed Mosaic: Create designs by gluing seeds onto cardstock or wood.

Sunflower Heads In Home Decor

Integrated into home decor, sunflower heads offer a rustic charm.

Decor Item Ideas
Wreaths: Attach to a wreath form for a seasonal door decoration.
Centerpieces: Combine with candles and pinecones on a tray.
Wall Art: Mount dried heads in shadow boxes or frames.

Turning Waste Into Garden Gold

Turning Waste into Garden Gold should not be an overlooked art. Those once vibrant sunflower heads, drooping with the passing of summer, can spark new life into your garden. The towering beauties of your garden, even in their fading form, have much to offer. Their cycle in your garden need not end with the close of the season. Learn to transform these natural treasures into valuable resources for next year’s growth.

Composting Sunflower Heads

Nutrient-rich compost is black gold for every garden, and sunflower heads are excellent additions to your compost pile. Follow these simple steps:

  • Chop them up – Smaller pieces break down quicker.
  • Balance – Mix with green and brown compost materials.
  • Turn the pile – This helps for even decomposition.

Be patient. Over time, the sunflower heads will decompose and enrich your compost with potassium and magnesium, essential for plant growth.

Using Sunflower Stalks For Support In Gardens

The sturdy stalks of sunflowers can serve a new purpose. Do not discard these natural poles. Here’s how to use them:

  1. Cut them down – Trim to desired lengths after the heads are removed.
  2. Position strategically – Place near plants that require support.
  3. Secure plants – Use garden ties to attach plants to the stalks.

These stalks not only add structural integrity to your garden but also contribute to its natural aesthetic. Their rough texture is also great for supporting climbing plants.

Supporting Wildlife With Sunflower Remnants

As sunflower blooms fade, life springs from their seeds and husks. Flower heads, though no longer vibrant, serve as resources. Dead sunflower heads provide food and shelter for various wildlife throughout the seasons. This support is crucial for ecosystem equilibrium. Artful reuse of sunflower remnants benefits your garden’s wildlife. Consider these humane, resourceful actions to keep nature thriving.

Feeding Birds With Sunflower Seeds

Sunflower seeds are nutritious treats for birds. When flowers wilt, these seeds become feasts. Strip seeds from their heads. Hang them in mesh bags or scatter them on a table. This attracts finches, cardinals, and more. Watch their merriment from your window.

Providing Shelter For Insects

Insects find solace in dry sunflower stalks and heads. Bees and other bugs nest in the hollow stems. Even birds repurpose them for building material. Leave a few heads and stalks in your garden. This simple act enriches local biodiversity.

Here’s how you can set up a sunflower insect hotel:

  1. Collect several dried stalks.
  2. Bundle them together.
  3. Tie the bundle securely.
  4. Position it horizontally off the ground.

Watch as these natural havens become buzzing with life!

(Check this out for more suggestions : https://www.growgardener.com/what-to-do-with-dead-sunflower-heads/

Frequently Asked Questions Of What To Do With Dead Sunflower Heads


Should You Cut Off Dead Sunflower Heads?


Yes, you should cut off dead sunflower heads to encourage new growth and maintain plant health, ideally after they fade or wilt.


What To Do With Sunflower After It Dies?


After a sunflower dies, cut the stem and remove any leaves. Hang the head upside down in a dry, ventilated space to extract seeds or leave it in the garden to feed birds. Compost the remaining plant parts to enrich the soil.


What Do I Do With Sunflower Heads?


Harvest sunflower heads after petals fall and hang them to dry. Collect seeds for snacking or planting. Compost remaining plant material to enrich your garden soil.


Do Sunflowers Grow Back After Cutting?


Sunflowers do not regrow after the main stem is cut. However, if smaller side shoots are left intact, they may produce additional blooms.


Conclusion

Repurposing dead sunflower heads enriches your garden and supports local wildlife. These leftovers transform into bird feed, contribute to compost, or become crafts. Embrace nature’s cycle by giving sunflower remnants a new lease on life. Let your creativity and sustainability go hand in hand for a greener tomorrow.

(To know more about Sunflower : https://bonsainurserybd.com/sunflower-splendor/

Best Bougainvillea for Bonsai

Best Bougainvillea for Bonsai: Vibrant Varieties Ranked

The best Bougainvillea for bonsai are the ‘Pixie’ and ‘Helen Johnson’ varieties. These compact, floriferous types adapt well to the bonsai form.

Bougainvillea plants bring a burst of vibrant colors to any bonsai collection with their striking flowers and thick, woody branches that lend themselves to artistic shaping. Ideal for bonsai due to their manageable size and response to pruning, the ‘Pixie’ and ‘Helen Johnson’ varieties stand out from the crowd.

Best Bougainvillea for Bonsai

Both are dwarf cultivars, which makes them particularly well-suited for the confined space of bonsai trays. They respond well to training, and their wood hardens off quickly, allowing them to retain their miniature tree form. Enthusiasts will appreciate the year-round blooming potential under the right conditions, making these Bougainvillea bonsai a joyful challenge to both novice and experienced practitioners. Commitment to regular pruning, sunlight exposure, and proper watering will yield stunning, miniature representations of these magnificent tropical plants.

Introduction To Bougainvillea As Bonsai

Bougainvillea plants transform into stunning bonsai with the right techniques. Their vibrant blooms and versatile branches make them a top choice for miniature tree enthusiasts. Embrace the charm of Bougainvillea as bonsai and discover a fascinating hobby.

The Appeal Of Bougainvillea In Bonsai Art

Bougainvillea bonsai trees are beloved for their colorful display and ease of shaping. These plants offer an array of hues, such as pink, purple, red, and orange. Their ability to bloom throughout the year under proper conditions keeps the admiration high among bonsai lovers.

  • Year-round blooms
  • Vibrant colors
  • Easy to train and prune

Characteristics Of Bougainvillea Suitable For Bonsai

Selecting the right Bougainvillea plant is vital for a thriving bonsai. Look for species with favorable traits.

Characteristic Importance
Compact Growth Suits small containers, enhances bonsai aesthetics
Hardy Nature Resilient to pruning, essential for bonsai shaping
Woody Stems Provides structural strength, necessary for training


Top Varieties Of Bougainvillea For Bonsai

Bonsai enthusiasts often seek out the most vibrant and adaptable plants. Bougainvillea is a top favorite for its stunning blooms and versatility. Various Bougainvillea species shine as bonsai. Let’s explore the best varieties, each with unique features to enhance your bonsai collection.

Bougainvillea ‘glabra’: The Classic Choice

Bougainvillea ‘Glabra is the traditional choice for bonsai. Its lush green foliage and plentiful purple flowers make it a popular pick. ‘Glabra’ is known for its fast growth and ease of training.

Bougainvillea ‘spectabilis’: The Showstopper

Bougainvillea ‘Spectabilis stands out with its large, colorful bracts. This variety can produce deep pink to purple flowers. It’s a vibrant addition that commands attention.

Bougainvillea ‘peruviana’: The Hardy One

‘Peruviana’ earns its place with remarkable toughness. It withstands less than ideal conditions, making it a great choice for new bonsai enthusiasts. This variety boasts orange-pink blooms that brighten any display.

Bougainvillea ‘sanderiana’: The Compact Wonder

For smaller spaces, ‘Sanderiana’ is ideal. This dwarf variety fits tight spots with ease. It presents lovely pink blossoms that enhance its miniaturized charm.

Bougainvillea ‘torch Glow’: The Unique Form

Bougainvillea ‘Torch Glow’ breaks the mold with its unusual growth habit. It forms upright spikes of brilliant color without the vine-like growth of other types. This makes it a standout feature in any bonsai collection.

Caring For Bougainvillea Bonsai

Bougainvillea bonsai trees are miniature marvels, adorned with vibrant blooms. A staple in many gardens, they can be a testament to your gardening prowess when trained as bonsais. Proper care is essential to keep these compact beauties thriving. Let’s delve into the ideal ways to nurture a bougainvillea bonsai.

Optimal Growing Conditions For Bonsai Health

Bougainvilleas flourish in well-lit environments. Direct sunlight powers their growth, essential for a healthy plant. Position your bonsai where it will receive at least five to six hours of sun daily.

A warm climate suits these plants best. They need temperatures between 60°F and 100°F (15°C and 38°C).
Ensure the plant is protected during cold snaps.

Well-draining soil prevents root rot. Use a mix designed for cacti or succulents for best results.

Watering Practices For Bougainvillea Bonsai

Watering needs precision. Over-watering leads to leaf drop; under-watering causes wilting. Check the topsoil; it should be moist. If dry, it’s time to water. During hot weather, water more frequently. In cooler seasons, cut back.

Training And Pruning Techniques

Shaping your bonsai is an art. Use wire to guide branches gently. Avoid deep cuts to prevent harming the plant. Prune after the blooming cycle. This encourages new growth and flower production. Trim regularly to maintain shape. Keep an eye out for unruly shoots.

Seasonal Care Adjustments

  • Spring: It’s growth time. Increase watering and start fertilizing.
  • Summer: Protect from extreme heat. Water consistently.
  • Fall: Begin to reduce watering. Prepare for dormancy.
  • Winter: Keep indoors if frosty. Water sparingly.

(To learn about Bougainvillea Fertilizer: https://bonsainurserybd.com/best-fertilizer-for-bougainvillea/

Showcasing Bougainvillea Bonsai

Imagine a miniature tropical paradise in your own living space. A Bougainvillea bonsai offers just that with its vibrant colors and graceful structure. This artform elevates the plant to a centerpiece worthy of admiration. To truly showcase a Bougainvillea bonsai, it is essential to display it in a way that highlights its natural beauty.

Displaying Your Bonsai For Maximum Impact

Location matters most in elevating the bonsai’s presence. Choose a spot with ample lighting that draws eyes directly to your Bougainvillea. A dedicated display table or hanging shelves create a stage for your bonsai. Ensure the backdrop is simple, letting the vibrant colors of Bougainvillea take center stage.

Pot Selection And Companion Planting

The right pot is crucial for visual harmony. Consider the color and size of your bonsai when selecting a pot. A complementary pot enhances the Bougainvillea’s bright hues. Companion planting can also advance your display. Small grasses or moss can add texture and depth. Use the rule of threes for the most natural look.

Incorporating Bougainvillea Bonsai In Your Garden

Integrating Bougainvillea bonsai into your garden can create a captivating view. Place them among larger plants as a surprising element. They can also serve as a standalone feature on a patio. For cohesion, match your bonsai’s style with your garden’s theme, whether it’s tropical, Zen, or modern.


Frequently Asked Questions On Best Bougainvillea For Bonsai

What Is The Best Dwarf Bougainvillea?

The best dwarf bougainvillea variety is ‘Bambino Baby Sophia’, known for its vibrant blooms and compact growth habit. Perfect for small gardens and containers, it thrives with minimal care.

How Long Do Bougainvillea Bonsai Live?

Bougainvillea bonsai can live for over 30 years with proper care and conditions. Regular pruning and maintenance are key to longevity.

How Big Do Bougainvillea Bonsai Plants Get?

Bougainvillea bonsai plants typically grow between 1 to 2 feet tall. Pruning and pot size control their growth.

What Temperature Is Good For Bougainvillea Bonsai?

Bougainvillea bonsai thrives at temperatures between 60°F and 100°F. Protect these plants from frost to maintain health and vibrant blooms.

Conclusion

Selecting the perfect bougainvillea for your bonsai project brings both charm and challenge to your garden. With vibrant hues and versatile shapes, bougainvillea bonsai can transform any space. Embrace the artistry of bonsai and watch these radiant plants flourish. Your patience will reward you with a breathtaking display.

Happy planting!

Shopping Basket