Bonsai Care Summer Guide

Bonsai Care Summer Guide: Thriving with the Heat

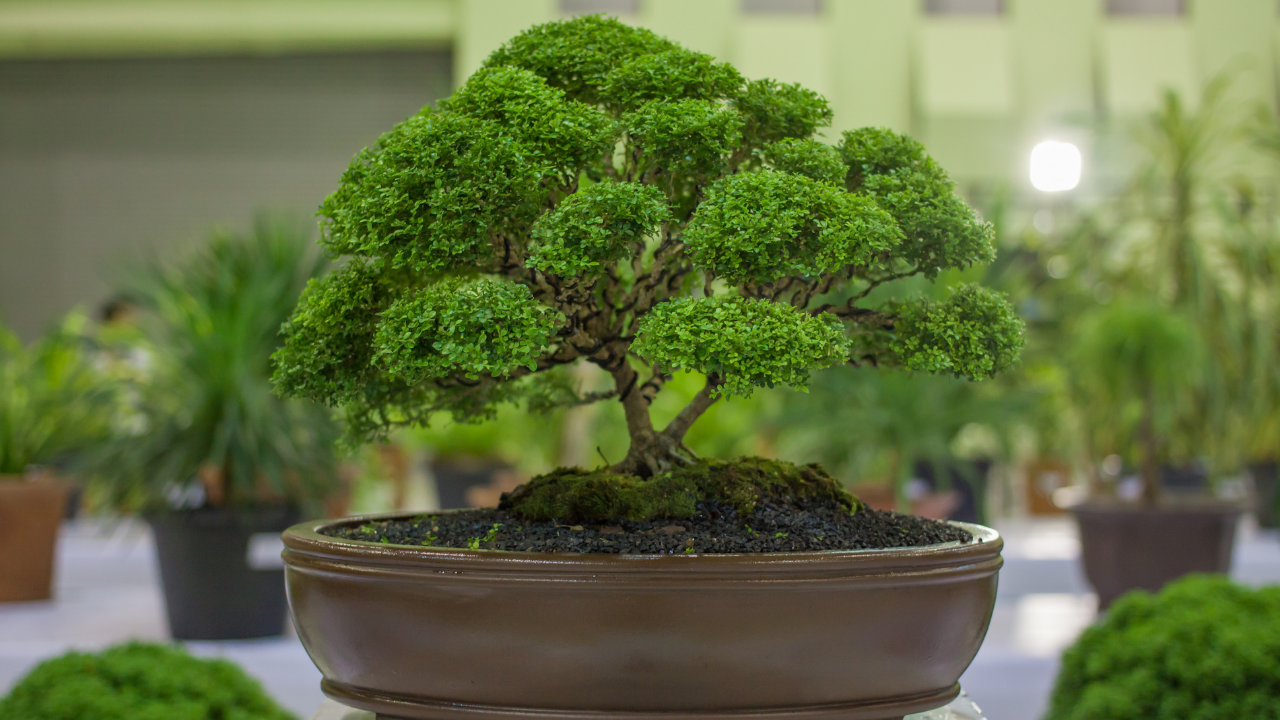
During summer, bonsai trees require diligent watering and protection from intense heat. Ensure consistent soil moisture and provide shade to prevent leaf scorch.

Bonsai enthusiasts know that summer care is pivotal for the health and aesthetics of these miniature trees. Warm temperatures and longer days can either bolster their growth or pose significant threats if not managed correctly. The task is to maintain a balance between sunlight exposure, watering frequency, and nutrient delivery.

Bonsai Care Summer Guide: A bonsai’s need for water increases with the temperature, yet overwatering remains a common pitfall. Pruning is essential to shape and prevent overgrowth, while fertilization supports their heightened summertime vitality. Vigilance is key—inspect your trees regularly for signs of stress or pest infestation. By tailoring care strategies to the unique demands of the summer season, bonsai owners can assist their trees in thriving despite the challenges of the hotter months.

Signs Of Summer Stress In Bonsai

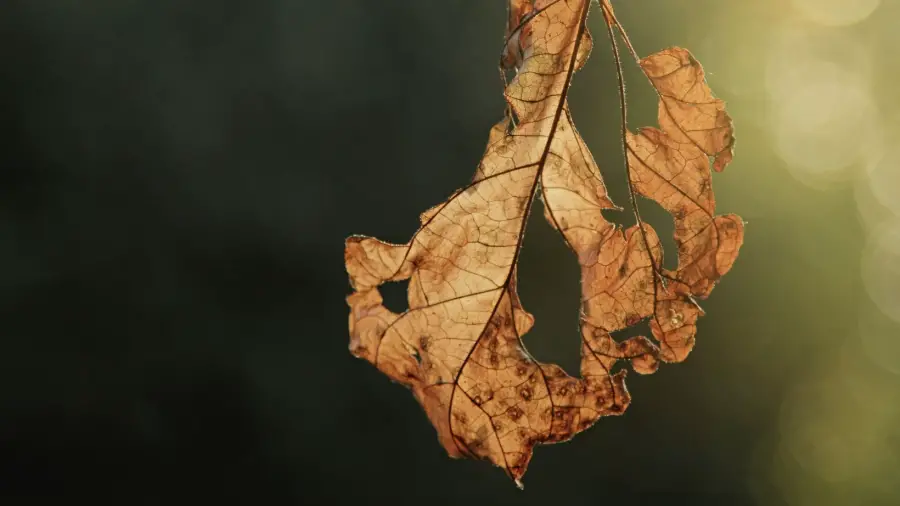
Bonsai trees feel summer heat just like we do. Leaves getting brown at the edges might mean leaf burn. A quick check will show if leaves look crispy or faded.

If the soil feels dry and crumbly, your bonsai needs water. Press your finger into the soil to a knuckle’s depth. If dry, it’s time to water the tree. Soil should stay moist, not wet.

Does the pot feel hot to touch? The pot might overheat on sunny days. Try to shield the pot from direct sunlight. This helps to keep roots cool. Roots love it cooler than hot.

Bonsai Care Summer Guide: Thriving with the Heat

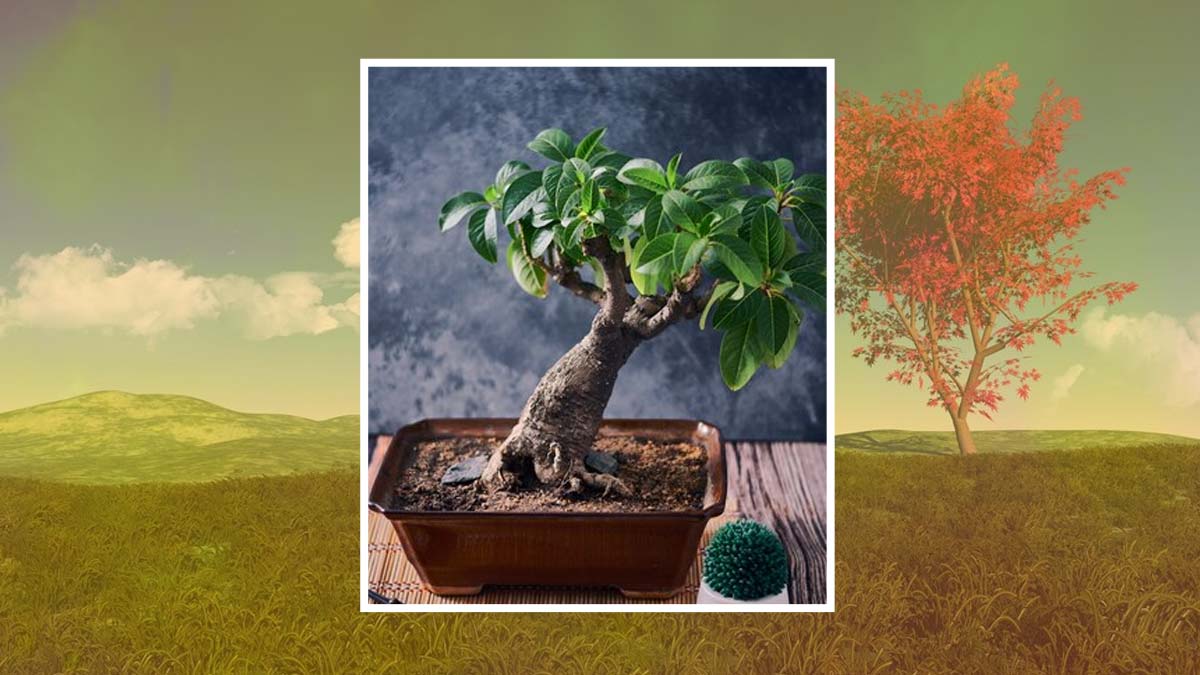
Credit: www.herzindagi.com

Watering Wisdom: Hydration For Bonsai Health

Proper hydration is vital for bonsai health in summer. Water your bonsai when the topsoil feels dry. A good technique is to touch the soil every morning.

The best time to water is early morning or late evening. Sun is less intense then. Your bonsai can absorb moisture without quick evaporation.

Use the double watering method for thorough hydration. First, water to cover the soil’s surface. Wait for absorption. Then, water again until excess drains out.

Sheltering Bonsai From The Scorching Sun

Bonsai plants need special care in summer. The sun can be too strong, and can harm them. It is important to find the best spot for your Bonsai.

Using shades or screens can protect them. A light cloth anchor can save your plant. It acts like a sunglasses for trees.

Moving your Bonsai can keep it happy. Small trees like cooler places during hot days. You will sometimes need to change their place twice a day.

Positioning Needs to be changed with sun movement
Shade Use covers or screens to protect
Benefits Healthier growth, avoids leaf burn


Bonsai Care Summer Guide: Thriving with the Heat

Credit: www.amazon.com

Pruning Practices For The Peak Heat

Trimming elongated shoots on your bonsai ensures a balanced shape. Use sharp scissors to make clean cuts. Aim to snip just above a leaf node for the best growth. This practice keeps your bonsai tidy during the hot months.

Correct pruning techniques involve precision. Timing is key; prune in the early morning or evening. This avoids direct sun on fresh cuts. Protect the tree by cutting only one-third of the foliage at any time.

Bonsai trees in summer may face wire constraints. Check wires regularly to prevent them from cutting into the bark as branches grow. If the wire leaves an impression, it’s time to remove it gently without harming the branches.

Soil And Substrate: Adjustments For Summer

Choosing the right substrate is vital for bonsai health. A well-draining mix helps avoid root rot. Particle size should be small to retain moisture but not too tight. Akadama, pumice, and lava rock are popular choices. They provide a balance between aeration and moisture retention.

Mulching plays a key role in water conservation. A layer of organic material atop the substrate can greatly reduce moisture loss. Organic mulch also adds nutrients as it breaks down. This practice keeps roots cool and moist during hot summer days.

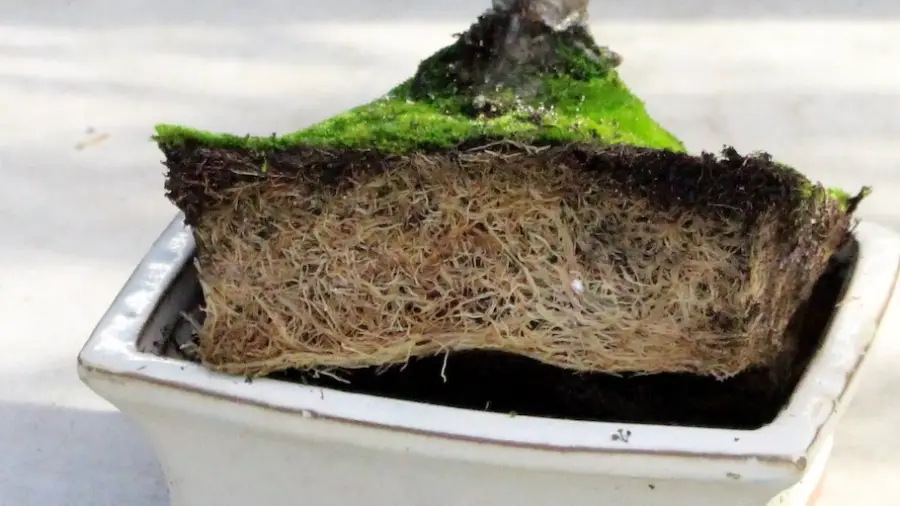
Repotting considerations should not be ignored. High temperatures demand cautious repotting. Aim to repot before summer or wait until cooler months. This reduces stress on the bonsai. If repotting is necessary, ensure quick root recovery by providing shade and adequate water.

Bonsai Care Summer Guide: Thriving with the Heat

Credit: mossballpets.com

Fertilization Finesse During Hot Months

Choosing the right fertilizer is crucial for summer bonsai care. Go for products with a balanced N-P-K ratio, which stands for nitrogen, phosphorus, and potassium. Organic options, like fish emulsion or seaweed extract, provide gentle nourishment for your bonsai.

Fertilizer application should match your bonsai’s growth cycle. During summer, a consistent bi-weekly schedule can promote health. Yet, some species may need a modified approach. Always water your tree before feeding it to protect the roots.

To prevent damage from over-fertilization, observe your bonsai’s response. Signs of excess include burnt leaf edges or stunted growth. Reduce the fertilizer frequency or strength if you notice these symptoms. Remember, less can be more when it comes to plant food in the heat.

Tackling Extreme Heat: Innovative Solutions

Bonsai trees need special care during hot months. Refrigeration techniques help cool bonsai in extreme heat. Put the tree in a fridge for short periods. This avoids sun damage.

To increase humidity, mist the leaves. Keep the pot in a tray of water filled with pebbles. This helps maintain moisture without overwatering the roots.

Reduce pot temperature by shading the pot. Place it on cool surfaces, like grass or soil. Use materials such as a reflective foil to shield the pot from direct sunlight.

Myths And Misconceptions: Summer Bonsai Care

Bonsai trees need careful watering during hot months, not just more. Bonsai roots can rot if overwatered. Underwatering stresses them too. Soil type and pot size dictate the watering schedule.

Bonsai leaves get sunburnt if exposed to strong midday sun without acclimation. Use a shade cloth to protect them. Not all species are sun-sensitive, know your tree.

  • Over-fertilizing can burn the roots.
  • Ignoring pests cause irreparable harm.
  • Improper pruning can stunt growth.

Special Attention For Specific Species

Maples thrive with cooler roots during hot months. Place them in semi-shade to prevent leaf scorch. This helps keep leaves vibrant and healthy.

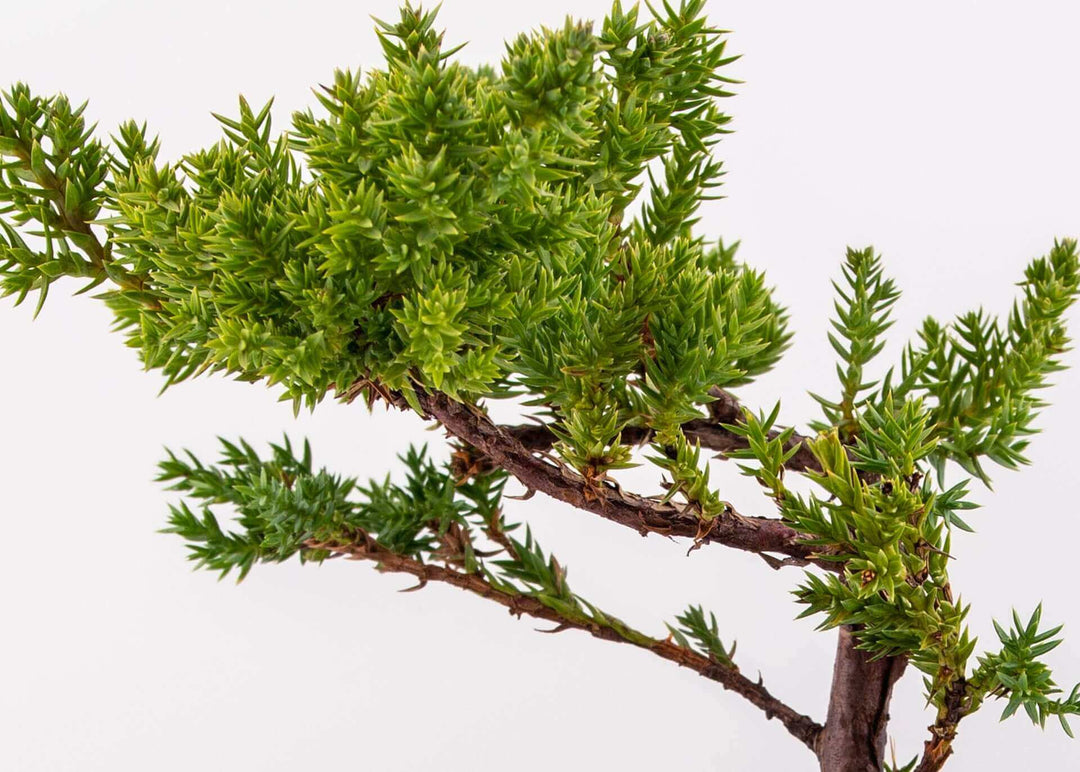
Junipers need a balance of light and water. Ensure they get enough water to combat summer heat. Yet, do not overwater as it may harm roots. Ensure proper drainage is in place.

Tropical Bonsai, like Ficus, need consistent warmth. Keep them hydrated and in high humidity. A morning mist provides moisture without over-soaking the soil.

Preparing Bonsai For Post-summer Recovery

After the summer heat, your Bonsai trees might need some help. First, start by checking for scorched leaves and signs of dehydration. These are common issues following strong sunlight and high temperatures. Leaves could be brown and crispy.

Bonsais may also show signs of overwatering caused by attempting to combat the heat. Look for yellow leaves or a mushy base. Check the soil; it should be moist, not soggy.

Once you’ve assessed the damage, it’s time for rejuvenation. Trim away the damaged foliage carefully to allow for new growth. Consider a nutrient-rich fertilizer to restore vigor. Be gentle, your Bonsai needs to recover slowly.

For the autumn season, start planning the transition. Gradually reduce watering as the weather cools. Begin preparing to bring any sensitive varieties indoors. Remember, each Bonsai has unique needs, so tailor your care accordingly.

Frequently Asked Questions On Bonsai Care Summer Guide

How Do You Take Care Of A Bonsai Tree In The Summer?

Ensure your bonsai receives consistent watering during summer. Protect it from intense afternoon sunlight by providing shade. Regularly check for pests and apply suitable treatments if needed. Maintain appropriate humidity levels around the bonsai. Prune as necessary to manage growth and maintain shape.

How Often Should I Water Bonsai In Summer?

Water your bonsai once daily during summer, adjusting for high temperatures and humidity. Check soil moisture; water more if needed.

How Hot Is Too Hot For Bonsai?

Temperatures above 95°F (35°C) can be too hot for bonsai trees, risking heat stress and damage.

Can You Leave Bonsai Outside In Summer?

Yes, you can leave bonsai outside in summer, but ensure they’re protected from extreme heat and receive appropriate watering.

Conclusion

As the sun shines bright on your bonsai, remember to stay vigilant. Summer brings unique challenges, but with proper care, your miniature tree will thrive. Regular watering, shade from harsh rays, and attentive pruning are key. Embrace these tips for vibrant foliage and robust health.

Keep nurturing your bonsai‘s beauty through the summer and beyond. Enjoy the serene presence it adds to your space, and let its enduring vitality be a testament to your dedicated care.

Beginner Bonsai Care Tips

Beginner Bonsai Care Tips: Cultivate Your Miniature Oasis!

Beginner bonsai care requires consistent watering and proper lighting. Choose a suitable soil mix and fertilize seasonally.

Cultivating a bonsai is an art form that blends horticulture with aesthetic design. Embarking on the bonsai journey can bring immense satisfaction and a unique sense of calm. As a beginner, grasping the essentials of bonsai care paves the way for a thriving miniature tree.

Whether you’re nurturing an indoor tropical species or an outdoor traditional variety, understanding your plant’s specific needs is crucial. Regular watering keeps the shallow root system healthy, while positioning for adequate sunlight supports growth. Selecting the right soil composition ensures proper drainage and aeration, which are vital for root development. Seasonal fertilization helps to replenish nutrients, promoting vigor and beauty. With dedication and attentiveness, bonsai care becomes a rewarding hobby that enhances any living space or garden.

Beginner Bonsai Care Tips: Cultivate Your Miniature Oasis!

Credit: www.amazon.com

The Art Of Bonsai

Bonsai care begins with a deep understanding of its origins. Tracing back centuries, Bonsai is not merely about charming miniature trees. It’s an art form that showcases nature’s grandeur on a diminutive scale. Representing patience and dedication, these pint-sized wonders echo the beauty of their full-sized counterparts.

Essentially, Bonsai is a creative expression that blends cultivation techniques with the plant’s natural growth. Its roots are entrenched in ancient traditions that value the balance of form, harmony, and proportion. Bonsai demand consistent attention and careful nurturing, principles born from the mindfulness of their cultivators.

Choosing Your First Bonsai

Embarking on bonsai care rewards with patience and creativity. Bonsai trees require specific attention but are delightful hobbies for beginners. Juniper, Ficus, and Chinese Elm stand out as favorite choices. These species are resilient, low-maintenance, and adaptable, perfect for novices. Seek trees with a strong trunk, healthy leaves, and symmetrical balance. The right bonsai brings nature’s peace into your home. Analyze your space to determine size and style. Ensure ample light and air flow for your tree’s health. Remember, your space influences your tree’s growth.

Essential Tools For Bonsai Care

Maintaining healthy bonsai trees requires specific tools. Proper trimming and shaping are vital. Beginners need a concave cutter for precise pruning. This cutter helps heal tree wounds faster. A sharp pair of scissors is mandatory. Scissors are perfect for triming small leaves and branches. Equally important are wire cutters. These cutters manage wiring practices, guiding your bonsai’s shape.

Watering and feeding your bonsai is a delicate balance. Use a small watering can with a fine nozzle. It directs water accurately without soil disruption. Opt for bonsai-specific fertilizer to ensure proper nutrition. Remember, trees have unique feeding schedules.

Beginner Bonsai Care Tips: Cultivate Your Miniature Oasis!

Credit: shelflifebooksrva.com

Finding The Ideal Location

Bonsai trees thrive under the right light and climate conditions. Direct sunlight is key for optimal growth. Aim for a spot that receives at least six hours of sunlight daily. Yet, harsh midday sun can harm delicate leaves, so consider mild morning light instead.

Different bonsai varieties might need specific light conditions. Some prefer bright indoors spots; others love the outdoors. Ensure your bonsai’s location aligns with its species requirements. The right balance promotes healthy foliage and strong growth.

Temperature and humidity also greatly impact bonsais. These mini trees prefer a consistent temperature and moderate humidity. Sudden changes can stress the tree. Use a humidity tray and occasionally mist your bonsai to maintain moisture. During winter, protect the bonsai from cold drafts and heaters.

Watering Your Bonsai Correctly

Understanding the proper way to water a bonsai is key to its survival and health. Each bonsai species needs different amounts of water. It depends on various factors including tree size, pot size, and climate.

Determining the right time to water is crucial; feel the soil about 1 cm deep. If it feels dry, it’s time to water. Employ a gentle stream from a watering can. Ensure the soil becomes moist but not soggy.

Yellow leaves and squishy stems signal overwatering. On the flip side, dry and brittle leaves suggest underwatering. Adjust your watering schedule as needed. Keep an eye on the weather and season; water less in cold months.

Pruning Techniques

Maintaining the shape and health of a bonsai is crucial. Regular pruning is necessary for a tidy appearance. Spring and summer are ideal for structural pruning. This is when trees grow most. Trim overgrown branches to maintain shape. Use clean, sharp scissors for cutting. Cutting encourages new growth. Fall and winter pruning focuses on removing dead foliage. It prepares trees for dormancy. It is less about shaping.

Seasonal routines differ for various bonsai species. Always research your specific bonsai type. Some species require minimal pruning. Others need frequent cuts to stay small. Health checks during pruning are vital. Look for pests and diseases. Healthy trees cope better with pruning. Unhealthy ones may suffer.

Soil And Repotting

Successful bonsai care begins with the right soil mix. Use a mix that drains well but retains moisture. Aim for a balance of akadama, pumice, and lava rock. The exact blend depends on your bonsai species and climate.

Step Action
1 Remove your bonsai from its pot gently.
2 Trim the roots carefully, not too much.
3 Clean the old soil from roots using chopsticks.
4 Prepare the new soil mix as mentioned.
5 Place a screen over the pot’s drainage holes.
6 Add a layer of new soil in the pot.
7 Position your bonsai and add soil around.
8 Water thoroughly after repotting.

Repotting must be done during the right season, typically in spring. It gives your bonsai a fresh start. Younger trees need repotting more often than older ones. Always be gentle to avoid damaging the delicate roots.

Common Pests And Diseases

Bonsai trees, like all plants, can face pests and diseases. It’s vital to spot distress early. Look for yellowing leaves, stunted growth, or unusual spots. These can be signs of trouble. Regularly check for bugs, like aphids or spider mites.

Preventing issues is better than fixing them. Ensure proper sunlight, water, and nutrients for your bonsai. Cleanliness helps; remove fallen leaves quickly. A well-ventilated area prevents many problems. Neem oil can deter pests. If you find a problem, isolate the affected bonsai first.

Treating pests and diseases requires careful steps. Use organic pesticides when possible. Read instructions well before applying. For fungal issues, consider a fungicide. Sometimes, a professional opinion is needed. Remember, patience and consistent care can save a bonsai in distress.

Joining The Bonsai Community

For those eager to dive into Bonsai, joining a local club is a great start. Members of these clubs often share a wealth of knowledge and experience. Engaging with a community provides unique learning opportunities.

Participation in online forums can also offer valuable insights and support. These platforms allow worldwide interactions with other enthusiasts.

Events for Bonsai Enthusiasts
Workshops Hands-on guidance from experts.
Exhibitions A chance to see diverse Bonsai styles.
Beginner Bonsai Care Tips: Cultivate Your Miniature Oasis!

Credit: homegrown-garden.com

The Zen Of Bonsai Maintenance

Bonsai maintenance merges art with the rhythm of nature. Each tree tells a unique story through its miniature stature. Attending to a bonsai requires patience and a gentle touch. Watering, trimming, and soil care form the crux of daily attention.

Observing your bonsai daily ensures its health and beauty. Watch for leaf changes or signs of distress. This practice not only nurtures the tree but also instills a sense of tranquility in the caretaker. The act of caring for bonsai allows a serene bond with nature to flourish.

Frequently Asked Questions Of Beginner Bonsai Care Tips

How Do You Take Care Of A Bonsai Tree For Beginners?

Water your bonsai regularly, allowing soil to dry slightly between watering. Place in ample indirect sunlight. Use bonsai-specific fertilizer during growing seasons. Prune and shape to maintain size and aesthetics. Protect from extreme temperatures for optimal health.

What To Do When You First Get A Bonsai?

Upon receiving your bonsai, place it in a suitable location with adequate sunlight. Water it thoroughly, ensuring proper soil moisture. Familiarize yourself with its specific care needs, including watering frequency, preferred lighting, and fertilization schedule. Regularly observe for changes in foliage and soil dryness.

What Is A Beginner Friendly Bonsai Tree?

A beginner-friendly bonsai tree is the Ficus. Its resilience and ease of care make it ideal for newcomers to bonsai cultivation.

What Is The Easiest To Maintain Bonsai?

The Ficus bonsai is the easiest to maintain due to its resilience and adaptability to indoor environments, requiring minimal care.

Conclusion

Embarking on your bonsai journey can be joyful and fulfilling. Remember to start with the basics: watering, positioning, and gentle pruning. Keep patience as your silent companion, and watch your miniature tree thrive. As your skills grow, so will your bonsai, shaping a unique story told through its flourishing branches.

Let’s nurture nature together, step by step.

Bonsai Tree Styling Techniques

Bonsai Tree Styling Techniques: Sculpt with Mastery

Bonsai tree styling techniques shape trees into miniature artistic forms. Common methods include pruning, wiring, and grafting.

Bonsai, the ancient Japanese art form of miniature tree cultivation, integrates nature and creativity into a harmonious display. By understanding and applying key styling techniques, enthusiasts can transform ordinary trees into extraordinary bonsai specimens. Proper styling not only enhances the visual appeal of these living sculptures but also ensures their health and longevity.

From the initial choice of tree species to the meticulous care in shaping, every step in the bonsai styling process is deliberate and holds significance. This introduction to bonsai styling techniques prepares gardeners and hobbyists to embark on the rewarding journey of bonsai artistry, creating serene and elegant representations of the natural world in miniature.

The Essence Of Bonsai

The art of Bonsai has deep roots in tradition, tracing back centuries. It is a way to create natural beauty in miniature. Bonsai trees embody harmony and patience, shaped carefully over time. Enthusiasts see bonsai as more than plants; they are living sculptures. Each tree tells a unique story through its form, reflecting the balance of nature. Skilled artists use various styling techniques to guide these stories. This creates stunning visual poetry. The tree’s size and shape evolve with the artist’s vision, showcasing the essence of Bonsai. This ancient art captures nature’s essence, bringing its tranquility into our homes.

Selecting Your Bonsai Subject

Selecting the right species for your bonsai is crucial. Consider growth rate, leaf size, and hardiness before choosing. Some species adapt well to bonsai techniques, while others do not. Maples, pines, and junipers often make excellent subjects due to their flexibility and resilience.

Before starting, inspect the plant’s structure. Look for a strong trunk and well-positioned branches. Root health is equally important for long-term success. Imagine the potential of your bonsai as you examine each tree. This foresight can guide your styling decisions in the years to come.

Basic Styling Types

Bonsai tree styling is an art that transforms trees into miniature landscapes. The Formal Upright Style, known as Chokkan, features trees with straight trunks. These trunks are thicker at the bottom and taper towards the top. Main branches spread out evenly, starting one third up the trunk.

The Informal Upright Style, or Moyogi, is similar but with curved trunks. Trees of this style resemble mature, yet smaller, versions of full-sized trees. This style is popular among beginners due to its natural look and simpler approach.

Slanting Style, or Shakan, features trees leaning to one side. These trees have a solid root base on the side opposite the slant, offering balance. Slanted trunks convey motion and can suggest growth in a windy environment.

Bonsai Tree Styling Techniques: Sculpt with Mastery

Credit: www.newyorker.com

Tools Of The Trade

Concave Cutters are essential for precise pruning. They create smooth cuts that heal quickly. Using these, bonsai artists can remove branches without leaving stubs. This helps maintain the tree’s natural look.

Bonsai Wire and Pliers help in shaping branches. The wire wraps around branches to guide their growth. Pliers ensure firm grips for safe wiring. Correct usage prevents bark damage and ensures desired shapes.

Root Rakes and Hooks untangle roots without harm. They prepare roots for pruning and repotting. Rakes loosen soil, letting air and water reach roots. Hooks are great for removing excess soil. They keep the root system healthy for a sturdy bonsai.

Wiring Techniques

Applying bonsai wire is a delicate process. Proper techniques ensure the tree’s growth and shape. Thicker wire controls main branches. Use thinner wire for smaller branches. Start from the trunk, moving outwards to the tips.

Timing is critical for wiring bonsai trees. Spring is often best, as trees are growing. This allows for adjustments as the tree develops. It’s essential to monitor the tree. This prevents cutting into the bark.

Wire removal requires care. If the wire is tight, cut it off. Never unwind the wire. This can damage the branches. Inspect regularly, as the growing season can speed up the process. Always use bonsai wire cutters for this task.

Pruning For Perfection

Pruning for Perfection shapes and maintains Bonsai trees. Structural Pruning involves cutting branches.

This creates a tree’s basic shape. It is often done in winter. Maintenance Pruning keeps this shape.

It occurs more often to manage new growth. Defoliation is used on deciduous trees.

It reduces leaf size. This helps make the tree look smaller. This technique requires timing and care.

Achieving Balance And Proportion

Creating harmony in Bonsai trees involves careful branch positioning. The goal is visual balance, which you achieve by arranging branches at various heights and directions. Lower branches should extend out wider to give a stable look. Upper branches need to be shorter and point upwards for a natural appearance.

The tree trunk tapering is also crucial for Bonsai aesthetics. A strong thick base that narrows to the apex of the tree mimics mature trees. This technique involves selective pruning and wiring to guide growth. Over time, tapering gives the tree an illusion of age and strength.

Advanced Styles And Techniques

Cascade and semi-cascade bonsai styles mimic nature’s gravity pull on trees. Trees grow downwards, like waterfalls. Your bonsai can mimic this too.

With Literati style, imagine trees battling for light. They twist, turn, and reach high. This style shows unseen wind and struggle. It’s about survival beauty.

Group Planting creates a mini-forest. You place multiple trees together. They should vary in size and form a natural scene. Picture a forest walk in a pot.

Seasonal Care For Continual Aesthetics

Seasonal care keeps your Bonsai trees thriving. Each season demands specific attention. Repotting is essential for Bonsai health and should generally occur during spring. Choose the right soil mixture and a pot that complements your tree’s size.

Winter brings cold threats to Bonsais. Shield trees from frost by moving indoors or using protective covers. Ensure adequate light exposure and avoid over-watering during these dormant months.

For Summer maintenance, a consistent watering routine is key. The sun and heat increase the need for moisture. Yet, don’t drown the roots; allow the soil to dry slightly between waterings. Shield from extreme heat to prevent leaf scorching.

Bonsai Tree Styling Techniques: Sculpt with Mastery

Credit: www.1stdibs.com

Overcoming Common Styling Challenges

Handling pests and diseases in bonsai is crucial. Inspect your bonsai regularly for signs of trouble. Yellowing leaves or small holes indicate pests. Spray with insecticidal soap for minor infestations. For serious problems, consult a bonsai specialist for the best course of action.

To repair damaged trees, act swiftly. If a branch breaks, carefully realign it using raffia and wire. Allow time for recovery before any further styling. Use cut paste on larger wounds to promote healthy healing.

Styling ageing bonsai requires a delicate touch. Prune with purpose, ensuring not to over trim. Respect the tree’s natural form while guiding its shape. This approach will add elegance and character to your aged bonsai.

Bonsai Inspiration And Creativity

Bonsai trees carry rich beauty and express clear artistry. Real inspiration flows from examining masterpieces by bonsai artists. Observe their works to unlock styling secrets and foster personal growth. Creativity blooms through interaction and learning from accomplished masters.

Experimentation plays a key role in the art of bonsai. Trying new styles brings surprises and innovation. Don’t fear making mistakes, as they lead to unique discoveries. Every twist and trim can reveal new forms, enhancing a tree’s essence.

Engaging with bonsai communities offers immense benefits. They provide a platform for sharing experiences and receiving feedback. Such interaction promotes learning and helps refine bonsai techniques. Working alongside like-minded enthusiasts empowers creativity. It’s about the joint journey in bonsai artistry.

Fostering Connections

Bonsai tree styling is a revered art form, merging horticulture with creative expression. Participation in bonsai exhibitions serves as a pivotal platform for enthusiasts to showcase their mastery and learn from peers. These events often feature a range of exquisitely styled bonsai trees, providing inspiration for both novices and experts alike.

Engaging in workshops and classes can significantly enhance one’s bonsai styling skills. With hands-on guidance from experienced instructors, attendees gain valuable insights into pruning, wiring, and shaping techniques. Whether a beginner or an adept, classes cater to all levels, helping individuals foster deeper connections with the art of bonsai.

Bonsai Tree Styling Techniques: Sculpt with Mastery

Credit: www.amazon.com

Frequently Asked Questions For Bonsai Tree Styling Techniques

How Do I Shape My Bonsai Tree?

To shape a bonsai tree, select a style and prune branches accordingly. Use wiring techniques to position branches and trunks. Trim leaves to reduce leaf size and encourage growth. Monitor tree health and adjust care as needed. Regular maintenance shapes and maintains the desired form.

When Should I Start Styling My Bonsai Tree?

Begin styling your bonsai tree after it has established strong roots, typically 2-5 years after planting. Tailor pruning and wiring techniques to your tree’s growth pattern and species-specific needs.

What Are The Techniques Of Bonsai Tree?

Bonsai tree techniques include selective pruning, wiring branches for shape, repotting for health, and using proper soil and fertilization. Regular watering and sunlight exposure are essential for growth.

What Is The Easiest Bonsai Style?

The easiest bonsai style is the “formal upright” (Chokkan). This style features a straight, vertical trunk and is ideal for beginners.

Conclusion

Crafting a unique bonsai masterpiece takes patience and practice. With the styling techniques shared, you’re equipped to shape your bonsai’s journey. Embrace each step’s artistry and watch your miniature tree evolve. Cultivate your skills, and let creativity flourish. Start styling your bonsai today — the possibilities are endless.

Organic Gardening Techniques

Organic Gardening Techniques: Secrets to Eco-Friendly Growth

Organic gardening employs natural processes to promote plant health and sustainability. It avoids synthetic chemicals, prioritizing eco-friendly practices.

Embracing organic gardening techniques benefits the environment, your health, and the local ecosystem. Key to its success are soil enrichment practices, such as composting and using natural fertilizers, which nourish plants without harmful residues. Crop rotation and the use of heirloom seeds also play crucial roles in maintaining biodiversity and soil health.

Integrated pest management using beneficial insects and companion planting helps reduce disease and pest issues naturally. By nurturing a diverse garden ecosystem, organic gardening aims to create a balance that reduces the need for interventions, fostering a more resilient and productive garden. These mindful methods of cultivation work in harmony with nature, boosting plant growth while conserving resources and supporting pollinators and wildlife.

Organic Gardening Techniques: Secrets to Eco-Friendly Growth

Credit: www.amazon.com

The Allure Of Organic Gardening

The allure of organic gardening reaches far and wide. It is a practice beloved by hobbyists and farmers alike. This trend is growing rapidly. Everyone wants fresher produce and a healthier lifestyle.

Organic gardening promises benefits for both our health and the environment. It gives us chemical-free fruits and vegetables. It also helps protect our earth.

  • Less soil pollution: No harmful pesticides means cleaner earth.
  • Water conservation: Organic gardens often use less water.
  • Biodiversity boosts: These gardens are homes to many creatures.
  • Reduced carbon footprint: No chemicals means less energy used.

Starting Your Organic Oasis

Finding the perfect spot for your organic garden matters. Sunlight plays a big part. Plants love six hours of daily sun. Water sources nearby make watering easy. Quiet areas with less wind protect your plants. Look for natural shelter like trees or fences.

Healthy soil means healthy plants. Start by testing the soil nutrients. Compost enriches the soil naturally. It adds vital nutrients back. Avoid chemicals to keep it natural. Work compost into the soil well. This helps plants to grow strong.

Plant Selection And Symbiotic Planting

Choosing the right plants is vital for an organic garden. Look for species that are well-suited to your local climate and soil conditions. Select plants that have natural resistance to pests and diseases, reducing the need for chemical interventions. Grouping compatible varieties together, known as companion planting, can yield tremendous benefits.

Companion Plant Benefits
Tomatoes Repels pests when planted with basil
Carrots Improves growth when planted near onions
Beans Fixes nitrogen in soil, helping corn

By observing these strategies, you nurture a sustainable ecosystem in your garden. This approach encourages healthy plant growth and a bountiful yield without relying on synthetic aids.

Natural Pest Control Methods

Organic gardening thrives with nature’s own pest control – beneficial insects. These tiny helpers keep harmful bugs in check. To attract beneficial insects, consider planting flower varieties like marigolds and sunflowers. Introducing nativo plants can also bring predatory species to your garden.

For an environment-friendly solution, organic pesticides can be made at home. Effective recipes include a garlic spray or a neem oil mixture. Each pesticide serves different needs. The garlic spray works well against soft-bodied pests. On the other hand, neem oil can handle a broader range of insects.

Application is key – always spray in the evening or early morning to avoid harming beneficial insects. Always follow the recommended concentrations to protect your plants and soil health.

Organic Fertilizers And Soil Enrichment

Organic gardens thrive with rich, nutrient-dense soil. A key method to achieve this is through composting. Simple kitchen scraps such as fruit peels, coffee grounds, and eggshells become valuable compost material. This process turns waste into gold for your garden.

Homemade natural fertilizers are cost-effective and eco-friendly. Eggshell tea, for instance, provides calcium to plants. Banana peels are great for a potassium boost. Meanwhile, fish tank water can be a nourishing treat for your plants without any additional costs.

Fertilizer Type Benefits to Plants
Eggshell Tea Calcium enrichment
Banana Peels Potassium boost
Fish Tank Water Nitrogen source

Water Conservation Techniques

Choosing the right irrigation method is key for water conservation. Drip irrigation delivers water slowly and directly to plant roots. This technique minimizes evaporation and runoff. Soaker hoses are a good choice, too. They let water seep out along their length.

Mulching plays a big part in moisture management. Organic mulches like straw or wood chips should cover the soil. These materials help keep soil cool and retain water. A 3-inch layer of mulch can make a big difference for water retention.

Sustainable Gardening Practices

Crop rotation boosts soil health and prevents pests. Different plants take and add various nutrients. Rotating them stops nutrient depletion. It avoids pest buildup, because pests often target specific plants.

Low carbon gardening involves simple methods. Use hand tools instead of machinery. Composting adds nutrients without chemicals. Planting native species saves water and supports wildlife.

Troubleshooting Common Issues

Organic gardening often encounters problems like diseases and bad weather. Solutions to these can be simple but effective. Natural remedies, such as neem oil and chamomile tea, help fight plant diseases. These options are safe for both plants and humans.

For adverse conditions, like too much rain or drought, mulching and water-wise practices are key. Mindful watering and choosing resilient plants ensure your garden thrives. Remember, consistent care and observation are crucial for an organic garden’s health.

Harvesting And Post-harvest Handling

Organic gardening boosts yield through natural processes. Techniques like crop rotation, composting, and polyculture enrich the soil. These practices reduce pests without chemicals. High-quality, nutrient-rich soil is a cornerstone for increasing harvests organically.

Proper timing is critical for optimal harvests. Picking vegetables at their peak ensures nutritional quality and flavor. Gentle handling is necessary to prevent bruising. Post-harvest, cool and shaded conditions are imperative for keeping produce fresh.

Storing your organic produce requires attention to detail to maintain its benefits. Different vegetables need varied storage conditions. Root crops like carrots and potatoes prefer cool and dark environments. Leafy greens stay fresh in humid and cool storage. Use airtight containers or properly ventilated storage to prolong shelf life.

Organic Gardening Techniques: Secrets to Eco-Friendly Growth

Credit: www.hickorystickbookshop.com

Garden To Table: Enjoying The Fruits Of Your Labor

Organic gardening rewards you with fresh ingredients for delicious recipes. Your vegetable plot’s beans, tomatoes, and herbs can transform into a mouthwatering salad. Imagine taking your sun-ripened strawberries to create a homemade jam that bursts with flavor. It’s a joy to eat food that you have grown yourself.

Sharing your bounty can build strong community ties and enhance well-being. Offer a basket of fresh produce to a neighbor. You might trigger a cycle of sharing and kindness within your community. Gather friends for a meal where everyone brings a dish made from their garden. These gatherings can turn into memories cherished by all.

Frequently Asked Questions For Organic Gardening Techniques

What Is The Organic Garden Method?

The organic garden method involves growing plants without synthetic pesticides or fertilizers, focusing on natural processes and biodiversity to maintain soil health and control pests.

How To Do Organic Gardening?

Start by choosing a sunny spot for your garden. Use compost and natural fertilizers to enrich the soil. Plant native species adapted to your climate. Control pests using organic methods such as beneficial insects. Practice crop rotation and use mulch to manage weeds and retain moisture.

What Is Organic Way Of Growing Plants?

Organic plant growth involves natural processes, without synthetic chemicals. It relies on compost, natural pest control, and heirloom seeds to cultivate healthy plants.

What Is Considered Organic Gardening?

Organic gardening involves growing plants without synthetic fertilizers or pesticides. It emphasizes natural soil enhancement and ecological balance.

Conclusion

Embracing organic gardening enriches both the earth and your table. Practice these techniques to sustain nature’s balance and your health. Remember, patience and persistence reward gardeners with flourishing beds. Start small, dream big, and watch your garden thrive organically! Enjoy the bountiful harvest and peace of mind that follows.

Gardening to Do List by Month

Gardening to Do List by Month: Seasonal Mastery!

A monthly gardening to-do list organizes your horticultural tasks effectively. It ensures optimal plant growth and garden aesthetics through the year.

As seasons change, so do the needs of your garden. Creating a to-do list based on the monthly changes helps any gardener stay on top of the essential tasks. From preparing seedbeds in early spring to pruning shrubs in winter, a well-maintained schedule is pivotal for the health and vigor of your garden.

Gardening to Do List by Month: It guides you through sowing, planting, weeding, and harvesting periods, all while addressing preventive care against pests and diseases. Managing your garden chores monthly enables you to enjoy a productive gardening experience and ensures your green space thrives regardless of the season. Whether you’re a beginner or an experienced green thumb, aligning your gardening activities with the monthly checklist will help you cultivate a vibrant and luscious outdoor sanctuary.

Seeds Of Success: January Start

January is the hidden gem for gardeners looking to get a jumpstart on the growing season. While the winter chill lingers, hope and excitement for spring thrive in the hearts of green-thumbs. This is the perfect time to start cultivating your gardening dreams, from the warmth of your home.

Indoor Sowing Underway

With the new year comes the excitement of indoor sowing. January’s cool temperatures might seem prohibitive for plant growth, but it’s an ideal month to begin your gardening indoors. Starting seeds inside offers them a protective environment to germinate and grow strong before the last frost. Utilize this time to grow sturdy seedlings ready for the spring.

  • Start herbs and vegetables like tomatoes, peppers, and leafy greens.
  • Choose containers that are deep enough for root development.
  • Maintain a warm temperature and sufficient light exposure.

Planning Your Garden Design

As seeds take root by your windowsill, now’s the moment to plan your garden’s design. Proper planning ensures a successful, beautiful growing season. Picture where each plant will go in your garden oasis.

  1. Sketch the layout of your garden beds on paper.
  2. Consider sunlight patterns and plant heights.
  3. Rotate crops from last year to prevent soil depletion.

Create a personalized blueprint for your garden. This foresight allows for maximizing space, time, and resources.

Preparations Bloom In February

As the chill of winter begins to wane, gardeners sense the potential of spring. February marks a time for proactive steps. With the right preparations now, gardens will thrive come spring.

Pruning For Potential

Pruning energizes plants for the season ahead. It’s vital for health and growth. This month, focus on trees and shrubs.

  • Remove dead or diseased branches.
  • Shape for aesthetics.
  • Enhance air circulation with thinning.

Soil Enrichment Strategies

Nutrient-rich soil is the backbone of a vibrant garden. February calls for soil assessment and amendment.

Task Action
Test Soil Determine pH and nutrient levels.
Add Compost Mix in to boost fertility.
Prepare Beds Clear weeds, loosen soil.

Marching Forward: Spring’s Arrival

As March rolls in, gardeners everywhere buzz with excitement. It’s time to welcome spring’s warm embrace. March is the perfect time to prep gardens for the cheerful season ahead. Each task promises a lush, vibrant landscape.

Early Planting Guide

Spring’s mild weather is ideal for planting. Use this guide to start your garden:

  • Check frost dates: Plant after the last frost for your area.
  • Begin with hardy vegetables: Think spinach, peas, and kale.
  • Plant vibrant annuals: Pansies and snapdragons add color.
  • Start seeds indoors: Tomatoes and peppers love a head start.

Garden Tool Maintenance

Well-maintained tools make gardening a breeze. Follow these steps for sharp, efficient tools:

  1. Clean: Wash off dirt and sap.
  2. Inspect: Look for damage or wear.
  3. Sharpen: Hone edges for precise cuts.
  4. Oiling: Prevent rust with a light oil coat.

Remember, regular tool care extends their life and aids garden health.

Gardening to Do List by Month: Seasonal Mastery!

Credit: www.cityoflompoc.com

April Showers Bring Garden Hours

April’s cool rain quenches your garden’s thirst and invites a symphony of green thumbs to play. As soil warms and buds bloom, this month is full of life, growth, and gardening tasks. Embrace the lush transformation; here’s your guide for what to do in the garden this month.

Disease And Pest Prevention

Gardens awaken in April, but so do pests and diseases. Smart prevention keeps your plants healthy and thriving.

  • Inspect plants regularly for signs of trouble.
  • Remove any dead foliage that harbors disease.
  • Apply fungicide to vulnerable plants as needed.
  • Keep soil healthy with compost and proper fertilization.
  • Mulch to reduce weed pressure and disease spread.

Transplanting Beginnings

Time to relocate young plants from indoor pots to your garden’s nurturing soil.

Vegetable Transplanting Date
Tomatoes After last frost date
Peppers 1-2 weeks after tomatoes
Eggplants With peppers

Remember these steps before transplanting:

  1. Harden off plants by slowly introducing them to outside conditions.
  2. Choose a cool, cloudy day for transplanting to ease plant stress.
  3. Water plants well before and after moving them.
  4. Space correctly to ensure room for growth and air circulation.

May’s Growth Spurt

May is the month where gardens truly come to life. Warm sunshine and longer days create the perfect
environment for plants to thrive. Gardeners witness a transformation as beds fill with vibrant colors and lush greenery. It’s a crucial time to stay on top of gardening tasks to ensure the health and beauty of your garden.

Harvesting Early Bloomers

By May, some flowers and vegetables are ready for harvest. Enjoy the fruits of your labor and create space for new growth.

  • Check for ripe produce such as leafy greens and radishes.
  • Pick spring flowers to encourage more blooms.
  • Remove any spent blooms to maintain a neat garden bed.

Organic Fertilizing Techniques

Natural growth needs natural nutrients. Organic fertilizers are key to sustainable growth.

  1. Compost: Enrich soil by adding homemade or store-bought compost.
  2. Manure: Use aged manure from herbivorous animals as a nutrient-dense fertilizer.
  3. Liquid Seaweed: Provide plants with a gentle growth boost using liquid seaweed mixtures.

June’s Sunshine And Care

As June rolls in, the garden bursts into life with vibrant colors and luscious growth. Longer days and warmer weather call for a fresh set of gardening tasks. Look after your green oasis with the right moves for June’s sunshine and ensure a season full of lush foliage and blooms. Dive into June’s garden care essentials to keep your outdoor space thriving.

Perfect weather conditions create an ideal stage for plant growth. Regular maintenance and tuned-in care are essential. Follow this guide to keep your garden vibrant and healthy.

Understanding Watering Needs

In June’s heat, consistent watering is key. Each plant type has unique needs that change with increasing temperatures. Adapt your watering routine to accommodate the hotter days of summer. Ensure proper hydration for your plants to sustain their growth and vitality.

  • Early morning is the best time to water.
  • Observe leaves for signs of water stress.
  • Use a moisture meter for accurate soil moisture levels.
  • Consider drip irrigation systems for efficient watering.

Summer Mulching Methods

Mulching is a summer gardening superhero. It helps in retaining moisture, suppressing weeds, and keeping soil temperatures stable. In June, apply a fresh layer of mulch to protect and nourish your soil.

Type of Mulch Benefits Considerations
Organic Mulch Improves soil quality Decomposes over time
Inorganic Mulch Lasts longer Does not improve soil
Living Mulch Adds biodiversity Requires gardening space

Apply mulch around plant bases, avoiding direct contact with stems and trunks. Control the thickness of your mulch layer to facilitate proper air and water flow to the soil.

July’s Midsummer Dream

Welcome to the heart of summer! July’s Midsummer Dream casts a special spell over gardens. Your beds are likely bursting with life. Blooms add splashes of color, while fruits and vegetables promise a delicious bounty. Yet, a gardener’s work is never done. July calls for vital tasks to maintain and enhance your garden’s glory.

Deadheading And Weeding

Deadheading flowers keeps your garden tidy and promotes more blooms. Remove spent flowers to channel energy back into the plant. This helps to extend the flowering period. Check roses, daisies, and petunias, as these often need attention in July.

  • Snip off the dead blooms.
  • Inspect plants for signs of disease or pests.
  • Use clean, sharp shears to avoid damage.

The battle against weeds continues. Regular weeding prevents these garden invaders from taking over. It also stops them from stealing valuable nutrients and water from your plants.

  1. Pull weeds when the soil is damp for easier removal.
  2. Get the roots out to prevent regrowth.
  3. Mulch to suppress new weed growth.

Succession Planting Plans

Keep your vegetable garden productive with succession planting. As early crops finish, replace them with new plants. This ensures a continuous harvest into fall.

First Crop Second Crop Sowing Time
Salad Greens Carrots Early July
Radishes Beets Mid July
Peas Spinach Late July
  • Prepare the soil between plantings.
  • Add compost to nourish the next set of crops.
  • Keep records of what you plant and when.


August’s Bounty And Beauty

August brings a garden to life with rich colors and full baskets. Tomatoes and peppers reach their peak, while flowers like marigolds and zinnias paint the landscape. This month combines the joy of harvesting with preparations for the cooler days ahead. Embrace the abundance and get ready for the next cycle of your garden’s life.

Peak Harvesting Time

The garden overflows with produce in August. Fruits and vegetables demand attention for picking. Daily walks through the garden help spot ripe goodies.

  • Check daily for ripeness: cucumbers, zucchini, and tomatoes.
  • Harvest early morning for best flavor and freshness.
  • Pick regularly to encourage more growth.

Herbs also need harvesting this month. Dry or freeze extras for year-round flavor.

Preparing For Fall Planting

August tells gardeners to ready for fall. Preparation ensures success for the upcoming planting season.

  1. Clean up beds: remove spent plants to prevent disease.
  2. Add compost or manure: enrich soil for fall crops.
  3. Select seeds: consider leafy greens and root vegetables.

Plan cool-weather flowers like pansies to keep gardens lively as temperatures drop.

Sowing The Seeds Of Fall In September

September whispers the arrival of fall, and gardeners eagerly shift their focus. It’s time to embrace the changing seasons. Planting during this month ensures a harvest of cool-weather crops. This guide outlines September gardening tasks. Get ready to sow a bountiful fall garden.

Planting Fall Crops

Fall crops require planning. September offers ideal temperatures for germination. Start by selecting vegetables that thrive in cooler weather. Examples include spinach, kale, and radishes. Follow these steps for a successful planting:

  • Prepare the soil: Clear summer plants and weeds. Add compost to enrich the soil.
  • Choose the right crops: Pick vegetables that grow well in your regional climate.
  • Sowing seeds: Plant seeds at the correct depth. Space them for proper growth.
  • Watering: Keep the soil moist. Fall crops need hydration for good development.

Lawn Revitalization

Your lawn needs attention in September. It’s the perfect time to revitalize your grass for next year. To rejuvenate your lawn, complete these tasks:

  1. Aerate the soil: Make holes in the lawn to allow air and water penetration.
  2. Seed over: Apply grass seeds. Choose a blend suited for your area’s fall and winter conditions.
  3. Fertilize: Use a fall lawn fertilizer. It helps roots grow deep and strong.
  4. Water regularly: Ensure new seeds receive enough moisture. Do this until the roots establish.

September’s lawn care sets the stage for lush spring turf. Sow seeds and care for the soil now. Reap the benefits when warmth returns!

October’s Waning Garden

As October ushers in cooler temperatures, gardens across the land are slowly nodding off to sleep. While the vibrant blooms of summer may be a memory, there’s still plenty to do this month to prepare your garden for its winter slumber.

Protecting Perennials

Perennials are the backbone of many gardens. They provide structure and return yearly. With the right care, these stalwarts will be ready to grow again in spring.

  • Cut back on watering but don’t let the plants dry out completely.
  • Remove dead foliage to prevent disease.
  • Add a layer of mulch to protect roots from freezing.

Garden Cleanup And Composting

Cleaning up in autumn makes for an easier spring. Take the time now to get ahead.

  1. Collect fallen leaves and use them as basis for compost.
  2. Dispose of diseased plant material to avoid pests next year.
  3. Empty and clean out pots in preparation for next season.
October Garden Tasks
Task Action Items
Perennial Care
  • Reduce watering
  • Remove dead foliage
  • Apply mulch
Cleanup
  • Gather leaves
  • Remove diseased materials
  • Clean pots

November’s Chilling Tasks

As autumn gives way to winter, November brings a host of garden tasks. Preparing for the cold is vital for a lush spring comeback. Let’s dive into this month’s gardening checklist.

Bulb Planting For Spring

It’s the last call to plant bulbs that will bloom in spring. Tulips, daffodils, and hyacinths are perfect candidates. Here’s a simple guide:

  • Pick a sunny, well-drained spot
  • Dig holes three times deeper than bulb height
  • Place bulbs pointy side up
  • Cover with soil and water lightly

Winterizing Irrigation Systems

Protecting your irrigation system prevents freezing and costly damages. Follow these steps:

  1. Shut off the water supply
  2. Drain all pipes and sprinklers
  3. Insulate exposed parts
  4. Use an air compressor for deep blowouts (if necessary)
Gardening to Do List by Month: Seasonal Mastery!

Credit: mghc.org

Rest, Review, Rejoice In December

As the final month of the year rolls in, gardeners find a special moment to Rest, Review, Rejoice in December. It’s a serene time for you and your garden. With a slower pace in the winter, nature offers a pause, an opportunity to celebrate the season’s successes and learn from the challenges. These final weeks are perfect for reflecting on the year’s efforts and preparing for future blooms.

Reflecting On The Year’s Garden

December calls for reflection, a look back over the past year’s garden. Think about what plants thrived and which ones didn’t. Did new techniques bring success? Make a list of the stars of your garden, the plants that awed you with their performance. Remember the lessons from failed experiments. This knowledge is the base for your future garden plan.

  • Best performers: Note the plants that did well.
  • Challenges faced: Record weather issues or pest problems.
  • Lessons learned: Jot down what new tricks you tried and how they turned out.
  • Favorite moments: Think about the times your garden made you happiest.

Planning For The Next Cycle

With reflections fresh in your mind, December gives you a peaceful chance to plan. Think about the next planting cycle. Dream up themes or colors for your garden. Consider what vegetables to rotate or new flowers to try. Will you expand your garden, try raised beds, or start composting? Create a wish list for seeds and tools you’ll need. Sketch a rough layout of your garden’s design.

Next Cycle Plans Wishlist Layout Ideas
Vegetable rotation Quality seeds Raised beds placement
New flower varieties New tools Color themes
Composting setup Soil amendments Pathway designs

Savor the restful December days. Enjoy the quiet of the garden. Let your mind stroll through green thoughts. A time to review, plan, and rejoice sets you on the right path for the growing season ahead.

Gardening to Do List by Month: Seasonal Mastery!

Credit: smith.agrilife.org

Frequently Asked Questions On Gardening To Do List By Month

What Month Is A Good Month To Plant A Garden?

The best month to plant a garden typically depends on your climate, but generally, spring months like April or May are ideal for many regions. Planting during these months allows for a long growing season. Always check your local frost dates for the most accurate timing.

What Month Is Too Late To Start A Garden?

It’s generally too late to start a garden if you begin after July, as most plants need time to mature before the first frost.

How Do I Make A Garden Schedule?

To create a garden schedule, assess your climate zone and plant hardiness. Determine planting times for various crops based on local frost dates. Regularly schedule watering, weeding, and fertilizing. Monitor plants’ growth and adjust care as needed. Record observations to refine future schedules.

What Is A Good Garden Plan?

A good garden plan optimizes space usage and considers sunlight, soil type, and plant compatibility. It includes a mix of flowers, vegetables, and herbs, ensuring seasonal growth and aesthetic appeal. Regular maintenance schedules are also integral to its success.

Conclusion

As we cycle through the seasons, your garden reflects the care you dedicate each month. This monthly checklist ensures your green space thrives, yielding beauty and bounty. Let’s embrace the rhythm of nature, and with these tips, cultivate a garden that’s the envy of the neighborhood.

Happy gardening!

Gardening to Save Money

Gardening to Save Money: Thrifty Tips for a Lush Garden

Gardening can significantly reduce grocery expenses by growing your own produce. Starting a home garden leads to savings and fresh, organic food options.

Embracing gardening as a way to cut costs offers numerous benefits beyond just financial savings. It equips individuals with the tools to cultivate a variety of vegetables, herbs, and fruits, ensuring access to fresh ingredients right at their doorstep. Engaging in this practice not just diminishes the frequency of store trips but also enhances your diet with healthy, pesticide-free options.

Gardening to Save Money: This introductory guide will dive into practical tips for establishing a cost-effective garden that thrives in your living space, whether it be a sprawling backyard or a compact balcony. By optimizing space, selecting high-yield crops, and using cost-effective gardening techniques, you can embark on a sustainable journey that enriches your plate and wallet alike.

Gardening to Save Money: Thrifty Tips for a Lush Garden

Credit: www.amazon.com

Cost-effective Gardening: An Introduction

Gardening can be more than just a hobby. It’s a way to save money. By growing your own vegetables, fruits, and herbs, you can cut costs from your grocery bill. In this blog post, we’ll explore how to start your own cost-effective garden and the additional benefits it brings.

Why Garden Economically?

Starting a garden with economy in mind is simple. Seeds and plants are less expensive than buying produce. A one-time purchase of seeds can yield multiple crops. Composting kitchen scraps saves on fertilizer costs.

  • Reduce grocery expenses
  • Stretch food budgets
  • Maximize the value of your yard

Benefits Beyond Savings

Gardening offers more than monetary advantages. It encourages healthy eating with fresh, organic options. Physical activity during gardening improves fitness. A green space fosters mental wellness and environmental benefits.

Benefits Details
Health Access to nutritious, fresh food
Fitness Regular outdoor exercise
Mindfulness Stress reduction and mental clarity
Eco-Friendly Contribution to a sustainable lifestyle

Planning Your Budget Garden

Transforming a patch of soil into a flourishing garden is both thrilling and cost-saving. Smart planning turns a humble garden into a wallet-friendly food source.

Setting A Gardening Budget

Begin with a clear budget for your garden venture. Outline anticipated costs for seeds, tools, and soil.

  • Gather prices from local stores and online.
  • Include a little extra for unplanned spends.

Choose plants that give big yields over pricey options.

Designing On A Dime

Create a beautiful garden without spending much. Use cuttings from friends or opt for seeds instead of full plants.

Free Resources Cheap Finds
Cuttings from neighbors Seed packets
Repurposed containers Sale soil or compost

Design with perennials that come back each year.

Mulch with free materials, like fallen leaves.

Money-saving Techniques

Gardening doesn’t have to break the bank. With a few clever hacks and a bit of know-how, you can cultivate a lush garden while keeping your wallet happy. Embrace these money-saving techniques to become a savvy green thumb.

Choosing Low-cost Plants

Smart plant choices make all the difference. Here’s how to pick plants that save you money:

  • Go for perennials: Unlike annuals, these plants come back every year.
  • Seed over sod: Starting a lawn from seed costs less than laying sod.
  • Split and share: Dividing plants and swapping with neighbors grows your garden free.

Remember to select plants native to your region. They’re low-maintenance and need less water, reducing costs over time.

Diy Garden Tools And Decor

DIY projects can slash costs. Try these ideas:

  1. Repurpose with purpose: Old items become unique planters or garden art.
  2. Make your own compost: Turn kitchen scraps into nutrient-rich soil.
  3. Build your tools: Craft trellises and supports from scrap wood or metal.

Creating decor and tools yourself not only saves money but also gives your garden a personal touch.

Seed Starting And Propagation

Welcome to the wonderful world of seed starting and propagation! Imagine standing in your lush garden, filled with vibrant plants you’ve cultivated from seed to bloom. Such a dream is not only fulfilling but can also significantly cut down your grocery expenses. Let me guide you through some cost-effective ways to cultivate a bountiful garden by harnessing the power of seeds and cuttings.

Growing From Seeds Vs. Buying Plants

Many gardeners are torn between starting their garden from seeds or buying young plants. Both have their merits, but if saving money is your goal, seeds are the clear winner. Here’s a quick comparison:

Method Cost Variety Control
Seeds Less expensive More options Complete journey
Young plants Higher cost Limited choices Starts mid-way

A packet of seeds often costs the same as a single plant but yields multiple seedlings. The larger variety allows for a more personalized garden. You also maintain control over the growing conditions from the start.

Propagating Plants For Free

Propagation is another fantastic way to expand your garden for free. Some plants can be multiplied by simply taking cuttings from healthy specimens. Let’s look at some easy steps:

  1. Choose a healthy “mother” plant.
  2. Cut a 4-6 inch section of stem.
  3. Remove lower leaves to expose nodes.
  4. Place the cutting in water or soil.
  5. Wait for roots to form before planting.

Herbs, succulents, and perennial flowers are particularly good for propagation. By propagating plants, you can duplicate your favorite varieties without spending an extra penny.

Water Wisdom: Cutting Costs On Irrigation

Gardening is a joy and a cost-effective way to enhance your home’s curb appeal. Yet, watering your garden can become expensive. Smart water use can lead to significant savings. Let’s dive into savvy irrigation tactics.

Harvesting Rainwater

Capture free water from the skies to reduce your bill. Utilize rain barrels or a cistern system to collect and store rainwater. Set them up under downspouts to catch water from the roof. Consider this:

  • A 1,000-square-foot roof can collect about 600 gallons from a 1-inch rainfall.
  • Use collected rainwater for gardens, lawns, and even for washing your car.

Efficient Watering Practices

Make every drop count with clever watering approaches. Here are some tips:

  1. Water early in the morning or late in the evening to reduce evaporation.
  2. Use a drip irrigation system or soaker hoses to deliver water directly to plant roots.
  3. Incorporate a smart controller that adjusts watering based on weather conditions.

Drip systems can save up to 50% compared to traditional watering methods. A well-timed system means less waste and more growth. Embrace these cost-saving techniques and watch your garden and wallet thrive.

Gardening to Save Money: Thrifty Tips for a Lush Garden

Credit: dontwastethecrumbs.com

Fertilizing On A Shoestring

Gardening enthusiasts, are you ready to nourish your garden without breaking the bank? The secret lies in efficient and cost-effective fertilizing methods. Let’s delve into “Fertilizing on a Shoestring” and explore how your garden can thrive on a tight budget.

Homemade Compost As Fertilizer

Rich soil fosters a flourishing garden. Homemade compost stands as a pillar for gardeners keen on sustainability. It turns kitchen scraps and yard waste into a nourishing feast for your plants.

  • Save your vegetable peels, fruit scraps, and coffee grounds.
  • Add in some fallen leaves and grass clippings.
  • Build a compost pile or use a bin to contain the materials.

Over time, these elements decompose. What’s left is a nutrient-rich fertilizer that plants love, all for zero dollars.

Natural Alternatives To Store-bought Fertilizers

Commercial fertilizers can be pricey. Go natural and save money with alternatives you might already have at home:

Household Item Plant Benefit
Eggshells Calcium for plant growth
Banana Peels Potassium for flower and fruit quality
Coffee Grounds Nitrogen for leafy growth

Simply mix these items into your soil or create a fertilizer tea by soaking them in water. Your garden will absorb the nutrients without any chemicals.

Pest Control Without The Price Tag

Gardening can enrich your home with a bounty of fresh produce and beautiful flowers. But unwanted guests, like pests, often threaten these green aspirations. Expensive chemical solutions are not the only way to keep your garden healthy. In this section, learn how to protect your plants without breaking the bank.

Natural Pest Deterrents

Nature itself offers tools to combat pest invasions. Several plants, when integrated into your garden’s ecosystem, serve as natural repellents. These include:

  • Marigolds: These flowers can deter beetles and nematodes.
  • Garlic: Its strong scent keeps away aphids and moths.
  • Chrysanthemums: This plant contains a natural insecticide.

Creating physical barriers such as netting or row covers can also guard against pests without the use of chemicals.

Making Your Own Pest Control Solutions

Personalize your pest control by making solutions at home. Simple ingredients can create effective repellents.

Ingredient Pest Targeted Preparation
Dish soap Aphids, mites Mix a few drops with water and spray on plants.
Vinegar Ants, slugs Combine with water and spray around the garden perimeter.
Baking soda Fungal diseases Combine with water and oil for a fungicidal spray.

Prevention is better than cure. Regularly inspect your plants for pests. A strong blast of water from a hose can dislodge many types of insects. Companion planting and proper garden maintenance can prevent issues from developing. This approach saves your plants and your pocket.

Maximizing Garden Yield, Minimizing Expense

Maximizing Garden Yield, Minimizing Expense is a clever approach to gardening. Smart strategies lead to more food while spending less money. Proper plant care and garden planning boost your garden’s productivity. A fruitful garden can reduce grocery costs significantly. Let’s dig into ways to reach that goal.

Crop Rotation And Soil Care

Crop rotation is vital for soil health.

  • Prevents disease build-up
  • Reduces pest infestations
  • Balances soil nutrients
  • Improves soil structure

A simple four-year rotation plan works well for most gardens. Organize crops into four categories:

  1. Legumes (peas, beans)
  2. Roots (carrots, beets)
  3. Leaves (lettuce, spinach)
  4. Fruits (tomatoes, cucumbers)

Switch these groups each year to keep soil fresh and fertile.

Companion Planting To Save Resources

Companion planting pairs plants together for mutual benefits.

Benefits include:

Companion Benefits
Tomatoes & Basil Enhances flavor, repels pests
Carrots & Onions Onions deter carrot flies
Cucumbers & Radishes Radishes lure pests away

Saving on pesticides and fertilizers is easy with companion planting.

Harvesting And Preserving Your Bounty

Gardens are treasure troves for the frugal at heart. Growing your own food is rewarding and cost-effective. Yet, it’s the harvesting and preserving where true savings shine. Proper techniques ensure no precious produce goes to waste.

Efficient Harvesting Techniques

Harvesting is an art that maximizes yield and quality. Check plants often since peak ripeness is fleeting.

  • Use clean, sharp tools to avoid damaging plants.
  • Pick regularly to encourage continuous production.
  • Morning harvests capture the best flavors.
  • Keep roots moist after picking for lasting freshness.

Gentle handling prevents bruising. Cool temperatures post-harvest preserve quality.

Preserving Your Produce For Longevity

After harvesting, it’s a race against time. Preserving your bounty extends its lifespan, ensuring fresh flavors year-round.

Method Benefits Best for
Canning Long shelf life Fruits, vegetables, sauces
Freezing Preserves nutrients Herbs, berries, blanched veggies
Drying Concentrates flavor Herbs, tomatoes, fruits
Pickling Unique taste Cucumbers, peppers, onions

Label everything with dates. Consider vacuum sealing for added protection.

Try racks or dehydrators for drying. They are space-efficient. Blanche vegetables before freezing to lock in nutrients.

Remember, consistency is key when canning. Follow trusted guidelines and recipes for safety. Rotate your stock to use older items first.

Community Gardening: Sharing Costs And Harvests

Community gardens weave people together, reducing expenses while increasing yields. These shared spaces allow for a unique blend of social interaction and cooperative economics. Various members come together, each contributing a small part to a bigger effort. This collaboration leads to a lush harvest that everyone enjoys. It’s not just plants that grow in these spaces; friendships, knowledge, and a connection to nature thrive as well.

Joining Or Starting A Community Garden

Setting foot in a community garden opens doors to both saving and socializing. Individuals can join existing gardens or take the initiative to create new ones. Sharing responsibilities means shared costs. Here’s a list to consider:

  • Plot rental fees: Split between members.
  • Water bills: More affordable when divided.
  • Gardening tools: Purchased communally.

Getting involved typically starts with a local search. Many gardens have online presence or community boards. Contact local gardening clubs or city programs for opportunities.

Seed And Tool Swaps

Trading seeds and tools is a smart move. Members exchange excess supplies, offering variety without extra cost. Swap events promote resource-sharing and reduce waste. Benefits include:

  1. Access to a diverse range of seeds: Robust options for planting.
  2. Tool sharing: No need for each member to buy the same tools.
  3. Knowledge exchange: Tips and tricks flow freely.

Adapting And Advancing Your Thrifty Garden

Thrifty gardening is a rewarding journey that evolves each season. It’s about maximizing yields while minimizing costs. By learning from past experiences, you can adapt your approach. Enhance your garden’s productivity without stretching your wallet.

Learning From Your Garden’s Performance

Analyze past success and failures to make smarter choices. What grew well? Which plants didn’t thrive? Here’s how:

  • Keep a journal of garden activity.
  • Record plant progress, weather changes, and pests.
  • Use this data to adjust planting times and strategies.

Identifying patterns helps you pick robust, cost-effective plants.

Incorporating New Money-saving Techniques

Embrace innovative, budget-friendly methods to boost your green space.

Technique Benefit
Composting Kitchen Scraps Enrich soil for free
Collecting Rainwater Reduce water bill costs
DIY Pest Repellents Avoid expensive chemicals

Trying new techniques like these can significantly cut down expenses.
They also promote a sustainable gardening practice. Take your thrifty garden to the next level!

Frequently Asked Questions Of Gardening To Save Money

Does A Garden Really Save Money?

A garden can save money by reducing grocery bills and providing fresh produce, but initial setup costs should be considered.

Is Gardening An Expensive Hobby?

Gardening costs vary widely. Starting small with seeds and basic tools can be cost-effective. Upscaling with rare plants and advanced equipment increases expenses.

What Is One Money Save Hack For Growing Vegetables?

Utilize kitchen scraps, like carrot tops and lettuce bases, to regrow vegetables and save on seeds or plants.

What Is The Cheapest Vegetable To Plant?

The cheapest vegetable to plant is often the humble radish, due to its fast growth and minimal care requirements.

Conclusion

Embracing gardening offers a bounty of financial benefits. It nurtures both your wallet and well-being, providing fresh produce while trimming grocery bills. Start sowing seeds today and reap the rewards of a healthier budget and lifestyle. Let your garden flourish and your savings grow alongside it.

How Do You Know When Your Bonsai Needs Repotting

How Do You Know When Your Bonsai Needs Repotting: Key Signs!

Your Bonsai needs repotting if its growth slows significantly or roots circle the pot. Signs include water quickly draining out or roots emerging from drainage holes.

Bonsai enthusiasts often ponder the timing of repotting their miniature trees. This crucial aspect of bonsai care ensures the long-term health and aesthetics of these carefully cultivated plants. Recognizing the need for repotting is essential, as a compact root system can hinder the tree’s ability to absorb nutrients and water.

How Do You Know When Your Bonsai Needs Repotting: Experts recommend inspecting bonsai annually, typically in the early spring, to assess root growth and soil condition. Healthy bonsai maintenance involves timely repotting, and this practice not only encourages vigorous growth but also provides an opportunity to refresh the soil, thereby contributing to the plant’s overall resilience. A well-timed repot can rejuvenate your bonsai and set the stage for continued flourishing.

The Lifespan Of Bonsai Soil

Bonsai trees, living art forms, also require essential care, comparable to their full-sized counterparts. A critical aspect of this care involves understanding the lifespan of bonsai soil. Recognizing when to repot your bonsai is crucial for its health and longevity.

Compaction Over Time

As time passes, soil compaction is inevitable. Tiny pockets in the soil, vital for air and water, begin to collapse. Roots can struggle, suffocating in the increasingly dense environment.

  • Water flows slower.
  • Drainage becomes less effective.
  • Air has less room to circulate.

When water fails to seep through quickly or stands on the surface, it’s a clear indicator. It signals compaction and points to repotting time.

Nutrient Depletion Signs

Soil is a reservoir of nutrients essential for bonsai health, but it doesn’t last forever. Nutrient depletion is a natural process that reduces soil fertility, affecting your bonsai’s growth and vigour.

Sign What it Means
Yellowing leaves Nutrient deficiency is likely, particularly nitrogen.
Stunted growth Potentially risky, soil has little to offer.
Leaf drop Tree cannot sustain itself, signals stress.

If your bonsai showcases these symptoms, consider the last time you repotted. The soil could be crying out for a refresh, to give your bonsai new life.

Root Health And Vigor

Root Health and Vigor are vital for a thriving bonsai tree. Neglecting root care can lead to a bonsai’s demise. Healthy roots mean a healthy tree. A key sign that your bonsai needs a new home is the root system condition. Let’s dive into how to check roots and spot troubles.

Visual Inspection Of Roots

Start by gently removing your bonsai from its pot. Be careful not to harm the roots. Healthy roots are flexible and have a light color. Dark or mushy roots suggest rot. Spotting this early saves your bonsai. A yearly check ensures roots are in top shape.

Root Bound Symptoms

  • Slow growth: When a bonsai’s growth slows down, it may be time to check its roots.
  • Water issues: Water that runs straight through the pot indicates a possible root-bound tree.
  • Leaf discoloration: Yellowing or wilting leaves might mean roots are struggling for nutrients.
  • Tight root circle: Roots tightly wound in a circle show a tree longing for more space.

If you notice any of these symptoms, prepare for repotting. A new pot offers a fresh start for your bonsai. It is crucial to keep your bonsai in a pot that supports root health.

Observing Water Drainage

Observing Water Drainage is crucial in maintaining the health of your Bonsai. Just like any plant, Bonsai trees require proper drainage to prevent root rot and ensure they receive the right amount of moisture. It’s a clear sign to repot when water no longer flows freely through the pot. Let’s dive deeper into what slowed drainage implies for your miniature tree’s well-being.

Slowed Drainage And Its Implications

Slowed drainage points to a compacted or clogged soil system. Roots may have become so entwined and dense that they’re blocking the water pathways. This often occurs after the Bonsai has been in the same soil for a long time. A table here can help explain.

Drainage Speed Soil Condition Action Needed
Quick Healthy Monitor
Slow Compacted Repot

Watering Patterns And Soil Permeability

Assessing your Bonsai’s watering patterns provides insights into soil permeability. If water doesn’t seep through but lingers on the surface, it’s a red flag. The Bonsai needs a soil mix that allows for airflow and water penetration. Notice these signs:

  • Water sits on top instead of soaking in
  • Water runs off the surface onto the ground
  • It takes longer for the Bonsai to dry out after watering

Adjust watering frequency and consider repotting into a more permeable soil mix to resolve these issues.


How Do You Know When Your Bonsai Needs Repotting: Key Signs!

Credit: www.realsimple.com

Leaves Tell The Tale

Leaves Tell the Tale when it’s time to repot your bonsai. They act as indicators, sending clear signals about the health of your miniature tree. Paying attention to these leafy clues can prevent long-term damage and ensure your bonsai continues to thrive in its environment. Let’s explore the leafy signs pointing to the need for repotting.

Discoloration And Dropping

Healthy bonsai leaves should exhibit vibrant colors characteristic of their species. Any variation from this suggests your bonsai may be in distress.

  • Yellowing Leaves: Often a sign of overwatering or poor drainage.
  • Brown Spots: Can indicate a pest problem or disease.
  • Leaf Drop: Outside of normal seasonal shedding, it may point to a compacted root system.

If leaves are not their usual color or fall off when they should not, consider repotting.

Stunted Leaf Growth

A bonsai with limited growth may have roots that can no longer support new foliage development. Here’s what to watch for:

  1. Leaves appear smaller than typical for the species.
  2. New shoots are weak or sparse.
  3. Overall growth seems to halt, even in the growing season.

Stunted growth hints that your bonsai’s pot restricts its roots. It’s time for a new home with more space.

Bonsai care requires attentiveness. By observing the condition of the leaves, you can ascertain the health of your bonsai and take appropriate action, like repotting, to maintain its beauty and vitality.

Growth Rate And Pot Size

Understanding the relationship between growth rate and pot size is vital for any bonsai enthusiast. Bonsais are unique, miniature trees that require careful attention to thrive. As these tiny giants mature, their growth can slow, and their pots may no longer serve their needs effectively. Let’s dive into how you can recognize the signs that it’s time to give your bonsai a new home.

Assessing Growth Slowdown

A clear sign that your bonsai may need repotting is a visible decline in growth speed. This is not always easy to spot, so look for these clues:

  • Leaves are smaller than usual.
  • Branches take longer to develop.
  • The tree has fewer blossoms or fruits than before.

Another indicator is when the roots emerge from the drainage holes. This means they crave more space!

Appropriate Pot Dimensions For Your Bonsai

The perfect pot size promotes healthy root and tree growth. Here’s a quick guide to help you:

Bonsai Size Pot Length Pot Depth
Small Bonsai 2/3 Tree Height Tree Trunk Diameter
Medium Bonsai Equal to Tree Height 1/2 Tree Trunk Diameter
Large Bonsai 1/3 Bigger than Tree Height Equal to Tree Trunk Diameter

Remember to pick a pot with good drainage. Ample room for roots means your bonsai remains healthy and vibrant.

Seasonal Timing For Repotting

Understanding seasonal patterns is vital for successful bonsai repotting. Just like gardeners plant seeds at specific times of the year, bonsai enthusiasts must time their repotting to coincide with the trees’ growth cycles. This minimizes stress and maximizes the benefits to the plant. Let’s explore the best seasons for transplanting your miniature tree.

Best Seasons For Transplanting Bonsai

Bonsai trees thrive when transplanted at the right time. This allows them to recover better from the shock of moving. The best seasons for transplanting are late winter and early spring. These seasons align with the period just before new growth starts, offering perfect timing for your bonsai’s transition.

Late Winter To Early Spring: The Optimal Repotting Window

Late winter to early spring marks the bonsai’s time of awakening. Sap begins to move, and buds start to develop, but the tree isn’t yet expending all its energy on growth. This is the prime time to repot. Doing so prepares your bonsai for a surge of spring growth in its new home.

Season Benefits for Bonsai
Late Winter Pre-growth period, less stress for trees
Early Spring Optimal root recovery and growth alignment
  • Check bonsai’s root status before repotting.
  • Ensure tools and materials are at hand.
  • Choose a slightly larger pot for mature growth.

Remember, a healthy bonsai is a happy bonsai. Aligning your repotting with these optimal seasonal windows makes for stronger, more vibrant trees. Happy planting!

Frequency Of Repotting

Bonsai trees, like all living plants, grow and change with time. Knowing when to repot your miniature tree ensures its health and beauty. Repotting frequency can depend on several factors such as the species, age, and pot size. Understanding these can help you maintain the perfect environment for your bonsai’s growth.

Species-specific Repotting Schedules

Each bonsai species has a unique growth rate. This affects how often you should repot. Consult a species-specific schedule to keep your tree thriving:

Bonsai Species Repotting Interval
Ficus Bonsai Every 2-3 years
Juniper Bonsai Every 3-4 years
Pine Bonsai Every 4-5 years
Maple Bonsai Every 2 years

Young Vs. Mature Bonsai: Differences In Repotting Needs

Young bonsai trees tend to grow more quickly. They need repotting more often to provide space for root growth. Here’s what you need to know:

  • Young bonsai: Repot every 1-2 years
  • Frequent repotting supports their rapid growth
  • Helps in shaping the root system early on

Mature bonsai trees grow slower. This means they require repotting less often. Keep in mind:

  • Mature bonsai: Repot every 3-5 years
  • Less disruption helps maintain their established shape
  • Monitor root growth to avoid over-crowding
How Do You Know When Your Bonsai Needs Repotting: Key Signs!

Credit: www.amazon.com

Steps For Repotting Your Bonsai

Successful bonsai care requires occasional repotting to maintain the health and aesthetics of these miniature marvels. Understanding the steps for repotting your bonsai is essential to ensure growth and longevity. This guide explores each stage in detail.

Preparing The New Soil Mixture

Begin with the right soil mix to guarantee your bonsai thrives after repotting. A well-draining, nutrient-rich mixture tailored to your specific bonsai species is critical.

  • Akadam
  • Pumice
  • Lava rock
  • Organic potting compost

Mix these components in ratios suited to your bonsai’s needs. Promote adequate water retention and drainage.

Technique For Gently Removing The Bonsai

Carefully extract your bonsai from its current pot to avoid damaging the roots. Water your bonsai beforehand to soften the soil. This makes the process smoother.

  1. Invert the pot and gently tap all sides.
  2. Carefully loosen the edges with a bonsai tool.
  3. Guide the tree out by the trunk’s base.

Root Pruning Considerations

Root pruning is a delicate process that encourages new growth and health. Take great care not to over-prune; remove only what’s necessary.

Percentage to Prune Tree Age/Size
<25% Mature/Larger
25%-30% Younger/Smaller

Prune the roots evenly around the tree to maintain balance. Look for any damaged or deceased roots and remove them.

With these steps, repotting your bonsai becomes a rejuvenating ritual that sustains the vitality of your miniature tree for years to come.

Post-repotting Care

Bonsai repotting marks a fresh chapter for your miniature tree. Proper care is crucial for its recovery. The steps you take after repotting ensure your bonsai thrives. Post-repotting care involves watering, location, and environmental tweaks.

Watering After Repotting

Water is the first friend your bonsai seeks post-repotting. Thorough soaking is essential. Use a soft stream of water to moisten the new soil until water flows freely from the drainage holes.

  • Check moisture daily.
  • Avoid water with high levels of calcium or chlorine.
  • Do not overwater; soggy roots harm your bonsai.

Location And Environmental Adjustments

Your bonsai is sensitive after repotting. Location and climate play a huge role. Shield your bonsai from harsh conditions.

Timeframe Location
First Weeks Indirect sunlight, protected from wind
Afterward Gradually introduce to normal conditions
  • Maintain a stable temperature.
  • Watch out for leaf changes, a sign to adjust conditions.
How Do You Know When Your Bonsai Needs Repotting: Key Signs!

Credit: www.homedepot.com

Frequently Asked Questions Of How Do You Know When Your Bonsai Needs Repotting

When Should You Repot A Bonsai Tree?

Repotting is typically needed every two to five years. It’s best to repot during late winter or early spring. This is right before new growth starts, ensuring minimal stress on the plant.

What Are Signs Your Bonsai Needs Repotting?

Look for roots circling the pot’s bottom or poking out of the drainage holes. Slow growth, yellowing leaves, or a loosening tree in the pot can also indicate it’s time for repotting.

How Does Repotting Affect Bonsai Health?

Repotting is vital for bonsai health. It refreshes the soil, providing essential nutrients. It also prevents root-bound conditions, promoting better water and oxygen absorption to keep the bonsai thriving.

Can Repotting Bonsai Cause Shock?

Yes, repotting can cause shock. However, doing it during the right season and with proper care minimizes stress. Aftercare is crucial: provide shade, avoid fertilizing for a month, and keep watering consistent to help recovery.

Conclusion

Understanding your bonsai’s repotting needs is essential for its health and vitality. Watch for signs of root crowding, slower growth, and soil depletion. Timely repotting keeps your miniature tree thriving. Remember, a nurtured bonsai reflects the care it receives — so stay observant and repot wisely for lasting beauty and growth.

How Do You Know If Your Bonsai Tree is Dying

How Do You Know If Your Bonsai Tree is Dying? Spot the Signs!

Your Bonsai tree might be dying if its leaves are turning yellow or brown and falling off. Brittle branches and a lack of new growth are also warning signs.

A Bonsai tree is a miniature masterpiece, revered for its beauty and the skill it takes to nurture it. But, just like any plant, Bonsais can fall victim to health issues. Recognizing the telltale signs that your Bonsai is in distress is crucial for any enthusiast or caretaker.

How Do You Know If Your Bonsai Tree is Dying

How Do You Know If Your Bonsai Tree is Dying: A thriving Bonsai boasts lush, green foliage and a strong structure, while a dying one displays clear distress signals. From leaf discoloration to soft, rotting roots, early detection of these symptoms can make the difference between revival and loss. This guide offers essential tips for identifying the health of your Bonsai and ensuring its longevity as a beloved centerpiece in your collection or living space.

The Art Of Bonsai

Bonsai, a timeless art form, blends horticulture and creativity. This practice transforms trees into miniatures through specific techniques. Yet, bonsai trees are delicate. They require constant care. Recognizing the health of your bonsai is crucial. It ensures your miniature tree thrives for years to come.

Origins And Significance

The art of bonsai dates back over a thousand years. Originating in China, it spread to Japan. Here, it adapted into the form we know today. The bonsai tree is more than a plant; it’s a symbol of harmony, balance, and patience. Each tree tells a unique story through its shape and form. Bonsai trees bring nature into the home. They also serve as ambassadors of an ancient tradition.

Caring For These Miniature Trees

Caring for bonsai trees is both rewarding and challenging. Each species has different needs. A healthy tree has a lush canopy, firm roots, and vibrant leaves. Signs of distress vary, but commonly include wilting, yellowing, or dropping leaves.

  • Watering: Overwatering or underwatering can harm your bonsai. The soil should remain moist but not soaked.
  • Lighting: Bonsais need plenty of light. Lack of light weakens them.
  • Pruning: Regular pruning keeps the tree miniature. It also encourages new growth.
  • Feeding: A balanced fertilizer supports overall health. Apply it during the growing season.

Monitor your bonsai closely. Respond quickly to any signs of decline. A bonsai tree might be dying if it shows prolonged poor health despite good care. Take action immediately to save your precious miniature tree.

Vital Signs Of A Healthy Bonsai

Recognizing the Vital Signs of a Healthy Bonsai is crucial in the art of bonsai care. Just like any living plant, bonsai trees exhibit signs that can either indicate flourishing health or a cry for help. Understanding these signs ensures the longevity and aesthetic appeal of these miniature wonders.

Leaf Color And Texture

Bonsai leaves tell a vibrant story about the tree’s condition. Healthy bonsai leaves typically display a rich, green hue and maintain a supple, firm texture. Beware of leaves that appear yellow, brown, or brittle as they might signal distress.

  • Deep green indicates optimal health.
  • Yellowing leaves can suggest overwatering or lack of nutrients.
  • Brown or crispy leaves may point to under-watering or sunburn.

Stem Strength And Root Health

Bonsai trees rely on robust stems and roots for stability and nutrient uptake. Sturdy stems with a buoyant, upright posture reflect a tree in prime condition. Roots should be firm and spread evenly around the soil, emerging slightly at the base of the trunk.

Feature Healthy Sign Unhealthy Sign
Stems Upright and resilient Weak or limp
Roots Slight visibility at the soil surface Invisible or excessively protruding

Careful observation of leaf color and texture, along with stem and root vigor, will guide you in nurturing a resilient bonsai. A healthy bonsai not only thrives but also enhances the aesthetics of its miniaturized landscape.

Common Symptoms Of Distress

Bonsai trees lend an air of contemplative beauty to any space. Yet, recognizing signs of distress in these miniature ecosystems is crucial to their survival. Vigilance is your greatest tool. Addressing symptoms early can save your bonsai from demise.

Discoloration And Dropping Leaves

Leaves are the mirror to a bonsai’s soul. Watch for changes in color or leaves falling off out of season. These are signs your tree is not happy. Yellowing leaves or those with unsightly brown spots should raise a red flag. Both may point to over-watering, poor drainage, or a lack of nutrients.

  • Yellow leaves – often from too much water.
  • Brown spots – potentially a sign of disease.
  • Leaf drop – check water and light conditions.

Brittle Branches And Weak Growth

A bonsai’s branches should be supple and vigorous. When they grow brittle or snap easily, it suggests underlying health issues. This weakness often results from under-watering, low humidity, or a pest invasion. Slow or halted growth also indicates a problem. A thriving bonsai should continue to put out new leaves and branches, even if slowly.

Signs of Distress Possible Causes
Brittle branches Lack of water or pests
Weak growth Poor soil or insufficient light

Assessing Water And Light Issues

Knowing if your bonsai tree is struggling can be puzzling. Look no further – by assessing water and light issues, you can pinpoint the problem. A thriving bonsai demands just the right amount of water and light. Uncover the signs and get your little tree back to full health.

Overwatering Vs. Underwatering

Your bonsai’s water needs are delicate. It’s like a balancing act. Too much water, and the roots drown. Not enough, and they wither. Spot the clues early to save your green friend.

  • Overwatering: Leaves turn yellow. Stems feel soggy. Mold or mildew may appear on the soil.
  • Underwatering: Leaves droop and brown. Soil feels bone dry. The tree seems lifeless.

Check the soil before watering. Use your finger to test. The top inch should be dry before you water again. A healthy bonsai prefers a drink only when needed.

Adequate Light Exposure

Bonsais love the sun. Without enough light, they can’t photosynthesize properly. They need a bright spot to flourish.

Symptoms Possible Issue Solution
Lanky growth, weak stems Too little light Move to a brighter spot
Scorched leaves Too much direct light Provide filtered sunlight

Monitor your tree’s exposure. Change its position with seasons. Your bonsai’s leaves will tell its light story.

Detecting Pests And Diseases

Understanding the health of a bonsai tree can be like piecing together a mystery. One clue to look for is the presence of pests and diseases. These can be silent assailants, slowly diminishing the vitality of your miniature tree.

Common Pests In Bonsai

Pests are tiny, but they can cause big problems for bonsai trees. Identifying these troublemakers early on is vital. Common invaders include:

  • Spider Mites: Tiny and red or white, they cause yellowing leaves.
  • Aphids: Green or black, they create sticky sap on leaves.
  • Scale Insects: These pests look like small bumps on branches. They hinder growth.
  • Mealybugs: White, cottony bugs that cluster in leaf axils.

Recognizing Fungal And Bacterial Infections

Fungal and bacterial foes attack bonsai trees, often going unnoticed until severe damage occurs. Here’s what to scout for:

Signs Infections
Brown or black spots on leaves May indicate a fungal infection like leaf spot.
White, powdery coating on leaves Suggests powdery mildew.
Slimy, dark areas at the base Can be a sign of root rot due to bacteria.

Regular inspections keep your bonsai healthy. Remove any affected areas carefully. Consider a professional’s opinion if unsure.

Reviving Your Bonsai

Is your bonsai tree looking unwell? Fear not! With the right steps, you can bring your miniature tree back to life. Signs such as yellowing leaves, dry branches, and lack of growth can indicate stress or disease. Reviving your bonsai requires attention to its unique needs. Follow these strategies to nurture your tree back to health.

Pruning And Repotting Strategies

Pruning and repotting play crucial roles in the health of your bonsai. They remove dead material and encourage new growth.

  • Clip dead leaves and branches to redirect energy.
  • Prune carefully, focusing on overgrown areas.
  • Examine roots during repotting for any rot.
  • Choose the right soil and a slightly larger pot.
  • Repot during dormancy, typically in spring.

Adjusting Care Routines And Environment

Making changes to the care routine and environment can improve your bonsai’s health. Always cater to the specific needs of your bonsai species.

Care Aspect Strategy
Watering Keep soil consistently moist, avoid overwatering.
Light Provide bright, indirect sunlight for several hours.
Humidity Maintain moderate levels, consider a humidity tray.
Fertilization Use balanced fertilizer, reduce frequency in poor health.

Monitor the results after these adjustments, and remain patient. With consistent care, your bonsai tree can rebound from its weakened state to flourish once again. Remember to observe for any further signs of distress and alter your care routine as necessary. With these strategic moves, your bonsai should return to its original vibrancy.

Preventive Measures And Tips

Keeping a bonsai tree healthy demands attention to detail. By practicing preventive measures, your bonsai can thrive for many years. These steps not only aid in maintaining its beauty but also prevent it from dying.

Routine Maintenance

Proper care is key for any bonsai. Start with these simple routine maintenance tips:

  • Water your bonsai only when the soil feels dry. Use a watering can or hose attachment that can simulate gentle rainfall.
  • Check for pests frequently. Pests can damage a bonsai quickly.
  • Prune regularly. Pruning helps maintain shape and promotes new growth.
  • Clean the leaves often. Dust and grime can block sunlight.
  • Provide the right amount of light. Most bonsai trees prefer bright, indirect light.
  • Repot your bonsai every two to five years. This renews the soil and encourages root health.

Advanced Techniques For Bonsai Longevity

Beyond the basics, certain advanced techniques can help sustain your bonsai’s life. Implement the following strategies to further enhance its health:

  1. Use a balanced fertilizer. Do it during the growing season for the best results.
  2. Implement a soil mixture specific to your bonsai type. This will ensure proper drainage and nutrient absorption.
  3. Observe the tree’s response to seasonal changes. Adjust care as needed for temperature and humidity shifts.
  4. Conduct occasional root pruning to prevent overgrowth. This should be done with care, ideally by an expert or under experienced guidance.
  5. Employ wiring techniques to shape branches and trunks. This is a skilled practice that can both style and strengthen your bonsai.

Remember that each bonsai species might require unique care. Always research and understand your tree’s specific needs. By following these routine maintenance and advanced techniques, your bonsai tree has the best chance of a long and vibrant life.

Frequently Asked Questions Of How Do You Know If Your Bonsai Tree Is Dying

What Are Signs Of A Dying Bonsai Tree?

Changes in a bonsai tree indicating decline include yellowing or brittle leaves, lack of new growth, and a dry or overly spongy trunk. Root rot, often caused by overwatering, can also be a sign of distress.

How Often Should You Water A Bonsai?

Bonsai watering should be measured and consistent, typically when the topsoil appears dry. Overwatering or underwatering can both harm the tree. Assessing the bonsai size, species, and container size is essential for a watering regimen.

Can A Wilted Bonsai Be Revived?

A wilted bonsai can sometimes be revived, depending on the damage. Ceasing improper watering practices, providing appropriate sunlight, and ensuring good soil condition are critical. Immediate attention increases the chances of recovery.

Why Is My Bonsai Losing Leaves?

Leaf loss in bonsai can be due to overwatering, underwatering, lack of light, or a temperature shock. It is crucial to monitor the environment and watering schedule carefully to prevent stress on the tree.

Conclusion

Recognizing the signs of a dying bonsai is crucial for timely intervention. Keep an eye out for yellowing leaves, stunted growth, and dry soil. Your bonsai’s recovery hinges on early detection and proper care. Embrace the art of bonsai preservation, ensuring your miniature tree thrives for years to come.

Adenium Bonsai

Adenium Bonsai Benefits: Enhance Your Space & Well-being

Adenium bonsai trees enhance aesthetic appeal and purify indoor air. They require minimal maintenance and are drought-tolerant.

Cultivating an Adenium bonsai, commonly known as the Desert Rose, offers a graceful fusion of art and nature right in your living space. These miniature trees, with their vibrant blossoms and unique, swollen trunks, serve as striking decor pieces that captivate the attention of visitors and plant enthusiasts.

Adenium Bonsai

Perfect for those with a busy lifestyle, Adenium bonsai demand very little water, making them an excellent choice for aspiring green thumbs who may not have the time for high-maintenance flora. Their hardy nature also means they thrive in environments that mimic their native arid conditions, making them a durable and long-lasting addition to any home. Enjoy the beauty and tranquility of a bonsai, while also reaping the air-purifying benefits associated with indoor plants.

The Allure Of Adenium Bonsai

The Allure of Adenium Bonsai charms enthusiasts worldwide. These miniature beauties captivate with their resilient nature and striking appearance. They offer a unique twist on traditional bonsai, infusing an exotic flair into homes and gardens. Let’s delve into the enchanting world of Adenium bonsai and discover why they stand out.

Origins And Unique Characteristics

Adenium bonsai, known as the ‘Desert Rose‘, hail from arid regions of Africa and the Arabian Peninsula. Their ability to thrive in harsh environments makes them stand out. With swollen trunks, also known as caudex, and brilliant flowers, they exude a unique charm.

  • Thick Trunk: The caudex serves as a water reservoir.
  • Profuse Bloomer: Vibrant flowers in various hues.
  • Low Maintenance: Adenium demands very little care.

Comparing Adenium To Traditional Bonsai Trees

Feature Adenium Bonsai Traditional Bonsai
Climate Adaptability Adapted to dry, hot environments. Often require specific climate conditions.
Water Requirements Minimal watering needed. Regular watering schedule.
Blooming Year-round flowering potential. Seasonal or specific species-related.
Care Level Beginner-friendly. Varies, some may be complex.

Aesthetic Appeal In Your Living Space

The allure of Adenium Bonsai transforms your living space into a vibrant tableau. Its rich colors and unique growth patterns offer a visual treat that sparks joy and creativity.

Adenium Bonsai As Natural Art

Adenium Bonsai stands as a masterpiece of nature’s art. Each twist and turn of its trunk tells a story. The balancing act of its lush crown and the rugged, caudex base is eye-catching. This miniature tree is akin to a living sculpture in your home.

  • Bold blossoms catch the eye.
  • Silky smooth leaves invite touch.
  • Artistic trunk shapes spark curiosity.

Incorporating Adenium Into Interior Design

Adenium Bonsai easily becomes the focal point in any room. It complements modern, minimalist, and even traditional decor.

Placement Effect
Living Room Adds liveliness and warmth.
Study Area Inspires focus and clarity.
Bedroom Invites calmness and serenity.

Pairing Adenium Bonsai with other elements like books or soft lighting enhances its charm. It adds life to shelves and tables. The bonsai brings nature indoors without clutter. Every day, it offers a unique view as it continues to grow and change.

Health And Well-being Advantages

Adenium Bonsai trees bring more than just beauty to a room. They offer powerful benefits for your health and well-being. Bringing an Adenium Bonsai into your space can enhance air quality and lift your mood. Read on to discover how these beautiful plants can make a huge difference in your everyday life.

Air Purifying Properties

Adenium Bonsai acts as natural air purifiers. Their leaves absorb toxins and carbon dioxide. They release clean oxygen for you to breathe. This exchange helps to create a healthier environment in your home or office.

  • Reduces indoor pollutants
  • Boosts humidity by releasing water vapor
  • Improves air circulation

Psychological Benefits Of Indoor Plants

Surrounding yourself with greenery like the Adenium Bonsai has profound psychological effects. Plants can ease stress and improve focus. Having a bonsai to care for can bring joy and satisfaction too.

Benefit Description
Reduces Stress Caring for a Bonsai offers a relaxing break from screen time.
Increases Focus Plants in your view can lead to better concentration on tasks.
Enhances Mood Green spaces can lift spirits and improve overall well-being.

Cultivation And Care

The allure of Adenium bonsai trees lies not just in their striking appearance but also in the relatively straightforward care they require. With proper cultivation and care, Adeniums thrive, offering both aesthetic beauty and the satisfaction of nurturing a living sculpture. Let’s explore the essentials of Adenium care to help you grow these captivating plants successfully.

Basic Care Tips For Beginners

If you’re new to the world of Adenium bonsai, here are some simple guidelines:

  • Watering: Wait until the soil is dry before watering.
  • Light: Provide bright, indirect sunlight for most of the day.
  • Soil: Use a well-draining soil mix to prevent root rot.
  • Feeding: Fertilize sparingly to promote growth.
  • Repotting: Repot every two to three years to refresh the soil.
  • Pruning: Trim to shape and encourage branching.

Advanced Techniques For Seasoned Enthusiasts

Gardeners with experience can enhance their Adenium bonsai with these advanced tactics:

Technique Benefit Frequency
Root Trimming Encourages a more compact root system. During repotting
Grafting Merges different Adeniums for varied colors. As desired
Defoliation Stimulates new foliage and branches. Once per season

Beyond these techniques, remember to provide Adeniums the right environment. They require warmth and are sensitive to frost. Monitor your climate and adjust care as needed. With patience and attention, your Adenium bonsai will flourish.

Choosing The Perfect Adenium Bonsai

Adenium bonsais combine beauty and simplicity. They bring a unique charm to your living space. These miniature trees are low-maintenance, drought-tolerant, and visually stunning. A perfect blend of art and nature, an Adenium bonsai could be your next living masterpiece. Finding the right one is key.

Selecting The Right Variety

Variety matters. Each Adenium bonsai has distinct colors and shapes. Consider these factors:

  • Blossom Colors: Pinks, reds, and whites are common. Pick your favorite.
  • Leaf Shape: Some have broader leaves, others, more slender. Think about the look you want.

Size And Placement Considerations

Think about where your bonsai will live. Light and space are crucial.

Size Placement
Mini Windowsills or small tables
Medium Desk or shelf
Large Room focal point

Remember, big bonsais need more space. Small ones fit snug spots.


Community And Connection

Adenium bonsai trees are not just about aesthetics and calm in your living space. They are a bridge to a world of connection and community. When you dive into the world of these lovely, resilient plants, a door to new friendships and knowledge opens. Cultivating these diminutive beauties often leads to sharing stories, tips, and much excitement with other enthusiasts worldwide.

Joining Adenium And Bonsai Enthusiasts Groups

Being part of Adenium and bonsai groups brings together people with a common passion. It’s an opportunity to connect with others, learning from their experiences and increasing your network. Various platforms host such groups:

  • Social Media Platforms: Facebook, Instagram, Twitter.
  • Online Forums: Bonsai enthusiast websites and dedicated forums.
  • Local Clubs: Meet and learn from growers in your area.

Joining these groups can result in exciting opportunities like exhibitions, sessions, and even competitions.

Sharing Tips And Experiences With Fellow Growers

Every grower has unique insights and strategies for nurturing Adenium bonsai. When these experiences are shared, everyone learns and grows. Some popular discussion topics include:

  1. Watering and soil composition.
  2. Pruning techniques and growth patterns.
  3. Pest control and health management.

Sharing stories from a success or a challenge can inspire and assist others in their bonsai journey. Such interactions foster a supportive environment where all members can thrive.

Frequently Asked Questions For Adenium Bonsai Benefits

What Is An Adenium Bonsai?

Adenium bonsai refers to the art of cultivating Adenium plants in miniature. It’s popular for its distinctive swollen trunk and beautiful flowers. Bonsai enthusiasts appreciate its low maintenance and unique appearance.

Can Adenium Bonsai Improve Air Quality?

Yes, like many plants, Adenium bonsai can contribute to improving air quality. They absorb carbon dioxide and release oxygen, helping to purify the air indoors. However, their rate of air purification is not as high as some other indoor plants.

What Are The Care Tips For Adenium Bonsai?

Adenium bonsai thrives with bright light and minimal water. It requires well-draining soil and infrequent watering to prevent root rot. In colder seasons, reduce watering and protect the plant from temperatures below 50°F.

Are There Health Benefits To Growing Adenium Bonsai?

Growing Adenium bonsai offers mental health benefits. It’s known for reducing stress and promoting relaxation. The practice of shaping bonsai can also improve focus and creativity, benefiting overall well-being.

Conclusion

Embracing the art of Adenium bonsai yields delightful rewards. These charming plants enhance your space, purifying the air and uplifting moods. Ideal for novice and seasoned gardeners alike, Adenium bonsais promise a blend of beauty and well-being. Cultivate one, and watch tranquility take root in your life.

Discover the joy these miniature wonders can bring home.

What is So Special About a Bonsai Tree

What is So Special About a Bonsai Tree? Unveiling Its Charm!

Bonsai trees are special for their miniaturized yet mature appearance and the artistry involved in their cultivation. These trees embody nature’s beauty on a diminutive scale, drawing awe and intrigue.

A bonsai tree is not merely a plant; it is a horticultural sculpture, a blend of meticulous care and creative expression. Gardeners shape bonsai trees through precise pruning, wiring, and intentional neglect to mimic mature trees in nature, albeit in a miniature form.

What is So Special About a Bonsai Tree

What is So Special About a Bonsai Tree: This art form, originating from China and developed in Japan, represents patience, attention to detail, and a connection to nature. Its allure lies in the tree’s ability to evoke a sense of calm and reflection, making bonsai trees not just a botanical feat but also a spiritual one. Thus, bonsai trees hold a unique place in both gardens and cultural practices around the world, symbolizing harmony, balance, and resilience.

The Timeless Allure Of Bonsai

The enchanting world of bonsai trees captivates with a blend of horticultural mastery and artistic expression. These miniature marvels encapsulate nature’s beauty, scaled down to fit within our homes and gardens. Bonsai trees are special for their history, culture, and the deep philosophical meaning they embody. Let’s unearth the wonders of these living sculptures.

Roots In History: Bonsai Through The Ages

Bonsai trees are steeped in history, tracing back over a thousand years. Initially originating in China, the art form spread to Japan, where it was honed and perfected. These living artifacts have stood the test of time, symbolizing harmony and balance throughout the ages. Delve into the timeline:

  • The Tang Dynasty (618-907): early records of miniature landscapes
  • The Kamakura Period (1185-1333): bonsai art form embraced in Japan
  • Modern times: global appreciation and bonsai mastery continues to evolve

More Than Mini Trees: The Philosophical Significance

Bonsai trees represent more than their diminutive size. They are a bridge between humans and the natural world. Cultivating a bonsai is a reflective practice, inviting patience, mindfulness, and respect for nature. These aspects are deeply rooted in philosophical thought:

Philosophical Aspect Significance in Bonsai
Patience Nurturing a tree for years teaches one to value the passage of time.
Mindfulness Each snip and trim is a mindful act, bringing one into the present moment.
Nature Caring for a bonsai fosters a deep connection with the environment.

The Art Behind Bonsai

The Art Behind Bonsai is a captivating dance of patience and skill. These miniaturized trees are more than just plants; they’re living sculptures. Mastering the art of bonsai requires harmony between the gardener and nature. Let’s peek into what makes this art form so unique and reverential.

Cultivation Techniques: Shaping Nature’s Artwork

Bonsai cultivation is a meticulous process. It shapes each tree into a miniature masterpiece. This craft involves a variety of precise techniques:

  • Pruning: Careful cutting controls shape and growth.
  • Wiring: Wires guide branches into graceful forms.
  • Repotting: Regular repotting maintains health and proportions.
  • Feeding: Balanced nutrients keep the tree thriving.

Gardeners bend and twist trees over years. This transforms them into a display of harmony and balance.

Species Selection: The Canvas Of Choice

Choosing the right species for bonsai is like picking a canvas for painting. Each species has its own beauty and challenges. Here are popular ones:

Species Features
Juniper Hardy and versatile.
Maple Stunning fall colors.
Pine Classic needle-like leaves.
Ficus Great for beginners.

Selecting a species aligns with the artist’s vision. It sets the path for the bonsai’s future beauty.

Bonsai Aesthetic Elements

The art of bonsai is steeped in a rich tradition of patience and detailed craftsmanship. Bonsai trees encapsulate the beauty of nature in miniature form. These tiny trees awe onlookers with their poise and grandeur. What makes each bonsai tree special is not just its age or species, but the distinct aesthetic elements that it showcases.

Balance And Proportion: The Visual Equilibrium

When you gaze at a bonsai, the first thing that strikes you is its harmony. The tree’s design follows rules of balance and proportion, creating visual equilibrium. A bonsai should not lean heavily to one side. Nor should it appear to topple over. Designers take great care to ensure each branch and leaf contributes to an overall sense of balance. Symmetry is less important than the feeling of stability. A larger branch on one side, for instance, can be offset by a smaller, but strategically placed, branch on the opposite side.

  • Every tree part plays a role in the balancing act.
  • Proper weight distribution is crucial.

Empty Space: The Importance Of Ma In Design

In bonsai art, empty space, or “Ma,” is as important as filled space. Ma is the Japanese concept that refers to the aesthetic use of empty space. It provides breathing room for the tree. It creates areas of respite for the eyes. This principle is key in bonsai design. It allows each element of the tree to stand out. Ma also encourages contemplation and is essential in achieving the zen-like state many bonsai enthusiasts cherish.

  1. Intentional space sets a bonsai apart.
  2. Ma gives the tree a clear structure.
  3. It encourages a peaceful viewing experience.

Caring For A Living Sculpture

Embracing the art of bonsai turns plant care into a form of expression. The bonsai tree stands as a living sculpture, a manifestation of beauty and patience. Unlike other potted plants, a bonsai requires more than just basic maintenance. Its distinct charm comes from detailed, methodical care that allows it to embody both nature and artistic design in miniature form.

Daily Dedication: Watering, Pruning, And Positioning

Meticulous attention daily underpins the bonsai’s vitality. Like clockwork, watering ensures your living sculpture thrives. The bonsai’s compact size means its roots have less space and require careful monitoring to maintain the right moisture levels.

Pruning is not just about aesthetics; it’s vital for health. Regularly trimming shoots and leaves helps to shape the tree while also controlling growth. This delicate dance keeps the tree miniature and mirrors its grand counterparts in nature.

Positioning your bonsai can make or break its development. Light exposure influences growth patterns, while rotation ensures all sides receive equal attention. Strategic placement contributes to the tree’s form and balance, effectuating its stature as a work of art.

Seasonal Rituals: Repotting And Root Care

Bonsai trees embrace the cycle of seasons, and so must their caretakers. Each change of season ushers in unique requirements, particularly concerning repotting and root care.

  • Repotting is essential to provide fresh soil and room for root growth. It ensures your bonsai does not become root-bound, which can stunt its growth and diminish health.
  • During repotting, examining the roots is critical. Trimming them stimulates growth and maintains the tree’s compact shape.
  • Choosing the right time for repotting is crucial, usually when the tree is not in active growth, often in spring or fall.

These seasonal rituals reaffirm your commitment to the bonsai, with each practice ensuring your miniature tree stays healthy and continues to reflect the timeless allure of nature.

The Bonsai Community And Culture

The Bonsai Community and Culture are as intricate and enriching as the art of bonsai itself. Enthusiasts from all over the globe connect through shared love and respect for these miniature trees. This dedicated group not only propagates bonsai but also values the deeper philosophical aspects it embodies. A sense of unity, patience, and diligence echo within this unique cultural sphere.

Clubs And Exhibitions: Sharing The Passion

Bonsai clubs unite individuals eager to delve into the world of tiny trees. Members meet regularly, discuss styling techniques, and care for their bonsai. They encourage novice growers and celebrate the achievements of seasoned practitioners.

  • Networking opportunities
  • Monthly workshops and talks
  • Seasonal exhibitions

Exhibitions showcase the beauty and diversity of bonsai. Enthusiasts display their prized specimens. Judges award the most exceptional trees. The public admires and learns from these living pieces of art.

Influencers And Masters: Learning From The Experts

The bonsai world reveres its masters and influencers. These experts impart wisdom and inspire others. They have dedicated years, even lifetimes, to perfecting the craft of bonsai.

Expert Contribution
Masahiko Kimura Pushing creative boundaries in bonsai art
Ryan Neil Integrating Western techniques with bonsai

Books, videos, and online resources afford access to their expertise. Workshops enable direct interaction. Participants learn about aesthetic principles, horticultural skills, and the philosophy underpinning bonsai.

Bonsai trees have garnered immense appreciation worldwide. Not merely plants, these miniature masterpieces embody art, patience, and connection to nature. Their allure has captured the hearts of many, including those in the worlds of media and art. From the screens of cinemas to the canvases in galleries, bonsai trees have rooted themselves in popular culture, symbolizing peace, harmony, and balance.

Inspirational Appearances: From Tv Shows To Blockbuster Movies

The presence of bonsai trees in film and television often signifies more than just set decoration. They often stand as metaphors for growth, care, and meticulous grooming. Cinematic icons have featured these tiny giants, captivating audiences and leaving a lasting impression.

  • The Karate Kid – A classic example, where bonsai symbolizes balance and the protagonist’s journey.
  • Star Wars – Exotic planetscapes are crafted, resembling bonsai aesthetics, to showcase otherworldly beauty.
  • Inception – These trees mirror the intricate levels of the mind in this blockbuster hit.

Bonsai And Creativity: Inspiring Artists And Designers

Bonsai trees inspire creativity and innovation. Artists and designers draw upon the shapes and stories of bonsai, infusing their works with similar dedication and finesse.

Industry Influence
Visual Arts They translate the essence of bonsai into stunning visuals, incorporating themes of miniature beauty.
Fashion Design Designers pattern textiles and collections after the delicate form of bonsai trees.
Architecture Analogous to bonsai’s precision, architects design intimate spaces that resonate with tranquility and structure.

Frequently Asked Questions Of What Is So Special About A Bonsai Tree?

What Is The Point Of Having A Bonsai Tree?

The point of having a bonsai tree includes aesthetic enjoyment, the satisfaction of nurturing, and experiencing a connection with nature. It also promotes patience and creativity.

Why Are Bonsai Trees So Valuable?

Bonsai trees are valuable due to their intricate care requirements, artistic beauty, and the time invested in cultivating and training them. Their uniqueness and longevity also contribute to their worth.

What Does A Bonsai Tree Symbolize?

A bonsai tree symbolizes harmony, balance, patience, and the beauty of nature’s dwarfed form. It is a representation of dedication and the intricate art of cultivation.

What Makes The Bonsai Tree Unique?

The bonsai tree is unique due to its miniature size and its mimicking of mature trees’ shapes through careful pruning and cultivation. These ornamental plants embody the beauty of nature in a compact form, making them both artistic and horticultural marvels.

Conclusion

Embracing the bonsai tree offers more than aesthetic appeal. It’s an art form, a meditation tool, and a symbol of patience. As each bonsai uniquely mirrors nature’s beauty, it beckons us to appreciate life’s simplicity and detail. Beginner or seasoned gardener, the bonsai’s allure is undeniable, promising a special connection with the natural world.