Vegetable-Gardening

10 Game-Changing Vegetable Gardening Hacks to Unlock Your Green Thumb

Are you passionate about gardening? Do you dream of having a thriving vegetable garden that yields bountiful harvests? If so, you’re in the right place! In this article, we will share with you 10 game-changing vegetable gardening hacks that will help you unlock your green thumb and achieve incredible results in your garden. Whether you’re a seasoned gardener or just starting out, these tips and tricks will enhance your gardening skills and transform your vegetable patch into a flourishing oasis of fresh produce. So, let’s dive in and discover how you can take your vegetable gardening to the next level!

Vegetable-Gardening

Hacking Your Way to a Thriving Vegetable Garden

1. Start with the Right Soil

The foundation of a successful vegetable garden lies in the soil. It’s essential to create a nutrient-rich environment that promotes healthy plant growth. Begin by testing your soil’s pH level using a home testing kit or by sending a sample to a local agricultural extension office. Most vegetables prefer a slightly acidic to neutral pH range of 6.0 to 7.0. If your soil is too acidic, you can add lime to raise the pH, and if it’s too alkaline, you can amend it with sulfur or organic matter to lower the pH. Additionally, enrich the soil with compost or well-rotted manure to improve its structure and fertility.

When it comes to vegetable gardening, starting with the right soil sets the foundation for success. Choosing a nutrient-rich soil composition tailored to the needs of your plants is crucial. Conduct a soil test to determine its pH level and make any necessary adjustments to create an optimal environment. Incorporate organic matter, such as compost or well-rotted manure, to improve soil structure and fertility. By providing your vegetables with the ideal soil conditions, you’ll be giving them a head start in their growth journey and maximizing your chances of a thriving and productive garden.

2. Embrace Companion Planting

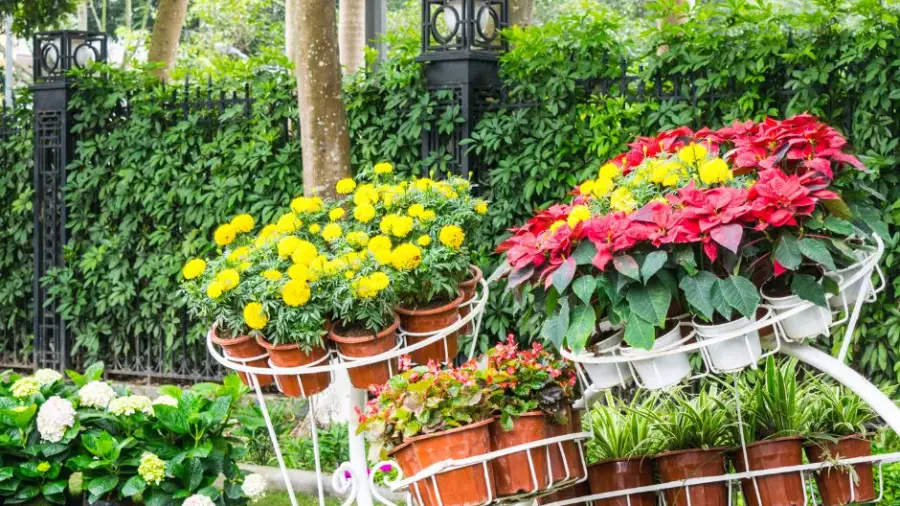
Companion planting is a gardening technique where specific plants are grown together to benefit one another. By strategically placing compatible plants next to each other, you can deter pests, enhance pollination, and maximize space utilization. For instance, planting marigolds alongside your tomatoes can repel nematodes and ward off aphids. Similarly, interplanting basil with your peppers can improve their flavor and growth. Research different companion plants for your vegetables and experiment with combinations to reap the rewards of this symbiotic gardening practice.

Embracing companion planting is a game-changing strategy in vegetable gardening. By strategically pairing compatible plants, you can unlock a range of benefits for your garden. For instance, planting marigolds alongside your vegetables can naturally repel pests, while interplanting herbs like basil can enhance the flavor and growth of neighboring crops. Companion planting also promotes pollination and maximizes space utilization in your garden. By harnessing the power of these plant partnerships, you’ll create a harmonious and productive vegetable garden that thrives with the help of nature’s cooperative relationships.

3. Practice Succession Planting

Succession planting involves sowing seeds or transplanting seedlings at staggered intervals to ensure a continuous supply of fresh produce throughout the growing season. By planting new crops as others are harvested, you can optimize your garden’s productivity and avoid gluts or shortages. This technique works particularly well with fast-growing vegetables like lettuce, radishes, and beans. Plan your planting schedule and make regular plantings every few weeks to extend your harvest and enjoy a steady stream of homegrown goodness.

Practice succession planting to ensure a continuous harvest throughout the vegetable gardening season. By staggering your plantings, you can enjoy a steady supply of fresh produce. As one crop is harvested, you can promptly fill the vacant space with new plantings. This technique is particularly effective with fast-growing vegetables like lettuce, radishes, and beans. By carefully planning your planting schedule and consistently sowing seeds or transplanting seedlings, you’ll extend your harvest and make the most of your garden’s potential. Say goodbye to gluts and shortages, and say hello to a consistent abundance of homegrown goodness from your vegetable garden.

4. Make Use of Raised Beds

Raised beds offer numerous advantages for vegetable gardening. They provide better drainage, allow for easier weed control, and enable you to create a custom soil mix tailored to the needs of your plants. Raised beds also warm up faster in spring, which extends the growing season and enables earlier plantings. Construct your raised beds using untreated lumber or recycled materials, ensuring they are of a manageable width for easy access from all sides. Fill them with a blend of quality topsoil, compost, and organic matter to create a fertile and well-draining environment for your vegetables.

Making use of raised beds is a transformative approach in vegetable gardening. Raised beds offer a range of benefits that contribute to the success of your garden. They provide improved drainage, allowing excess water to flow away more efficiently and preventing waterlogged soil. Additionally, raised beds make weed control easier, as the defined boundaries help keep unwanted plants at bay. You have the freedom to customize the soil mix, tailoring it to the specific needs of your plants. Raised beds also warm up faster in the spring, extending the growing season and enabling earlier plantings. With raised beds, you’ll create an optimal environment for your vegetables, unlocking their full potential and setting the stage for a flourishing and abundant garden.

5. Implement Mulching Techniques

Mulching is an uncomplicated yet incredibly effective technique that provides numerous benefits for your vegetable garden. Applying a layer of organic mulch, such as straw, shredded leaves, or grass clippings, around your plants helps to suppress weeds, retain moisture, regulate soil temperature, and prevent soil erosion. Mulch also breaks down over time, adding valuable nutrients to the soil and improving its structure. Remember to replenish the mulch as needed throughout the season to maintain its effectiveness and keep your plants healthy and happy.

Implementing mulching techniques is a game-changer in vegetable gardening. By applying a layer of organic mulch around your plants, you can unlock a host of benefits. Mulch helps suppress weeds, reducing competition for nutrients and moisture. It acts as a natural insulator, regulating soil temperature and protecting plant roots from extreme heat or cold. Mulch also retains moisture, reducing the frequency of watering and preventing soil erosion. As the mulch breaks down over time, it enriches the soil with valuable nutrients, enhancing its fertility. By incorporating mulching into your gardening routine, you’ll create a healthier, more resilient garden that thrives with minimal effort.

6. Install Drip Irrigation

Watering your vegetable garden efficiently is crucial for its success. Instead of relying on hand watering or overhead sprinklers, consider installing a drip irrigation system. Drip irrigation delivers water directly to the base of each plant, minimizing water waste through evaporation and ensuring that the roots receive a consistent and adequate water supply. This method also helps prevent leaf diseases by keeping foliage dry. With the use of a timer, you can easily automate your watering schedule and save time while promoting optimal plant growth.

Installing drip irrigation is a transformative step in vegetable gardening. This efficient watering system delivers water directly to the base of each plant, ensuring that the roots receive a consistent and adequate water supply. Drip irrigation minimizes water waste through evaporation and runoff, making it a sustainable choice for your garden. With the use of a timer, you can easily automate your watering schedule, saving you time and effort. This method also keeps the foliage dry, reducing the risk of leaf diseases. By installing drip irrigation, you’ll optimize water usage, promote healthier plants, and enjoy the convenience of a well-maintained garden.

7. Protect Your Plants from Pests

Dealing with pests can be a frustrating challenge in vegetable gardening. However, there are several natural and eco-friendly ways to protect your plants without resorting to harmful chemicals. Introduce beneficial insects like ladybugs, lacewings, and praying mantises to your garden, as they feed on common pests like aphids and caterpillars. You can also create physical barriers using mesh netting or row covers to prevent pests from reaching your plants. Additionally, companion planting, as mentioned earlier, can play a significant role in deterring pests naturally.

Protecting your plants from pests is a critical aspect of successful vegetable gardening. By implementing effective pest management strategies, you can safeguard your precious crops without relying on harmful chemicals. Introduce beneficial insects, such as ladybugs and praying mantises, which naturally prey on common garden pests. Utilize physical barriers like mesh netting or row covers to create a barrier against pests. Companion planting can also play a significant role in deterring pests, as certain plants emit natural repellents. By taking proactive measures to protect your plants, you’ll promote a healthy and thriving garden, free from the devastating impact of pests.

8. Utilize Vertical Gardening

If you have limited space in your garden or want to maximize your yield, vertical gardening is the way to go. Growing vegetables vertically not only saves space but also increases air circulation and sunlight exposure, leading to healthier plants. Install trellises, stakes, or cages to support climbing vegetables like tomatoes, cucumbers, and beans. Make use of hanging baskets or vertical planters for herbs and salad greens. With vertical gardening, you can transform even the smallest of spaces into a lush and productive vegetable garden.

Utilizing vertical gardening techniques is a game-changer in vegetable gardening, especially when space is limited. Vertical gardening involves growing plants vertically, utilizing structures like trellises, stakes, or cages. By training your vegetables to grow upwards, you not only maximize space but also improve air circulation and sunlight exposure for healthier plants. This method is particularly beneficial for vining crops like tomatoes, cucumbers, and beans. Hanging baskets or vertical planters can also be used for growing herbs and salad greens. With vertical gardening, even the smallest of spaces can be transformed into a lush and productive vegetable garden, unlocking the full potential of your growing area.

9. Practice Regular Pruning and Maintenance

Pruning and maintaining your vegetable plants are essential for their overall health and productivity. Remove any dead or diseased foliage to prevent the spread of diseases and improve airflow. Pinch off suckers on tomato plants to redirect the energy towards fruit production. Regularly inspect your plants for signs of pests or nutrient deficiencies and take appropriate action. By staying on top of maintenance tasks, you can ensure that your vegetable garden remains in top shape and continues to thrive.

Practicing regular pruning and maintenance is a key aspect of successful vegetable gardening. By keeping your plants well-maintained, you can ensure their overall health and productivity. Regularly remove any dead or diseased foliage to prevent the spread of diseases and improve airflow around the plants. Pinch off suckers on tomato plants to redirect the energy towards fruit production. Stay vigilant and inspect your plants regularly for signs of pests or nutrient deficiencies, taking appropriate action when needed. By staying proactive with pruning and maintenance tasks, you’ll create an environment where your vegetable garden can thrive and flourish, yielding an abundance of healthy and flavorful produce.

10. Keep Learning and Experimenting

Gardening is a continuous learning process, and there is always room to grow and improve your skills. Stay curious, read gardening books and articles, join online forums or local gardening clubs, and learn from experienced gardeners. Experiment with new varieties of vegetables, try different growing techniques, and keep a journal to track your successes and failures. Each season presents an opportunity to expand your knowledge and discover new ways to unlock your green thumb.

To truly unlock your green thumb in vegetable gardening, it’s essential to embrace a mindset of continuous learning and experimentation. Treat each season as an opportunity to expand your knowledge and discover new techniques. Stay curious and seek out gardening books, articles, and online resources to deepen your understanding. Join gardening forums or local clubs to connect with experienced gardeners and learn from their wisdom. Experiment with new vegetable varieties, growing methods, and innovative practices. Keep a journal to track your successes and failures, allowing you to fine-tune your approach. By embracing a learning mindset and being open to experimentation, you’ll continuously evolve as a gardener and unlock new levels of success in your vegetable garden.

FAQs

Q: What is the recommended frequency for watering my vegetable garden?

A: The watering schedule for your vegetable garden is influenced by factors such as weather conditions, soil type, and the specific needs of your plants. As a general guideline, aim to provide about 1 inch of water per week, either through rainfall or supplemental irrigation. However, it’s crucial to monitor the soil moisture levels and adjust your watering schedule accordingly.

Q: Should I use chemical fertilizers in my vegetable garden?

A: While chemical fertilizers can provide quick and concentrated nutrients to your plants, they are not the only option. Organic fertilizers, such as compost, well-rotted manure, and seaweed extract, offer a more sustainable and environmentally friendly approach. They improve soil health, promote beneficial microbial activity, and nourish your plants naturally.

Q: How can I protect my vegetable garden from extreme weather conditions?

A: Extreme weather conditions like heatwaves, frost, or heavy rains can have a significant impact on your vegetable garden. Consider using shade cloths or row covers to protect your plants from excessive heat or sun. During frost, cover your plants with blankets or fabric to prevent damage. Proper drainage and raised beds can help mitigate the effects of heavy rain and prevent waterlogging.

Q: What are some common pests in vegetable gardens and how can I control them naturally?

A: Common pests in vegetable gardens include aphids, caterpillars, slugs, and snails. To control them naturally, you can introduce beneficial insects like ladybugs and praying mantises. You can also use organic pest control methods like handpicking, using insecticidal soap or neem oil, and creating physical barriers with netting or row covers.

Q: Can I grow vegetables indoors?

A: Yes, you can grow vegetables indoors with the help of grow lights and proper ventilation. Choose compact varieties suitable for container gardening, provide them with adequate light, moisture, and nutrients, and ensure good air circulation. Leafy greens, herbs, and cherry tomatoes are some popular choices for indoor vegetable gardening.

Q: What should I do with leftover vegetables from my garden?

A: If you have an abundance of vegetables from your garden, there are several things you can do. Share them with friends, family, or neighbors. Preserve them through canning, freezing, or drying. Donate them to local food banks or community organizations. You can also incorporate them into delicious recipes or experiment with pickling and fermenting techniques.

Conclusion

Unlocking your green thumb and achieving a thriving vegetable garden is within your reach. By implementing these 10 game-changing vegetable gardening hacks, you’ll set yourself up for success and enjoy a bountiful harvest of fresh, homegrown produce. Remember to start with the right soil, embrace companion planting, and practice succession planting. Make use of raised beds, mulching techniques, and drip irrigation for optimal growth. Protect your plants from pests, utilize vertical gardening, and maintain your garden regularly. And most importantly, keep learning and experimenting. Happy gardening!

Spider Plant

Spider Plant: A Guide to Growing and Caring for Chlorophytum comosum

Welcome to our comprehensive guide on spider plants! In this article, we will delve into the world of Chlorophytum comosum, commonly known as the spider plant. With its graceful arching leaves and air-purifying qualities, the spider plant has become a popular choice among houseplant enthusiasts. Whether you are a seasoned gardener or a beginner looking to add some greenery to your home, this guide will provide you with all the information you need to successfully grow and care for spider plants.

Spider Plant
Spider Plant

Spider Plant: An Overview

The spider plant (Chlorophytum comosum) is a species of perennial flowering plant in the family Asparagaceae. Native to tropical and southern Africa, spider plants have long, slender leaves that can reach lengths of up to 16 inches (40 cm). The plant gets its name from the long, arching leaves that resemble the legs of a spider.

Spider plants are known for their adaptability and resilience, making them an excellent choice for both indoor and outdoor cultivation. They are often grown as houseplants due to their ability to tolerate a wide range of light conditions and their air-purifying qualities.

Spider Plant: Key Characteristics

Before diving into the details of growing and caring for spider plants, let’s take a closer look at some key characteristics of this fascinating plant:

Arching Leaves

One of the most distinctive features of the spider plant is its arching leaves. The leaves grow in a fountain-like arrangement, cascading gracefully over the sides of the container. The narrow, pointed leaves are typically green with a white or creamy stripe down the center, although there are also variegated varieties with additional splashes of yellow or light green.

Air-Purifying Qualities

Spider plants are renowned for their air-purifying qualities. They have been shown to effectively remove harmful volatile organic compounds (VOCs) from the air, such as formaldehyde, xylene, and toluene. This makes them an excellent choice for improving indoor air quality, particularly in spaces with limited ventilation.

Easy Propagation

Spider plants are incredibly easy to propagate, making them a favorite among plant enthusiasts. They produce long, arching stems called runners that eventually develop baby spider plants, also known as spiderettes or plantlets, at their tips. These spiderettes can be easily rooted in water or planted directly into potting soil, giving you the opportunity to expand your spider plant collection or share them with friends and family.

Low Maintenance

If you’re looking for a low-maintenance plant, you can’t go wrong with a spider plant. They are highly adaptable and can tolerate a wide range of light conditions, from bright, indirect sunlight to low light. Spider plants are also forgiving when it comes to watering, as they can withstand periods of drought. However, they prefer to be kept evenly moist, so regular watering is recommended.

Growing Spider Plants: A Step-by-Step Guide

Now that we have familiarized ourselves with the key characteristics of spider plants, let’s explore the step-by-step process of growing and caring for these beautiful plants:

Step 1: Choosing the Right Location

Spider plants have the ability to flourish in various light conditions, although they have a preference for bright, indirect sunlight. Find a location in your home that receives bright, filtered light, such as near a north or east-facing window. To prevent leaf scorching, it is advisable to refrain from exposing the spider plant to direct sunlight.

Step 2: Selecting the Right Container

Choose a container that has drainage holes to prevent waterlogged soil. Spider plants prefer to be slightly root-bound, so you don’t need a large pot. A 6-8 inch (15-20 cm) pot is usually sufficient for an average-sized spider plant.

Step 3: Preparing the Potting Soil

Spider plants thrive in well-draining potting soil. You can either purchase a pre-made potting mix suitable for indoor plants or create your own by combining equal parts of peat moss, perlite, and vermiculite. This mixture provides excellent drainage while retaining enough moisture for the plant’s roots.

Step 4: Planting the Spider Plant

Fill the container with the prepared potting soil, leaving enough space for the root ball. Carefully remove the spider plant from its nursery container, taking care not to damage the roots. Place the plant in the center of the container and backfill it with additional soil, gently firming it around the roots.

Step 5: Watering the Spider Plant

Water the spider plant thoroughly after planting to settle the soil and ensure good root-to-soil contact. Allow the top inch (2.5 cm) of soil to dry out between waterings, and be careful not to overwater, as this can lead to root rot. Spider plants exhibit greater tolerance towards being underwatered rather than overwatered.

Step 6: Providing Adequate Humidity

Spider plants appreciate moderate humidity levels, so consider placing a small tray of water near the plant or misting the leaves regularly. This will help create a more favorable environment for the plant’s growth.

Step 7: Fertilizing the Spider Plant

During the growing season (spring and summer), it is recommended to nourish your spider plant with a balanced, water-soluble fertilizer on a monthly basis. Follow the instructions on the fertilizer packaging for the appropriate dilution rate. Exercise caution to avoid over-fertilization, as it may result in fertilizer burn.

Step 8: Pruning and Maintenance

Prune yellow or brown leaves as they appear to maintain the plant’s appearance. You can also trim back excessively long or leggy stems to encourage bushier growth. Spider plants are generally pest-free, but if you notice any signs of infestation, such as webbing or small insects, treat the plant with an appropriate insecticide or horticultural soap.

Step 9: Propagating Spider Plants

As mentioned earlier, spider plants are incredibly easy to propagate. Wait until the spiderettes develop roots of their own, then carefully detach them from the mother plant. You can either place them in a jar of water until they develop more roots or plant them directly into potting soil. Keep the new plants in a warm, humid environment until they establish themselves.

Frequently Asked Questions (FAQs)

How often should I water my spider plant?

Spider plants thrive when the soil is consistently moist, but it’s important to avoid waterlogging. Water them when the top inch (2.5 cm) of soil feels dry to the touch. It’s better to be underwater than overwater, as spider plants are more tolerant of drought than excessive moisture.

Can spider plants tolerate low light conditions?

Yes, spider plants are adaptable and can tolerate low-light conditions. However, they will thrive and produce more vibrant foliage if placed in bright, indirect sunlight. To prevent leaf scorching, it is best to steer clear of direct sunlight for your spider plant.

Are spider plants safe for pets?

Yes, spider plants are considered non-toxic to cats and dogs. However, some pets may be attracted to the long, dangling leaves, and excessive chewing can cause mild gastrointestinal upset. If you notice your pet showing interest in the plant, consider hanging it out of reach or placing a barrier around it.

How do I prevent my spider plant from producing spiderettes?

Spider plants naturally produce spiderettes as a way to propagate themselves. If you want to prevent the plant from producing spiderettes, you can snip off the long stems before they develop baby plants. However, keep in mind that this will prevent the plant from reproducing, and you won’t be able to propagate new spider plants from the mother plant.

Why are the leaves of my spider plant turning brown?

Brown leaves on a spider plant can be caused by various factors, including underwatering, overwatering, low humidity, or direct exposure to sunlight. Evaluate your watering routine and adjust it accordingly, ensuring that you’re neither overwatering nor allowing the plant to dry out completely. Increase humidity levels by misting the leaves or placing a tray of water nearby. If the plant is receiving direct sunlight, move it to a spot with bright, indirect light.

Can spider plants be grown outdoors?

Yes, spider plants can be grown outdoors in mild to warm climates. They are typically grown as perennials in USDA hardiness zones 9-11. If you live in a region with frost or cold winters, it’s best to grow spider plants indoors or bring them indoors during the colder months.

Do spider plants require any special soil mix?

Spider plants thrive in well-draining potting soil. A suitable soil mix can be created by combining equal parts of peat moss, perlite, and vermiculite. This blend ensures proper drainage while retaining sufficient moisture for the roots of the plant.

How long do spider plants typically live?

With adequate care, spider plants have the potential to thrive for multiple years. They are long-lived perennials and can continue to thrive and produce spiderettes for many years.

Can I use spider plants to purify the air in my home?

Yes, spider plants are known for their air-purifying qualities. They can effectively remove harmful volatile organic compounds (VOCs) from the air, such as formaldehyde, xylene, and toluene. Adding spider plants to your indoor space can help improve air quality and create a healthier environment.

Conclusion

In conclusion, spider plants (Chlorophytum comosum) are versatile, low-maintenance plants that add beauty and health benefits to any indoor or outdoor space. With their arching leaves, air-purifying qualities, and easy propagation, spider plants have become a popular choice among plant enthusiasts. By following the step-by-step guide provided in this article and providing them with the right conditions, you can enjoy the beauty of spider plants and reap the rewards of their air-purifying properties. So go ahead, bring some greenery into your life with a spider plant!

gardening ideas

Gardening Ideas: Creating a Lush and Beautiful Garden

Welcome to the world of gardening! If you’re looking for inspiration and creativity to transform your outdoor space into a lush and beautiful garden, you’ve come to the right place. In this article, we will explore a wide range of gardening ideas that will help you bring life and vibrancy to your surroundings. Whether you’re a seasoned gardener or just starting out, these ideas will provide you with the guidance and inspiration you need to create a stunning garden that reflects your personal style.

gardening ideas

Gardening Ideas for a Stunning Garden

Embrace Container Gardening

If you have limited space or want to add a touch of greenery to your patio or balcony, container gardening is a fantastic option. By using various containers such as pots, hanging baskets, or window boxes, you can create a visually appealing garden without the need for a large yard. Choose a variety of plants that thrive in containers, such as colorful annuals, herbs, or even small fruit trees. Remember to select containers that complement your overall design and consider the different heights and textures of the plants for an eye-catching display.

Table of Contents

Grow Your Own Vegetables

Growing your own vegetables is an incredibly rewarding experience like no other. Not only does it provide you with a fresh and healthy food source, but it also allows you to connect with nature and enjoy the fruits of your labor. Start by creating a dedicated vegetable patch in your garden or even consider building raised beds for easier maintenance. Choose a variety of vegetables that suit your taste and climate, from leafy greens like lettuce and spinach to delicious tomatoes, peppers, and root vegetables. Don’t forget to provide them with proper sunlight, water, and nutrients to ensure optimal growth.

Create a Butterfly-Friendly Garden

Invite the beauty of butterflies into your garden by creating a butterfly-friendly space. These delicate creatures are not only mesmerizing to watch but also play a vital role in pollination. Planting a variety of nectar-rich flowers will attract butterflies and provide them with a food source. Some popular choices include lavender, milkweed, coneflowers, and butterfly bushes. Additionally, consider incorporating host plants, such as parsley or dill, to provide a habitat for butterfly eggs and caterpillars. With careful planning, you can create a captivating garden that becomes a haven for these delightful creatures.

Add Vertical Interest with Trellises and Arbors

If you’re looking to add height and vertical interest to your garden, trellises and arbors are your secret weapons. These structures not only provide support for climbing plants but also create a visually striking focal point in your garden. Consider planting vines like clematis, honeysuckle, or jasmine that will gracefully climb and cover the trellises or arbors. The interplay between the lush greenery and the architectural elements will give your garden a sense of depth and charm.

Incorporate Water Features

Nothing adds tranquility and serenity to a garden quite like the sound of flowing water. Incorporating a water feature, such as a small pond, fountain, or birdbath, can transform your garden into a peaceful oasis. Not only will it create a soothing ambiance, but it will also attract birds, butterflies, and other wildlife to your garden. Choose a water feature that suits the size and style of your garden, ensuring proper maintenance and circulation to keep the water fresh and clean.

Embrace Sustainable Gardening Practices

As gardeners, it’s essential to embrace sustainable practices that help preserve and protect our environment. Consider implementing eco-friendly techniques such as composting, using organic fertilizers, and conserving water. Composting allows you to turn kitchen scraps and yard waste into nutrient-rich soil, reducing the need for chemical fertilizers. Using organic fertilizers ensures that your plants grow healthily without harming beneficial insects and soil microorganisms. Additionally, implementing water-saving techniques like mulching and drip irrigation can significantly reduce water consumption in your garden.

Frequently Asked Questions (FAQs)

FAQ 1: What are some low-maintenance gardening ideas?

Creating a low-maintenance garden is an excellent option for those with busy lifestyles or limited time. Now, let’s explore a few ideas to consider:

  • Choose native plants that are well-adapted to your local climate and require minimal care.
  • Implement efficient irrigation systems, such as drip irrigation, to reduce water waste.
  • Incorporate mulch to suppress weeds and retain moisture in the soil.
  • Opt for perennial plants that come back year after year, reducing the need for replanting.
  • Use self-watering containers or invest in a timed irrigation system for potted plants.

FAQ 2: What are some ways to attract pollinators to my garden?

Attracting pollinators is crucial for the health and productivity of your garden. Here are some tips to attract pollinators:

  • Include a diverse selection of flowering plants that offer nectar and pollen throughout the entire season.
  • Avoid using pesticides and insecticides that can harm pollinators.
  • Provide a water source like a shallow dish with rocks for bees and butterflies to drink from.
  • Create habitats like butterfly gardens or bee houses to encourage nesting and reproduction.
  • Avoid removing weeds completely, as they often serve as a food source for pollinators.

FAQ 3: Can I grow vegetables in containers?

Yes, you can absolutely grow vegetables in containers. Container gardening allows you to enjoy homegrown vegetables even if you have limited space. Here are some tips for successful vegetable container gardening:

  • Choose containers that are large enough to accommodate the root system of the vegetables.
  • Select a well-draining potting mix specifically formulated for container gardening.
  • Provide adequate sunlight for your vegetable plants, ensuring they receive at least 6-8 hours of direct sunlight.
  • Water your container vegetables regularly, keeping the soil evenly moist but not waterlogged.
  • Fertilize your plants with a balanced organic fertilizer to provide them with the necessary nutrients.

FAQ 4: How do I prevent pests and diseases in my garden?

Preventing pests and diseases is an essential aspect of maintaining a healthy garden. Now, let’s explore some preventive measures you can take:

  • Practice proper sanitation by removing fallen leaves and debris that can harbor pests and diseases.
  • Choose disease-resistant plant varieties and ensure proper spacing between plants for good air circulation.
  • Attract beneficial insects like ladybugs and lacewings that naturally control pests.
  • Use organic pest control methods such as neem oil, insecticidal soaps, or companion planting.
  • Regularly inspect your plants for any signs of pests or diseases and take immediate action if necessary.

FAQ 5: How do I design a small garden space?

Designing a small garden requires careful planning to make the most of the available space. Here are some design tips for small gardens:

  • Opt for vertical gardening by using trellises, hanging baskets, or wall-mounted planters to maximize space.
  • Choose compact or dwarf varieties of plants that won’t overwhelm the area.
  • Utilize raised beds or containers to create separate areas for different plants or themes.
  • Incorporate mirrors or reflective surfaces to create an illusion of a larger space.
  • Use a limited color palette and focus on textures and layers to add depth and interest.

FAQ 6: How often should I water my garden?

The watering frequency for your garden depends on various factors such as plant types and environmental conditions. However, a general guideline is to water deeply and infrequently rather than shallowly and frequently. This encourages deep root growth and ensures that the water reaches the plant’s root zone.

Assess the moisture level of the soil by inserting your finger into the soil up to the second knuckle. If the soil feels dry at that depth, it indicates that watering is needed. Provide enough water to moisten the soil to a depth of 6-8 inches for most plants. However, be cautious not to overwater, as it can lead to root rot and other issues.

In times of hot and dry weather, it may be necessary to increase the frequency of watering.

Additionally, container plants tend to dry out faster than plants in the ground, so monitor their moisture levels closely. Remember to water in the early morning or late afternoon to reduce water loss due to evaporation.

Conclusion

Gardening is a delightful and rewarding hobby that allows you to connect with nature, beautify your surroundings, and enjoy the satisfaction of nurturing plant life. By incorporating these gardening ideas into your outdoor space, you can create a lush and beautiful garden that reflects your personal style and provides a haven for birds, butterflies, and other wildlife.

Remember to experiment, have fun, and adapt the ideas to suit your specific needs and preferences. Gardening is a journey of discovery, and with each season, you’ll learn and grow as a gardener. So grab your gardening tools, put on your sun hat, and embark on this green adventure!

bonsai trees hard to take care of

Are Bonsai Trees Hard to Take Care Of?

Bonsai trees are known for their exquisite beauty and the artistry involved in their cultivation. These miniature trees have captivated the hearts of people around the world, but there is often a lingering question: Are bonsai trees hard to take care of? In this comprehensive guide, we will explore the world of bonsai care and provide you with all the information you need to successfully nurture and maintain these delicate living sculptures.

bonsai trees hard to take care of

Are Bonsai Trees Hard to Take Care Of?

Taking care of bonsai trees requires a certain level of dedication and knowledge. While they may seem challenging to care for, with the right guidance and a little practice, anyone can successfully grow and maintain bonsai trees. It’s important to remember that bonsai care is a continuous process that requires regular attention and care. So, let’s dive into the specifics of bonsai care and discover how you can master the art of nurturing these enchanting trees.

Table of Contents

Understanding Bonsai Trees

Before delving into the details of caring for bonsai trees, it’s essential to understand what exactly they are. Bonsai is a Japanese art form that involves cultivating small trees in containers to mimic the shape and scale of full-sized trees found in nature. The term “bonsai” in Japanese directly translates to “planted in a container”. Bonsai trees are not a specific species but rather a representation of various tree species through careful cultivation and shaping techniques.

The Art of Bonsai Care

Choosing the Right Bonsai Tree

When starting your bonsai journey, selecting the right tree is crucial. Different species of trees have different care requirements, so it’s important to choose a tree that suits your environment and level of expertise. Some popular choices for beginners include the Juniper, Chinese Elm, and Ficus species. These trees are more forgiving and easier to care for, making them ideal for those new to bonsai.

Providing Adequate Lighting

One of the key factors in bonsai care is providing the appropriate amount of light. Bright, indirect sunlight is ideal for the optimal growth and well-being of most bonsai trees. Placing your bonsai near a south-facing window or providing supplemental artificial lighting can ensure they receive the necessary light for healthy growth. However, it’s important to avoid exposing your bonsai to direct sunlight for extended periods, as it can lead to leaf burn.

Watering with Precision

Ensuring proper watering is crucial to maintain the health and vitality of your bonsai tree. The watering needs of bonsai trees can vary depending on factors such as the species, size of the tree, and the climate in which you live. As a general rule, it’s important to check the moisture level of the soil regularly and water your bonsai when the topsoil starts to feel slightly dry. Avoid overwatering, as it can lead to root rot, and underwatering, as it can cause dehydration.

Nurturing the Soil and Fertilizing

The soil composition plays a vital role in the overall health of your bonsai tree. Bonsai trees require a well-draining soil mixture that retains some moisture while allowing excess water to escape. You can create a suitable soil mixture by combining components such as Akadama, pumice, and lava rock. Additionally, fertilizing your bonsai tree at the appropriate times throughout the year will provide it with the necessary nutrients for optimal growth and vitality.

Pruning and Shaping Techniques

Pruning and shaping are integral aspects of bonsai care and are used to maintain the desired form and proportions of the tree. Regular pruning helps to control the growth of the tree and encourages back budding, which leads to the development of new branches. Additionally, wiring techniques can be employed to shape and position the branches and trunk of the bonsai tree, creating the desired aesthetic appeal.

FAQs (Frequently Asked Questions)

Can bonsai trees be kept indoors?

Yes, bonsai trees can be kept indoors, but it’s important to choose species that are suitable for indoor conditions. Trees such as the Ficus or the Chinese Elm can adapt well to indoor environments. However, it’s crucial to provide them with adequate light and maintain proper humidity levels.

How often should I water my bonsai tree?

The watering frequency for bonsai trees depends on various factors such as species, size, and climate. As a general guideline, it’s recommended to water your bonsai tree when the topsoil starts to feel slightly dry. However, it’s essential to monitor the moisture level regularly and adjust your watering routine accordingly.

Do bonsai trees require special soil?

Yes, bonsai trees require a well-draining soil mixture that promotes healthy root development. A typical bonsai soil mixture consists of components like Akadama, pumice, and lava rock. This mixture allows for proper water drainage while retaining some moisture necessary for the tree’s health.

Can I shape my bonsai tree?

Yes, shaping your bonsai tree is an important aspect of bonsai care. Techniques such as pruning, wiring, and clipping can be used to shape the branches and trunk, giving your bonsai tree the desired form and aesthetic appeal.

What is the typical time frame for a bonsai tree to reach maturity?

The time it takes for a bonsai tree to mature depends on various factors, including the species, growth rate, and care provided. Some bonsai trees can take several years to develop the desired characteristics, while others may take decades. Patience is a key virtue when it comes to bonsai cultivation.

Can I repot my bonsai tree?

Yes, repotting is an essential part of bonsai care. Repotting allows for root pruning, replenishing the soil, and ensuring the overall health of the tree. It’s typically done every 2-3 years, depending on the growth of the tree and the condition of the root system.

Conclusion

In conclusion, while bonsai care requires dedication and knowledge, it is not an impossible task. With the right guidance and a commitment to learning, anyone can successfully take care of bonsai trees. Remember to choose the right tree, provide adequate lighting and water, nurture the soil, and utilize pruning and shaping techniques to maintain the desired form. Bonsai trees are living works of art that reward their caretakers with immense beauty and a sense of accomplishment. So, embrace the art of bonsai and let these captivating trees bring joy and tranquility to your life.

Bonsai-pot

Bonsai Pots: A Complete Guide to Choosing and Caring for Your Bonsai Trees

Introduction

Welcome to our comprehensive guide on bonsai pots. If you’re a bonsai enthusiast or considering getting started with this beautiful art form, you’ve come to the right place. Bonsai pots play a crucial role in the health and aesthetics of your bonsai trees, and choosing the right pots is essential for their well-being and visual appeal. In this article, we’ll delve into the world of bonsai pots, covering everything from their importance to the different types available, and provide expert tips on selecting and caring for your bonsai pots.

Bonsai-pot

Table of Contents

Bonsai Pots Why Matter

Bonsai pots are not just containers; they are an integral part of the overall aesthetic presentation of bonsai trees. The right pot can enhance the beauty and character of the tree, while the wrong one can detract from its appeal. Bonsai pots provide a controlled environment for the tree’s roots, allowing proper drainage, airflow, and root development. They also contribute to the tree’s stability and balance. In short, bonsai pots are the canvas on which your miniature tree masterpiece is displayed.

The Artistry of Bonsai Pots

Bonsai pots are not merely functional; they are crafted with great artistry and attention to detail. Master potters spend years honing their skills to create pots that harmonize with the tree’s style, size, and age. The shape, color, texture, and glaze of the pot should complement the tree, accentuating its unique features and evoking a sense of natural beauty. When selecting a bonsai pot, consider it as a work of art that harmonizes with the tree to create a visually captivating composition.

Choosing the Right Bonsai Pot

Selecting the right bonsai pot requires careful consideration of several factors. Following are some key points to keep in mind:

  1. Size Matters: The size of the pot should be proportional to the tree. A pot that is too large or too small can affect the tree’s growth and balance.
  2. Style and Shape: Consider the style and shape of the tree when choosing a pot. Formal upright trees may benefit from rectangular pots, while cascade-style trees look stunning in oval or crescent-shaped pots.
  3. Color and Texture: The color and texture of the pot should harmonize with the tree’s foliage and bark. Earthy tones and subtle textures are often preferred to maintain a natural aesthetic.
  4. Drainage Holes: Ensure the pot has adequate drainage holes to prevent waterlogging, which can lead to root rot and other issues.

Traditional Bonsai Pots

Traditional bonsai pots are inspired by ancient Chinese and Japanese pottery traditions. These pots often feature classic shapes and subdued colors, allowing the focus to remain on the tree. Common traditional styles include:

  1. Rectangular Pots: Ideal for formal upright or slanting trees, rectangular pots exude elegance and stability.
  2. Round Pots: Round pots are versatile and suitable for a wide range of tree styles, from informal upright to cascade.
  3. Hexagonal Pots: Hexagonal pots are popular for displaying trees with intricate branching patterns, such as broom or windswept styles.

Contemporary Bonsai Pots

Contemporary bonsai pots offer a departure from traditional styles and often incorporate modern design elements. These pots can be more experimental in shape, color, and texture, allowing for greater artistic expression. Some contemporary styles include:

  1. Abstract Pots: Abstract pots feature unconventional shapes and bold colors, making them a statement piece in any bonsai collection.
  2. Textured Pots: Textured pots add an interesting dimension to the overall composition, creating visual interest and tactile appeal.
  3. Hand-Painted Pots: Hand-painted pots are highly sought after for their unique designs, which can range from intricate landscapes to abstract motifs.
Bonsai Pots
Bonsai Pots

Bonsai Pot Materials

Bonsai pots are crafted from various materials, each with its own characteristics and benefits. Common bonsai pot materials include:

  1. Ceramic: Ceramic pots are widely used and favored for their durability, versatility, and aesthetic appeal. They come in various styles, finishes, and glazes.
  2. Mica: Mica pots are lightweight, yet strong and durable. They provide excellent insulation for the tree’s roots and are resistant to temperature extremes.
  3. Wood: Wood pots, often made from treated cedar or teak, offer a natural and rustic look. They are suitable for certain tree species and can enhance the tree’s overall organic feel.
  4. Plastic: Plastic pots are lightweight, affordable, and easy to clean. They are commonly used for training purposes or when portability is a priority.

Caring for Your Bonsai Pots

Proper care and maintenance of bonsai pots are essential to ensure the longevity of both the pot and the tree. Here are some tips to keep your bonsai pots in great condition:

  1. Cleaning: Regularly clean your pots to remove dirt, algae, and other debris. Use a soft brush or sponge and avoid harsh chemicals that may damage the pot’s surface.
  2. Re-Glazing: If your ceramic pot’s glaze starts to fade or chip over time, consider re-glazing it to restore its original beauty and protect it from moisture.
  3. Winter Protection: In colder climates, protect your bonsai pots from freezing temperatures by moving them to a sheltered area or using insulating materials.
  4. Repotting: Repot your bonsai trees at the appropriate intervals to ensure healthy root growth and prevent pot-bound conditions. Choose a new pot that accommodates the tree’s increasing root system.

FAQs

1. How often should I water my bonsai tree in its pot?

It depends on various factors such as tree species, pot size, and environmental conditions. As a general rule, check the moisture level of the soil regularly and water when it feels slightly dry to the touch.

2. Can I use any pot for my bonsai tree?

While you can technically use any container, it’s recommended to use bonsai pots specifically designed for the purpose. Bonsai pots provide the ideal environment for the tree’s root system and contribute to its overall aesthetic appeal.

3. Do bonsai pots come with drainage holes?

Yes, most bonsai pots come with drainage holes to ensure proper water drainage and prevent waterlogging, which can be detrimental to the health of the tree.

4. Can I use a bonsai pot with a different shape than the traditional styles?

Absolutely! Bonsai is an art form that allows for creativity and personal expression. While traditional styles have their charm, feel free to experiment with different shapes and styles that resonate with you and complement your tree’s aesthetics.

5. How do I prevent my bonsai pot from getting stained?

To prevent staining, place your bonsai pot on a saucer or a surface that won’t be affected by water or fertilizer runoff. If stains do occur, gently clean the pot using mild soap and water or a mixture of vinegar and water. Avoid using abrasive materials that can scratch the pot’s surface.

6. Can I use bonsai pots for indoor bonsai trees?

Yes, bonsai pots are suitable for both indoor and outdoor bonsai trees. However, it’s important to consider the specific needs of your indoor bonsai, such as light requirements and humidity levels, to ensure their well-being.

Conclusion

Bonsai pots are more than just containers; they are essential elements of the artistry and care that go into cultivating bonsai trees. By selecting the right pot and providing proper care, you can enhance the beauty and health of your bonsai. Remember to consider factors like size, style, color, and material when choosing a bonsai pot. Regularly clean and maintain your pots to ensure their longevity and the well-being of your trees. With the information provided in this guide, you are now equipped to embark on your bonsai journey with confidence and create stunning compositions that reflect your passion for this ancient art form.

bonsai trees poisonous to dogs

Are Bonsai Trees Poisonous to Dogs? A Comprehensive Guide

Introduction

If you’re a dog owner and a plant enthusiast, it’s essential to be aware of the potential hazards certain plants may pose to your furry friend. Bonsai trees, with their delicate and intricate appearance, have captivated many people’s hearts. However, before introducing a bonsai tree into your home or garden, it’s crucial to ask the question: are bonsai trees poisonous to dogs? In this comprehensive guide, we’ll explore the topic thoroughly, providing expert insights and answers to frequently asked questions to ensure the safety of your beloved canine companion.

bonsai trees poisonous to dogs

Table of Contents

Are Bonsai Trees Poisonous to Dogs?

Yes, some species of bonsai trees can be toxic to dogs. It’s important to familiarize yourself with the specific varieties and potential dangers associated with bonsai trees to ensure the well-being of your four-legged companion.

Understanding Bonsai Trees

Bonsai trees are miniature trees that are carefully cultivated and pruned to maintain their small size and aesthetically pleasing appearance. This ancient Japanese art form requires skill and patience to create these living works of art. Bonsai trees come in various species, each with its unique characteristics and care requirements.

Common Types of Bonsai Trees

When considering bonsai trees for your home or garden, it’s essential to consider the specific types that may pose a risk to your dog if ingested. Some common bonsai tree varieties that are potentially toxic to dogs include:

  1. Sago Palm Bonsai (Cycas revoluta): The Sago Palm, commonly used in bonsai cultivation, contains cycasin, a toxic compound that can cause severe gastrointestinal symptoms if consumed by dogs.
  2. English Yew Bonsai (Taxus baccata): English Yew is an evergreen coniferous tree often used in bonsai. However, it contains toxic alkaloids called taxines, which can be harmful to dogs if ingested.
  3. Japanese Yew Bonsai (Taxus cuspidata): Similar to the English Yew, the Japanese Yew bonsai also contains taxines, making it toxic to dogs.
  4. Azalea Bonsai (Rhododendron spp.): Azaleas, commonly used in bonsai cultivation, contain grayanotoxins, which can cause vomiting, diarrhea, and even cardiovascular issues if ingested by dogs.
  5. Jade Tree Bonsai (Crassula ovata): While not as toxic as some other bonsai tree varieties, the Jade Tree can still cause gastrointestinal upset if consumed by dogs.

Remember that this is not an exhaustive list, and there may be other bonsai tree species that can be toxic to dogs. It’s essential to research the specific variety you are considering and consult with experts to ensure the safety of your pet.

Identifying Poisonous Bonsai Varieties

To identify whether a specific bonsai tree is toxic to dogs, it’s crucial to research the specific species and consult reliable resources. When purchasing or adopting a bonsai tree, inquire about its botanical name and conduct thorough research to determine if it poses any risks to dogs. Additionally, seek advice from professional bonsai cultivators or consult with a veterinarian who is knowledgeable about plant toxicity.

Toxic Components in Bonsai Trees

Bonsai trees contain various toxic components that can be harmful to dogs. Some of these components include alkaloids, glycosides, and other chemical compounds that may cause adverse effects when ingested. The specific toxic compounds can vary depending on the bonsai tree species. It’s important to understand the potential dangers associated with each type of bonsai tree to take appropriate precautions.

Symptoms of Bonsai Tree Poisoning in Dogs

If a dog ingests a toxic bonsai tree or any part of it, it may exhibit certain symptoms of poisoning. These symptoms can vary depending on the specific bonsai tree species and the amount ingested. Common symptoms of bonsai tree poisoning in dogs may include:

  • Vomiting
  • Diarrhea
  • Excessive drooling
  • Loss of appetite
  • Lethargy
  • Abdominal pain
  • Difficulty breathing
  • Irregular heartbeat

If you suspect that your dog has ingested a toxic bonsai tree or is displaying any of these symptoms, it’s crucial to seek immediate veterinary attention.

Immediate Steps for Bonsai Tree Poisoning

If you suspect bonsai tree poisoning in your dog, it’s important to take immediate steps to ensure their safety. Here are the recommended actions:

  1. Contact a veterinarian: Call your veterinarian or a local animal emergency center to seek guidance on the situation. They will provide you with specific instructions based on your dog’s symptoms and the type of bonsai tree ingested.
  2. Don’t induce vomiting without professional advice: While inducing vomiting can sometimes be beneficial in cases of poisoning, it’s essential to consult with a veterinarian before attempting to induce vomiting in your dog. Some toxins can pose a greater risk if regurgitated.

3. Follow the veterinarian’s instructions: Listen carefully to the veterinarian’s guidance and follow their instructions. They may ask you to bring your dog in for immediate treatment or provide you with specific steps to take at home while transporting your dog to the clinic.

Remember, time is of the essence in cases of potential poisoning. Prompt action and professional veterinary care can greatly increase the chances of a positive outcome.

Preventing Bonsai Tree Poisoning

Prevention is key when it comes to keeping your dog safe from the potential hazards of bonsai trees. Here are a few proactive steps you can implement::

  1. Research bonsai tree species: Before introducing a bonsai tree into your home or garden, thoroughly research the specific species and determine if it is safe for dogs. Avoid purchasing or cultivating bonsai tree varieties that are known to be toxic.
  2. Secure the bonsai tree: If you have a bonsai tree and a curious dog, make sure to secure the tree in a location where your dog cannot access it. Consider using barriers or elevated stands to keep the bonsai tree out of reach.
  3. Supervise interactions: When your dog is in proximity to bonsai trees, whether indoors or outdoors, supervise their interactions closely. Redirect their attention to dog-friendly activities and discourage any chewing or nibbling on the trees.
  4. Train your dog: Training plays a crucial role in preventing your dog from engaging with potentially harmful objects. Teach them commands such as “leave it” or “drop it” to discourage them from interacting with bonsai trees.
  5. Provide dog-friendly alternatives: Offer your dog safe and engaging alternatives to redirect their chewing instincts. Provide them with appropriate chew toys or natural, dog-friendly plants that they can safely enjoy.

By implementing these preventive measures, you can minimize the risk of bonsai tree poisoning and ensure the well-being of your furry friend.

Frequently Asked Questions

Can dogs safely interact with non-toxic bonsai trees?

Yes, dogs can safely interact with non-toxic bonsai trees. Non-toxic bonsai tree species are an excellent alternative if you want to enjoy the beauty of these miniature trees without worrying about the potential dangers they may pose to your dog. Some examples of non-toxic bonsai trees include the Chinese Elm (Ulmus parvifolia) and the Ficus Bonsai (Ficus spp.).

What are some dog-friendly alternatives to bonsai trees?

If you’re concerned about the potential risks associated with bonsai trees, there are several dog-friendly alternatives you can consider. Some safe and dog-friendly plant options include Spider Plants (Chlorophytum comosum), Boston Ferns (Nephrolepis exaltata), and Areca Palms (Dypsis lutescens). These plants can add beauty to your living space without posing a threat to your furry friend.

Should bonsai trees be kept indoors or outdoors?

The choice of whether to keep bonsai trees indoors or outdoors depends on the specific species and their care requirements. Some bonsai trees thrive indoors, while others require the outdoor environment to flourish. Before bringing a bonsai tree into your home, research its specific care needs and ensure that you can provide the appropriate conditions, whether indoors or outdoors.

How can I train my dog to avoid chewing on bonsai trees?

Training your dog to avoid chewing on bonsai trees requires consistent and positive reinforcement. Start by teaching basic commands such as “leave it” and “drop it.” Whenever you notice your dog showing interest in the bonsai tree, use these commands and reward them with praise and treats when they comply. Additionally, provide them with suitable chew toys and redirect their attention whenever they attempt to chew on the tree.

Are there any precautions I should take while choosing a bonsai tree?

When choosing a bonsai tree, there are several precautions you should consider:
Research the species: Thoroughly research the specific bonsai tree species you’re interested in and determine if it is toxic to dogs. Choose non-toxic varieties to ensure the safety of your furry friend.
Check for safe cultivation practices: Some bonsai trees may be treated with pesticides or other chemicals during cultivation. Ensure that the bonsai tree you choose has been cultivated using safe and dog-friendly practices.
Inspect the tree for loose parts: Examine the bonsai tree for any loose branches, leaves, or other parts that your dog may be tempted to chew on. Opt for a tree that is well-maintained and does not pose any hazards.
Consider the size of the tree: Choose a bonsai tree size that is appropriate for your living space and the size of your dog. Large bonsai trees may be more challenging to secure and keep out of reach, so it’s best to choose a size that minimizes any potential risks.
Consult with experts: If you’re unsure about the safety of a particular bonsai tree species or need guidance in choosing the right one, consult with bonsai cultivation experts or seek advice from a veterinarian who is knowledgeable about plant toxicity.
By taking these precautions, you can select a bonsai tree that enhances your living space while keeping your dog’s safety in mind.

Can bonsai tree poisoning be fatal for dogs?

Yes, bonsai tree poisoning can be fatal for dogs if not promptly addressed and treated. Certain toxic compounds present in bonsai trees can cause severe symptoms and complications, including organ damage and respiratory distress. It’s essential to seek immediate veterinary care if you suspect your dog has ingested a toxic bonsai tree or is exhibiting symptoms of poisoning.

Conclusion

In conclusion, while bonsai trees can be beautiful additions to your home or garden, it’s crucial to prioritize the safety of your furry companion. Some bonsai tree species can be toxic to dogs, causing a range of symptoms and potential health risks. By researching the specific bonsai tree varieties, identifying toxic components, and implementing preventive measures, you can ensure a safe environment for your dog. Remember to consult with experts and seek veterinary attention if you suspect bonsai tree poisoning. With proper care and precautions, you can enjoy the artistry of bonsai trees while keeping your dog happy and healthy.

(To know about Bonsai Trees Poisonous to Cats or Not? : https://bonsainurserybd.com/are-bonsai-trees-poisonous-to-cats/ )

Bonsai tools

Bonsai Tools: The Ultimate Guide to Cultivating Your Miniature Masterpieces

Welcome to the ultimate guide to bonsai tools! Whether you are a seasoned bonsai enthusiast or just starting out in this captivating art form, having the right tools is essential for nurturing and shaping your miniature masterpieces. In this comprehensive article, we will explore the various types of bonsai tools available, and their uses, and provide expert tips and advice on how to choose the best tools for your bonsai journey. So, grab your gardening gloves, and let’s dive into the world of bonsai tools!

Bonsai tools

Table of Contents

Bonsai Tools: A Prerequisite for Success

Bonsai tools play a crucial role in the cultivation and maintenance of bonsai trees. These specialized tools are designed to provide precision and finesse, allowing you to trim, prune, wire, and shape your bonsai with utmost care. Here, we will delve into the essential bonsai tools that every enthusiast should have in their collection.

Bonsai Tools: The Must-Haves

  1. Pruning Shears: Also known as bonsai scissors, pruning shears are indispensable for trimming branches and leaves. These shears are designed with sharp, pointed blades that enable you to make clean and precise cuts without causing any harm to the tree.
  2. Concave Branch Cutters: These unique tools are specifically crafted to remove larger branches while promoting the healing process. The concave blades create a curved cut, allowing the wound to heal quickly and seamlessly.
  3. Bonsai Wire Cutters: As you begin your bonsai journey, you’ll soon discover the importance of wiring your tree to achieve desired shapes. Bonsai wire cutters are essential for safely removing wire without damaging the branches or trunk.
  4. Root Rakes: Maintaining healthy root growth is vital for the overall health of your bonsai. Root rakes help in untangling and combing out the roots during repotting, ensuring optimal growth and nutrient absorption.
  5. Bonsai Knob Cutters: When it comes to removing unsightly knobs or undesirable branches, bonsai knob cutters are your go-to tools. These cutters are designed with a concave profile that facilitates clean and precise removal.
  6. Bonsai Tweezers: Bonsai tweezers are small yet mighty tools that aid in meticulous work, such as removing weeds, positioning small wires, or adjusting miniature ornaments. These delicate tools provide the required finesse to handle intricate tasks.
  7. Bonsai Turntables: Turntables are not just for cake decorating; they are also invaluable in bonsai cultivation. These rotating platforms allow you to effortlessly rotate your bonsai, granting easy access to all angles for precise pruning and wiring.
  8. Bonsai Knives: Bonsai knives are versatile tools that serve multiple purposes, including grafting, cutting roots, and carving deadwood. The sharp and sturdy blades of these knives ensure clean and accurate cuts.
  9. Branch Benders: For those seeking to create dramatic bends or shape their bonsai branches, branch benders come to the rescue. These flexible tools help in gradually training branches into desired positions, giving your bonsai a unique character.
  10. Watering Cans: While not a traditional “tool,” watering cans are essential for maintaining the health and vitality of your bonsai. Opt for a watering can with a fine nozzle to provide a gentle and controlled stream of water.

Frequently Asked Questions (FAQs)

FAQ 1: How often should I prune my bonsai?

Pruning frequency depends on the specific tree species and the desired shape you aim to achieve. Typically, it is advisable to trim your bonsai during its dormant season, which typically occurs in late winter or early spring. However, minor pruning, such as removing unwanted shoots or branches, can be done throughout the year.

FAQ 2: Can I use regular garden tools for bonsai?

While it is possible to use regular garden tools for some basic tasks, investing in specialized bonsai tools is highly recommended. Bonsai tools are meticulously crafted for the intricate tasks of bonsai cultivation, offering enhanced precision and control.

FAQ 3: How do I choose the right bonsai tools?

When selecting bonsai tools, consider factors such as the type of tree species you are working with, the tasks you plan to perform, and your budget. It is advisable to invest in quality tools that are durable and ergonomically designed for comfortable use.

FAQ 4: How do I clean and maintain my bonsai tools?

After each use, it is essential to clean your bonsai tools to prevent the spread of diseases or pests. Simply wipe the blades with a clean cloth or use a mild disinfectant solution. Additionally, ensure that your tools are always stored in a dry and rust-free environment.

FAQ 5: Can I use wire cutters for other purposes?

While wire cutters are primarily used for removing bonsai wire, they can also be handy for cutting small gauge wires, such as those used in crafts or jewelry making.

FAQ 6: Is it necessary to use turntables for bonsai care?

Turntables are not essential but highly beneficial for bonsai enthusiasts. They provide ease of access to all sides of the tree, making tasks like pruning, wiring, and styling more convenient. However, you can still achieve great results without using a turntable.

Conclusion

Bonsai tools are the secret behind the artistry and finesse of bonsai cultivation. Equipping yourself with the right tools will empower you to shape and mold your miniature trees into breathtaking creations. From pruning shears to branch benders, each tool plays a significant role in nurturing your bonsai masterpiece. Remember to choose quality tools, maintain them properly, and enjoy the journey of creating living artwork.

Bonsai Soil

Bonsai Soils: Creating the Perfect Environment for Your Bonsai Trees

Bonsai trees are a timeless art form that brings natural beauty and tranquility into any space. As an enthusiast, you understand the importance of providing the optimal conditions for your bonsai to thrive. One crucial factor that significantly impacts the health and growth of your bonsai is the choice of bonsai soils. In this comprehensive guide, we will explore the world of bonsai soils and delve into everything you need to know to create the perfect environment for your beloved trees.

Bonsai-Soil

Bonsai Soils: What Makes Them Special?

Bonsai soils are specifically formulated to meet the unique needs of bonsai trees. These miniature masterpieces require a well-draining soil mix that retains just the right amount of moisture while ensuring adequate oxygen reaches the roots. The choice of soil affects the overall health, vigor, and longevity of your bonsai, making it an essential aspect of successful bonsai cultivation.

Table of Contents

The Basics of Bonsai Soils

What are the key components of bonsai soils?

To understand bonsai soils better, let’s examine the primary components that make up an ideal bonsai soil mix:

  1. Akadama: Akadama is a clay-like soil component widely used in bonsai cultivation. It provides excellent water retention while allowing proper aeration and drainage.
  2. Pumice: Pumice is a lightweight volcanic rock that aids in water drainage and root aeration. It prevents soil compaction and ensures the roots receive sufficient oxygen.
  3. Lava rock: Lava rock, another volcanic component, contributes to the overall drainage capabilities of the soil mix. It helps maintain a balance between water retention and proper air circulation.
  4. Organic matter: Adding organic matter, such as composted bark or sphagnum moss, improves the soil’s structure, enhances water-holding capacity, and promotes microbial activity.

Why is well-draining soil important for bonsai?

Bonsai trees, despite their small size, have relatively large root systems in proportion to their container size. A well-draining soil mix is crucial to prevent waterlogging, which can lead to root rot and other fungal diseases. Adequate drainage ensures that excess water does not accumulate around the roots, safeguarding your bonsai’s health and longevity.

How to create your own bonsai soil mix?

Creating your own bonsai soil mix allows you to customize it to suit the specific needs of your trees. Following is the way to get you started:

  • Mix 50% Akadama, 25% pumice, and 25% lava rock to form the base of your soil mix.
  • Add a small amount of organic matter, such as composted bark or sphagnum moss, to promote nutrient retention and microbial activity.
  • Ensure all the components are well-blended and distribute the mixture evenly in the pot.

Remember, the proportions of the components may vary depending on your bonsai species and environmental conditions. It’s essential to observe your trees closely and adjust the soil mix accordingly.

Selecting the Right Bonsai Soil Mix

What factors should you consider when choosing a bonsai soil mix?

Several factors should influence your choice of bonsai soil mix:

  1. Bonsai species: Different bonsai species have varying soil requirements. Some prefer a well-draining mix, while others thrive in more moisture-retentive soils.
  2. Climate: The weather conditions in your specific area are crucial factors that influence the choice of the most appropriate soil mix for your bonsai. Dry and arid climates may require a soil mix with greater water-holding capacity, while humid environments may benefit from a more porous mix.
  3. Pot size: The size of your bonsai pot affects how quickly the soil dries out. Smaller pots tend to dry out faster, necessitating a soil mix that retains moisture longer.
  4. Experience level: Beginners may opt for pre-packaged bonsai soil mixes, which provide a balanced composition suitable for a wide range of species. As you gain experience, you can experiment with custom soil mixes tailored to the specific needs of your trees.
Bonsai Soil

Are there any alternatives to traditional bonsai soil mixes?

While traditional bonsai soil mixes are highly effective, some alternatives can also be used:

  • Inorganic substrates: Inorganic substrates like LECA (lightweight expanded clay aggregate) or perlite can be used to replace some or all of the organic components. These alternatives provide excellent drainage and aeration while reducing the risk of soil compaction.
  • Soil amendments: Some bonsai enthusiasts incorporate soil amendments like mycorrhizal fungi or beneficial bacteria to enhance root health and nutrient uptake.

It’s crucial to research and experiment with different soil mixes to find the one that best suits your bonsai’s needs.

FAQs

1. What are the signs of inadequate drainage in bonsai soils?

Signs of inadequate drainage include yellowing leaves, root rot, and foul-smelling soil. If you notice these symptoms, it’s essential to adjust your soil mix and improve the drainage to prevent further damage to your bonsai.

2. Can I use regular potting soil for my bonsai?

Regular potting soil is generally not suitable for bonsai trees. It tends to retain too much water, leading to root rot. Bonsai-specific soil mixes provide the ideal balance of water retention and drainage needed for healthy bonsai growth.

3. How often should I repot my bonsai tree?

The frequency of repotting depends on various factors such as the species, age, and overall health of your bonsai. As a general guideline, repotting is typically done every 1-3 years, allowing you to refresh the soil and prune the roots for optimal growth.

4. Can I reuse the soil from my bonsai tree when repotting?

Reusing bonsai soil is possible if it remains in good condition and free from disease. However, it’s advisable to refresh the soil during repotting to replenish nutrients and ensure the health of your bonsai.

5. How can I improve the water-holding capacity of my soil mix?

To improve water retention, you can incorporate moisture-retentive materials like sphagnum moss or composted bark into your soil mix. These organic components help the soil retain moisture for a longer duration, ensuring your bonsai receives adequate hydration.

6. Can I use regular garden soil for my bonsai?

Using regular garden soil for bonsai is generally not recommended. Garden soil may contain pests, diseases, or weed seeds that can harm your bonsai. Additionally, garden soil is often too heavy and lacks the necessary drainage properties required for bonsai cultivation.

Conclusion

Creating the perfect environment for your bonsai trees is an art in itself, and selecting the right bonsai soil is a crucial step toward their long-term health and vitality. By understanding the unique requirements of bonsai soils and considering factors like species, climate, and pot size, you can provide your bonsai with an optimal growing medium. Remember to monitor your trees closely and make adjustments as needed to ensure they thrive in their miniature world of beauty and tranquility.

Bonsai-Trees-Poisonous-to-Cats

Are Bonsai Trees Poisonous to Cats?

Bonsai trees have captivated people around the world with their miniature beauty and unique aesthetic appeal. These meticulously pruned and shaped trees offer a sense of tranquility and bring nature’s beauty indoors. However, if you are a cat owner and considering bringing a bonsai tree into your home, you may have concerns about the potential toxicity of these plants to your feline companion. In this article, we will explore whether Are Bonsai Trees Poisonous to Cats or not and provide some insights on keeping your pets safe in a bonsai-filled environment.

Bonsai-Trees-Poisonous-to-Cats

Introduction

Cats are naturally curious creatures, and their exploratory nature often leads them to investigate plants in the house. As a responsible pet owner, it is crucial to be aware of the potential risks associated with certain plants, including bonsai trees. While not all bonsai trees are poisonous to cats, some species can pose a threat if ingested.

Table of Contents

Understanding Bonsai Trees

Bonsai trees are not a specific species of tree; rather, they are regular trees that are carefully cultivated and pruned to create a miniature version of their larger counterparts. The art of bonsai originated in China and later spread to Japan, where it gained significant popularity. These trees require special care and attention to maintain their small size and distinctive shape.

Common Bonsai Tree Species

There are numerous bonsai tree species, each with its unique characteristics and requirements. Some popular bonsai tree species include:

  1. Ficus Bonsai
  2. Juniper Bonsai
  3. Jade Bonsai
  4. Japanese Maple Bonsai
  5. Pine Bonsai
  6. Azalea Bonsai

Potential Toxicity of Bonsai Trees

When it comes to the toxicity of bonsai trees, it is essential to consider the specific species you have in your home. While some bonsai trees are non-toxic to cats, others can be potentially harmful or even toxic if ingested. Toxicity levels can vary based on the specific part of the tree, such as leaves, stems, or bark.

Types of Toxins Found in Bonsai Trees

Bonsai trees may contain various toxins that can be harmful to cats. Some common toxins found in certain bonsai tree species include:

  1. Calcium oxalate crystals: These crystals are present in plants like Ficus bonsai and can cause oral irritation, drooling, and difficulty swallowing if ingested.
  2. Terpenoids: Certain bonsai tree species, such as juniper, produce terpenoids, which can cause digestive issues, vomiting, and diarrhea in cats.
  3. Alkaloids: Some bonsai tree species, like azaleas, contain alkaloids that are toxic to cats and can lead to symptoms such as weakness, tremors, and abnormal heart rate.

Symptoms of Bonsai Tree Poisoning in Cats

If your cat has ingested a toxic bonsai tree or a part of it, you should watch for the following symptoms:

  1. Drooling and excessive salivation
  2. Vomiting
  3. Diarrhea
  4. Loss of appetite
  5. Lethargy
  6. Difficulty breathing
  7. Seizures (in severe cases)

If you notice any of these symptoms, it is crucial to seek immediate veterinary attention for your cat.

Preventive Measures for Cat Owners

To ensure the safety of your cat, consider the following preventive measures when keeping bonsai trees in your home:

  1. Research bonsai tree species: Before bringing a bonsai tree into your home, thoroughly research the species to determine its toxicity level to cats.
  2. Place bonsai trees out of reach: Position your bonsai trees in a location that is inaccessible to your cat, such as high shelves or enclosed display cases.
  3. Use deterrents: Apply cat-safe deterrents, such as bitter-tasting sprays, on the leaves and branches of bonsai trees to discourage your cat from chewing on them.
  4. Supervise interaction: When your cat is in the same room as the bonsai tree, supervise their interaction to prevent any potential accidents or ingestion.
  5. Provide alternative chewing options: Offer your cat safe and suitable chewing alternatives, such as catnip toys or dental treats, to redirect their chewing behavior.
Are Bonsai Trees Poisonous to Cats

Safe Alternatives for Indoor Plants

If you are concerned about the potential toxicity of bonsai trees, you may opt for alternative indoor plants that are known to be safe for cats. Some cat-friendly indoor plants include:

  1. Spider Plant (Chlorophytum comosum)
  2. Boston Fern (Nephrolepis exaltata)
  3. Areca Palm (Dypsis lutescens)
  4. Bamboo Palm (Chamaedorea seifrizii)
  5. African Violet (Saintpaulia)
  6. Calathea (Calathea spp.)

Creating a Pet-Friendly Bonsai Environment

If you are determined to have bonsai trees in your home while keeping your cat safe, consider the following steps:

  1. Choose non-toxic bonsai tree species: Opt for bonsai tree species that are known to be non-toxic to cats, such as the money tree (Pachira aquatica) or the ponytail palm (Beaucarnea recurvata).
  2. Secure the bonsai tree: Ensure that the bonsai tree is securely placed in its container or pot to prevent accidental tipping or dislodging.
  3. Separate the bonsai area: Create a designated area for your bonsai trees where your cat’s access can be restricted, such as using baby gates or indoor fencing.
  4. Regularly clean fallen leaves: Cats may be tempted to play with or chew on fallen leaves, so make it a habit to clean up any fallen foliage promptly.
  5. Consult a veterinarian: If you have concerns about specific bonsai tree species or your cat’s behavior around them, consult with a veterinarian for guidance.

Conclusion

In conclusion, while not all bonsai trees are poisonous to cats, some species can pose a threat if ingested. It is crucial for cat owners to research the specific bonsai tree species and take preventive measures to ensure their feline friends remain safe. By understanding the potential risks and implementing necessary precautions, you can create a harmonious environment where your beloved cat and bonsai trees coexist peacefully.

Frequently Asked Questions (FAQs)

Can cats get sick from chewing on bonsai leaves?

Yes, certain bonsai tree species contain toxins that can cause illness in cats if ingested.

Are all bonsai tree species toxic to cats?

No, not all bonsai tree species are toxic to cats. Some species are considered safe for feline companions.

What should I do if my cat ingests a part of a bonsai tree?

If you suspect that your cat has ingested a part of a bonsai tree and is showing symptoms of poisoning, seek immediate veterinary attention.

Are there any bonsai tree species that are safe for cats?

Yes, some bonsai tree species, such as the money tree or the ponytail palm, are known to be non-toxic to cats.

How can I train my cat to avoid bonsai trees?

You can use deterrents, provide alternative chewing options, and supervise your cat’s interaction with bonsai trees to train them to avoid them.

The-Ultimate-Guide-to-Growing-Orchids

The Ultimate Guide to Growing Orchids: Tips and Tricks for a Blooming Success

Welcome to the ultimate guide on growing orchids! Orchids are exquisite and elegant flowers that captivate the senses with their beauty and fragrance. Whether you’re a seasoned gardener or a beginner, this comprehensive guide will provide you with valuable tips and tricks to ensure a blooming success in cultivating orchids. From understanding the basics of orchid care to advanced techniques, this guide has got you covered. So, let’s dive in and discover the secrets to growing stunning orchids!

The-Ultimate-Guide-to-Growing-Orchids

Table of Contents

Orchids, often referred to as the “queens of the plant kingdom,” are known for their diverse species and captivating blooms. With the right knowledge and care, you can successfully cultivate these enchanting flowers in your own home or garden. In this section, we will explore the essential tips and tricks to help you achieve blooming success with your orchids.

Choosing the Right Orchid Species

The first step in growing orchids is selecting the right species that suits your preferences and growing conditions. There are thousands of orchid species available, each with its unique requirements. Some popular orchid varieties include Phalaenopsis, Cattleya, Dendrobium, and Oncidium. Research different species and choose the ones that are best suited for your climate and environment.

Providing Adequate Light

Orchids need the right amount of light to bloom. Place your orchids in a location where they can receive bright, indirect light. Direct sunlight needs to avoid, as it can burn their delicate leaves. If you’re growing orchids indoors, consider placing them near east or west-facing windows. Supplemental grow lights can also be used to ensure your orchids receive sufficient light.

Understanding Temperature and Humidity Requirements

Temperature and humidity play crucial roles in orchid growth. Most orchids prefer a temperature range of 60-80°F (15-27°C) during the day and a slightly cooler temperature at night. However, different orchid species have specific temperature requirements, so it’s essential to research the ideal temperature range for your chosen orchids.

In terms of humidity, orchids thrive in environments with higher humidity levels. Mist your orchids regularly or use a humidifier to maintain adequate humidity. Placing a tray of water near your orchids can also help increase humidity levels around them.

Watering and Fertilizing Orchids

Proper watering and fertilization are essential for the health and growth of orchids. Orchids should be watered thoroughly but sparingly. Allow the potting medium to dry slightly between watering sessions to prevent overwatering, which can lead to root rot. It’s advisable to water orchids in the morning to allow any excess moisture to evaporate throughout the day.

When it comes to fertilization, orchids have specific nutritional needs. Use a balanced orchid fertilizer and dilute it according to the instructions provided. Fertilize your orchids regularly during the active growing season, typically spring and summer. However, reduce or stop fertilization during the dormant period, usually in fall and winter.

Orchid Potting and Repotting

Proper potting is crucial for orchid health and growth. Orchids need a well-draining potting medium that allows air circulation around their roots. Use specialized orchid potting mixtures consisting of materials like bark, sphagnum moss, or coconut husk chips.

Repotting orchids is necessary every one to two years refresh the potting medium and provide ample space for root growth. Carefully remove the orchid from its current pot, gently untangle the roots, and trim any damaged or rotting roots before repotting it into a slightly larger container with a fresh potting medium.

Dealing with Common Orchid Pests and Diseases

Like any other plant, orchids are susceptible to pests and diseases. The most common orchid pests include aphids, mealybugs, scale insects, and spider mites. Regularly inspect your orchids for signs of infestation and take immediate action if you spot any pests. Insecticidal soaps or horticultural oils can be effective in controlling pests.

Orchids can also suffer from fungal or bacterial infections, such as root rot or leaf spots. To prevent diseases, ensure proper air circulation around your orchids, avoid overwatering, and maintain good hygiene practices. If you notice any signs of disease, promptly remove the affected parts and treat the orchid with appropriate fungicides or bactericides.

Propagating Orchids

Propagating orchids allows you to expand your collection and share the beauty of these flowers with others. There are several methods of orchid propagation, including division, back bulb propagation, and keiki propagation. Each method requires specific techniques and conditions, so it’s advisable to research the propagation method suitable for your orchid species.

Conclusion

Congratulations! You have now become well-versed in the art of growing orchids. By following the tips and tricks outlined in this ultimate guide, you can create a flourishing orchid garden that will delight you with its vibrant blooms. Remember to choose the right orchid species, provide adequate light, temperature, and humidity, and give your orchids the care they deserve. With patience and dedication, you’ll witness the rewards of your efforts as your orchids thrive and bloom in all their glory.

FAQs (Frequently Asked Questions):

Q: How often should I water my orchids?

A: Orchids should be watered thoroughly but sparingly. Water them when the potting medium begins to dry out, typically every 7-10 days. Adjust the frequency based on the specific needs of your orchid species.

Q: Can I grow orchids without natural light?

A: While orchids require bright, indirect light to thrive, you can grow them under artificial grow lights. Select full-spectrum lights designed for orchid cultivation and provide them with a photoperiod similar to natural daylight.

Q: What should I do if my orchid stops blooming?

A: There are several reasons why an orchid may stop blooming, including insufficient light, improper temperature or humidity, or lack of nutrients. Assess the growing conditions and make necessary adjustments to encourage blooming.

Q: How do I prevent overwatering my orchids?

A: To prevent overwatering, allow the potting medium to dry slightly between watering sessions. Use well-draining potting mixtures and pots with drainage holes. It’s better to underwater orchids than to overwater them.

Q: Do orchids require a dormant period?

A: While some orchid species have a natural dormant period, not all orchids require one. Research the specific orchid species you’re growing to determine if it needs a dormant period and adjust care accordingly.

Q: Can I grow orchids in a terrarium?

A: Yes, orchids can be grown in terrariums, provided there is adequate airflow and proper temperature and humidity control. Choose miniature or compact orchid species that are well-suited for terrarium environments.