guava-plantation

Guava Plantation at Home: A Complete Guide to Growing Delicious Guavas in Your Backyard

Introduction: Embrace the Joy of Guava Plantation at Home

Welcome to the exciting world of guava plantation at home! If you’re a fan of tropical fruits and want to experience the satisfaction of growing your own, then guava is an excellent choice. Guava trees are relatively easy to cultivate, making them perfect for home gardeners of all levels. In this comprehensive guide, we will take you through every step of the process, from selecting the right location to harvesting ripe guavas. So, let’s get started and turn your backyard into a delightful guava paradise!

guava-plantation

Table of Contents

Why Choose Guava Plantation at Home?

Before we delve into the details of guava cultivation, let’s explore why growing guavas at home is an excellent decision.

1. Freshness and Flavor Unmatched

Guava fruits, when picked fresh from your own tree, offer an unparalleled burst of flavor and freshness. Store-bought fruits can’t compete with the juiciness and aroma of homegrown guavas.

2. Nutritional Richness

Guavas are packed with essential nutrients like Vitamin C, Vitamin A, dietary fiber, and antioxidants. By growing them at home, you ensure that you and your family enjoy the maximum nutritional benefits.

3. Sustainable and Eco-Friendly

Home gardening promotes sustainability by reducing your carbon footprint and supporting local biodiversity. Guava trees are relatively low-maintenance, making them a sustainable choice for fruit cultivation.

4. Aesthetic Appeal

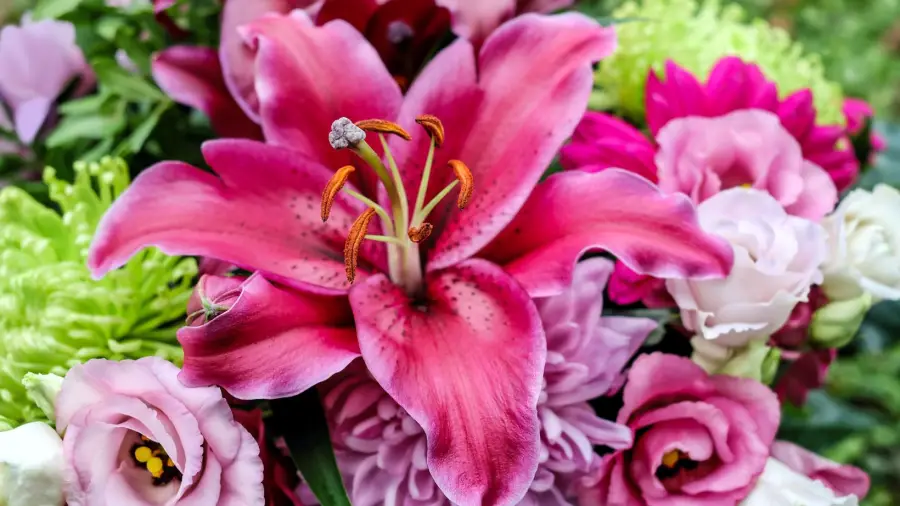
Guava trees are not only fruit-bearing wonders but also add beauty to your garden. Their lush green foliage and fragrant white flowers make them an attractive addition to any landscape.

Selecting the Right Guava Variety

Before you start planting, it’s essential to choose the right guava variety suited for your region and preferences.

1. Common Guava (Psidium guajava)

The common guava is the most widely grown variety, known for its sweet and aromatic fruits. It thrives in tropical and subtropical climates, making it suitable for many regions.

2. Strawberry Guava (Psidium littorale)

Strawberry guava, also known as Cattley guava, is prized for its small, red, and incredibly flavorful fruits. It is more cold-tolerant than common guava and can be grown in slightly cooler climates.

3. Pineapple Guava (Feijoa sellowiana)

Though not a true guava, pineapple guava is popular for its exotic taste and versatility. It produces unique green fruits with a pineapple-like flavor.

Preparing the Planting Site

Now that you’ve chosen the perfect guava variety, it’s time to prepare the planting site for your guava trees.

1. Sunlight Requirements

Guavas thrive in full sunlight, so select a location in your garden that receives at least 6 to 8 hours of direct sunlight daily.

2. Soil Conditions

Guavas prefer well-draining soil with a slightly acidic to neutral pH. Conduct a soil test to check the soil’s pH and amend it accordingly.

3. Spacing

Guava trees can grow quite large, so ensure you space them at least 10 to 15 feet apart to allow ample room for growth.

4. Planting Process

Dig a hole twice the size of the root ball, place the guava plant gently, and backfill with soil. Water thoroughly after planting.

Nurturing Your Guava Trees

Once your guava trees are in the ground, they require proper care to thrive and bear abundant fruits.

1. Watering

Young guava trees need regular watering to establish their roots. Once established, water them deeply but infrequently.

2. Fertilizing

Fertilize your guava trees with a balanced fertilizer every 2 to 3 months during the growing season to promote healthy growth.

3. Mulching

Apply a layer of organic mulch around the base of your guava trees to retain moisture, control weeds, and provide nutrients.

4. Pruning

Prune your guava trees to shape them and remove any dead or diseased branches. Pruning also encourages better fruit production.

Guava Pest and Disease Management

Like all plants, guava trees are susceptible to pests and diseases. However, with proper care and monitoring, you can keep these issues under control.

1. Common Pests

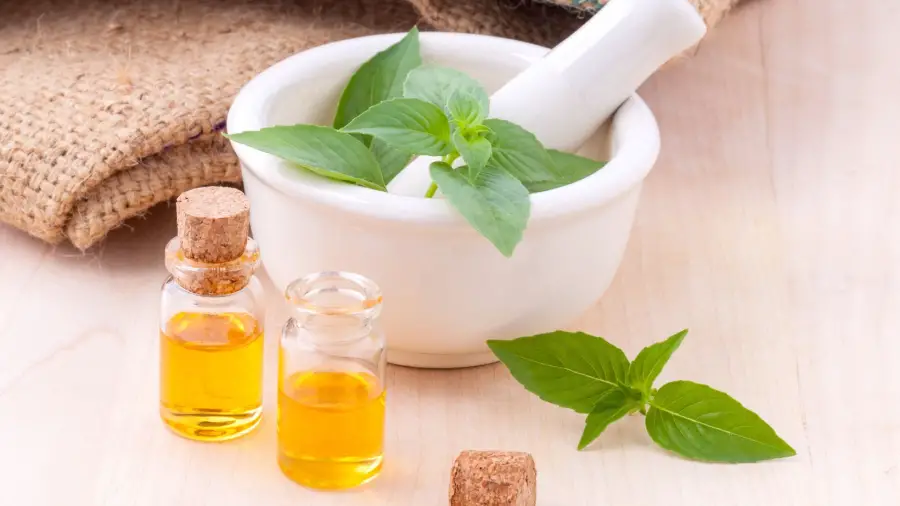
Keep an eye out for common pests like fruit flies, scale insects, and mealybugs. Use natural insecticides or neem oil to manage infestations.

2. Diseases

Guavas can suffer from fungal diseases like anthracnose and rust. As a preventive measure in guava plantation, apply appropriate fungicides.

3. Eco-Friendly Solutions

In guava plantation, foster the presence of natural predators like ladybugs and lacewings to control pests. Additionally, maintaining good hygiene in your garden helps prevent diseases.

Guava Harvesting and Storage

One of the most rewarding moments in guava plantation at home is the harvest. Let’s learn how to pick and store guavas properly.

1. Harvesting Time

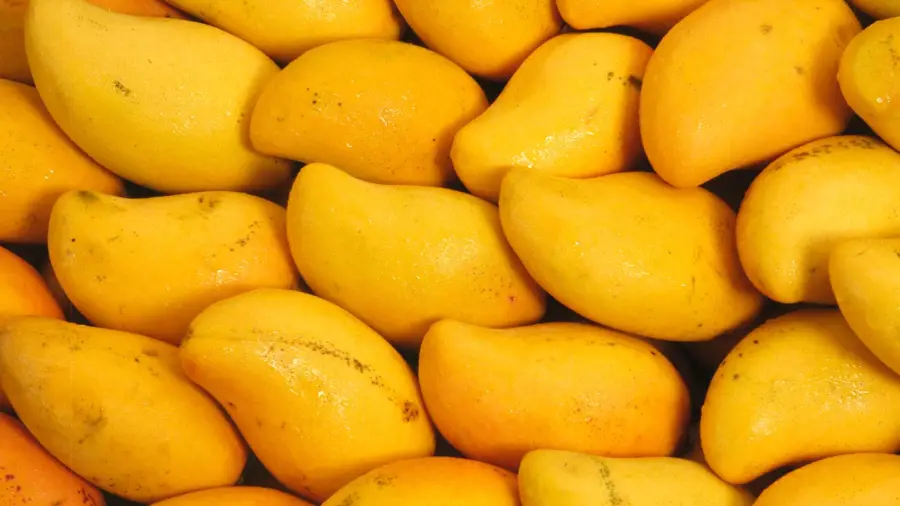
Guavas are ready for harvest when they turn fully ripe and develop a strong aroma. Pick them gently to avoid damaging the fruits.

2. Post-Harvest Handling

Handle guavas with care to prevent bruising. Use ripe guavas promptly, and store unripe ones in a cool, dry place to ripen.

Guava Cuisine: Recipes to Savor

Once you have a bountiful harvest, explore these delightful guava recipes.

1. Guava Smoothie

Blend ripe guavas with yogurt, honey, and ice for a refreshing and nutritious smoothie.

2. Guava Chutney

Create a tangy chutney by simmering guavas with spices, vinegar, and sugar.

3. Guava Dessert

Make a luscious guava dessert by combining pureed guavas with whipped cream and gelatin.

guava-plantation-home

FAQs About Guava Plantation at Home

Q: In guava plantation, how long does it take for a guava tree to bear fruit?

A: Guava trees typically start bearing fruit within 2 to 4 years after planting.

Q: Can I grow guava trees in containers?

A: Yes, you can grow guava trees in large containers, but ensure they have sufficient space and sunlight.

Q: How often should I prune my guava tree?

A: Prune your guava tree annually during the dormant season to maintain its shape and remove dead wood.

Q: Is it possible to grow guavas in colder climates?

A: While common guava is more suited for warm climates, strawberry guava and pineapple guava can tolerate colder temperatures.

Q: Are guava leaves edible?

A: Yes, guava leaves are edible and often used in herbal teas for their medicinal properties.

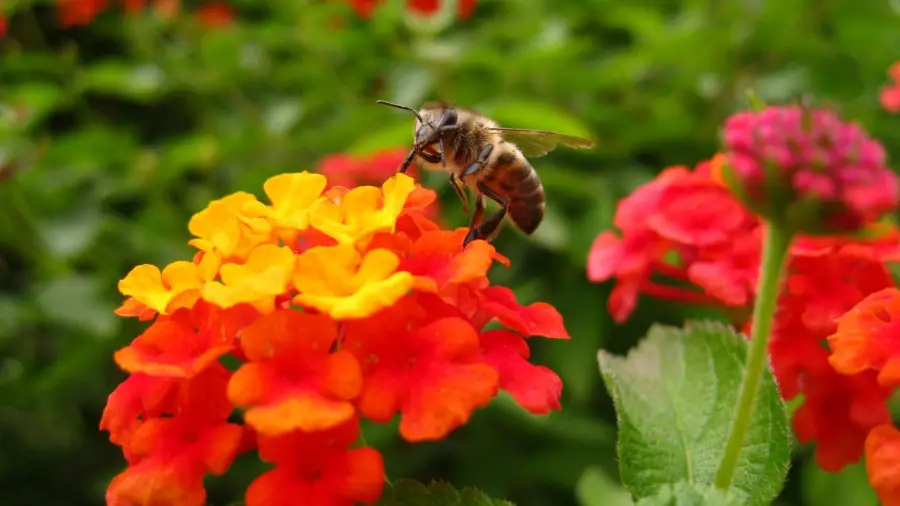
Q: Do guava trees attract bees?

A: Guava flowers are pollinated by bees, making them essential for fruit development.

Conclusion: Grow Your Guava Paradise

Congratulations! You are now equipped with all the knowledge needed for a successful guava plantation at home. From selecting the right variety to nurturing your trees and enjoying the bountiful harvest, you can now embark on this exciting journey. Remember to provide your guava trees with love, care, and attention, and they will reward you with delicious and nutritious fruits. So, get your gardening gloves on and turn your backyard into a tropical paradise with your very own guava plantation!

lemons Galore

Lemons Galore: The Ultimate DIY Guide to Creating a Bountiful Lemon Plantation at Home!

Welcome to the ultimate guide on creating a bountiful lemon plantation at home! Whether you’re a seasoned gardener or a first-timer, cultivating your own lemon trees is a rewarding and satisfying experience. Not only will you have access to fresh, juicy lemons for various culinary delights, but the lush green lemon trees will also add beauty and fragrance to your backyard. In this comprehensive DIY guide, we’ll walk you through everything you need to know to successfully grow and maintain a flourishing lemon plantation right in your backyard.

lemons Galore

Table of Contents

Lemons Galore: The Ultimate DIY Guide to Creating a Bountiful Lemon Plantation at Home!

In this section, we’ll dive into the core aspects of creating your own bountiful lemon plantation. From choosing the right lemon tree variety to preparing the soil and nurturing your trees, we’ve got you covered!

1. Selecting the Perfect Lemon Tree Variety

To start your lemon plantation, the first and most crucial step is choosing the right lemon tree variety. There are several types of lemons, each with unique characteristics. Some popular lemon varieties include Eureka, Lisbon, Meyer, and Ponderosa. Consider factors such as climate, space availability, and your preferences in taste and fruit size when making your selection.

2. Finding the Ideal Location

Lemons thrive in sunny, well-drained locations, so choose a spot in your backyard that receives full sunlight for at least 8 hours a day. Avoid areas with waterlogged soil or excessive shade, as these conditions can hinder the growth of your lemon trees.

3. Preparing the Soil for Plantation

The success of your lemon plantation greatly depends on the quality of the soil. Lemons prefer slightly acidic soil with a pH range of 5.5 to 6.5. Conduct a soil test to determine its pH level and amend it with organic matter if necessary. Ensure good drainage to prevent waterlogging.

4. Planting Your Lemon Trees

Once you have selected the right location and prepared the soil, it’s time to plant your lemon trees. For a Lemons Galore plantation, dig a hole that is twice as wide and deep as the root ball of the tree. Carefully remove the lemon tree from its container, position it in the hole, and backfill with soil. Water thoroughly after planting.

5. Providing Proper Care and Maintenance

Like any other plant, lemon trees need care and attention to thrive. Regular watering, fertilizing, and pruning are essential for healthy growth and fruit production. Use organic fertilizers and follow a consistent watering schedule to ensure optimal growth.

6. Protecting Your Lemon Trees from Pests and Diseases

Pests and diseases can pose a threat to your lemon trees. Keep a close eye on your trees for any signs of infestations or diseases. Use natural remedies or organic pesticides to protect your lemon trees while minimizing harm to the environment.

7. Harvesting Juicy Lemons

The most rewarding part of your lemon plantation journey is harvesting ripe, juicy lemons! In a Lemons Galore plantation, the ripening time of lemons can vary depending on the variety and may take several months. Wait until the lemons are fully yellow and slightly soft to the touch before harvesting. Use pruning shears to gently remove the fruit from the tree.

8. Preserving and Using Lemons

With a bountiful lemon harvest, you’ll have plenty of lemons to use in various culinary delights. From making lemonade to baking lemon-infused desserts, the possibilities are endless. Additionally, learn how to preserve lemons for later use by freezing or dehydrating them.

lemons-Galore-guide

Frequently Asked Questions (FAQs)

Can I grow lemon trees in pots?

Yes, you can grow lemon trees in pots if you have limited space or live in colder regions. Choose a dwarf lemon variety, use well-draining potting mix, and ensure the pot receives sufficient sunlight.

How often should I water my lemon trees?

Water your lemon trees deeply once a week during the growing season. For a Lemons Galore plantation, make adjustments to the watering frequency based on weather conditions and the moisture level of the soil.

For a Lemons Galore plantation, what is the ideal time to plant lemon trees?

The best time to plant lemon trees is in spring or early summer when the soil is warm and the risk of frost has passed.

In a Lemons Galore plantation, how much time does it take for lemons to ripen on the tree?

Lemons can take anywhere from 4 to 12 months to ripen, depending on the variety and growing conditions.

How do I know if my lemon tree is getting enough nutrients?

Signs of nutrient deficiency in lemon trees include yellowing leaves, stunted growth, and reduced fruit production. Conduct a soil test to identify any nutrient deficiencies and adjust your fertilization accordingly.

Can I use lemon seeds to grow my lemon trees?

While it is possible to grow lemon trees from seeds, keep in mind that the resulting tree may not produce the same quality of fruit as the parent tree. It’s best to use grafted lemon trees for consistent fruit production.

Conclusion

Congratulations! You’ve now learned how to create a bountiful lemon plantation at home like a pro. By following the steps in this ultimate DIY guide, you’ll be able to grow healthy lemon trees and enjoy a plentiful harvest of delicious lemons. Remember to provide proper care and maintenance to your lemon trees, and they will reward you with juicy fruits for years to come. So, roll up your sleeves, get your gardening tools ready, and let Lemons Galore: The Ultimate DIY Guide to Creating a Bountiful Lemon Plantation at Home be your companion on this exciting journey!

              Papaya-leaves

              Dengue Defense: Unlocking the Healing Power of Papaya Leaves

              Introduction

              Dengue fever is a mosquito-borne viral infection that affects millions worldwide, leading to severe flu-like symptoms and, in extreme cases, life-threatening complications. In the quest for effective remedies, scientists and herbal experts have uncovered the remarkable healing potential of papaya leaves. In this article, we delve into the numerous health benefits of papaya leaves in the fight against dengue fever and how they can strengthen your immune system. With firsthand knowledge and credible sources, we present you with a comprehensive guide on Dengue Defense: Unlocking the Healing Power of Papaya Leaves.

              Papaya-leaves

              The Miraculous Papaya Leaves

              Papaya leaves, often overlooked, contain a wealth of nutrients and powerful enzymes that can aid in dengue fever treatment and prevention. Let’s explore the incredible elements that make papaya leaves a potent natural remedy:

              1. Papain – Nature’s Healing Enzyme: Papaya leaves are rich in papain, a proteolytic enzyme known for its anti-inflammatory properties. Papain helps reduce inflammation in the body, easing the discomfort caused by dengue fever.
              2. Carpaine – The Antiviral Agent: Carpaine is another valuable component found in papaya leaves. It exhibits strong antiviral properties, making it effective in inhibiting the replication of the dengue virus.
              3. Rich in Vitamins and Minerals: Papaya leaves are a treasure trove of essential vitamins and minerals, including vitamin C, vitamin A, iron, calcium, and magnesium. These nutrients play a crucial role in boosting the immune system and promoting faster recovery.

              The Science Behind Papaya Leaves and Dengue Defense

              The healing power of papaya leaves is not mere folklore; it is backed by scientific research. Several studies have been conducted to understand the efficacy of papaya leaves in combating dengue fever:

              1. A Study by the Journal of Medicinal Food: This study revealed that papaya leaf extract significantly increased platelet count in dengue-infected patients, aiding in clotting and reducing bleeding risk.
              2. Research by the Asian Pacific Journal of Tropical Biomedicine: The research demonstrated that papaya leaf extract possesses immunomodulatory properties, helping the immune system respond effectively to the dengue virus.
              3. A Clinical Trial by the National Institutes of Health (NIH): The NIH conducted a clinical trial that showed the potential of papaya leaf extract in alleviating symptoms such as fever and body pain in dengue-infected patients.

              How to Use Papaya Leaves for Dengue Defense?

              Now that we understand the science behind papaya leaves’ effectiveness let’s explore how to use them to unlock their healing power:

              1. Papaya Leaf Juice: One of the most popular methods is preparing fresh papaya leaf juice. Take a few mature papaya leaves, wash them thoroughly, remove the stems, and blend them with a little water. Strain the mixture to obtain the juice and consume it twice a day.
              2. Papaya Leaf Capsules: For those who find the taste of the juice unpleasant, papaya leaf capsules or supplements are available in the market. Ensure to follow the recommended dosage as per the product instructions.
              3. Papaya Leaf Tea: Papaya leaf tea is another soothing option. Steep dried or fresh papaya leaves in hot water for 10-15 minutes and drink it warm.
              papaya-leaves-dengue-medicine

              Frequently Asked Questions (FAQs)

              Are Papaya Leaves Safe for Everyone?

              Yes, papaya leaves are generally safe for consumption. However, pregnant or breastfeeding women should avoid using them without consulting a healthcare professional. Additionally, individuals with a history of latex allergy or papain sensitivity should exercise caution.

              Can Papaya Leaves Prevent Dengue Fever?

              While papaya leaves have shown promise in helping combat dengue fever, they are not a guaranteed preventive measure. It’s essential to take other precautions, such as using mosquito nets and repellents, to minimize the risk of dengue infection.

              How Long Does It Take to See Results?

              The time it takes for papaya leaves to show results may vary from person to person. Some individuals experience relief from symptoms within a few days, while others may take longer. Consistency in usage is vital for the best results.

              Can I Consume Papaya Leaves Daily?

              Regular consumption of papaya leaves is generally safe, but it’s advisable to take breaks. Consider consuming them for a few weeks, then take a break before resuming.

              Are There Any Side Effects of Papaya Leaves?

              In some cases, excessive consumption of papaya leaves or its products may lead to mild stomach upset. To avoid any adverse effects, stick to the recommended dosage of papaya leaves.

              Is Papaya Leaf Extract Commercially Available?

              Yes, papaya leaf extract is available in health food stores and online retailers. Ensure to choose products from reputable brands with good reviews.

              Conclusion

              Papaya leaves have emerged as a remarkable natural remedy for combating dengue fever and boosting the immune system. Their rich nutrient profile and potent enzymes, such as papain and carpaine, make them an effective ally in the battle against the dengue virus. Scientific research supports the efficacy of papaya leaves, and their usage has garnered positive results in dengue-infected patients.

              Remember to consult your healthcare provider before incorporating papaya leaves into your dengue defense strategy, especially if you have existing medical conditions or are on medication. Embrace the healing power of papaya leaves and take charge of your well-being.

              (To have some idea about vegetable gardening : https://bonsainurserybd.com/10-game-changing-vegetable-gardening/)

              Grape

              Grape Plantation at Home: A Step-by-Step Guide to Growing Your Own Vineyard!

              Introduction

              Dreaming of owning a lush vineyard and producing your own delicious grapes at home? Look no further! Grape Plantation at Home is an exciting and rewarding venture that allows you to connect with nature and savor the fruits of your labor. In this step-by-step guide, we’ll walk you through the entire process, from choosing the right grape varieties to nurturing and harvesting your vineyard. Whether you’re a seasoned gardener or a novice, our detailed instructions, coupled with personal experiences and credible sources, will empower you to grow your own vineyard and enjoy the sweet success of homegrown grapes.

              Grape

              Table of Contents

              Selecting the Perfect Location for Your Vineyard

              The key to a thriving grape plantation starts with choosing the ideal location. Following are some essential factors to consider:

              1. Sunlight Exposure: Grapes love sunlight! Select a spot with full sun exposure for at least 6 to 8 hours a day to ensure healthy growth and ripening of the fruits.
              2. Soil Quality: Grapes flourish in well-draining soil with a slightly acidic to neutral pH level. Perform a soil test to assess the soil’s fertility and make necessary amendments.
              3. Air Circulation: Good air circulation prevents the development of diseases. Avoid planting grapes in areas prone to frost or stagnant air.
              4. Water Drainage: Adequate drainage is crucial to prevent waterlogged roots. Avoid low-lying areas that retain water.

              Choosing the Right Grape Varieties

              The success of your vineyard depends on selecting grape varieties suited to your climate and preferences. Consider these popular choices:

              1. Concord: A popular American grape variety known for its sweetness and versatility. Concord grapes are ideal for eating fresh, making juice, and producing jellies.
              2. Cabernet Sauvignon: A classic red wine grape, Cabernet Sauvignon produces rich and complex wines with bold flavors.
              3. Chardonnay: This green-skinned grape variety is famous for producing exquisite white wines with notes of apple, pear, and citrus.
              4. Muscat: Also known as Moscato, Muscat grapes are sweet and aromatic, perfect for making dessert wines.

              Preparing the Soil and Planting Grapes

              With the location and grape varieties chosen, it’s time to prepare the soil and get planting:

              1. Soil Preparation: Clear the area of any weeds or debris and perform necessary soil amendments based on the soil test results. Tilling the soil to a depth of 12-18 inches helps with aeration.
              2. Building Trellis Systems: Grapevines need support to grow, and a trellis system is essential for training them. Construct sturdy trellises according to the number of grapevines you plan to grow.
              3. Planting Grapevines: Dig holes deep enough to accommodate the roots of the grapevines. Place the plants in the holes and cover them with soil, ensuring the root crown is at ground level.
              4. Watering and Mulching: Water the newly planted grapevines thoroughly and add a layer of organic mulch to retain moisture and suppress weed growth.

              Nurturing Your Vineyard

              Now that your grapevines are in the ground, it’s time to nurture them to ensure healthy growth and bountiful harvests:

              1. Pruning: Proper pruning is essential for the development of strong and productive grapevines. Prune during the dormant season to remove dead or weak growth and shape the vines.
              2. Training the Vines: Train the young vines to follow the trellis system carefully. As they grow, gently guide the main shoots along the trellis wires.
              3. Fertilizing: Grapevines benefit from balanced fertilizers. Apply fertilizers during the growing season to provide essential nutrients.
              4. Pest and Disease Management: Regularly inspect the vineyard for pests and signs of diseases. Use natural methods or appropriate treatments to protect your vines.

              Blossoms to Bunches: Grape Development and Care

              As the grapevines mature and bloom, it’s crucial to take care of them to ensure abundant fruit production:

              1. Flowering and Pollination: Grapevines produce delicate flowers that require successful pollination to set fruit. Encourage pollinators in your garden to aid this process.
              2. Thinning the Bunches: To improve grape quality, thin out crowded bunches, leaving only the healthiest grapes to ripen.
              3. Watering Schedule: Proper irrigation is crucial during the fruiting season. Maintain a consistent watering schedule to avoid stress on the vines.
              4. Bird Netting: As the grapes ripen, protect them from hungry birds by using bird netting.

              Harvesting and Enjoying Your Homegrown Grapes

              The moment of truth has arrived! It’s time to harvest your luscious grapes and relish the rewards of your hard work:

              1. Harvesting Time: Grapes are ready for harvesting when they reach their full color and flavor. Gently handpick the clusters to avoid damaging the vines.
              2. Storing Grapes: Store freshly picked grapes in a cool, humid environment to maintain their freshness and extend their shelf life.
              3. Wine Making: If you’ve planted wine grape varieties, you can embark on the delightful journey of making your own wine. Research the winemaking process or join a local winemaking club for guidance.
              4. Savoring the Fruits of Your Labor: Enjoy the taste of your homegrown grapes in various culinary delights, from fresh fruit salads to homemade grape jams and pies.
              Grape-plantations

              FAQs about Grape Plantation at Home

              Can I grow grapes in containers?

              Yes, you can grow certain grape varieties in containers, but ensure the containers are large enough to accommodate the roots and use well-draining soil.

              How long does it take for grapevines to bear fruit?

              It typically takes 2 to 3 years for grapevines to mature and produce their first crop.

              Are grapevines high-maintenance?

              While grapevines require attention and care, they are relatively low-maintenance compared to some other fruit crops.

              Do grapes need a lot of water?

              Grapes prefer moderate water levels, especially during the fruiting season. Overwatering can lead to diluted flavors in the grapes.

              What is the best time to prune grapevines?

              Prune grapevines during the dormant season, usually in late winter or early spring.

              Can I grow grapes in colder climates?

              Yes, certain grape varieties are cold-hardy and can thrive in colder climates with proper protection

              Conclusion

              Embarking on a Grape Plantation at Home journey can be an incredibly rewarding experience. From selecting the right grape varieties to nurturing your vineyard through each stage of growth, the joy of harvesting and savoring your homegrown grapes is unmatched. Remember to be patient and attentive, as growing grapes requires time and care. With this step-by-step guide and the passion to succeed, you’ll soon become a proud vineyard owner, enjoying the delightful fruits of your labor and the beauty of nature right in your backyard.

              banana-bonanja

              Banana Bonanza: Turn Your Home into a Fruitful Haven with a DIY Banana Plantation!

              Introduction

              Welcome to the world of “Banana Bonanza” where we will explore the delightful journey of turning your home into a fruitful haven with a DIY banana plantation! Imagine waking up every morning to the sight of lush green banana plants bearing delicious, ripe fruits. With the right knowledge, a bit of effort, and a touch of nature’s magic, you can transform your garden into a tropical paradise.

              Whether you’re a seasoned gardener or a novice with a green thumb, this comprehensive guide will provide all the information you need to cultivate and nurture your very own banana plantation. From choosing the right banana variety to dealing with potential challenges, we’ve got you covered.

              So, let’s embark on this exciting adventure of growing bananas and filling your home with their sweet abundance!

              (For more knowledge about fruits gardening : https://bonsainurserybd.com/rooftop-fruit-plantation/)

              Banana

              Table of Contents

              Banana Bonanza: Turn Your Home into a Fruitful Haven with a DIY Banana Plantation!

              Bananas, often referred to as the “fruit of paradise,” are not only delicious but also packed with essential nutrients. They are a great source of potassium, vitamin C, vitamin B6, and dietary fiber, making them an excellent addition to any diet.

              1. Benefits of Growing Your Own Banana Plantation

              • A Sustainable Food Source: Having your banana plantation means you can enjoy a constant supply of fresh, organic bananas without relying on external sources.
              • Cost-Effective: Growing your bananas saves money in the long run as store-bought organic bananas can be expensive.
              • Eco-Friendly: By cultivating your bananas, you contribute to environmental conservation by reducing carbon emissions associated with transportation.
              • Health Benefits: Consuming home-grown bananas ensures that you and your family consume pesticide-free, healthy fruits.
              • Landscaping Aesthetics: Banana plants add a lush, tropical touch to your garden, enhancing its beauty.

              2. Selecting the Right Banana Variety

              Choosing the appropriate banana variety is crucial to a successful plantation. Different varieties have unique flavors, growth habits, and adaptability to specific climates. Some popular varieties include:

              • Cavendish Bananas: Known for their sweetness and commercial popularity.
              • Dwarf Cavendish Bananas: Ideal for smaller spaces and container gardening.
              • Lady Finger Bananas: A gourmet delight with small, slender fruits.
              • Red Banana: A visually appealing variety with a sweet and tangy taste.
              • Plantain: Often used for cooking due to its starchy nature.

              3. Creating the Perfect Growing Conditions

              Bananas thrive in warm, tropical climates, but they can be grown in various regions with some care. Here are the essential growing conditions:

              • Sunlight: Banana plants require at least 10 hours of bright sunlight daily.
              • Soil: Well-draining, nutrient-rich soil with a pH between 5.5 and 7.0 is ideal.
              • Watering: Bananas need regular watering to keep the soil moist.
              • Temperature: Optimal growth occurs in temperatures between 75°F to 85°F (24°C to 29°C).

              4. Preparing the Soil and Planting

              • Soil Preparation: Clear the planting area and enrich the soil with organic matter.
              • Planting: Dig holes and plant the banana suckers or rhizomes about 4-8 feet apart.
              • Mulching: Add a layer of organic mulch to retain soil moisture and control weeds.

              5. Proper Care and Maintenance

              Banana plants require regular attention to ensure healthy growth and abundant fruiting.

              • Watering: Maintain consistent soil moisture without overwatering.
              • Fertilizing: Feed your banana plants with balanced fertilizer regularly.
              • Pruning: Remove old and dead leaves to encourage new growth.
              • Pest and Disease Control: Monitor for pests and diseases and take necessary measures.

              6. Dealing with Common Challenges

              • Cold Weather Protection: Protect your banana plants from cold temperatures using frost cloth or straw.
              • Pests: Keep an eye out for aphids, spider mites, and banana weevils.
              • Diseases: Look out for black leaf streak and Panama disease, and take preventive measures.

              7. Harvesting and Ripening Bananas

              Harvesting bananas at the right time is essential to enjoy their full flavor.

              • Harvesting: Cut the bunches when the fruit reaches the desired maturity stage.
              • Ripening: Bananas can be ripened off the plant by placing them in a paper bag.

              8. Recipes and Culinary Delights

              When it comes to culinary delights, the versatile banana takes center stage, offering a plethora of delectable recipes to tantalize your taste buds. From the classic banana bread that fills your home with its irresistible aroma to creamy banana smoothies that provide a refreshing treat on a warm day, this fruit never fails to impress. Indulge in mouthwatering banana pancakes for a delightful breakfast or savor the sweetness of caramelized bananas as a luscious dessert topping. For those seeking a savory twist, try incorporating bananas into tropical-inspired salads or curries for a unique and flavorful experience. The options are endless, and the charm of bananas lies in their ability to add natural sweetness and creaminess to a wide array of dishes, making them a culinary treasure worth exploring. So, grab your apron and let the banana-inspired culinary adventure begin!

              9. Sustainable Gardening Practices

              In the realm of banana cultivation, embracing sustainable gardening practices is not just an option but a responsibility towards the environment. By adopting eco-friendly techniques, you not only ensure the health and vitality of your banana plants but also contribute to the preservation of our planet. Composting kitchen scraps to create nutrient-rich organic fertilizers for your banana plants minimizes waste and reduces the need for harmful chemicals. Implementing water-saving strategies, such as using mulch to retain soil moisture and collecting rainwater, not only conserves water but also benefits your banana plantation in the long run. Embrace the concept of companion planting by intercropping your banana plants with complementary herbs or vegetables to promote biodiversity and natural pest control. Sustainable gardening practices not only protect your cherished banana plants from harm but also foster a harmonious ecosystem that nurtures and sustains life. So, let your banana plantation become a beacon of sustainable gardening, leaving a positive impact on both your home and the planet.

              banana-bonanja

              Frequently Asked Questions (FAQs)

              Can I grow bananas in a non-tropical climate?

              Yes, you can grow bananas in non-tropical climates by creating suitable microclimates and using cold protection during winters.

              How long does it take for a banana to bear fruit?

              Banana plants usually take 9 to 12 months to bear fruit, depending on the variety and growing conditions.

              What is the best time to fertilize banana plants?

              Fertilize your banana plants every two to three months during the growing season.

              Can I grow bananas in pots?

              Yes, certain dwarf banana varieties can be grown in large pots or containers.

              How do I prevent banana plants from toppling over in strong winds?

              Providing adequate support to the plant with stakes or tying it to a sturdy structure can prevent toppling.

              Do banana plants require a lot of water?

              Yes, banana plants require regular watering, especially during dry periods.

              Conclusion

              Congratulations! You are now equipped with the knowledge and insights to turn your home into a fruitful haven with your very own DIY banana plantation. From selecting the right banana variety to harvesting and caring for your plants, the journey to growing delicious bananas is a rewarding one.

              Embrace sustainable gardening practices, unleash your creativity in the kitchen with banana recipes, and relish the joy of nurturing nature’s gifts. Let “Banana Bonanza” fill your home with sweetness, joy, and the tropical ambiance of a thriving banana plantation.

              So, roll up your sleeves, get your gardening tools ready, and let the Banana Bonanza begin!

              Mango

              Gardening Mango at Home: A Guide to Growing Your Own Tropical Delight

              Introduction

              Imagine stepping into your own backyard, feeling the soft grass beneath your feet, and being greeted by the sight of ripe, golden mangoes hanging from your very own mango tree. The thought of growing mangoes at home might seem like a distant dream, but with the right knowledge and a bit of effort, you can turn that dream into a reality. In this guide, we will take you through the journey of gardening mangoes in your home. So, let’s get started on this exciting tropical adventure!

              Mango

              Selecting the Right Mango Variety

              Before you start gardening mangoes at home, it’s crucial to choose the right mango variety that suits your climate and preferences. Some popular mango varieties for home gardening include:

              • Dwarf Varieties: Ideal for small gardens or containers, dwarf mango trees are compact and produce smaller fruits.
              • Keitt: A large and robust mango tree with delicious, non-fibrous fruit. It’s well-suited for warm climates.
              • Palmer: This variety is known for its disease resistance and sweet, juicy mangoes.
              • Tommy Atkins: A widely grown variety with beautiful red and green skin and a sweet-tangy taste.

              Finding the Perfect Spot

              Mango trees thrive in warm, tropical climates with full sun exposure. When choosing the perfect spot for your mango tree, consider the following factors:

              • Sunlight: Ensure that your mango tree receives at least 6 to 8 hours of sunlight daily for optimal growth and fruit production.
              • Soil: Mango trees prefer well-draining soil with a slightly acidic to neutral pH level.
              • Protection from Frost: Mango trees are sensitive to frost, so plant them in an area protected from cold winds and frost.

              (To get some idea about fruit plantations : https://bonsainurserybd.com/rooftop-fruit-plantation/)

              Planting Your Mango Tree

              Once you’ve selected the right variety and location, it’s time to plant your mango tree. Follow these steps for successful planting:

              1. Prepare the Soil: Dig a hole that is twice the size of the root ball and mix organic compost into the soil.
              2. Remove the Tree from the Container: Gently remove the mango tree from its container, taking care not to damage the roots.
              3. Plant the Tree: Place the mango tree in the center of the hole and fill it with soil, pressing it down firmly to eliminate air pockets.
              4. Watering: Water the newly planted tree thoroughly to help it establish its roots.

              Caring for Your Mango Tree

              Caring for your mango tree is essential to ensure healthy growth and a bountiful harvest. Following are some tips for proper care:

              • Watering: Mango trees require regular watering, especially during dry spells. When cultivating mango trees, it is essential to avoid overwatering, as excessive moisture can lead to root rot.
              • Fertilization: Feed your mango tree with a balanced fertilizer high in potassium, phosphorus, and micronutrients during the growing season.
              • Pruning: Prune your mango tree to remove dead or diseased branches and promote airflow within the canopy.
              • Pest and Disease Control: Keep a close eye on your mango tree for signs of pests or diseases and take appropriate measures to control them.
              • Mango Mulching: Apply a layer of organic mulch around the base of the tree to retain moisture and suppress weed growth.

              Harvesting Your Homegrown Mangoes

              The most rewarding part of gardening mangoes at home is the harvest season! Mangoes generally take several months to ripen, depending on the variety and climate. To determine if your mangoes are ready for harvest:

              • Color: Look for a change in color. Depending on the variety, ripe mangoes may exhibit shades of yellow, orange, or red.
              • Firmness: For mango ripeness, gently squeeze the fruit; it should yield slightly under gentle pressure.
              • Aroma: Ripe mangoes emit a sweet, fruity aroma around the stem.
              • Drop Test: If you gently tug a mango and it easily comes off the tree, it’s ready to be harvested.
              mango-plantation

              Frequently Asked Questions (FAQs)

              Q: Can I grow mangoes in containers?

              A: Yes, you can grow dwarf mango varieties in containers, making them suitable for small spaces and patios.

              Q: How long does it take for mango trees to bear fruit?

              A: Mango trees typically take 2 to 4 years to bear fruit, depending on the variety and growing conditions.

              Q: Can I grow mangoes in cooler climates?

              A: Mangoes thrive in warm, tropical climates and are not well-suited for cooler regions with frost.

              Q: How do I protect my mango tree from pests?

              A: Regularly inspect your mango tree for pests and use organic pest control methods or insecticidal soap to address infestations.

              Q: Do mango trees require a lot of maintenance?

              A: While mango trees need regular care, they are relatively low-maintenance once established.

              Q: Can I prune my mango tree during any season?

              A: The best time to prune a mango tree is during the dormant winter months to stimulate new growth in the spring.

              Conclusion

              Gardening mango at home can be a rewarding and enjoyable experience. With the right variety selection, proper care, and a little patience, you can relish the satisfaction of harvesting your very own homegrown mangoes. Whether you have a spacious backyard or a cozy patio, mango trees can be accommodated in various settings, allowing you to savor the taste of tropical sweetness right at home. So, roll up your sleeves, get your gardening tools ready, and embark on this fruitful journey of growing your own mango tree!

              Herbal Gardens

              The Healing Power of Herbal Gardens: Growing Medicinal Plants at Home

              Introduction

              In today’s fast-paced world, where stress and health issues are prevalent, many individuals are turning to natural remedies and alternative medicine for healing and wellness. One of the most effective ways to access the healing power of nature is by cultivating a herbal garden at home. The Healing Power of Herbal Gardens: Growing Medicinal Plants at Home not only offers a bountiful collection of therapeutic plants but also creates a serene space to unwind and connect with nature.

              Herbal Gardens

              The Healing Power of Herbal Gardens: Growing Medicinal Plants at Home

              A well-designed herbal garden can be a sanctuary of health and tranquility, providing abundant medicinal plants with various healing properties. Let’s explore the steps to create your own herbal garden and unlock the potential of these natural wonders.

              Table of Contents

              1. Selecting the Right Location

              Choosing the perfect spot for your herbal garden is crucial. Make sure your Herbal Garden receives ample sunlight throughout the day. Most medicinal plants thrive in sunlight, making a sunny windowsill or a south-facing balcony an ideal choice.

              (To get some idea of gardening at home : https://bonsainurserybd.com/5-small-space-rooftop-garden-ideas/)

              2. Preparing the Soil

              Healthy soil is the foundation for a flourishing herbal garden. Opt for well-draining soil with a balanced pH level. Incorporate organic compost to enrich the soil with essential nutrients.

              3. Curating Medicinal Plants

              Diversify your herbal garden with a selection of medicinal plants that complement each other. Some popular options include:

              • Lavender (Lavandula angustifolia): Known for its calming properties, lavender helps with stress relief and improves sleep quality.
              • Peppermint (Mentha × piperita): A potent digestive aid, peppermint can soothe upset stomachs and alleviate headaches.
              • Aloe Vera (Aloe barbadensis miller): Valued for its healing gel, aloe vera is excellent for treating skin conditions and promoting wound healing.
              • Chamomile (Matricaria chamomilla): Renowned for its relaxing effects, chamomile tea aids in reducing anxiety and inducing better sleep.
              • Echinacea (Echinacea purpurea): Boost your immune system with echinacea, which is believed to ward off colds and infections.

              4. Designing Your Herbal Garden

              Create a visually appealing garden layout to enhance its healing ambiance. Consider using a mix of raised beds, containers, and borders to organize your medicinal plants strategically.

              5. Proper Watering and Care

              Regular watering is essential for the health of your medicinal plants. In your Herbal Gardens, be mindful not to overwater or underwater the plants. Each plant may have specific watering requirements, so research their individual needs.

              6. Harvesting Medicinal Plants

              Timing is critical when harvesting medicinal plants. The best time is usually early in the morning when the concentration of essential oils is at its peak. Proper drying and storage methods will preserve their potency.

              7. Making Herbal Remedies

              Harness the full potential of your herbal garden by learning to make various herbal remedies. From teas and tinctures to salves and ointments, these natural preparations can address a range of health concerns.

              8. Safety Precautions

              While herbal remedies offer numerous benefits, it’s essential to use them responsibly. Consult with a healthcare professional before trying new remedies, especially if you are pregnant, nursing, or taking medications.

              9. Attracting Beneficial Insects

              Invite beneficial insects like bees and butterflies into your herbal garden. They play a vital role in pollination, which promotes plant growth and ensures a thriving ecosystem.

              10. Embracing Sustainable Practices

              Incorporate sustainable practices into your gardening routine. Utilize rainwater harvesting, composting, and natural pest control methods to minimize the environmental impact.

              11. The Healing Power of Herbal Gardens: Growing Medicinal Plants at Home and Mental Wellness

              Beyond physical health, herbal gardens can significantly impact mental wellness. Spending time in a calming green space can reduce stress, anxiety, and depression, fostering a positive outlook on life.

              12. Companionship of Herbal Gardens

              Herbal gardens provide more than medicinal benefits; they offer a sense of companionship. Caring for and nurturing plants can be therapeutic and fulfilling, promoting a sense of purpose and responsibility.

              13. The Art of Herbal Tea Blending

              Experiment with blending different herbal teas from your garden’s harvest. Unleash your creativity and craft unique flavors while enjoying the numerous health benefits of herbal infusions.

              14. Herbal Gardens for Urban Dwellers

              Living in a bustling city shouldn’t deter you from creating an herbal garden. Urban dwellers can use vertical gardening techniques, balcony planters, or community gardens to cultivate medicinal plants.

              15. Cultural Heritage of Medicinal Plants

              Medicinal plants have been an integral part of various cultures throughout history. Explore the rich cultural heritage and traditional uses of herbs from different regions of the world.

              16. From Garden to Kitchen: Culinary Herbs

              Many medicinal plants are also culinary herbs. Discover the dual benefits of growing herbs that not only add flavor to your dishes but also promote well-being.

              17. The Healing Power of Herbal Gardens: Growing Medicinal Plants at Home for Children

              Teach children about the wonders of nature and the importance of sustainability by involving them in planting and caring for a herbal garden. It’s a valuable educational and bonding experience.

              18. Overcoming Common Gardening Challenges

              Gardening may come with its share of challenges. Learn how to identify and address issues such as pests, diseases, and environmental factors to ensure your herbal garden thrives.

              19. Herbs for Stress Relief and Relaxation

              Combat the stresses of daily life by cultivating herbs that specifically target stress relief and relaxation. Learn to make soothing herbal preparations to unwind and rejuvenate.

              20. Herbal Gardens in Traditional Medicine

              Discover the historical significance of herbal gardens in traditional medicine systems like Ayurveda, Traditional Chinese Medicine, and Native American healing practices.

              21. Perennial vs. Annual Medicinal Plants

              Differentiate between perennial and annual medicinal plants and how they fit into your herbal garden. Perennials offer long-lasting benefits, while annuals provide diverse options each year.

              22. Herbal Gardens for Immune Support

              Boost your immune system by growing herbs that enhance immunity. These plants can aid in preventing illnesses and maintaining overall well-being.

              23. Aromatic Herbs for Aromatherapy

              Explore the world of aromatherapy with aromatic herbs from your garden. Enjoy the calming scents and therapeutic benefits of essential oils.

              24. Herbal Gardens for Natural Skincare

              Craft your own natural skincare products using herbs from your garden. Experience the beauty-enhancing properties of herbal-infused skincare routines.

              25. Sharing the Bounty of Your Herbal Garden

              Spread the joy and benefits of herbal gardens by sharing your harvest with friends, family, and community members. Encourage others to embark on their healing journey with medicinal plants.

              Herbal-Gardens-Home

              Frequently Asked Questions (FAQs)

              Q: Can I grow medicinal plants indoors?

              A: Absolutely! Many medicinal plants can thrive indoors if they receive sufficient sunlight and proper care.

              Q: In Herbal Gardens, how long does it take for medicinal plants to mature?

              A: The time it takes for medicinal plants to mature varies depending on the plant. Some may be ready for harvest within a few months, while others might take a year or more.

              Q: Are there any medicinal plants that are easy to grow for beginners?

              A: Yes, several medicinal plants are beginner-friendly, such as chamomile, peppermint, and lemon balm.

              Q: In Herbal Gardens, can I use herbal remedies alongside conventional medications?

              A: It’s essential to consult with a healthcare professional before combining herbal remedies with conventional medications to avoid any potential interactions.

              Q: What is the best time of day to harvest medicinal plants?

              A: Early morning is the ideal time to harvest medicinal plants when their essential oil content is highest.

              Q: How can I preserve the freshness and potency of my harvested herbs?

              A: Drying and storing your harvested herbs properly is key to preserving their freshness and potency. In Herbal Gardens, store them in airtight containers in a cool, dark place.

              Conclusion

              The Healing Power of Herbal Gardens: Growing Medicinal Plants at Home opens a gateway to a world of natural healing and well-being. Cultivating your own herbal garden allows you to connect with nature, learn the art of herbal remedies, and promote a healthier lifestyle. Embrace the wonders of medicinal plants and experience the transformative effects they can have on your physical and mental health.

              Lily

              Lily: A Guide to the Enchanting Flower

              Introduction

              Lilies are some of the most captivating and beloved flowers, known for their elegant beauty and enchanting fragrance. With their vibrant colors and distinct shapes, lilies have been cherished in gardens and floral arrangements for centuries. In this comprehensive guide, we will delve into the fascinating world of lilies, exploring their various types, growing techniques, and essential care tips. Whether you’re an avid gardener or a flower enthusiast, join us as we unravel the allure of the magnificent lily.

              Lily

              What are Lilies?

              Lily, scientifically known as Lilium, is an herbaceous flowering plant that belongs to the Liliaceae family. These stunning flowers boast a trumpet-shaped, six-petal bloom, and they come in a wide array of colors, ranging from pristine white to deep crimson. Native to the temperate regions of the Northern Hemisphere, lilies are found in various parts of the world, including Asia, Europe, and North America.

              Table of Contents

              The Different Types of Lilies

              Lilies encompass numerous species and hybrids, each possessing its unique characteristics and charm. Let’s explore some popular types of lilies:

              1. Easter Lily (Lilium longiflorum)

              The lily, particularly the Easter Lily, symbolizes purity, hope, and renewal. Its pure white, trumpet-shaped blooms are commonly associated with the Easter season, making it a cherished gift and a classic choice for religious celebrations.

              2. Asiatic Lilies (Lilium asiatica)

              Asiatic lilies are renowned for their vivid colors and striking appearance. They come in various shades, including vibrant oranges, pinks, and yellows. These lilies are early bloomers and add a cheerful touch to any garden.

              3. Tiger Lily (Lilium lancifolium)

              With its distinct reddish-orange color adorned with dark spots, the Tiger Lily is easily recognizable. It carries a sense of boldness and is admired for its wild beauty.

              4. Daylilies (Hemerocallis)

              Often confused with true lilies, daylilies are a separate genus, but their name stems from their lily-like appearance. They are known for their prolonged blooming period and come in an assortment of colors.

              5. Casa Blanca Lily (Lilium ‘Casa Blanca’)

              The Casa Blanca Lily exudes elegance with its large, pure white blossoms and sweet fragrance. The lily is a popular choice for weddings and formal occasions.

              Cultivating Lilies: Planting and Growing Tips

              Lilies are relatively easy to grow, and with the right care, they can thrive in various climates. Here are some essential tips to ensure successful lily cultivation:

              1. Selecting the Right Location

              Lilies prefer well-draining soil and require at least six hours of sunlight daily. Choose a location in your garden that receives ample sunlight and has fertile, loamy soil.

              2. Planting Lilies

              Plant lily bulbs during the fall, approximately 6 to 8 inches deep in the soil. If you’re planting multiple bulbs, space them at least 8 to 12 inches apart to allow sufficient room for growth.

              3. Watering

              Lilies require consistent moisture but should not be waterlogged. To ensure healthy growth, it’s essential to keep the soil around the lily evenly moist, particularly during the growing season. A layer of mulch can help retain moisture and regulate the soil temperature.

              4. Fertilization

              For optimal growth and abundant blooms, apply a balanced, slow-release fertilizer to the lily during the growing season. This will promote healthy development and vibrant flowers. Avoid fertilizers high in nitrogen, as they can lead to excessive foliage growth.

              5. Supporting Tall Varieties

              Some lily varieties can grow quite tall and may require support to prevent them from bending or breaking. Use stakes or cages to provide support as the plants grow.

              6. Deadheading

              Remove faded flowers regularly to encourage continuous blooming and prevent the plant from putting energy into seed production.

              7. Overwintering

              In colder climates, apply a layer of mulch over the lily bulbs in late fall to protect them from freezing temperatures.

              Caring for Lilies: Common Challenges and Solutions

              While lilies are generally low-maintenance, they can face certain challenges. Let’s explore some common lily issues and their solutions:

              1. Pests and Diseases

              Lilies can be susceptible to pests like aphids, mites, and slugs, as well as diseases like botrytis and lily mosaic virus. Use organic insecticides and fungicides, if necessary, and remove infected plants promptly.

              2. Yellowing Leaves

              Yellowing leaves may indicate overwatering or underwatering. For the best results, tailor your watering schedule to the specific needs of the lily and ensure adequate drainage in the soil.

              3. Lily Beetle Infestation

              The red lily beetle can be a significant problem for lily growers. Handpick and destroy these pests when spotted, and consider using neem oil as a natural deterrent.

              4. Stunted Growth

              Inadequate sunlight or poor soil quality can cause stunted growth in lilies. Ensure they receive enough sunlight and amend the soil with compost for better nutrition.

              5. Wilting Flowers

              Wilting flowers may result from high temperatures or insufficient watering. Provide shade during the hottest part of the day and ensure the soil remains consistently moist.

              Lily Symbolism and Cultural Significance

              Throughout history, lilies have held profound cultural significance and symbolism in various civilizations:

              1. Ancient Egypt

              In ancient Egypt, lilies were associated with rebirth and the afterlife. They often appeared in tombs and burial sites as symbols of resurrection.

              2. Greek Mythology

              Lilies were connected to Greek mythology, representing purity and the goddess Hera. According to legend, lilies grew from the milk of Hera, the queen of the gods.

              3. Christianity

              In Christianity, lilies are linked to the Virgin Mary and symbolize purity, chastity, and virtue. They are often featured in religious artwork and ceremonies.

              4. Chinese Culture

              In Chinese culture, lilies symbolize abundance, prosperity, and good luck. They are frequently used in celebrations and traditional festivals.

              5. Victorian Era

              During the Victorian era, lilies conveyed messages through the language of flowers. The color and type of lily carried specific meanings, allowing people to express sentiments discreetly.

              Lily-care-guide

              FAQs

              Are lilies toxic to pets?

              Yes, certain types of lilies, such as Easter lilies, tiger lilies, and daylilies, are toxic to pets, especially cats. Ingestion of these lilies can lead to severe health issues and, in some cases, be fatal. Keeping these plants out of reach of pets is essential to ensure their safety, especially when it comes to the lily varieties that are toxic to animals.

              How do I store lily bulbs?

              If you need to store lily bulbs temporarily, keep them in a cool, dry place. To maintain the well-being of the lily bulbs, steer clear of exposing them to direct sunlight or extreme temperatures. Plant the bulbs as soon as possible for the best results.

              Can I grow lilies in containers?

              Yes, lilies can be grown successfully in containers. When planting lilies, opt for a spacious pot with excellent drainage, and ensure to use a high-quality potting mix for the best results. Ensure the container receives sufficient sunlight and water the lilies regularly.

              When is the best time to cut lilies for arrangements?

              Cut lilies for floral arrangements when the buds are just beginning to open. This ensures the longest vase life and prevents premature wilting.

              How can I encourage my lilies to bloom more?

              For an abundance of blooms, make sure to regularly deadhead spent flowers on the lily plant. Additionally, provide adequate sunlight, water, and fertilization to support healthy growth and abundant blooming.

              Can I grow lilies from seeds?

              While it is possible to grow lilies from seeds, it can be a time-consuming process, and the resulting plants may not be identical to the parent plant. Most gardeners prefer growing lilies from bulbs for a more predictable outcome.

              Conclusion

              Lilies are undeniably a treasure among flowers, captivating hearts with their stunning beauty and rich symbolism. Whether adorning gardens, celebrations, or religious ceremonies, these enchanting blooms have left an indelible mark on cultures around the world. With the knowledge of their diverse types, cultivation techniques, and care, you can now embark on your journey of growing and appreciating the splendor of lilies. Embrace the allure of these delightful blossoms and witness the magic they bring to your life.

              (To get some ideas you can check : https://bonsainurserybd.com/5-small-space-rooftop-garden-ideas/)

              Roses

              Roses 101: A Comprehensive Guide to Growing, Pruning, and Caring for Your Blooms 🌱🌹

              Introduction

              Roses are the epitome of beauty and elegance, enchanting gardeners and admirers for centuries. Cultivating these exquisite blooms may seem daunting, but fear not! This comprehensive guide, “Roses 101: A Comprehensive Guide to Growing, Pruning, and Caring for Your Blooms 🌱🌹,” is here to walk you through the entire process. Whether you’re a seasoned green thumb or a gardening novice, this article will provide you with valuable insights, expert advice, and practical tips to help your roses thrive. Let’s delve into the world of roses and unlock the secrets to growing, pruning, and caring for these magnificent flowers!

              Roses

              Roses 101: A Comprehensive Guide to Growing, Pruning, and Caring for Your Blooms 🌱🌹

              Roses, with their mesmerizing fragrance and captivating colors, have become symbolic of love, passion, and beauty. But before we delve into the art of nurturing these blooms, let’s start with the basics.

              Table of Contents

              The Different Types of Roses

              Roses come in an astonishing variety of types, each with its unique characteristics and growth requirements. Here are some popular rose types you can choose from:

              1. Hybrid Tea Roses: Known for their classic, high-centered blooms and long stems, hybrid tea roses are perfect for cutting and creating stunning floral arrangements.
              2. Floribunda Roses: These roses produce clusters of blooms and are cherished for their profuse flowering throughout the season.
              3. Climbing Roses: As their name suggests, climbing roses have long canes and are ideal for covering trellises, walls, and fences.
              4. Shrub Roses: Hardy and low-maintenance, shrub roses offer continuous blooms and are perfect for landscaping.
              5. Miniature Roses: Small in size but big in charm, miniature roses are perfect for containers and small gardens.
              6. Grandiflora Roses: A hybrid of hybrid tea and floribunda roses, grandiflora roses showcase the best of both worlds with large, clustered blooms.
              7. Old Garden Roses: These classic roses have a rich history and come in various types, such as Alba, Bourbon, Damask, and Gallica roses.

              Remember that different rose types may require varying levels of care and attention. Research the specific needs of your chosen variety to ensure successful cultivation.

              Selecting the Right Location

              Like any living organism, roses need the right environment to thrive. Choosing the proper location for planting is crucial to their well-being.

              1. Sunlight Requirements: Roses are sun-loving plants and generally require at least 6-8 hours of direct sunlight daily. For your roses to flourish, select a spot in your garden that receives ample sunlight.
              2. Soil Quality: Well-draining soil with a pH level between 6.0 to 6.5 is ideal for roses. Amend the soil with organic matter to improve its texture and fertility.
              3. Air Circulation: Good air circulation prevents common rose diseases. Avoid planting roses too close together or near large structures that block airflow.
              4. Shelter from Harsh Winds: While roses adore sunlight, they don’t fare well in strong winds. Plant them in a location that offers some protection from harsh gusts.

              Planting Your Roses

              With the ideal location in mind, it’s time to get your hands dirty and plant those roses!

              1. Choosing Container Roses: If you opt for container-grown roses, select plants with healthy, robust roots and well-established stems.
              2. Bare-Root Roses: For bare-root roses, soak the roots in water for a few hours before planting to ensure proper hydration.
              3. Digging the Hole: When planting roses, dig a hole that is slightly wider and deeper than the root ball.
              4. Proper Spacing: Give your roses enough space to grow and flourish. Space them at least 2-3 feet apart, depending on the specific variety.
              5. Backfilling and Watering: Gently backfill the hole with soil and water thoroughly to eliminate air pockets around the roots.
              6. Mulching: Apply a layer of organic mulch around the base of the plant to retain moisture, regulate soil temperature, and prevent weed growth.

              Watering and Feeding Your Roses

              Proper watering and feeding are vital to a rose’s health and vitality. Here’s how to ensure your roses get the nourishment they need:

              1. Watering Schedule: Roses require consistent watering, especially during dry spells. To promote deep root growth in roses, ensure you water deeply at the base of the plant.
              2. Early Morning Watering: Water your roses early in the morning to allow the foliage to dry before evening, reducing the risk of fungal diseases.
              3. Fertilizing Roses: Feed your roses with a balanced fertilizer that is specifically formulated for roses. Apply fertilizers in spring and early summer.
              4. Compost and Organic Matter: Regularly add compost and organic matter to the soil to enhance its nutrient content and promote overall soil health.

              Pruning Your Roses

              Pruning is an essential aspect of rose care that helps maintain their shape, remove dead or diseased wood, and stimulate new growth.

              1. Timing: The best time to prune roses is in late winter or early spring before new growth appears.
              2. Tools: Use sharp and clean pruning shears to make clean cuts and reduce the risk of transmitting diseases.
              3. Pruning Techniques: Different rose types require different pruning techniques. Learn how to prune your specific rose variety to avoid any damage.
              4. Removing Dead Wood: Cut out any dead, damaged, or weak stems to encourage healthier growth.
              5. Shaping the Rosebush: Trim the rosebush to achieve the desired shape, promoting better airflow and sunlight penetration.

              Dealing with Common Pests and Diseases

              Roses, like any other plant, are susceptible to pests and diseases. Promptly identifying and addressing these issues will safeguard your roses’ health.

              1. Aphids and Thrips: These tiny insects feed on rose sap and can be controlled with insecticidal soaps or horticultural oils.
              2. Black Spot: This fungal disease causes black spots on leaves. Regularly inspect your roses and use fungicides as a preventive measure.
              3. Powdery Mildew: Powdery mildew presents as a white, powdery coating on leaves. Apply fungicides and ensure good air circulation.
              4. Spider Mites: These pests suck sap from leaves, leading to discoloration. Spray roses with water to dislodge them or use miticides.
              5. Japanese Beetles: Handpick these pests or use traps to keep their population in check.

              Remember to choose organic pest control methods whenever possible to minimize chemical exposure.

              Tips for Winter Care

              As the winter chill sets in, it’s essential to provide your roses with some extra care to ensure their survival during the cold months.

              1. Winter Mulching: Apply a thick layer of mulch around the base of the plant to insulate the roots from freezing temperatures.
              2. Stop Fertilizing: Stop fertilizing your roses in late summer to discourage new growth, making the plants more resilient to winter conditions.
              3. Pruning for Winter: In late winter, remove any dead or diseased wood to prevent further damage during cold spells.
              4. Watering: Continue to water your roses in the winter, but reduce the frequency to prevent waterlogged soil.
              Roses-care-guide

              Frequently Asked Questions (FAQs)

              Q: How often should I water my roses?

              A: Roses generally need deep watering once or twice a week, depending on weather conditions. For optimal rose growth, make sure the soil remains moist without becoming waterlogged.

              Q: Do roses require a lot of sunlight to bloom?

              A: Yes, roses thrive in full sunlight. They require at least 6-8 hours of direct sunlight daily to produce healthy blooms.

              Q: When is the best time to plant roses?

              A: The ideal time to plant roses is in early spring, after the last frost, or in late winter before the growing season begins.

              Q: How can I prevent diseases in my rose garden?

              A: To prevent diseases, provide good air circulation, avoid overhead watering, and promptly remove any diseased plant material.

              Q: How do I deadhead roses, and why is it essential?

              A: Deadheading is the process of removing spent blooms. It promotes new growth, prevents seed formation, and encourages continuous flowering.

              Q: Can I grow roses in containers?

              A: Yes, many rose varieties are suitable for container gardening. Choose compact and miniature varieties for the best results.

              Conclusion

              With the knowledge gained from “Roses 101: A Comprehensive Guide to Growing, Pruning, and Caring for Your Blooms 🌱🌹,” you are well-equipped to embark on your rose-growing journey. Remember to choose the right rose type, provide the ideal growing conditions, and care for your roses diligently. Your efforts will be rewarded with stunning blooms and a garden filled with the timeless beauty and fragrance of roses. Happy gardening!

              lantana

              Lantana: The Vibrant and Versatile Flower

              Introduction: Embracing the Beauty of Lantana

              Lantana is a captivating flowering plant that has found its way into the hearts of gardeners and nature enthusiasts alike. Known for its vibrant, multi-colored flowers, lantana brings a touch of tropical charm to any landscape. Its hardiness, versatility, and ease of cultivation have made it a popular choice for gardens around the world. In this article, we will delve into the fascinating world of lantana, exploring its various species, cultivation techniques, and the many ways it can enhance our lives.

              lantana

              Lantana: Unveiling Its Diversity

              Lantana is a genus that encompasses over 150 species, each boasting its unique attributes and charm. From the radiant Lantana camara to the delicate Lantana montevidensis, these plants vary in color, size, and growth habits. Let’s explore some of the most captivating lantana species and their distinct characteristics.

              Lantana camara: The Classic Beauty

              Lantana camara, commonly known as the “common lantana,” is one of the most widely recognized species. Its blooms come in a breathtaking array of colors, such as red, orange, yellow, and pink, which often change as the flowers age. This stunning color transformation has earned it the nickname “ham and eggs.” Additionally, Lantana camara attracts butterflies and hummingbirds, making it a delightful addition to butterfly gardens.

              Lantana montevidensis: The Trailing Wonder

              Lantana montevidensis, also called “trailing lantana” or “weeping lantana,” exhibits a cascading growth habit, making it ideal for hanging baskets or cascading over garden walls. Its small, lilac-colored flowers create a soft and elegant appearance, adding a touch of grace to any setting.

              Lantana depressa: The Groundcover Champion

              Lantana depressa, the “creeping lantana,” offers a low-growing and sprawling habit, making it an excellent choice for groundcovers. Its vibrant flowers bloom in hues of pink, purple, and white, brightening up any landscape with a carpet of color.

              Lantana involucrata: The Wild Beauty

              Lantana involucrata, known as the “wild lantana” or “button sage,” thrives in natural and wild landscapes. This native lantana species features clusters of delicate pink to lavender flowers, attracting a myriad of pollinators, including bees and butterflies.

              Cultivating Lantana: Tips for Success

              Successfully cultivating lantana requires an understanding of its growth requirements and optimal care practices. Whether you’re a seasoned gardener or a novice, these essential tips will ensure your lantana thrives in its environment.

              Choosing the Right Location

              Lantana thrives in full sunlight, so selecting a location with at least six to eight hours of direct sunlight daily is crucial. Ensure that the area has well-draining soil, as lantana does not tolerate waterlogged conditions.

              Planting Lantana

              When planting lantana, dig a hole twice as wide as the plant’s root ball and place it in the center. After planting the lantana, fill the hole with soil and gently tamp it down, ensuring that you water the plant thoroughly to aid in the establishment of its roots.

              Watering and Fertilizing

              Once established, lantana is relatively drought-tolerant and requires moderate watering. For lantana, it’s best to water deeply but infrequently to promote deeper root growth. Apply a balanced, slow-release fertilizer during the growing season to promote healthy blooms.

              Pruning for Abundant Blooms

              Regular pruning is essential to encourage bushier growth and more abundant blooms. Pinch back the tips of the stems to encourage branching and remove spent flowers to promote continuous flowering.

              Lantana: Benefits Beyond Beauty

              Lantana’s allure goes beyond its aesthetic appeal; it offers various benefits that extend to both gardeners and the environment.

              Attracting Pollinators

              Lantana’s nectar-rich flowers act as a magnet for pollinators like bees, butterflies, and hummingbirds. By including lantana in your garden, you play a vital role in supporting these essential pollinators.

              Deer-Resistant Properties

              Unlike many other flowering plants, lantana is relatively deer-resistant, making it an excellent choice for gardens in areas with deer populations.

              Medicinal Uses

              In traditional medicine, lantana has been used to treat various ailments, such as respiratory issues, skin infections, and inflammation. However, it’s crucial to note that some parts of the plant can be toxic if ingested, and caution should be exercised.

              Lantana-flower

              FAQs about Lantana

              Q: Can I grow lantana indoors?

              A: While lantana thrives outdoors in full sunlight, it can be challenging to grow it indoors due to its need for ample sunlight. However, you can try placing it near a sunny window to improve its chances of survival.

              Q: Is lantana a perennial or an annual plant?

              A: Lantana is typically considered a perennial in frost-free regions, where it can survive year-round. In colder climates, it behaves as an annual and needs to be replanted each spring.

              Q: How do I propagate lantana?

              A: Lantana can be propagated through seeds or cuttings. When dealing with lantana, gather seeds from mature flowers and sow them in well-draining soil. For cuttings, take a 4-6 inch cutting from a healthy plant, remove the lower leaves, and place it in a pot with a mix of soil and sand.

              Q: Does lantana require special care during winter?

              A: In regions with mild winters, lantana may continue to bloom, requiring minimal protection. However, in colder climates, it is best to bring potted lantana indoors or cover outdoor plants with mulch or burlap to protect them from frost.

              Q: Are there any specific companion plants for lantana?

              A: Lantana pairs well with a variety of plants, including salvia, verbena, and coreopsis. These combinations create eye-catching displays of color and attract a diverse range of pollinators.

              Q: Is lantana invasive?

              A: Some lantana species, particularly Lantana camara, can be invasive in certain regions. Check with your local authorities before planting it in your garden to ensure it is not considered an invasive species in your area.

              Conclusion

              Lantana’s versatility, beauty, and numerous benefits make it a treasured addition to any garden. From attracting pollinators to offering a splash of color all year round, lantana continues to captivate gardeners worldwide. By following proper cultivation techniques and understanding its unique characteristics, you can create a thriving lantana garden that will be the envy of the neighborhood. So why not embrace the beauty of lantana and add a touch of tropical charm to your landscape today?

              (To get some idea about gardening : https://bonsainurserybd.com/gardening-ideas/)