Cucumber-Gardening

Organic Cucumber Gardening: A Step-by-Step Guide to Grow Fresh, Healthy Veggies at Home!

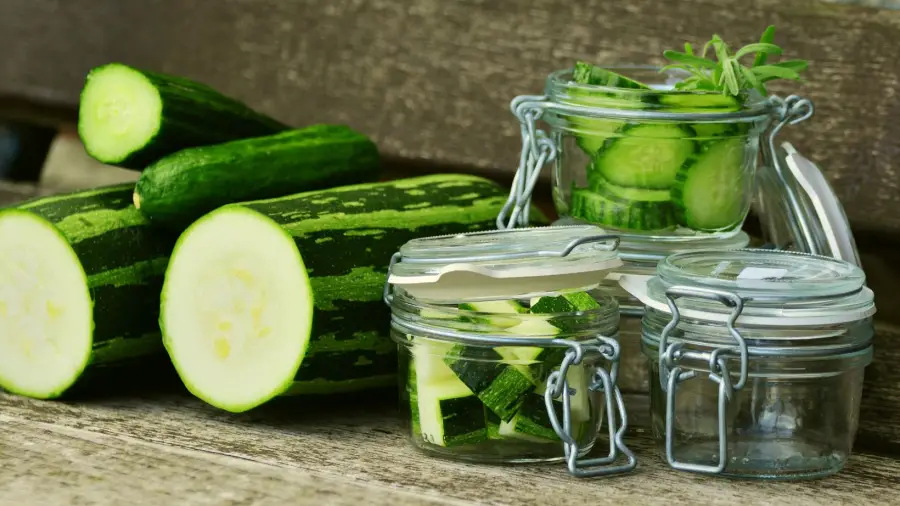
In today’s busy world, many people want to grow fresh and healthy veggies at home. One of the easiest and most satisfying veggies to grow organically is cucumbers. These crisp and tasty vegetables are not only delicious but also full of good stuff for your body. In this complete guide, we’ll take you through the process of cucumber gardening, from picking the right types of cucumbers to harvesting a lot of them in your own backyard. Let’s start on a journey to grow your own fresh and healthy veggies!

Cucumber-Gardening

Table of Contents

1. Choosing the Right Cucumber Varieties

To begin your cucumber gardening adventure, you need to pick the right types of cucumbers. There are different kinds to choose from, like those for salads, pickles, or even special kinds like English cucumbers. Go for the ones you like to eat. Slicing cucumbers are great for salads and snacking. Pickling cucumbers are perfect for making your own pickles. English cucumbers are long and don’t have seeds, which makes them great for slicing into sandwiches or enjoying with some hummus.

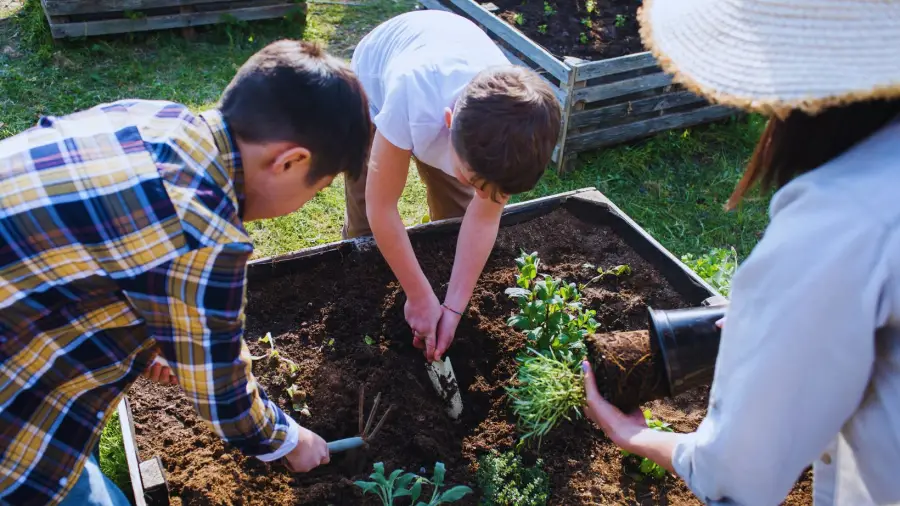
2. Preparing Your Garden Space

Before you start planting, you have to get your garden ready. Clear out any weeds or junk from the area where you want to grow your cucumbers. Make sure that your cucumber plants will get at least 6-8 hours of sunlight every day. Sunlight is super important for them to grow well. Find a spot in your garden that gets the most sun during the day. If you don’t have much space, you can use containers or grow your cucumbers vertically.

3. Getting the Soil Ready for Healthy Cucumbers

Healthy cucumbers need good soil. First, check the pH of your soil and fix it if it’s not between 6.0 and 6.8. You want well-draining soil that’s rich in organic matter. Organic matter can be things like compost or well-rotted manure. This stuff makes the soil better for your cucumbers. Mix in a good amount of organic matter into your garden bed to give your cucumber plants the nutrients they need.

4. Using Compost Magic

Composting is a great way to make your soil even better. Make a compost pile in your backyard and toss in things like fruit and veggie scraps, coffee grounds, and eggshells from your kitchen. Turn the compost often so it breaks down properly. When it’s ready, put it in your garden bed to give your cucumber plants a steady supply of nutrients. Compost also helps the soil hold onto water and lets your cucumber roots grow better.

5. Planting Cucumber Seeds

You’re ready to plant your cucumber seeds once the last frost of the season is over. Follow the instructions on the seed packet for how far apart and how deep to plant them. Usually, you’ll plant cucumber seeds about an inch deep and space them 12 to 24 inches apart, depending on the kind you’re growing. If you’re using containers, get ones that are at least 5 gallons in size. Plant 2-3 seeds per container and remove the weaker ones once they start growing.

6. Giving Them Enough Sun

Cucumber plants love sunlight. Make sure they get lots of sun so they can make healthy cucumbers. If you’re growing cucumbers indoors or in a greenhouse, you might need to use grow lights to help them out.

7. Watering Your Cucumber Plants

Watering your cucumbers regularly is super important, especially when it’s hot outside. Keep the soil nice and moist, but don’t drown it. Cucumber plants have shallow roots, so they need water often and evenly. Water them at the base to keep the leaves dry and to stop fungus from growing. You can use a soaker hose or a drip system to water them efficiently.

8. Giving Them Food for Growth

Your cucumber plants need food to grow well and give you lots of cucumbers. Use organic fertilizer that releases nutrients slowly. Follow the instructions on the package and don’t use too much, or your plants might make too many leaves and not enough fruit.

9. Using Trellises and Stakes

To save space and keep your cucumbers off the ground, you can use trellises or stakes. This also helps air flow better and lowers the chance of diseases. Cucumber vines can get really long and wild, so using something like a trellis makes it easier to see and pick your cucumbers. You can gently tie the vines to the trellis or stakes as they grow.

10. Watching Out for Bugs and Diseases

Keep an eye out for cucumber pests like aphids, cucumber beetles, and spider mites. Use natural ways to keep them away from your plants. One way is to release helpful insects like ladybugs or lacewings to eat the pests. Check your plants often for signs of diseases like powdery mildew or downy mildew. If you see them early, you can use natural fungicides or neem oil to fix the problem.

11. Pruning and Training Cucumber Vines

Cut back and guide your cucumber vines as they grow. This helps air move around the plants better, lowers the risk of disease, and makes it easier to find and pick cucumbers. When the vines are about 12 inches long, pinch off the tips to make them branch out sideways. Remove any leaves that are damaged or turning yellow. Be gentle with the vines so you don’t hurt the little curly things they use to grab onto supports.

12. Knowing When to Harvest

To enjoy your cucumbers at their best, you need to know when they’re ready to pick. Usually, they’re good to go when they’re firm, green, and about 6-8 inches long. But check the guidelines for your specific cucumber type, as some grow longer or shorter. Don’t let them get too ripe, or they might taste bitter and be tough.

13. Picking Your Organic Cucumbers

When it’s time to pick your cucumbers, be gentle. Use scissors or a sharp knife to cut them from the plant, leaving a small piece of stem attached to the cucumber. This helps them stay fresh longer. Keep picking cucumbers often to encourage more to grow on your plants. The more you pick, the more cucumbers you’ll get.

14. Storing and Enjoying Your Homegrown Cucumbers

To keep your cucumbers fresh, store them in the fridge. You can put them in a bag with holes or wrap them in a damp paper towel to keep them crunchy. Cucumbers can last up to a week in the fridge. Eat them in different ways, like in salads, sandwiches, or as a healthy snack with dip. Homegrown cucumbers make your meals extra tasty!

15. Cucumber Gardening: Handling Common Problems

Even if you do everything right, you might run into some issues while growing cucumbers. Here are some tips to deal with them:

  • Yellow Leaves: If your leaves turn yellow, it might mean your plants need more nutrients or water. Make sure they’re getting enough of both.
  • Powdery Mildew: This is a common fungus that can affect cucumber plants. To stop it, make sure your plants have space to breathe, don’t crowd them, and use natural fungicides if needed.
  • Misshapen Cucumbers: Cucumbers that look weird can happen because of uneven watering or poor pollination. Make sure you water your plants evenly, and if you see flowers not turning into cucumbers, you can pollinate them by hand.

Conclusion

Growing cucumbers organically is a great way to enjoy fresh and healthy veggies right from your garden. By following these detailed steps, you can grow delicious cucumbers in your own backyard. Enjoy the taste of homegrown goodness and the satisfaction of knowing you’ve grown your food naturally!

Cucumber-gardening-organic

FAQs

How long does it take for cucumbers to grow?

Usually, it takes 50 to 70 days from planting to harvest, but it depends on the type and how you care for them.

Can I grow cucumbers in containers?

Yes, you can grow cucumbers in big containers, as long as they get enough support and sunlight.

What are common pests that affect cucumber plants?

Common pests include aphids, cucumber beetles, and spider mites. Use natural methods to keep them away.

How do I prevent powdery mildew on cucumber plants?

Make sure your plants have enough space, good air flow, and use natural fungicides if you see powdery mildew.

Are there cucumber varieties for pickling?

Yes, there are cucumber types specifically for making pickles. Look for them when planning your garden.

Cucumber gardening is deeply fulfilling, connecting you with nature as you nurture your plants. Enjoy the fresh, homegrown cucumbers on your table, a testament to your dedication and the harmony between humans and the earth.

(To know more about Organic Cucumber Gardening idea: https://bonsainurserybd.com/organic-gardening-101/ )

Fertigation

Fertigation for Optimal Garden Fertilization: Pros and Cons

Introduction:

In the world of gardening, enthusiasts are constantly seeking innovative ways to improve their gardens’ health and productivity. Fertigation, a combination of fertilization and irrigation, has gained popularity as a method to nourish plants efficiently. This article explores the pros and cons of using fertigation in your garden, shedding light on whether it’s the right choice for you.

Fertigation

What is Fertigation?

Fertigation is a method of delivering fertilizers and nutrients to plants through an irrigation system. It involves mixing water-soluble fertilizers with irrigation water and delivering the mixture directly to the plant’s root zone. This approach allows for a consistent and controlled supply of nutrients, promoting plant growth.

Table of Contents

The Pros of Fertigation

Increased Nutrient Efficiency:

One of the significant advantages of fertigation is its ability to enhance nutrient efficiency. Unlike traditional fertilization methods, which may result in nutrient runoff, fertigation delivers nutrients directly to the plants. This reduces waste and ensures that plants receive the full benefit of the applied fertilizers. For gardeners focused on efficient fertilization, this aspect of fertigation is a game-changer.

Precise Nutrient Delivery:

Fertigation allows gardeners to fine-tune the nutrient mix based on the specific needs of their plants. By adjusting the fertilizer concentration in the irrigation water, you can provide plants with precise amounts of essential nutrients, optimizing their growth and development. This precision in nutrient delivery is particularly advantageous when dealing with plants with varying nutritional requirements.

Reduced Labor Intensity:

Compared to manual fertilization, which can be labor-intensive, fertigation automates the process. Once the system is set up, it can deliver nutrients consistently without requiring constant attention. This frees up your time for other essential garden tasks. Fertigation is a blessing for those looking to reduce the physical demands of traditional fertilization.

Improved Plant Health:

Consistent nutrient delivery through fertigation promotes healthier and more robust plants. Nutrients are available when plants need them, reducing the risk of nutrient deficiencies and related problems. This leads to improved overall plant health and vitality. For gardeners seeking lush and vibrant gardens, fertigation contributes significantly to plant well-being.

The Cons of Fertigation

Initial Investment:

Implementing a fertigation system requires an initial investment in equipment and infrastructure. This includes purchasing injectors, pumps, and irrigation lines, which can be costly. However, the long-term benefits often outweigh this upfront expense. Gardeners need to weigh this expense against the potential long-term savings and benefits of efficient fertilization.

Technical Knowledge Required:

To use fertigation effectively, you need to understand how to calibrate and operate the equipment correctly. This may require a learning curve for gardeners who are new to the technique. Seeking guidance from experienced fertigation experts can be helpful. Investing time in acquiring the necessary knowledge is crucial for a successful transition to fertigation.

Equipment Maintenance:

Like any mechanical system, fertigation equipment requires regular maintenance to function correctly. Neglecting maintenance can lead to system malfunctions and uneven nutrient distribution. Routine checks and upkeep are essential to ensure consistent performance. Gardeners must be prepared for the responsibility of maintaining their fertigation system for optimal results.

Risk of Over-Fertilization:

While fertigation offers precise control over nutrient delivery, it also poses the risk of over-fertilization if not managed properly. Excessive fertilization can harm plants and the environment. Careful monitoring and adjustment of nutrient concentrations are crucial to avoid this issue. Gardeners need to exercise caution to prevent potential harm to their plants and the ecosystem.

How to Implement Fertigation:

To implement fertigation in your garden, you’ll need to follow specific steps, including selecting the right equipment, preparing nutrient solutions, and setting up the system. It’s essential to research and plan carefully to ensure a successful transition to fertigation. Proper implementation is key to reaping the benefits of this fertilization method.

Environmental Considerations:

When adopting fertigation, consider its environmental impact. Properly managed fertigation can reduce nutrient runoff and pollution, but mismanagement can have adverse effects on water quality and ecosystems. Responsible use of fertigation is vital to minimize environmental risks. Gardeners should be conscious of their environmental responsibilities when choosing this fertilization method.

Conclusion:

In conclusion, fertigation offers numerous benefits for gardeners looking to improve nutrient delivery and plant health. While it requires an initial investment and some technical know-how, the long-term advantages make it a compelling option. However, gardeners must use fertigation responsibly to avoid over-fertilization and minimize environmental impact. For those seeking efficient and effective garden fertilization, fertigation is a valuable tool to consider.

( To get ideas about Gardening : https://bonsainurserybd.com/gardening-ideas/ )

Fertigation-Gardening

FAQs:

Is fertigation suitable for all types of gardens?

Fertigation can be adapted to various garden types, but it’s essential to assess your garden’s specific needs and research the best practices for your plants.

Can fertigation be used with organic fertilizers?

Yes, fertigation can be used with water-soluble organic fertilizers, providing a natural nutrient source for your plants.

What are common mistakes to avoid when using fertigation?

Common mistakes include improper calibration, neglecting equipment maintenance, and failing to monitor nutrient levels regularly.

Does fertigation save water compared to traditional watering methods?

Fertigation can be water-efficient as it delivers nutrients directly to the root zone, reducing water wastage.

How can I learn more about setting up a fertigation system for my garden?

You can consult gardening resources, attend workshops, or seek guidance from experienced gardeners to learn more about implementing fertigation effectively. Gardening enthusiasts can tap into various resources to master the art of fertigation

Incorporating fertigation into your gardening routine can significantly enhance your garden’s health and productivity. By understanding its pros and cons and using it responsibly, you can take a step towards achieving lush and thriving plants in your garden. Embracing the precision and efficiency that fertigation offers, you’ll not only witness the visible benefits in your garden but also contribute to more sustainable and environmentally responsible fertilization practices. So, explore the world of fertigation, and watch your garden flourish with the focused care that only Fertigation can provide.

Capsicum

The Power of Capsicum: Enhancing Your Immune System the Natural Way

In today’s fast-paced world, prioritizing our health has never been more crucial. With the ongoing global health concerns, people are increasingly seeking natural ways to boost their immunity. Enter Capsicum, the superfood that’s gaining recognition for its remarkable immune-boosting properties. In this comprehensive guide, we’ll delve into the incredible benefits of Capsicum and how it can revolutionize your immune system.

Capsicum

Introduction

Capsicum, also known as bell pepper or sweet pepper, is not just a colorful and flavorful addition to your meals; it’s a powerhouse of health benefits.

Table of Contents

What is Capsicum?

Capsicum is a versatile vegetable that comes in vibrant colors such as red, green, yellow, and orange. It boasts a rich nutritional profile that’s essential for your well-being.

Nutritional Value of Capsicum

The nutritional content of Capsicum is truly impressive, offering a variety of vitamins and minerals crucial for your health. These include vitamin C, vitamin A, vitamin B6, vitamin K1, folate, potassium, and dietary fiber.

Abundant Vitamin C Content

Capsicum is particularly renowned for its high vitamin C content. This vitamin plays a pivotal role in fortifying your body’s defense mechanisms. It aids in the production of white blood cells and antibodies, effectively acting as the soldiers that protect your body from harmful germs.

Antioxidant Abundance

Capsicum is a treasure trove of antioxidants, substances that combat harmful free radicals in your body. By keeping these free radicals in check, Capsicum helps prevent illnesses and maintains your overall well-being.

Strengthening Immune Function

The combined action of vitamins, minerals, and antioxidants in Capsicum empowers your immune system. A robust immune system is your body’s frontline defense against infections and illnesses.

Capsicum Varieties

Capsicum comes in various types, each with its unique taste and health benefits. You have the freedom to choose the one that suits your palate best.

Incorporating Capsicum into Your Diet

Incorporating Capsicum into your daily meals is a breeze. You can add it to salads, stir-fries, sandwiches, or savor it as a crunchy snack with accompaniments like hummus. The possibilities are endless when it comes to enjoying its health-enhancing benefits.

Delectable Capsicum Recipes

Here are two mouthwatering recipes that make excellent use of Capsicum:

1. Stuffed Bell Peppers

Ingredients:

  • Bell peppers (any color)
  • Ground turkey or tofu
  • Rice
  • Tomato sauce
  • Spices of your choice

Instructions:

  1. Cut the tops off the bell peppers and remove the seeds.
  2. Cook the ground turkey or tofu and rice separately.
  3. Mix the cooked ingredients with tomato sauce and your preferred spices.
  4. Stuff the bell peppers with the mixture.
  5. Bake until the peppers are tender.

2. Capsicum and Quinoa Salad

Ingredients:

  • Quinoa
  • Chopped bell peppers (multiple colors)
  • Cherry tomatoes
  • Cucumber
  • Red onion
  • Olive oil and lemon dressing

Instructions:

  1. Cook quinoa and allow it to cool.
  2. Mix quinoa with chopped vegetables.
  3. Drizzle with olive oil and lemon dressing.
Capsicum-boost

Potential Side Effects

While Capsicum is generally safe for most individuals, some may experience stomach discomfort or heartburn when consuming large quantities. If you’re not accustomed to spicy foods, it’s advisable to start with a small amount.

Conclusion

Capsicum is not only a delicious addition to your meals but also a superfood that can naturally boost your immunity. Packed with essential nutrients, especially vitamin C and potent antioxidants, it fortifies your body, preparing it to combat illnesses effectively.

FAQs

1. Is Capsicum the same as chili peppers?

No, Capsicum, or bell peppers, are not the same as chili peppers. Capsicum is sweet and not spicy.

2. Can I eat Capsicum if I have a sensitive stomach?

If you have a sensitive stomach, it’s advisable to start with a small amount of Capsicum to gauge your body’s reaction. Some individuals may experience discomfort if they consume excessive amounts.

3. Are there any other health benefits of Capsicum?

Yes, Capsicum offers additional health benefits, including improved eye health, assistance with weight management, and a reduced risk of long-term health issues due to its rich nutrient content.

4. Can Capsicum be included in a vegan diet?

Certainly, Capsicum is a plant-based food and is suitable for both vegans and vegetarians.

5. How should I store Capsicum to keep it fresh?

To prolong the freshness of Capsicum, store it in the refrigerator. If you wish to extend its shelf life further, freezing is also an option.

Incorporating Capsicum into your daily meals not only elevates your health but also adds a burst of color and flavor to your culinary experiences. As you embark on this journey to boost your immunity the natural way, remember that Capsicum is not just a superfood; it’s a delicious and versatile companion in your quest for overall well-being. So, go ahead, explore its countless culinary possibilities, and savor the vibrant benefits of this remarkable vegetable. Cheers to a healthier and tastier life with Capsicum!

Boost your immune system naturally by incorporating more Capsicum into your diet. Savor its delightful taste and experience improved well-being in no time.

(To know about gardening hack in backyard : https://bonsainurserybd.com/organic-gardening-101/ )

Cabbages-plantation

Cabbages: Unlocking the Secrets to Cultivating Enormous Cabbages in Your Own Backyard

Introduction

Have you ever gazed in awe at those colossal cabbages displayed at the local farmer’s market and wondered about the secrets behind their impressive size? The time has come to demystify the process! In this comprehensive guide, we will divulge the tips and techniques for growing gigantic cabbages right in your backyard. Whether you’re a seasoned gardening expert or just embarking on this green journey, we guarantee that our insights will not only be informative but also enjoyable to implement.

Cabbages

Opt for the Right Cabbage Variety

Choosing the Perfect Cabbage Variety

Let’s embark on our journey to colossal cabbages by addressing the first crucial step: selecting the ideal cabbage variety. Think of it as choosing the right tool for a specific task. Certain cabbage types naturally have the potential to grow larger than others. Consider opting for varieties like “Mammoth Red Rock” or “Goliath” cabbages, renowned for their ability to reach impressive sizes.

Table of Contents

Prepare Your Soil

Lay the Groundwork with Proper Soil Preparation

Now, let’s delve into the soil – the very foundation of healthy and robust cabbages. Envision your soil as a cozy haven for your cabbages. To create an inviting environment, enrich your soil with organic matter and compost. This is akin to adding plush pillows and cozy blankets to ensure your cabbage’s comfort.

If you’re uncertain about your soil’s needs, consider conducting a soil test. This serves as a health check-up for your garden, revealing the nutrients lacking and enabling you to provide precisely what your cabbages require.

Find the Ideal Location

Choose the Perfect Sunbathing Spot

Cabbages are akin to sun enthusiasts, craving ample sunlight. Picture your cabbage as a sunbather luxuriating in the sun’s warmth. Select a location in your backyard where your cabbages can bask in at least six hours of direct sunlight daily.

Planting and Spacing

Planting Depth Matters

When the time comes to plant your cabbage seeds or seedlings, pay heed to the planting depth. Think of it as tucking them into bed snugly. Plant them in such a way that the soil covers their roots and reaches up to their first set of leaves. This promotes strong root development, much like a sturdy foundation for a house.

Provide Adequate Spacing

Cabbages require personal space to stretch and flourish. Visualize them as graceful dancers on a stage, necessitating room to twirl and pirouette. Plant them approximately 18 to 24 inches apart. This allows them to grow without feeling crowded, ensuring their leaves can unfurl freely without encroaching on their neighbors.

Watering and Mulching

Maintain Soil Moisture

Let’s discuss hydration. Just like you on a scorching day, cabbages need to stay well-hydrated. Ensure consistent watering, keeping the soil consistently moist but not waterlogged. Think of it as offering your cabbages a refreshing drink on a warm day. Inconsistent watering can result in stunted growth and smaller cabbages, so make it a habit to monitor their moisture needs regularly.

Harness the Power of Mulching

To assist your cabbages in staying cool and adequately hydrated, contemplate mulching. Imagine mulch as a protective sun hat and sunscreen for your cabbages. Scatter organic mulch, such as straw or leaves, around them. This aids in retaining moisture in the soil and maintaining an optimal temperature, creating a comfortable environment for your plants.

Pest Control and Disease Prevention

Vigilance Against Pests

Now, let’s address the potential pests that might disrupt your cabbage’s tranquility. Visualize them as unwelcome intruders crashing a picnic. Common cabbage adversaries include aphids, cabbage worms, and slugs. Keep a vigilant eye out for these intruders and take prompt action when necessary. Consider introducing beneficial insects or using neem oil as a natural means to deter these unwanted guests.

Preventing Diseases

Disease prevention is akin to taking vitamins to maintain good health. Cabbages can fall prey to ailments like clubroot and downy mildew. To shield your cabbages from these threats, practice crop rotation. Think of it as altering your daily routine to stay in top form. Maintain a tidy garden environment, and refrain from overhead watering, which can encourage fungal growth.

Fertilization

Nourishing Your Cabbages

Let’s turn our attention to nourishing your cabbages, akin to serving them a delectable meal. Cabbages are voracious eaters, especially in their early stages. Utilize a balanced fertilizer with a higher nitrogen content to stimulate lush and leafy growth. It’s the equivalent of serving them their favorite salad to munch on.

Harvesting Tips

Timing is Crucial

The moment of truth arrives when it’s time to reap the rewards of your labor. Visualize it as selecting the ripest apple from a tree. Harvest your cabbages when they feel firm and have attained their full size, typically occurring around 75-90 days after planting.

Harvesting Technique

When it’s time to pluck your cabbages, employ a sharp knife to cut them from the stem. Leave a few outer leaves attached; this is akin to packing them in a protective lunchbox. This approach preserves the freshness of the cabbage for an extended period and prevents damage.

Conclusion

Cultivating gargantuan cabbages in your backyard is no longer an elusive dream. With the right cabbage variety, diligent soil preparation, attentive care, and these user-friendly tips, you’ll soon be astounded by the size of your cabbage harvest. Roll up your sleeves, don your gardening gloves, and witness your cabbages thrive!

Cabbages-plantation

FAQs

When should I plant cabbage in my backyard?

Cabbage is typically planted in early spring for a summer harvest or in late summer for a fall harvest.

How can I naturally protect my cabbages from pests?

You can employ natural methods such as introducing ladybugs or utilizing row covers to deter pests.

What should I do with surplus cabbages that I can’t use all at once?

Store them in a cool, dark place or explore preservation methods like fermentation or pickling.

Can I grow colossal cabbages in containers on my balcony?

While possible, it’s more challenging due to space limitations. Cabbages thrive best when planted in the ground.

Are there specific companion plants that enhance cabbage growth?

Yes, consider planting onions and marigolds nearby, as they can help deter pests and promote cabbage growth.

With these comprehensive explanations and gardening insights, you’ll soon be cultivating enormous cabbages that will turn your backyard into the envy of the neighborhood. Happy gardening!

( To know more about vegetables gardening hacks : https://bonsainurserybd.com/10-game-changing-vegetable-gardening/ )

Ladies' Finger-delight

Ladies’ Finger Delights: Mouthwatering Recipes You Need to Try Today!

If you’re a fan of culinary adventures and delicious, homemade dishes, you’re in for a treat! In this article, we’ll explore the world of ladies’ fingers, also known as okra, and uncover some delightful recipes that will make your taste buds dance with joy. From crispy fried okra to spicy gumbo, these recipes are a must-try for any food enthusiast.

Ladies'-finger

Introduction

Ladies’ finger, or okra, is a versatile and nutritious vegetable that is widely used in various cuisines around the world. Its unique flavor and slimy texture make it a favorite ingredient in many dishes. In this article, we’ll explore the numerous ways you can prepare and enjoy okra in your kitchen.

Table of Contents

The Health Benefits of Okra

Before we dive into the recipes, let’s take a moment to appreciate the health benefits of okra. This green wonder is packed with vitamins, minerals, and fiber, making it an excellent addition to your diet. It’s known to aid digestion, boost immunity, and even help regulate blood sugar levels.

Ladies’ Finger/Crispy Fried Okra

Ingredients:

  • Fresh okra pods
  • Cornmeal
  • Salt and pepper
  • Oil for frying

Instructions:

  1. Wash the fresh okra pods and pat them dry with a paper towel. The key to achieving crispiness is ensuring the okra is dry.
  2. Trim off the tops and tips of the okra pods, then slice them into thin rounds, about 1/4-inch thick.
  3. In a bowl, combine cornmeal, salt, and pepper to taste.
  4. Heat about 1 inch of oil in a deep skillet or frying pan over medium-high heat until it reaches 350°F (180°C).
  5. Dredge the okra slices in the cornmeal mixture, ensuring they are evenly coated.
  6. Carefully place the coated okra slices into the hot oil. Fry them in batches to avoid overcrowding the pan.
  7. Fry until the okra is golden brown and crispy, which should take about 3-4 minutes per batch.
  8. Use a slotted spoon to remove the fried okra from the oil and place them on a plate lined with paper towels to drain any excess oil.
  9. Serve the crispy fried okra immediately as a delightful appetizer or side dish.

Ladies’ Finger/Okra Curry

Ingredients:

  • Okra (fresh or frozen)
  • 2 onions, finely chopped
  • 2 tomatoes, chopped
  • 2 cloves garlic, minced
  • 1 teaspoon turmeric powder
  • 1 teaspoon cumin powder
  • 1 teaspoon coriander powder
  • 1/2 teaspoon garam masala
  • Salt to taste
  • 2 tablespoons oil

Instructions:

  1. Heat oil in a pan over medium heat. Add the minced garlic and sauté for a minute until it becomes fragrant.
  2. Add the finely chopped onions and cook until they turn translucent.
  3. Add the chopped tomatoes and cook until they soften and the oil begins to separate from the mixture.
  4. Add the turmeric, cumin, coriander, garam masala, and salt. Stir well to combine the spices.
  5. Add the okra to the spice mixture and stir gently to coat the okra evenly.
  6. Cover the pan and cook on low heat for about 20-25 minutes, stirring occasionally until the okra is tender.
  7. Serve the flavorful okra curry with steamed rice or warm naan bread.

Stuffed Okra/Ladies’ Finger

Ingredients:

  • Okra pods
  • Ground meat or vegetarian stuffing (e.g., breadcrumbs, herbs, and spices)
  • Tomato sauce
  • Salt and pepper to taste

Instructions:

  1. Start by gently washing the okra pods and patting them dry.
  2. Cut off the stem ends of the okra and make a lengthwise slit, being careful not to cut all the way through. This creates a pocket for the stuffing.
  3. Prepare your chosen stuffing mix by combining ground meat or vegetarian options with herbs, spices, salt, and pepper.
  4. Carefully stuff each okra pod with the prepared mixture.
  5. In a saucepan, heat tomato sauce over low heat. Place the stuffed okra pods into the sauce.
  6. Cover the saucepan and let the okra simmer in the tomato sauce for about 20-25 minutes, or until the okra is tender.
  7. Serve the stuffed okra hot, with some of the tomato sauce spooned over the top.

Ladies’ Finger/Okra and Tomato Stir-fry

Ingredients:

  • Okra pods
  • Tomatoes, chopped
  • Garlic cloves, minced
  • Olive oil
  • Salt and pepper to taste
  • Your choice of seasonings (e.g., paprika, cayenne pepper, or crushed red pepper flakes)

Instructions:

  1. Wash the okra pods and trim the ends. Slice them into 1/2-inch thick rounds.
  2. Heat olive oil in a large skillet or wok over medium-high heat. Add minced garlic and sauté until fragrant.
  3. Add the sliced okra to the skillet and stir-fry for about 5 minutes until it begins to soften.
  4. Add the chopped tomatoes and continue to stir-fry for another 3-4 minutes until the tomatoes are tender and the okra is cooked through.
  5. Season the stir-fry with salt, pepper, and your choice of seasonings for added flavor.
  6. Serve the okra and tomato stir-fry as a side dish or over steamed rice.

Ladies’ Finger/Okra Gumbo

Ingredients:

  • Okra pods, sliced
  • Shrimp or chicken, diced
  • Bell peppers, chopped
  • Celery, chopped
  • Creole seasoning or Cajun spice blend
  • Rice for serving

Instructions:

  1. In a large, heavy-bottomed pot, prepare a roux by heating oil over medium heat and slowly adding flour while stirring constantly. Continue to cook the roux, stirring, until it reaches a deep brown color.
  2. Add chopped bell peppers and celery to the roux. Sauté until they begin to soften.
  3. Stir in sliced okra and continue to cook for a few minutes.
  4. Add diced shrimp or chicken and creole seasoning to the pot. Stir well to combine.
  5. Pour in enough water or broth to cover the ingredients, and bring the mixture to a boil.
  6. Reduce the heat, cover, and simmer for about 20-25 minutes, or until the gumbo thickens and the flavors meld together.
  7. Serve the okra gumbo over cooked rice for a hearty and flavorful meal.

Ladies’ Finger/Okra Salad

Ingredients:

  • Okra pods
  • Red onion, thinly sliced
  • Tomatoes, diced
  • Lemon vinaigrette dressing (lemon juice, olive oil, salt, pepper, and a touch of honey)

Instructions:

  1. Begin by blanching the okra pods in boiling water for about 2-3 minutes, then immediately transfer them to an ice bath to stop the cooking process. Drain and pat dry.
  2. Slice the blanched okra pods into thin rounds.
  3. In a bowl, combine the sliced okra with thinly sliced red onions and diced tomatoes.
  4. Prepare the lemon vinaigrette by mixing lemon juice, olive oil, salt, pepper, and a touch of honey to taste.
  5. Drizzle the lemon vinaigrette over the salad and toss gently to combine.
  6. Chill the okra salad in the refrigerator for at least 30 minutes before serving to allow the flavors to meld together.

Roasted Okra/Ladies’ Finger

Ingredients:

  • Okra pods
  • Olive oil
  • Salt and pepper to taste
  • Paprika (optional, for added flavor)

Instructions:

  1. Preheat your oven to 425°F (220°C).
  2. Wash and dry the okra pods thoroughly.
  3. Trim the stem ends, then slice the okra pods in half lengthwise.
  4. In a mixing bowl, toss the okra with olive oil, salt, pepper, and a pinch of paprika if desired.
  5. Spread the seasoned okra in a single layer on a baking sheet.
  6. Roast in the preheated oven for about 20-25 minutes, or until the okra is tender and slightly crispy around the edges.
  7. Serve the roasted okra as a delightful and healthy side dish.
Ladies' Finger-delight

Ladies’ Finger/Okra and Shrimp Skewers

Ingredients:

  • Okra pods
  • Large shrimp, peeled and deveined
  • Lemon juice
  • Garlic, minced
  • Olive oil
  • Salt and pepper to taste

Instructions:

  1. Begin by soaking wooden skewers in water for at least 30 minutes to prevent them from burning on the grill.
  2. Wash and dry the okra pods, then trim the stem ends.
  3. In a bowl, combine lemon juice, minced garlic, olive oil, salt, and pepper to create a marinade.
  4. Thread the marinated shrimp and okra pods onto the soaked skewers, alternating between them.
  5. Preheat your grill to medium-high heat and lightly oil the grates to prevent sticking.
  6. Grill the skewers for about 2-3 minutes per side, or until the shrimp are pink and opaque and the okra is tender.
  7. Serve the okra and shrimp skewers with a side of your favorite dipping sauce or a squeeze of fresh lemon juice.

Ladies’ Finger/Okra Fritters

Ingredients:

  • Okra pods, thinly sliced
  • Cornmeal
  • Buttermilk
  • Spices (e.g., paprika, cayenne pepper, onion powder)
  • Frying oil (e.g., vegetable oil or peanut oil)

Instructions:

  1. Start by washing and patting dry the okra pods. Trim the stem ends and slice them into thin rounds.
  2. In a mixing bowl, combine the sliced okra with enough buttermilk to coat, and let it soak for about 10 minutes.
  3. In another bowl, mix cornmeal with your choice of spices, such as paprika, cayenne pepper, and onion powder.
  4. Drain the okra from the buttermilk and toss it in the seasoned cornmeal mixture until well coated.
  5. In a deep skillet or frying pan, heat about 2 inches of frying oil over medium-high heat until it reaches 350°F (180°C).
  6. Carefully add the coated okra slices to the hot oil, being cautious not to overcrowd the pan. Fry in batches if needed.
  7. Fry the okra for about 3-4 minutes, or until it turns golden brown and crispy. Use a slotted spoon to remove the fritters and drain them on paper towels.
  8. Serve the okra fritters as a delightful appetizer or snack, with your choice of dipping sauce.

Ladies’ Finger/Okra Soup

Ingredients:

  • Okra pods, sliced
  • Chicken or vegetable broth
  • Tomatoes, chopped
  • Onions, finely chopped
  • Spices (e.g., thyme, bay leaves, black pepper)
  • Salt to taste

Instructions:

  1. In a large soup pot, heat a bit of oil over medium heat.
  2. Add the finely chopped onions and sauté until they become translucent.
  3. Stir in the sliced okra and cook for a few minutes until it begins to soften.
  4. Add the chopped tomatoes and continue to cook until they start to break down and release their juices.
  5. Pour in the chicken or vegetable broth to cover the ingredients.
  6. Add your choice of spices, such as thyme and bay leaves, and season with salt and black pepper to taste.
  7. Cover the pot and let the soup simmer for about 20-25 minutes, allowing the flavors to meld and the okra to become tender.
  8. Serve the delicious okra soup hot, garnished with fresh herbs if desired.

Pickled Okra/Ladies’ Finger

Ingredients:

  • Fresh okra pods
  • White vinegar
  • Spices (e.g., dill seeds, garlic cloves, red pepper flakes)
  • Salt to taste

Instructions:

  1. Begin by washing the okra pods thoroughly and trimming the stem ends.
  2. Pack the okra pods into clean, sterilized glass jars, ensuring they fit snugly.
  3. In a saucepan, combine white vinegar, water, salt, and your choice of spices, such as dill seeds, garlic cloves, and red pepper flakes.
  4. Bring the vinegar mixture to a boil, then pour it over the okra pods in the jars, leaving about 1/2 inch of headspace.
  5. Seal the jars tightly with lids and let them cool to room temperature.
  6. Once cooled, refrigerate the pickled okra jars for at least a week before enjoying. The longer they sit, the more flavorful they become.

Conclusion

Ladies’ finger, or okra, offers a world of culinary possibilities. Whether you prefer it crispy, spicy, or savory, there’s an okra recipe for everyone. Incorporate this nutritious vegetable into your meals and delight in its unique flavors and health benefits.

FAQs

Is okra slimy when cooked?

Okra can be slimy when overcooked, but proper cooking techniques can minimize this texture.

What are the nutritional benefits of okra?

Okra is rich in vitamins, minerals, and fiber, making it a nutritious addition to your diet.

Can I freeze okra?

Yes, you can freeze okra for later use, but blanch it first for the best results.

What cuisines use okra extensively?

Okra is commonly used in Southern, Creole, Indian, and Middle Eastern cuisines.

What’s the best way to store fresh okra?

Store fresh okra in a paper towel-lined bag in the refrigerator to keep it fresh longer.

So, are you ready to embark on a culinary journey with ladies’ finger? These mouthwatering recipes are your ticket to exploring the delicious world of okra. Give them a try and satisfy your taste buds like never before.

(To know about Home Gardening Ladies’ Finger/Okra: https://bonsainurserybd.com/organic-gardening-101/ )

Bonsai-Styling

Bonsai Styling Tips: Crafting Your Miniature Masterpiece

In the world of gardening and horticulture, few art forms are as captivating as bonsai. These enchanting miniature trees have been cultivated for centuries, offering a unique blend of nature and human creativity. Bonsai trees require meticulous care and attention to detail to achieve their full potential. Whether you’re a seasoned bonsai enthusiast or a newcomer eager to embark on this rewarding journey, this article will provide you with essential bonsai styling tips that will help you shape your very own arboreal masterpiece.

Bonsai-Styling

The Art of Bonsai: An Introduction

Understanding Bonsai

Bonsai, derived from the Japanese words “bon” (meaning tray) and “sai” (meaning plant), is a form of art that involves growing miniature trees in small containers. The objective is to create a harmonious, scaled-down representation of a full-sized tree while preserving its natural beauty.

Bonsai is more than just a potted plant; it’s a profound art form that requires a deep understanding of horticulture and aesthetics. At its core, bonsai encapsulates the beauty of nature in a confined space, allowing us to appreciate the elegance and resilience of trees in miniature form.

Table of Contents

The Bonsai Aesthetic

Central to bonsai is the concept of “Wabi-sabi,” which appreciates imperfection and transience. Bonsai artists strive to capture the essence of an ancient tree weathered by time and nature.

The essence of “Wabi-sabi” lies in the imperfections and quirks of each tree. It’s about celebrating the knots, scars, and crooked branches, as they tell the story of a tree’s journey through time. When styling your bonsai, remember that perfection is not the goal; rather, it’s the character and uniqueness of your tree that make it truly special.

Choosing Your Bonsai Tree

Selecting the Right Species

Different tree species are suitable for bonsai cultivation. Consider factors like climate, space, and your level of expertise when choosing your tree.

Selecting the right species is the first crucial step in your bonsai journey. Some species are more forgiving and suitable for beginners, such as the Ficus or Jade plant, while others like the Japanese Maple or Pine require more experience. Research and choose a species that aligns with your local climate and your commitment to care.

Size Matters

The size of your bonsai tree matters. Smaller trees are ideal for beginners, as they are easier to manage and style.

Beginners often find success with smaller trees as they are more forgiving when it comes to styling mistakes. Compact trees like the Shohin or Mame bonsai are excellent choices for novices. As you gain experience, you can gradually work with larger trees and explore more intricate designs.

Pot Selection and Preparation

Picking the Perfect Pot

Choosing the right pot is crucial. It should complement your tree’s style and provide adequate drainage.

When selecting a pot for your bonsai, consider the tree’s size, shape, and style. The pot should enhance the tree’s aesthetic, not overpower it. Ensure that the pot has drainage holes to prevent waterlogging, a common issue in bonsai care.

Soil Mix and Repotting

Bonsai trees require specific soil blends to thrive. Learn when and how to repot your tree to ensure its health.

Bonsai soil is a specialized mixture designed to provide optimal drainage and aeration. Repotting is essential to refresh the soil, trim roots, and promote healthy growth. The frequency of repotting depends on the age and species of your bonsai.

Pruning and Shaping Techniques

Basic Pruning

Regular pruning is essential for maintaining your bonsai’s shape. Learn the basics of pruning branches and roots.

Pruning is at the heart of bonsai styling. It involves selectively trimming branches, leaves, and roots to achieve the desired shape. This technique not only maintains the tree’s form but also encourages new growth and ramification.

Wiring for Elegance

Wiring allows you to bend and shape branches, adding elegance and character to your bonsai.

Wiring is a fundamental technique for shaping your bonsai tree. It enables you to guide branches into graceful curves or desired positions. Use soft aluminum or copper wire, and be gentle to avoid damaging the tree’s delicate branches.

Deadwood Techniques

Incorporating deadwood into your bonsai design can create a sense of age and history.

Deadwood techniques involve preserving and enhancing dead or weathered wood on your bonsai. These techniques add character and a sense of history to your tree, making it appear as though it has weathered the elements for many years.

Bonsai Care and Maintenance

Light and Water

Proper light and water management are vital. Understand your tree’s specific needs.

Light and water are the lifeblood of your bonsai. Ensure your tree receives the right amount of sunlight, which varies depending on the species. Monitor soil moisture and water when the soil surface starts to dry, avoiding both overwatering and underwatering.

Fertilization

Bonsai trees require tailored fertilization to stay healthy and vibrant.

Fertilization provides essential nutrients for your bonsai’s growth. Use a balanced, slow-release fertilizer designed for bonsai. The frequency and strength of fertilization depend on the season and the tree’s growth stage.

Bonsai Styling: Patience and Artistry

Design Principles

Explore the principles of bonsai design, including balance, proportion, and asymmetry.

Bonsai design is an art in itself. Understanding design principles like balance, proportion, and asymmetry will help you create harmonious and visually appealing compositions. Study traditional bonsai styles to gain inspiration for your own creations.

Seasonal Considerations

Adapt your care routine to the changing seasons to ensure your bonsai thrives year-round.

Each season brings unique challenges and opportunities for bonsai care. Adjust your watering, fertilization, and styling activities to suit the changing needs of your tree. Protect your bonsai from extreme weather conditions to ensure its longevity.

Conclusion

Creating a stunning bonsai tree is a blend of horticultural skill and artistic vision. By carefully selecting your tree, mastering pruning and shaping techniques, and maintaining its health, you can craft a captivating miniature masterpiece that reflects the beauty of nature. Embrace the imperfections, and remember that your bonsai journey is a continuous process of growth and refinement.

FAQs (Frequently Asked Questions)

Can anyone grow a bonsai tree, or is it only for experts?

Bonsai is for everyone! Beginners can start with easy-to-care-for species and gradually gain expertise.

How often should I water my bonsai tree?

The frequency varies depending on the species and environment. Check the soil moisture regularly and adjust accordingly.

What tools do I need to maintain my bonsai tree?

Basic tools include pruning shears, wire cutters, concave cutters, and a root hook. Invest in quality tools for precision.

Can I grow a bonsai indoors?

Some species can thrive indoors, but most prefer outdoor conditions with plenty of light. Research your specific tree’s requirements.

How long does it take to create a mature-looking bonsai tree?

It can take several years to achieve the desired mature appearance, depending on the species and care. Patience is key in bonsai cultivation.

Bonsai Styling

In the enchanting world of bonsai, styling is where your creativity takes root. By mastering the art of bonsai styling, you transform a simple tree into a living work of art, capturing the essence of nature in a miniature form. With patience, practice, and a deep appreciation for the beauty of imperfection, your bonsai journey becomes a lifelong adventure. Embrace the bonsai styling techniques you’ve learned here, and let your imagination flourish as you craft unique and captivating bonsai trees that reflect your own personal touch. Happy bonsai styling!

Start your bonsai journey today, and watch as your miniature tree evolves into a living work of art that brings tranquility and beauty to your life. With dedication and the tips provided here, you’ll master the art of bonsai styling and create your own botanical masterpiece for generations to admire.

Organic-gardening

Organic Gardening 101: Grow Your Own Healthier, Tastier Produce

Introduction

Organic gardening isn’t just a hobby; it’s a lifestyle choice that can transform the way you eat and live. By growing your own fruits and vegetables, you not only ensure a steady supply of fresh, chemical-free produce but also contribute to a healthier planet. In this comprehensive guide to Organic Gardening 101, we’ll explore the ins and outs of cultivating your garden paradise. From selecting the right location to mastering the art of composting, we’ve got you covered.

Organic-gardening

Getting Started

The Essence of Organic Gardening

At the heart of Organic Gardening 101 lies the fundamental belief in nurturing nature rather than controlling it. This approach is not just about growing food; it’s a philosophy that promotes biodiversity, respects the environment, and encourages sustainable practices. When you embark on your organic gardening journey, you become a steward of the earth, tending to your piece of land with care and responsibility.

Table of Contents

Selecting the Perfect Location

Choosing the right spot for your organic garden is crucial. To ensure a successful harvest, your garden should receive a minimum of 6-8 hours of direct sunlight daily. Additionally, opt for a location with well-draining soil to prevent waterlogged roots and other moisture-related issues. Easy accessibility for regular maintenance is also essential. A garden that’s conveniently located will encourage you to spend more time caring for it.

Essential Tools and Equipment

Every organic gardener needs a set of reliable tools and equipment to tend to their garden. These tools include spades, hoes, rakes, watering cans, and sturdy gardening gloves. Investing in high-quality, eco-friendly gardening equipment is a smart choice, as it ensures durability and reduces environmental impact. Quality tools make gardening tasks more manageable and enjoyable.

Preparing Your Garden

Soil Health Matters

Healthy soil is the cornerstone of a thriving organic garden. Before you start planting, it’s crucial to assess and improve your soil’s quality. You can begin by conducting a soil test to determine its pH level and nutrient content. Based on the results, you can amend the soil with organic matter like compost, well-rotted manure, or peat moss. Regularly adding compost not only enriches the soil but also improves its structure, making it more conducive to plant growth.

Planning Your Layout

A well-thought-out garden layout can make a significant difference in your gardening experience. When planning your garden, consider factors such as space utilization, sunlight exposure, and efficient irrigation. One popular technique in organic gardening is companion planting, where you strategically arrange different plant species to enhance their mutual growth. For instance, planting basil near tomatoes can help deter pests that commonly affect tomato plants.

Plant Selection

Choosing the right plants for your organic garden is a crucial step toward success. Start by selecting organic, non-GMO seeds or seedlings. Opt for varieties that are well-suited to your climate and growing conditions. This ensures that your plants have the best chance of thriving. Be sure to consider your personal taste preferences as well. After all, one of the joys of organic gardening is enjoying the fruits (and vegetables) of your labor.

Nurturing Your Garden

Watering Wisely

Proper watering is a key factor in organic gardening. Water your garden early in the morning to reduce water loss through evaporation. A soaker hose or drip irrigation system can help deliver water directly to the base of your plants, minimizing water waste. Consistent and adequate moisture is essential for healthy plant growth, so pay close attention to your garden’s hydration needs.

Organic Pest Control

Dealing with pests in your organic garden doesn’t require resorting to chemical pesticides. Instead, you can employ natural methods to keep unwanted critters at bay. Companion planting, where certain plants repel or deter pests, is one effective strategy. For example, marigolds can help protect your garden from nematodes, while garlic and chives can discourage aphids and other insect pests. Additionally, introducing beneficial insects like ladybugs and praying mantises can help maintain a balanced ecosystem in your garden.

Composting Magic

Composting is like a secret ingredient that can supercharge your organic garden’s growth. It’s the process of turning kitchen scraps, yard waste, and other organic materials into nutrient-rich compost. This “black gold” is a natural fertilizer that improves soil fertility and structure. To create compost, collect items such as fruit and vegetable scraps, coffee grounds, eggshells, leaves, and grass clippings in a designated compost bin or pile. Over time, these materials will decompose and transform into a valuable resource for your garden.

Harvesting and Enjoying the Fruits of Your Labor

Timing is Key

When it comes to harvesting your organic produce, timing is crucial. Each fruit and vegetable has its optimal harvest window when it’s at peak ripeness, flavor, and nutritional value. Harvesting too early or too late can affect the taste and quality of your crops. To become a skilled organic gardener, learn the specific harvest times for the plants you’re growing. This knowledge will ensure that you enjoy the full bounty of your garden.

Delicious Organic Recipes

One of the joys of organic gardening is the opportunity to create delicious meals from your homegrown produce. From fresh, crisp salads made with your own lettuce and cucumbers to homemade tomato sauce crafted from sun-ripened tomatoes, the possibilities are endless. Organic vegetables and herbs burst with flavor, making every dish a culinary delight. To inspire your culinary adventures, explore organic recipes that highlight the taste and quality of your garden-fresh ingredients.

Sharing the Abundance

As your organic garden flourishes, you’ll likely find yourself with a surplus of produce at certain times of the year. Sharing your garden’s bounty with friends, family, and neighbors is a wonderful way to build a sense of community and spread the joys of organic gardening. It’s a gesture of goodwill that can strengthen relationships and inspire others to embark on their own gardening journeys.

FAQs

What is organic gardening, and why is it essential?

Organic gardening is a holistic approach to growing plants that emphasizes sustainability, environmental responsibility, and natural methods. It avoids synthetic chemicals and promotes healthier soil, plants, and food. It’s essential because it contributes to healthier eating, reduces harm to the environment, and supports biodiversity.

How can I improve soil quality in my organic garden?

Improving soil quality in your organic garden involves adding organic matter like compost and well-rotted manure. This enhances soil fertility, structure, and water-holding capacity. Avoid chemical fertilizers, as they can harm soil health in the long run.

Are there natural ways to deter pests in my garden?

Yes, there are several natural ways to deter pests in your garden. Companion planting, where certain plants repel or deter pests, is effective. Additionally, you can introduce beneficial insects like ladybugs, lacewings, and parasitic wasps. Natural repellents like neem oil can also help protect your plants.

Is organic gardening suitable for beginners?

Absolutely! Organic gardening is suitable for gardeners of all levels, including beginners. Starting small and learning as you go is a great approach. As you gain experience, you can expand your garden and experiment with different techniques. It’s a rewarding and educational journey.

Can I save money by growing my organic produce?

Yes, growing your organic produce can save you money in the long run. While there may be initial setup costs, such as purchasing tools and organic seeds or seedlings, the ongoing cost of maintaining your garden is relatively low. Plus, the value of the fresh, organic produce you harvest far outweighs these expenses.

What are some easy-to-grow organic vegetables for beginners?

If you’re new to organic gardening, consider starting with easy-to-grow vegetables like tomatoes, lettuce, radishes, and zucchini. These crops are relatively low-maintenance and provide satisfying results, making them perfect choices for novice garden.

Conclusion

Organic Gardening 101 is not just a means to grow your own healthier, tastier produce; it’s a step towards a more sustainable and fulfilling lifestyle. By following the principles outlined in this guide, you can embark on a journey to nurture your garden and nourish your body with nature’s bounty. Start today, and experience the joy of organic gardening.

(To know more about Gardening Hacks : https://bonsainurserybd.com/10-game-changing-vegetable-gardening/ )

Bonsai Styling

Unlocking the Secrets of Bonsai Styling: Crafting Nature’s Miniature Masterpieces

Bonsai, a venerable art with roots tracing back over a millennium to ancient China, continues to captivate the imagination with its extraordinary ability to metamorphose ordinary trees into living masterpieces. This intricate craft, blending artistic flair with horticultural finesse, transforms each bonsai tree into a miniature marvel. In this comprehensive article, we will delve into the realm of bonsai styling and provide invaluable guidance, particularly designed for both budding enthusiasts and beginners.

Bonsai Styling

Deciphering the Artistry of Bonsai

Bonsai, translating to “tray planting,” transcends the realm of mere gardening; it embodies a fusion of artistry, unwavering patience, and profound horticultural knowledge. This art form revolves around nurturing and sculpting trees to emulate their full-sized counterparts while preserving their diminutive stature.

Handpicking the Perfect Bonsai Tree

Embarking on the journey of bonsai styling begins with a critical decision – selecting the ideal tree species. Different species exhibit distinct growth patterns and requirements. For those venturing into the world of bonsai for the first time, some excellent choices include junipers, ficuses, and Chinese elms. Thorough research of your chosen species is paramount to success.

Bonsai Styling: Essential Tools for Bonsai Mastery

To craft a bonsai masterpiece, an arsenal of specialized tools is indispensable. This toolkit encompasses concave cutters, branch cutters, wire cutters, and bonsai shears. Each instrument plays a pivotal role in molding and preserving your bonsai’s exquisite form.

The Art of Pruning

At the core of bonsai styling lies the art of pruning. Regularly trimming and shaping your tree’s branches and foliage not only preserves its size but also stimulates fresh growth in desired directions. Pruning is the keystone to enhancing the overall aesthetic allure of your bonsai.

Mastering the Techniques of Wiring and Training

Wiring stands as a fundamental technique in guiding your bonsai’s branches into their desired configuration. This method involves delicately wrapping wire around branches, manipulating them to achieve the desired silhouette. Patience is the essence here, as perfecting the shape may take months or even years.

Soil and Pot Selection: The Foundation of Success

The choice of soil mix and pot for your bonsai is pivotal to its vitality and development. Bonsai trees exhibit unique soil requirements distinct from conventional garden soil. A well-draining, coarse bonsai soil mix is imperative to prevent waterlogged roots.

Nurturing Through Watering and Fertilizing

A judicious approach to watering and fertilization is critical in maintaining your bonsai’s health. Overwatering can precipitate root rot, while under-watering may stress the tree. Regular fertilization during the growing season ensures your bonsai receives the essential nutrients it needs to thrive.

Safeguarding Your Bonsai’s Well-being

Bonsai trees, like any other plants, are susceptible to pests and diseases. Regular inspections are paramount to detect signs of infestations or ailments promptly. Proactive care is pivotal in preserving your bonsai’s health and vibrancy.

Cultivating the Virtue of Patience

Bonsai styling unfolds as a slow, contemplative process, demanding patience, commitment, and an eagerness to learn from both triumphs and setbacks. Embrace the journey of observing your bonsai’s gradual evolution over time; hastening the process is seldom fruitful.

Conclusion

Within the world of bonsai, styling is an exquisite fusion of art and science. By adhering to these expert tips and techniques, you embark on your very own bonsai odyssey, crafting miniature masterpieces that reflect your imagination and dedication. Always remember, bonsai is not merely the cultivation of trees; it is the nurturing of a living masterpiece, capturing the essence of nature in a captivating, diminutive form.

Bonsai Wire

FAQs

How frequently should I water my bonsai tree?

The frequency of watering varies, contingent upon factors such as the tree species, season, and climate. Generally, water your bonsai when the topsoil feels slightly dry to the touch.

Can any tree be styled as a bonsai?

While numerous tree species can be crafted into bonsai, some exhibit greater suitability due to their growth patterns and adaptability. Extensive research aids in selecting a species aligning with your skill level and climate.

When is the optimal time for repotting a bonsai tree?

The prime period for repotting your bonsai falls in early spring, just before the onset of new growth. This timing enables the tree to recover and establish itself in its new pot.

Do bonsai trees necessitate specific indoor conditions?

Bonsai trees primarily thrive outdoors, requiring natural sunlight and seasonal temperature fluctuations. However, with meticulous care and ample light, certain species can thrive indoors.

How long does it take to create a finely styled bonsai tree?

Bonsai styling exemplifies a virtue of patience; the duration required varies significantly. Achieving the desired aesthetic can span several years or even decades, contingent upon the species and your skill level.

carrots

Carrots: The Ultimate Superfood for Weight Loss – Science Backed

Introduction

In the quest for a healthier lifestyle and sustainable weight loss, it’s essential to turn to nature’s bounty for answers. One such superfood that often goes underestimated is the humble carrot. Packed with essential nutrients, fiber, and a range of health benefits, carrots can be your secret weapon in achieving your weight loss goals. In this comprehensive guide, we will delve into the science-backed reasons why carrots deserve the title of the ultimate superfood for weight loss.

carrots

The Nutritional Powerhouse

Carrots, scientifically known as Daucus carota, are not just a staple in salads but a nutritional powerhouse. They are loaded with vitamins, minerals, and antioxidants, making them an ideal addition to your diet.

Table of Contents

Beta-Carotene: The Key Player

Beta-carotene, a type of antioxidant and a precursor to vitamin A, is abundantly present in carrots. This compound not only gives carrots their vibrant orange color but also offers numerous health benefits. It aids in weight loss by boosting metabolism and promoting fat oxidation.

Essential Vitamins and Minerals

Carrots are a rich source of essential vitamins and minerals like vitamin K, vitamin C, potassium, and folate. These nutrients support overall health and play a crucial role in maintaining a balanced weight.

Fiber for Satiety

Fiber is a weight watcher’s best friend, and carrots are brimming with it. High-fiber foods keep you feeling full for longer, reducing the chances of overeating and aiding in weight management.

The Science Behind Carrots and Weight Loss

Understanding how carrots impact weight loss involves delving into the science of nutrition and metabolism.

Metabolism Booster

Carrots contain compounds that can boost your metabolic rate. A faster metabolism means your body burns calories more efficiently, helping you shed pounds.

Low-Calorie, High-Nutrient

Carrots are low in calories but high in nutrients, making them a perfect addition to a weight loss diet. You can munch on them guilt-free while supplying your body with essential vitamins and minerals.

Regulation of Blood Sugar

Carrots have a low glycemic index, which means they have a minimal impact on blood sugar levels. This helps prevent sudden spikes and crashes in energy, reducing the temptation to snack on unhealthy foods.

Healthy Gut, Healthy Weight

The fiber in carrots supports a healthy gut microbiome. A balanced gut flora is associated with better weight management and reduced inflammation.

How to Incorporate Carrots into Your Diet

Now that we’ve established the science behind carrots and weight loss, let’s explore practical ways to make them a delicious part of your daily meals.

Fresh and Crunchy Snacks

Carrot sticks are a convenient and satisfying snack. Pair them with a tasty dip or enjoy them on their own for a satisfying crunch.

Soups and Stews

Add diced carrots to your soups and stews for extra flavor, nutrients, and a hearty texture.

Salads

Grated carrots make a colorful and nutritious addition to salads. They add a delightful sweetness and crunch to your greens.

Carrot Smoothies

Blend carrots into your morning smoothie for a nutritious and filling start to your day.

carrots-weight-loss

FAQs

Q: Can carrots really help with weight loss?

A: Absolutely! Carrots are low in calories, high in fiber, and contain metabolism-boosting compounds, making them an excellent choice for weight loss.

Q: How many carrots should I eat in a day for weight loss?

A: There’s no fixed quantity, but including a serving of carrots in your daily diet is a healthy choice.

Q: Are cooked carrots as beneficial as raw ones for weight loss?

A: Both cooked and raw carrots offer health benefits. Cooking can make some nutrients more accessible to your body.

Q: Can carrot juice aid in weight loss?

A: While carrot juice is nutritious, it’s best in moderation due to its sugar content. Whole carrots with fiber are a better choice.

Q: Can I overeat carrots while trying to lose weight?

A: While carrots are healthy, excessive consumption can lead to an imbalance in your diet. Moderation is key.

Q: Are there any side effects of eating too many carrots?

A: Consuming excessive carrots may result in skin discoloration due to beta-carotene. However, this is rare and usually harmless.

Conclusion

Carrots: The Ultimate Superfood for Weight Loss – Science Backed lives up to its title. The science behind carrots and weight loss is clear, and their nutritional benefits are hard to ignore. By incorporating carrots into your daily meals, you can boost your metabolism, control your appetite, and embark on a healthier weight loss journey. So, embrace this humble vegetable and let it be your secret weapon on the path to a slimmer, healthier you.

(To learn more about vegetables gardening hack : https://bonsainurserybd.com/10-game-changing-vegetable-gardening/ )

bonsai-care-blooming

Bonsai Care Tips: Cultivating Your Miniature Masterpiece

Introduction

Bonsai trees have captivated people for centuries with their elegance and mystique. These miniature trees, carefully cultivated to resemble their full-sized counterparts, are more than just plants; they are works of art. However, maintaining the health and beauty of a Bonsai tree requires patience, skill, and knowledge. In this comprehensive guide, we’ll explore the world of Bonsai care tips, ensuring your tiny treasures flourish.

bonsai-care

Table of Contents

Bonsai Care Tips

Bonsai Care Tips is a broad topic, encompassing various aspects of nurturing these delicate plants. Let’s delve into the intricacies step by step:

Selecting the Right Bonsai Tree

The journey to Bonsai mastery begins with choosing the right tree. Different species have different care requirements. Consider your climate, space, and experience level before selecting your Bonsai companion.

Pot Selection and Repotting

Selecting the appropriate pot size and repotting your Bonsai when necessary is crucial. This promotes root health, provides stability, and ensures your tree has enough space to thrive.

Soil Composition

The soil for Bonsai trees must offer excellent drainage while retaining moisture. We’ll discuss how to create the perfect soil mix to keep your Bonsai nourished.

Watering Techniques

Overwatering or underwatering can be detrimental to your Bonsai. We’ll provide guidance on how to strike the perfect balance and keep your tree’s roots healthy.

Pruning and Shaping

Pruning and shaping your Bonsai is an art form in itself. Learn when and how to trim branches and foliage to maintain your tree’s aesthetic appeal.

Wiring and Styling

Bonsai styling involves using wires to guide branches and achieve the desired shape. We’ll teach you the techniques to create stunning, natural-looking forms.

Sunlight Requirements

Understanding your Bonsai’s sunlight needs is essential. Some prefer full sun, while others thrive in partial shade. We’ll help you find the ideal spot for your tree.

Fertilizing Your Bonsai

Feeding your Bonsai the right nutrients at the right time is crucial for growth and health. We’ll explore various fertilization methods and schedules.

Pest and Disease Management

No Bonsai is immune to pests and diseases. Learn how to identify common issues and the steps to take to protect your miniature masterpiece.

bonsai-care-blooming

Winter Care

Winter can be challenging for Bonsai enthusiasts. Discover how to prepare your tree for the cold months and ensure its survival.

Bonsai Display and Presentation

Part of the joy of owning Bonsai is showcasing your creation. We’ll provide tips on selecting display containers and creating captivating presentations.

Bonsai Care Myths

Separating fact from fiction is essential in Bonsai care. We’ll debunk common myths that could hinder your tree’s well-being.

Bonsai Care for Beginners

If you’re new to Bonsai, don’t worry. We’ll offer a step-by-step guide tailored to beginners, making your journey into Bonsai care enjoyable and successful.

Bonsai Care for Advanced Enthusiasts

For those seeking to elevate their Bonsai skills, we’ll delve into advanced techniques, such as air-layering and yamadori.

Bonsai Care for Specific Species

Different Bonsai species require specialized care. Explore detailed care instructions for popular choices like the Ficus, Juniper, and Pine Bonsai.

Bonsai Care Troubleshooting

Encountering issues with your Bonsai? We’ll provide solutions to common problems, from yellowing leaves to root rot.

Bonsai Care Tools and Equipment

Discover the essential tools and equipment every Bonsai enthusiast should have in their toolkit, from pruning shears to wire cutters.

Bonsai Care Calendar

A well-organized care schedule is crucial. We’ll help you create a Bonsai care calendar to track tasks and ensure nothing is overlooked.

Bonsai Care Workshops and Communities

Joining Bonsai workshops and communities can enhance your knowledge and provide valuable insights. Learn how to connect with fellow enthusiasts.

Sustainability in Bonsai Care

Explore eco-friendly practices in Bonsai care, including sustainable sourcing of trees and pots, and reducing waste.

Bonsai Care and Feng Shui

Discover the ancient art of Feng Shui and how it relates to Bonsai care, bringing harmony and balance to your living spaces.

Bonsai Care as a Therapeutic Hobby

Bonsai care is not just about trees; it can be therapeutic for the mind and soul. Explore the relaxation and mindfulness aspects of this hobby.

Frequently Asked Questions (FAQs)

How often should I water my Bonsai?

Bonsai trees should be watered when the top layer of soil feels slightly dry to the touch. The frequency can vary depending on the species and environmental conditions.

Can I keep my Bonsai indoors?

While some Bonsai can thrive indoors, most require outdoor conditions with plenty of sunlight. Indoor Bonsai care demands careful attention to lighting and humidity.

Do Bonsai trees bloom?

Yes, many Bonsai trees can produce flowers. However, not all species bloom, and flowering depends on various factors, including age and health.

How do I prevent my Bonsai from becoming overgrown?

Regular pruning and shaping are essential to prevent overgrowth. Follow proper pruning techniques to maintain your Bonsai’s desired size and shape.

Can I create a Bonsai from any tree?

While theoretically possible, not all trees are suitable for Bonsai. Certain tree species are better suited due to their characteristics and growth patterns.

Is Bonsai care time-consuming?

Bonsai care can be as time-consuming as you choose it to be. Basic maintenance may only take a few minutes each day, while more intricate work can occupy hours.

Conclusion

Cultivating Bonsai trees is a rewarding journey that combines horticulture, artistry, and mindfulness. By following these Bonsai Care Tips, you can ensure the health and vitality of your miniature marvels. Remember, each Bonsai is a unique work of art, and with dedication and care, you can watch your tiny tree grow into a living masterpiece.