Bonsai-Bliss

Unlocking the Secrets of Bonsai: A Journey through History and Techniques

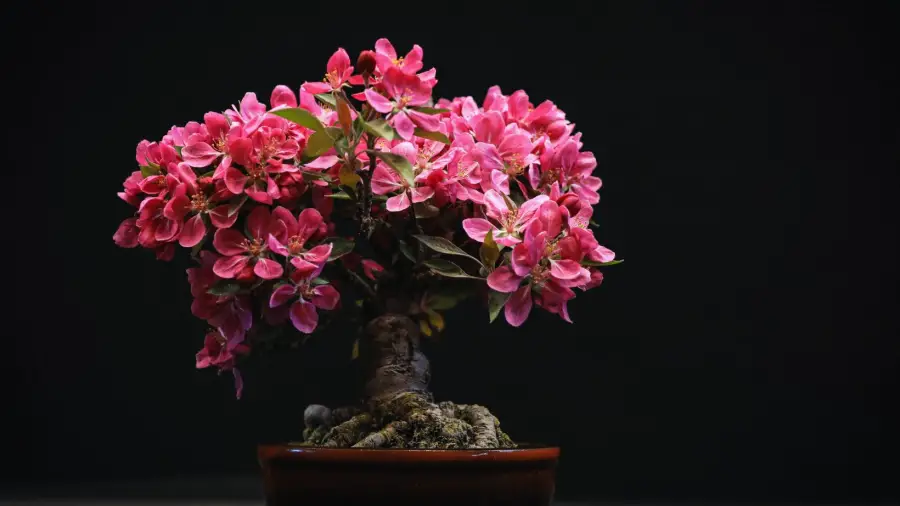
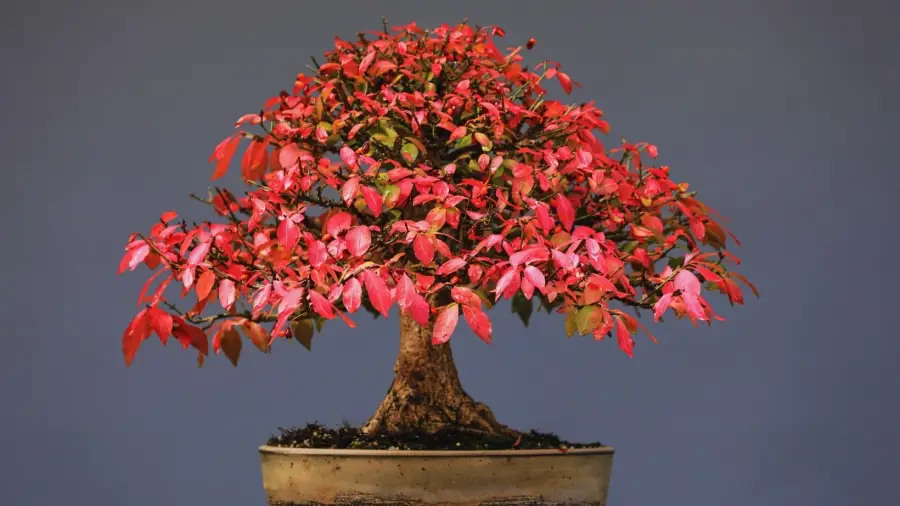
Bonsai is a form of highly skilled gardening that involves the cultivation of small trees in containers. This ancient art form originated in China and has since spread worldwide, with unique styles and techniques developed in different countries.

Bonsai-Bliss

Bonsai trees are meticulously trained and pruned to create miniature landscapes, with the goal of evoking a sense of awe and tranquility. These miniature trees require special care, including regular watering, feeding, and shaping, to maintain their delicate beauty. Bonsai enthusiasts invest time, patience, and expertise in mastering the art of bonsai, resulting in breathtaking creations that can be admired for generations.

The art of bonsai provides a deeply rewarding and fulfilling experience for those who appreciate the harmony and balance found in nature.

The History Of Bonsai

Bonsai, the art of growing miniature trees in containers, has a long and fascinating history that dates back thousands of years. This ancient horticultural practice originated in China and Japan, where it developed unique techniques and styles that are still revered today. In this blog post, we will explore the rich history of bonsai, tracing its origins and the early techniques and styles that shaped this art form.

Origins In Ancient China

The roots of bonsai can be traced back to ancient China, where it was known as “penzai” or “penjing.” These miniature trees were cultivated in pots by the Chinese elite, who viewed them as symbols of wealth and taste. The art of penzai dates back to the Han Dynasty (206 BCE – 220CE), and it became increasingly popular during the Tang Dynasty (618-907 CE).

During this time, penzai trees were mainly grown for religious and spiritual purposes. They were believed to possess magical powers and were often used in Taoist and Buddhist rituals. The Chinese craftsmen meticulously styled these miniature trees to represent the beauty of nature and the harmony between humans and the universe.

Early Techniques And Styles

In the 6th and 7th centuries, the art of bonsai was introduced to Japan through Buddhist monks who had studied in China. The Japanese adapted and refined the Chinese techniques, giving birth to their own unique style of bonsai, known as “bonkei” or “saikei.”

The Japanese embraced bonsai as a form of artistic expression and began refining techniques to suit their cultural aesthetics. One of the earliest Japanese bonsai schools, the Sakufu School, emerged during the Muromachi period (1336-1573). Under the influence of Zen Buddhism, the Japanese developed a deep appreciation for simplicity and understated elegance.

During the Edo period (1603-1868), bonsai became more accessible to the general public. Artisans began popularizing the art and sharing their knowledge by publishing bonsai compendiums. The techniques and styles of bonsai continued to evolve, and various schools, such as the Shinsei School and the Zeshin School, emerged.

The Edo period also saw the development of distinct bonsai styles such as the formal upright style (chokkan), the slanting style (shakan), the windswept style (fukinagashi), and the cascade style (kengai). These styles aimed to mimic the unique characteristics of mature trees found in nature, capturing their essence on a small scale.

Today, bonsai has evolved into a worldwide hobby and art form, with enthusiasts from various cultures embracing its beauty and meditative qualities. The techniques and styles honed by ancient Chinese and Japanese practitioners continue to inspire and influence contemporary bonsai artists around the globe.

Bonsai In Modern Times

Bonsai is an ancient art form that has seamlessly transitioned into modern times, captivating enthusiasts around the globe with its elegance and tranquility. As we delve into the contemporary world of bonsai, we witness the influence it has gained in the west, its growing popularity worldwide, and the profound symbolism it holds as a representation of patience and mindfulness.

Western Influence And Popularity

The art of bonsai originated in East Asia, but it has since made its way to the western world, where it has gained immense popularity. The western bonsai movement has adopted its own unique style, blending traditional techniques with a touch of modernity. This fusion has led to the creation of various styles such as formal upright, informal upright, slanting, and cascade, each displaying a distinct aesthetic appeal.

The western influence on bonsai is evident in the introduction of new species, particularly those native to western regions, as well as innovative training methods. Instead of purely adhering to the traditional Asian species, Western bonsai enthusiasts experiment with a wide variety of trees, including conifers, deciduous trees, and even fruit trees.

The popularity of bonsai in the western world can be attributed to its ability to bring a sense of peace and serenity to urban environments. As urban spaces are becoming increasingly crowded, individuals are turning to bonsai as a means of reconnecting with nature. The practice of cultivating and tending to a miniature tree not only provides a therapeutic escape from the pressures of modern life but also serves as a reminder of the beauty and resilience found in the natural world.

Global Appreciation For The Art Form

Bonsai has transcended cultural boundaries and is now appreciated and practiced by people from all corners of the globe. It has become a global art form, with bonsai exhibitions and competitions drawing participants and spectators from diverse backgrounds.

The globalization of bonsai has sparked a cross-pollination of ideas and techniques, further enriching the art form. Bonsai artists from different countries and cultures exchange knowledge and skills, fostering an environment of collaboration and growth. This global appreciation has led to the discovery and cultivation of unique bonsai styles, each reflecting the artistic tastes and cultural heritage of their creators.

Bonsai As A Symbol Of Patience And Mindfulness

Beyond its visual appeal, bonsai holds great significance as a symbol of patience and mindfulness. The process of cultivating a bonsai tree requires meticulous care, attention, and patience. Each branch is carefully pruned, each leaf delicately groomed, and each wire gently maneuvered into shape. This practice fosters the development of mindfulness, encouraging individuals to be fully present in the moment and to appreciate the beauty that can be found in even the tiniest details.

Bonsai serves as a tangible representation of the passage of time and the long-lasting results that can be achieved through consistent, dedicated effort. A well-maintained bonsai tree is a testament to the patience and perseverance of its caretaker. The act of nurturing and tending to a bonsai tree also instills the values of responsibility and respect for nature, as each tree embodies the harmonious coexistence between humans and the natural world.

The Art Of Bonsai Cultivation

Bonsai, a timeless art form originating in ancient China, has captivated enthusiasts around the world for centuries. The intricate and delicate nature of these miniature trees represents a fusion of horticulture and artistic expression, creating unique living sculptures that reflect the beauty of nature.

Choosing The Right Tree Species For Bonsai

One of the crucial steps in bonsai cultivation is selecting the right tree species. Each type of tree has its own growth patterns and characteristics that can significantly impact the outcome of your bonsai. Some popular tree species for bonsai include:

Species Description
Juniper A hardy evergreen tree with needle-like foliage and gnarled trunks, known for its resilience and adaptability.
Maple Known for its vibrant autumn colors and graceful branching, maple trees are a popular choice for bonsai enthusiasts.
Pine Pine trees offer an elegant silhouette and iconic needle-like leaves, representing strength and longevity in bonsai art.

Understanding The Basic Principles Of Styling

Bonsai styling is an art in itself, requiring knowledge of fundamental principles to create aesthetically pleasing compositions. These principles include:

  • Balance and proportion: Achieving a harmonious balance between the tree’s trunk, branches, and foliage, ensuring each element is proportionate to the tree’s size.
  • Movement and flow: Incorporating curves and bends in the branches and trunk to create a sense of movement and mimic the natural growth patterns of mature trees.
  • Empty space: Embracing the concept of “less is more” by leaving empty spaces or voids in the design, allowing the viewer’s imagination to complete the picture.

Pruning And Shaping Techniques

Pruning and shaping are critical techniques for bonsai cultivation, allowing you to direct the growth of the tree and refine its appearance. Here are some common techniques used:

  1. Branch pruning: Trimming branches to maintain the desired shape and balance of the bonsai.
  2. Leaf pruning: Removing unnecessary leaves to enhance the aesthetic appeal of the tree and create the illusion of maturity.
  3. Wiring: Carefully wrapping wire around tree branches to guide their growth and create desired shapes and angles.

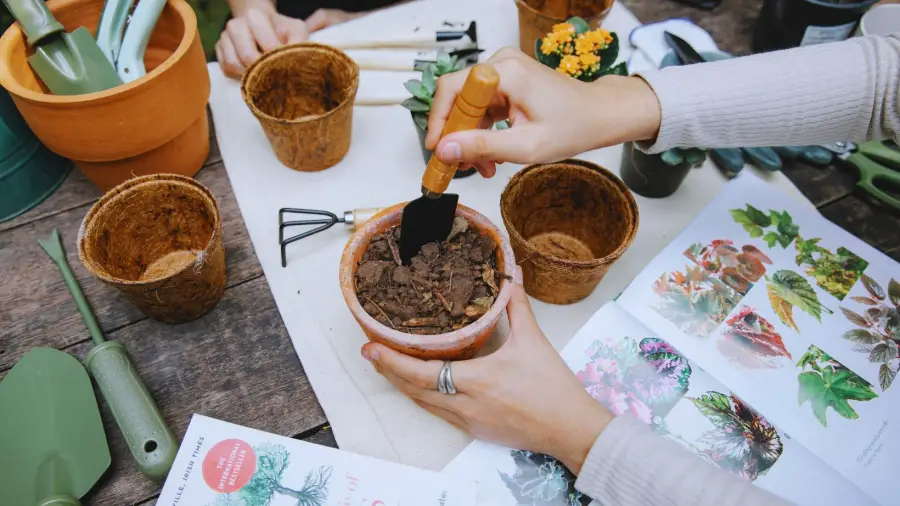
The Importance Of Pot Selection

The choice of pot for your bonsai is not merely decorative but plays a crucial role in the overall health and aesthetics of the tree. Consider these factors when selecting a pot:

  • Size: The pot should be appropriately sized to allow the tree’s roots to grow while maintaining balance and proportion.
  • Drainage: A bonsai pot should have adequate drainage holes to prevent waterlogging, which could lead to root rot.
  • Design: The pot’s design should complement the tree’s style and showcase its natural beauty without overshadowing it.

Caring For Bonsai Trees – Watering, Fertilizing, And Repotting

Proper care is vital for the long-term health and vitality of bonsai trees. Consider the following guidelines:

  • Watering: Bonsai trees have specific watering needs, requiring a delicate balance of moisture. Regularly check the soil’s moisture level and water accordingly, ensuring it never dries out completely or becomes waterlogged.
  • Fertilizing: Provide essential nutrients to your bonsai by fertilizing regularly during the growing season. Choose a bonsai-specific fertilizer and follow the instructions for optimal results.
  • Repotting: Repotting is necessary to refresh the soil, prevent root suffocation, and encourage healthy growth. Repot your bonsai when it outgrows its current pot or every 2-3 years, depending on its species.

Mastering the art of bonsai cultivation is a journey of patience, dedication, and creativity. By understanding the fundamental techniques and principles, along with proper care, you can create stunning bonsai trees that embody the beauty and tranquility of nature.

Creating A Bonsai Collection

Creating a Bonsai Collection Creating a bonsai collection is an exciting endeavor for both beginners and experienced enthusiasts. A bonsai collection not only adds a touch of natural beauty to your living space but also allows you to cultivate a sense of connection with nature. In this section, we will explore the key aspects of creating a bonsai collection, including selecting different tree species for variety, exploring different bonsai styles, and displaying bonsai trees in appropriate settings.

Selecting Different Tree Species For Variety

When it comes to selecting trees for your bonsai collection, variety is essential. Choosing different tree species will not only create visual interest but also present you with diverse growth patterns and characteristics to explore.

  • Consider selecting trees that are native to your region, as they will be better adapted to the local climate conditions.
  • Some common tree species suitable for bonsai include juniper, maple, pine, and ficus. Research the specific care requirements for each tree species, such as light, temperature, and water needs, to ensure their well-being.
  • By incorporating trees with different leaf shapes, textures, and colors, you can create a visually captivating collection that showcases the beauty of nature.

Exploring Different Bonsai Styles – Formal, Informal, And Semi-cascade

Bonsai trees can be shaped and styled in various ways to create unique and visually striking displays. Exploring different bonsai styles is a fascinating aspect of creating a bonsai collection.

  1. Formal Style: This style focuses on clean lines and a balanced composition. Trees are typically upright with symmetrical branches, giving a structured and elegant appearance.
  2. Informal Style: In contrast to the formal style, the informal style embraces asymmetry and a more naturalistic appearance. Trees in this style may have slanted trunks, varying branch lengths, and a more relaxed overall composition.
  3. Semi-Cascade Style: This style mimics the appearance of trees growing on slopes or cliffs. The trunk of the bonsai is slanted at an angle, and the branches gracefully cascade downwards, creating a dramatic and dynamic effect.

Displaying Bonsai Trees In Appropriate Settings – Indoors Or Outdoors

Displaying bonsai trees in appropriate settings is crucial for their health and overall aesthetics. The choice between indoor and outdoor settings will depend on the specific tree species and the conditions it requires.

Indoor Display Outdoor Display
Some tree species, such as the ficus, thrive indoors with adequate light and humidity levels. Placing them near a window where they receive sufficient sunlight is crucial. Many tree species, including juniper and pine, prefer outdoor settings as they require ample sunlight and natural air circulation. These trees can be displayed on patios, balconies, or in a dedicated outdoor bonsai garden.
Ensure proper ventilation and humidity control in indoor settings to prevent the buildup of stagnant air and potential pest infestations. When displaying bonsai outdoors, pay attention to seasonal variations and protect them from extreme weather conditions like frost or scorching heat.

Remember to provide adequate care and attention to bonsai trees regardless of the setting, ensuring they are watered, pruned, and fertilized regularly to maintain their health and beauty.


The Impact Of Bonsai On Mindfulness

The ancient art of bonsai not only brings the beauty of nature into our lives but also holds the power to transform our state of mind. Cultivating bonsai plants is more than just a hobby; it is a form of meditation that can foster a deep sense of mindfulness and inner peace. The process of nurturing these miniature masterpieces requires patience, attentiveness, and a connection with nature. In this article, we will explore how cultivating bonsai can be a powerful tool for cultivating mindfulness.

Cultivating Bonsai As A Form Of Meditation

Bonsai cultivation goes beyond merely trimming and shaping a tree. It involves a profound connection with the natural world, a harmony between the artist and the plant. Similar to meditation, bonsai requires a focused, undivided attention on the present moment. As you delicately trim, wire, and prune the bonsai, you become immersed in the task at hand, completely absorbed in the here and now. The act of nurturing a bonsai tree demands concentration and precision, which allows the mind to let go of distractions and worries, leading to a state of profound calmness.

Practicing bonsai as a form of meditation enables individuals to develop mindfulness, enhancing their ability to stay fully present and aware, both in their bonsai practice and in their daily lives as well. This art form encourages individuals to slow down, to observe with curiosity and patience, and to find joy in the simple act of caring for a living being.

The Therapeutic Benefits Of Working With Bonsai

Working with bonsai offers numerous therapeutic benefits that can positively impact both mental and emotional well-being. The process of creating and shaping a bonsai tree is an expressive outlet, allowing individuals to channel their creativity and emotions into an artistic endeavor.

Likewise, tending to a bonsai tree provides a sense of companionship and responsibility, creating a nurturing bond between the caretaker and the living art form. This connection can serve as a source of comfort, particularly during times of stress or emotional upheaval, offering a sense of solace and stability.

Therapeutic benefits of bonsai cultivation:
Enhanced creativity Reduced stress Improved focus
Bonsai cultivation encourages innovative approaches to shaping and designing the tree, allowing for artistic expression and fostering creativity. The process of tending to bonsai plants provides a therapeutic escape from daily stressors, promoting relaxation and tranquility. The mindful practice of bonsai improves focus and concentration, training the mind to remain present and attentive.

Nurturing Patience And Attentiveness Through Bonsai Cultivation

Cultivating bonsai plants requires a long-term commitment as these miniature trees take years to develop and mature. This journey builds patience and teaches individuals the value of delayed gratification. The slow, deliberate process of bonsai cultivation fosters an understanding that growth cannot be rushed, and great things require time and dedication.

Bonsai also instills a sense of attentiveness, as every small change in the plant’s appearance or growth pattern requires careful observation. By paying close attention to the needs of the bonsai, one learns to connect with the subtleties of the natural world and develop a heightened sense of awareness.

  1. The patience cultivated through the bonsai journey can be applied to various aspects of life, allowing for greater resilience and perseverance.
  2. The attentiveness honed through bonsai cultivation encourages individuals to notice the beauty in the details, fostering a deeper appreciation for the world around them.

In conclusion, bonsai is not just a decorative plant, but a transformative art form that can positively impact our state of mind. By engaging in the process of cultivating bonsai, individuals can develop mindfulness, unlock their creativity, and nurture patience and attentiveness. The journey of bonsai cultivation serves as a profound reminder of the beauty that can be found in the smallest, most intricate aspects of life.

Common Challenges In Bonsai Cultivation

Cultivating a bonsai tree can be a rewarding and fulfilling experience, but it’s not without its challenges. From dealing with pests and diseases to overcoming issues with root growth and trunk development, as well as addressing the impact of climate and environment, bonsai enthusiasts often face unique obstacles in their journey. In this blog post, we will explore these common challenges and provide helpful tips and strategies to overcome them.

Dealing With Pests And Diseases

One of the most common challenges when it comes to bonsai cultivation is dealing with pests and diseases. These tiny invaders can wreak havoc on your carefully nurtured miniature tree, causing damage to leaves, stems, and even the delicate root system. To protect your bonsai from these pesky intruders, consider the following:

  1. Regularly inspect your bonsai for any signs of pests or diseases. Look for wilting leaves, discoloration, or unusual growth patterns.
  2. Identify the specific pest or disease affecting your bonsai. This can help you choose the most effective treatment or prevention method.
  3. Use organic and natural pest control solutions whenever possible. This will minimize the risk of harm to your tree and the environment.
  4. Keep your bonsai in optimal health by following proper watering, pruning, and fertilizing techniques. A strong and healthy tree is more resistant to pests and diseases.

Overcoming Issues With Root Growth And Trunk Development

Root growth and trunk development are crucial aspects of bonsai cultivation. However, these areas can present challenges for many bonsai enthusiasts. To ensure healthy root growth and trunk development, consider the following strategies:

  • Regularly inspect the root system of your bonsai and remove any circling or tangled roots. This will help promote a healthy and well-established root structure.
  • Prune the branches and foliage of your bonsai to encourage trunk thickening. This will create a more balanced and aesthetically pleasing bonsai.
  • Consider using wire techniques to shape the trunk of your bonsai. This can help create the desired movement and character.
  • Provide adequate space for root growth by repotting your bonsai every 1-2 years. Ensure you use well-draining soil to prevent waterlogged roots.

Addressing The Impact Of Climate And Environment On Bonsai Trees

The climate and environment that your bonsai tree is exposed to can have a significant impact on its growth and overall health. To mitigate any negative effects, here are a few important considerations:

Climate Environment
Bonsai varieties have specific climate requirements. Research the specific needs of your bonsai and ensure it is placed in an environment that closely matches its preferred conditions. Protect your bonsai from extreme temperatures, strong winds, and excessive sunlight. Consider providing shade or creating a suitable microclimate using shade cloth or other protective measures.
Monitor the moisture level of the soil regularly. Overwatering or underwatering can have detrimental effects on your bonsai’s health. Adjust your watering schedule according to the climate and specific needs of your bonsai. Avoid placing your bonsai in areas with air pollution, drafts, or excessive noise. Find a quiet and clean spot to allow your bonsai to thrive and flourish.

By understanding and addressing the challenges that bonsai cultivation presents, you can ensure the health and vitality of your miniature masterpiece. Remember to take a proactive approach in dealing with pests and diseases, pay attention to root growth and trunk development, and create an optimal climate and environment for your bonsai tree. With patience, perseverance, and proper care, your bonsai will thrive and bring you joy for years to come.

Bonsai

Advanced Bonsai Techniques

When it comes to bonsai cultivation, mastering the basics is just the beginning. Once you have a solid foundation in bonsai care, you can begin to explore advanced techniques that allow you to take your bonsai trees to the next level. These advanced techniques involve specialized methods of shaping and propagating bonsai trees, allowing you to create unique and stunning designs. In this article, we will explore three advanced bonsai techniques: wiring and bending branches for better styling, layering and grafting for advanced shaping, and air-layering for propagating bonsai trees.

Wiring And Bending Branches For Better Styling

One of the most effective ways to shape bonsai trees is through the process of wiring and bending branches. By carefully wrapping wire around branches, you can guide their growth in the desired direction. This technique allows you to create elegant and flowing shapes that mimic the natural appearance of mature trees. When using this technique, it is important to choose the right gauge wire for the branch thickness, as using wire that is too thick or too thin can cause damage to the branches. Additionally, it is crucial to periodically check the wire for any signs of cutting into the bark or restricting the tree’s growth. If any such signs are observed, the wire should be removed or readjusted to prevent any lasting damage. Overall, wiring and bending branches is a valuable technique that gives you precise control over the shape and style of your bonsai tree.

Layering And Grafting For Advanced Shaping

Layering and grafting are advanced techniques that enable you to shape your bonsai tree in unique and creative ways. Layering involves encouraging the growth of roots on a specific section of a branch or trunk by partially stripping away the bark and creating a wound. Once the roots have formed, the branch or trunk can be separated, creating a new tree with its own root system. This technique allows for the creation of dramatic designs by incorporating sections of the original tree into the new one. Grafting, on the other hand, involves attaching a piece of one tree to another, allowing it to grow as part of the host tree. This technique is commonly used to fuse a desired variety or characteristic onto the rootstock of another tree. By using layering and grafting, bonsai artists can achieve intricate and complex designs that are not achievable through traditional pruning techniques alone.

Air-layering For Propagating Bonsai Trees

Air-layering is a technique that allows you to propagate bonsai trees by creating new roots on an existing branch or trunk without having to detach it from the parent tree. This method is particularly useful when you want to create a new bonsai tree from a branch with desirable characteristics, such as unique foliage or interesting bark. To perform air-layering, a ring of bark is removed from the branch where new roots are desired. The exposed area is then treated with a rooting hormone and covered with moist sphagnum moss or another suitable medium. Over time, roots will develop in this area, and once they are sufficiently established, the branch can be separated and potted as a new bonsai tree. Air-layering is an effective and efficient way to propagate bonsai trees while retaining their desirable attributes.

Building A Bonsai Community

Building a bonsai community is an integral part of the bonsai journey. By joining local bonsai clubs and organizations, you open yourself up to a wealth of knowledge and experiences that can take your bonsai skills to the next level. These clubs provide a space for enthusiasts to come together, share their passion, and learn from one another.

Membership in local bonsai clubs offers numerous benefits:

  • Access to a network of experienced bonsai practitioners who can provide guidance and support.
  • Opportunities to attend workshops and demonstrations conducted by seasoned bonsai artists, giving you valuable insights into different techniques and styles.
  • Access to a wide variety of resources, including books, magazines, and online platforms exclusive to club members.

Joining a bonsai club also allows you to connect with like-minded individuals who share your passion for this ancient art form. Through interactions with fellow enthusiasts, you can exchange ideas, discuss challenges, and gain new perspectives.

Participating in bonsai exhibitions and competitions is another great way to build a bonsai community. These events bring together bonsai enthusiasts from various backgrounds and skill levels, offering an opportunity to showcase your bonsai creations and connect with other talented individuals.

Benefits of participating in bonsai exhibitions and competitions include:

  • Gaining exposure for your bonsai creations and receiving feedback from experts and fellow enthusiasts.
  • Learning from other exhibitors through observing their techniques, styles, and presentation methods.
  • Networking opportunities with bonsai enthusiasts, which can lead to valuable connections and collaborations.

Being a part of bonsai exhibitions and competitions fosters camaraderie among bonsai enthusiasts, creating a supportive and encouraging atmosphere that inspires growth and improvement. It also allows you to contribute to the larger bonsai community by sharing your knowledge and experience with others.

One of the key aspects of building a bonsai community is the active sharing of knowledge and experiences. By engaging in discussions, workshops, and study groups, you can contribute to the collective learning and growth of the bonsai community.

Some ways to actively share your bonsai knowledge and experiences include:

  • Taking part in bonsai study groups where you can collaborate with others to further your understanding of bonsai techniques and principles.
  • Hosting or attending bonsai workshops, where you can share your own expertise and learn from others.
  • Participating in online forums and social media groups dedicated to bonsai, where you can offer advice, share photos of your bonsai creations, and engage in discussions.

Sharing your knowledge and experiences not only helps others in their bonsai journey but also encourages a sense of community and mutual growth. By actively contributing, you become an important part of the bonsai community, fostering an environment where everyone can thrive and excel.

Frequently Asked Questions On Bonsai

What Bonsai Means?

Bonsai refers to the art of growing miniature trees in containers. It involves careful pruning and styling techniques to create a visually appealing and natural-looking tree. Bonsai originated in ancient China and Japan and is now enjoyed worldwide as a form of artistic expression and horticulture.

What Do Bonsai Trees Symbolize?

Bonsai trees are symbolic of harmony, balance, and natural beauty. They represent patience and the appreciation of simplicity. They also reflect the idea of nurturing and cultivating living things. Bonsai trees can be seen as a reflection of life’s journey and the continuous pursuit of harmony with nature.

Can You Turn A Pine Tree Into A Bonsai?

Yes, pine trees can be turned into bonsai. Proper shaping, pruning, and care can transform a pine tree into a beautiful miniature version.

Can Any Tree Be A Bonsai?

Yes, any tree can potentially become a bonsai through careful pruning, shaping, and training techniques. With proper care, patience, and knowledge, almost any tree can be transformed into a bonsai.

Conclusion

Bonsai is a captivating art form that requires patience, skill, and dedication. By following the proper techniques and caring for these miniature trees, anyone can create their own serene and beautiful garden. The art of Bonsai not only brings peace and tranquility to our lives, but it also connects us with nature on a deeper level.

So, go ahead and embark on this fulfilling journey of Bonsai cultivation!

Bonsai-Trees

The Need for Speed: Which Bonsai Trees Grow the Fastest

Introduction

When it comes to cultivating bonsai trees, patience is often considered a virtue. However, for those eager to witness the beauty of a fully developed bonsai in a shorter timeframe, the question arises: “What bonsai tree grows the fastest?” In this article, we’ll delve into the world of bonsai cultivation and explore some of the swiftest-growing species that can help you achieve your miniature tree dreams more rapidly.

Bonsai-Trees

Understanding Bonsai Growth Rates

Before we dive into specific species, it’s essential to understand the factors that influence the growth rate of bonsai trees. Several variables can impact how quickly a bonsai matures:

1. Species Selection

The type of bonsai tree you choose plays a significant role in its growth rate. Some species naturally grow faster than others.

2. Environmental Factors

Environmental conditions such as light, temperature, humidity, and soil quality can either accelerate or slow down bonsai growth.

3. Pruning and Training

Proper pruning and training techniques can encourage faster development by directing the tree’s energy where you want it to go.

4. Fertilization

Using the right fertilizers and feeding schedules can stimulate growth and enhance overall health.

Fast-Growing Bonsai Species

Now, let’s explore some bonsai species known for their relatively speedy growth:

1. Chinese Elm

The Chinese Elm (Ulmus parvifolia) is a popular choice for bonsai enthusiasts. It exhibits rapid growth and can develop into an impressive bonsai within a few years.

2. Ficus

Ficus trees, particularly the Ficus Retusa and Ficus Microcarpa varieties, are known for their vigorous growth. With proper care, they can become elegant bonsai specimens in a relatively short time.

3. Jade Plant

The Jade Plant (Crassula ovata) is a succulent that grows quickly and is well-suited for bonsai beginners. Its thick trunk and lush foliage make it an attractive choice.

4. Boxwood

Boxwood (Buxus sempervirens) bonsai trees are prized for their dense foliage and fast growth. With frequent pruning and shaping, they can become miniature marvels in a relatively brief period.

5. Brazilian Rain Tree

The Brazilian Rain Tree (Pithecellobium tortum) is renowned for its rapid growth and unique foliage. It can quickly transform into a captivating bonsai specimen.

Cultivating Fast-Growing Bonsai

To harness the full potential of fast-growing bonsai trees, follow these essential steps:

1. Species Selection

Choose a species known for its speedy growth, such as the ones mentioned above.

2. Optimal Environment

Provide the ideal environmental conditions, including adequate sunlight and proper humidity levels.

3. Regular Pruning

Frequent pruning will help shape the bonsai and encourage branching.

4. Balanced Fertilization

Use a balanced fertilizer to ensure the tree receives essential nutrients for rapid growth.

Conclusion

In the world of bonsai cultivation, patience remains a virtue, but for those seeking quicker results, selecting fast-growing species like the Chinese Elm, Ficus, Jade Plant, Boxwood, or Brazilian Rain Tree can make all the difference. With proper care and attention, you can witness your bonsai masterpiece taking shape in a shorter time frame.

FAQs

1. Can any bonsai tree grow quickly?

While some bonsai species are naturally faster growers, the growth rate also depends on environmental factors and care.

2. Are fast-growing bonsai trees suitable for beginners?

Yes, fast-growing species like the Jade Plant and Chinese Elm are excellent choices for beginners due to their resilience and rapid development.

3. How often should I prune my fast-growing bonsai?

Regular pruning, typically every few weeks during the growing season, is essential to shape your bonsai and maintain its rapid growth.

4. Can I speed up bonsai growth with more fertilizer?

While fertilization is essential, over-fertilizing can harm your bonsai. Follow recommended guidelines for balanced growth.

In this article, we’ve explored the world of fast-growing bonsai trees, providing insights into species selection, cultivation techniques, and care tips. By following the advice outlined here, you can embark on a journey to create stunning bonsai trees that flourish in record time.

Aloe-Vera-Hair

Aloe Vera: Nature’s Miracle Plant for Beautiful Hair – Tips and Tricks

In the pursuit of healthy and luscious locks, many people turn to the wonders of nature. Among the various natural remedies, Aloe Vera stands out as a true miracle plant for achieving beautiful hair. Its versatile benefits have been cherished for centuries, and in this article, we will explore the numerous tips and tricks for harnessing the power of Aloe Vera to transform your hair. So, let’s delve into the world of this remarkable succulent and uncover the secrets of vibrant, gorgeous hair.

Aloe-Vera

Introduction to Aloe Vera

Aloe Vera, also known as the “Plant of Immortality,” has been revered for its health and beauty benefits for centuries. Its succulent leaves are filled with a gel-like substance that is packed with essential nutrients, vitamins, minerals, and enzymes. Aloe Vera is celebrated for its moisturizing, healing, and nourishing properties, making it an ideal natural remedy for hair care.

The Nutritional Powerhouse

Aloe Vera is a nutritional powerhouse for your hair. It contains a rich blend of vitamins A, C, and E, which are known for their antioxidant properties that combat free radicals and promote healthy hair growth. Additionally, it houses vitamin B12 and folic acid, essential for preventing hair loss and stimulating hair follicles.

Aloe Vera for Hair Growth

Promoting Scalp Health

One of the key aspects of healthy hair growth is a healthy scalp. Aloe Vera’s anti-inflammatory properties soothe an irritated scalp and reduce dandruff, creating an optimal environment for hair to flourish.

Strengthening Hair Strands

Aloe Vera is rich in amino acids, which strengthen hair strands from the roots, reducing breakage and hair loss. Regular application can lead to thicker and more robust hair.

Aloe Vera for Hair Moisture

Natural Hair Conditioner

Aloe Vera’s gel acts as a natural conditioner, deeply hydrating the hair without leaving it greasy. It locks in moisture, leaving your hair soft, shiny, and manageable.

Combatting Dryness and Frizz

For those struggling with dry, frizzy hair, Aloe Vera can work wonders. It helps balance the hair’s pH level, sealing moisture in and reducing frizz, making your hair look sleek and well-nourished.

Aloe Vera for Hair Repair

Healing Damaged Hair

Whether it’s due to heat styling or chemical treatments, damaged hair needs extra care. Aloe Vera’s enzymes promote hair repair by revitalizing damaged strands and preventing further harm.

Preventing Split Ends

Regular use of Aloe Vera can also prevent split ends, giving your hair a healthier appearance and reducing the need for frequent trims.

Aloe Vera Hair Masks and Treatments

DIY Aloe Vera Hair Mask

Creating your own Aloe Vera hair mask is simple and effective. Mix Aloe Vera gel with honey and coconut oil for a deep conditioning treatment that revitalizes your hair.

Aloe Vera and Coconut Oil Treatment

Combining Aloe Vera with coconut oil creates a powerful hair treatment that promotes growth, adds shine, and improves overall hair health.

Incorporating Aloe Vera into Your Haircare Routine

To reap the full benefits of Aloe Vera, consider using Aloe Vera-infused shampoos, conditioners, and serums in your daily haircare routine. These products are readily available and provide a convenient way to integrate this natural remedy into your regimen.

Aloe-Vera-Hair

Tips for Growing Aloe Vera at Home

If you’re interested in having a constant supply of fresh Aloe Vera gel, consider growing an Aloe Vera plant at home. It’s easy to cultivate and requires minimal maintenance. Just a small potted plant can provide you with a lifetime supply of this miracle ingredient.

( To know more about home Aloe-Vera Gardening idea : https://bonsainurserybd.com/5-small-space-rooftop-garden-ideas/ )

Conclusion

Aloe Vera is indeed nature’s miracle plant for beautiful hair. Its multifaceted benefits, including promoting hair growth, providing moisture, and repairing damage, make it a must-have in your haircare arsenal. So, why wait? Start incorporating Aloe Vera into your haircare routine and enjoy the transformation of your hair into a luscious, vibrant mane.

FAQs

Is Aloe Vera suitable for all hair types?

Yes, Aloe Vera is suitable for all hair types, from oily to dry and everything in between. It can be especially beneficial for those with scalp issues or dry, frizzy hair.

How often should I apply Aloe Vera to my hair?

You can apply Aloe Vera to your hair 1-2 times a week, depending on your hair’s condition. Experiment to find the frequency that works best for you.

Can Aloe Vera help with dandruff?

Absolutely! Aloe Vera’s anti-inflammatory properties can help soothe an irritated scalp and reduce dandruff.

Are there any side effects of using Aloe Vera on hair?

Aloe Vera is generally safe for hair and skin. However, some individuals may be sensitive to it. It’s advisable to do a patch test before applying it extensively.

Can I use store-bought Aloe Vera gel for my hair?

Yes, store-bought Aloe Vera gel can be used for your hair. Ensure that it is pure Aloe Vera gel without added chemicals or fragrances for the best results.

Pumpkin

The Ultimate Pumpkin Gardener’s Handbook: Tips, Tricks, and Treasures

Introduction

Welcome to “The Ultimate Pumpkin Gardener’s Handbook: Tips, Tricks, and Treasures.” If you’re passionate about growing the most incredible pumpkins in your garden, you’ve come to the right place. In this comprehensive guide, we will share essential tips, innovative tricks, and hidden treasures of pumpkin gardening. Whether you’re a novice or a seasoned gardener, you’ll find valuable insights to take your pumpkin cultivation to the next level.

Pumpkin

The Ultimate Pumpkin Gardener’s Handbook: Tips, Tricks, and Treasures

Table of Contents

Planning Your Pumpkin Garden

In this section, we’ll delve into the crucial aspects of planning your pumpkin garden. From selecting the right location to soil preparation and choosing the perfect pumpkin varieties, we’ve got you covered.

Soil Selection and Preparation

Healthy pumpkins start with the soil. Learn how to choose the ideal soil type, pH levels, and the importance of proper soil preparation.

Pumpkin Varieties and Selection

Discover a wide array of pumpkin varieties, from the classic Jack-o’-lantern to the exotic Cinderella pumpkin. We’ll guide you on selecting the best pumpkins for your garden.

Planting and Germination

Get step-by-step guidance on planting pumpkin seeds or seedlings and ensuring successful germination.

Nurturing Your Pumpkin Plants

Once your pumpkin plants are growing, it’s time to nurture them for robust growth. Explore tips on watering, fertilizing, and pest control.

Pumpkin Care and Maintenance

Learn how to maintain healthy pumpkin plants throughout the growing season, including pruning, weeding, and disease prevention.

Maximizing Pumpkin Growth

Unlock the secrets to maximizing pumpkin growth, including techniques for growing giant pumpkins.

Harvesting Perfect Pumpkins

Discover when and how to harvest your pumpkins for the best flavor and longevity.

Pumpkin Storage Tips

Get insights into proper pumpkin storage to keep your harvest fresh for longer.

Pumpkin Recipes and Culinary Delights

Explore delicious recipes and creative ways to enjoy your pumpkin harvest, from pies to soups and more.

Pumpkin Decorating Ideas

When the fall season arrives, it’s time to get creative with your pumpkins. Decorating pumpkins is not just about carving scary faces for Halloween; it’s a wonderful way to express your artistic flair and bring a touch of autumn charm to your home. Here are some fantastic pumpkin decorating ideas to inspire your inner artist:

1. Painted Pumpkin Masterpieces

Instead of carving, consider painting your pumpkins. Acrylic paints or even spray paint can transform ordinary pumpkins into vibrant works of art. From elegant patterns to whimsical designs, the possibilities are endless. You can even paint a pumpkin to resemble your favorite animal or character.

2. Glitter and Glam

For a touch of glamour, coat your pumpkins in glitter. Glitter pumpkins add a touch of magic to any fall decor. You can go for a full glittery look or create intricate glitter patterns. These sparkly creations are sure to catch the sunlight and make your home shine.

3. Mosaic Magic

If you love mosaic art, why not create a mosaic pumpkin? Break old, colorful dishes into pieces and arrange them in a stunning mosaic pattern on your pumpkin’s surface. Once grouted and polished, your mosaic pumpkin will be a showstopper.

4. Decoupage Delights

Decoupage is a technique that involves decorating with paper cutouts. Select fall-themed or patterned napkins, cut out the designs, and adhere them to your pumpkins with decoupage glue. Finish with a clear sealant for a polished look.

5. Nature’s Bounty

Embrace the beauty of nature by decorating your pumpkins with natural materials. Twigs, leaves, acorns, and pinecones can be glued onto your pumpkins to create rustic, woodland-themed decorations. These pumpkins blend seamlessly with the autumn landscape.

6. Carved Creations

Traditional pumpkin carving remains a beloved pastime, and for good reason. Carved pumpkins are perfect for spooky Halloween decorations. You can opt for classic jack-o’-lantern faces or get intricate with detailed designs.

7. Pumpkin Family Portraits

For a heartwarming touch, transform pumpkins into a family of characters. Paint or carve pumpkins to resemble your family members, complete with outfits and accessories. It’s a delightful way to celebrate togetherness.

8. Message Pumpkins

Spread positivity and inspiration by painting or writing uplifting messages on your pumpkins. These pumpkins make excellent centerpieces and can brighten anyone’s day.

Whichever decorating idea you choose, remember to have fun and let your imagination run wild. Pumpkin decorating is a delightful fall tradition that allows you to add a personal touch to your seasonal decor and create lasting memories with loved ones.

FAQs (Frequently Asked Questions)

How do I choose the right pumpkin variety for my garden?

Select a pumpkin variety based on your climate, available space, and intended use. For pies, go for sugar pumpkins, while larger varieties are ideal for carving.

What is the best soil pH for growing pumpkins?

Pumpkins thrive in slightly acidic to neutral soil with a pH range of 6.0 to 7.0.

How often should I water my pumpkin plants?

Water deeply once a week, ensuring the soil remains consistently moist but not waterlogged.

What can I do to prevent pumpkin diseases?

Practice crop rotation, use disease-resistant varieties, and maintain good garden hygiene to prevent pumpkin diseases.

When is the right time to harvest pumpkins?

Pumpkins are ready for harvest when their skin hardens and they have a deep, consistent color. Typically, this is in late September to early October.

Can I eat all parts of the pumpkin?

Yes, you can eat the flesh, seeds, and even the flowers of a pumpkin. Each part offers unique culinary possibilities.

Conclusion

“The Ultimate Pumpkin Gardener’s Handbook: Tips, Tricks, and Treasures” has equipped you with the knowledge and insights needed to become a pumpkin gardening expert. Whether you’re aiming for prize-worthy pumpkins or simply want to enjoy the fruits of your labor, this handbook is your go-to resource. Start your pumpkin gardening journey today and watch your garden flourish with bountiful, beautiful pumpkins.

( To know more about Organic Gardening: https://bonsainurserybd.com/organic-gardening-101/ )

Ginger

Grow Your Own Ginger Oasis: A Step-by-Step Guide to Successful Home Ginger Plantation

Ginger is a fantastic spice. It adds flavor to your meals and offers various health benefits. But what if we told you that you can easily grow your own ginger at home? Yes, you can create your very own ginger oasis right in your backyard or even indoors. In this step-by-step guide, we’ll break down the process in simple terms, so even if you’re new to gardening, you can enjoy the satisfaction of growing your own ginger.

Ginger

What is Ginger?

Before we dive into growing ginger, let’s understand what ginger is. Ginger is a tropical plant known for its spicy, aromatic rhizomes, which we commonly use as a spice in cooking. It’s also famous for its medicinal properties, like soothing upset stomachs and reducing inflammation.

Table of Contents

Step 1: Getting Started

What You’ll Need:

  • Ginger Rhizomes: These are ginger’s underground stems, which you’ll plant to grow new ginger.
  • A Suitable Location: Whether you have a garden or just a sunny windowsill, you can grow ginger. Choose a spot with indirect sunlight.
  • Well-Draining Soil: Ginger likes soil that doesn’t hold too much water, so make sure it drains well.
  • A Container (if you’re growing indoors): If you’re short on outdoor space, you can grow ginger in a pot or container.

( To know more about Container Gardening : https://bonsainurserybd.com/unlock-the-secrets-of-container-gardening/ )

Step 2: Choosing the Right Ginger Rhizomes

When you’re picking out ginger rhizomes, look for ones that are plump and have ‘eyes’ or small buds. These buds are where new ginger shoots will sprout from. If your ginger rhizomes look wrinkled or moldy, it’s best to choose others.

Step 3: Preparing the Soil

Ginger prefers a slightly acidic to neutral soil pH. If that sounds complicated, don’t worry. You can get a soil testing kit from your local garden center to check your soil’s pH. If it’s not in the right range, you can adjust it with a bit of lime (for acidic soil) or sulfur (for alkaline soil).

Step 4: Planting Your Ginger

Now, it’s time to plant your ginger. If you’re using a container, fill it with your well-draining soil. For outdoor planting, create shallow trenches in the soil, about 8 inches apart. Place your ginger rhizomes in the trenches with the buds facing upwards, and cover them with about 1-2 inches of soil.

Step 5: Watering and Moisture Control

Ginger loves moisture, but it doesn’t like to be waterlogged. Water your ginger when the top inch of soil feels dry to the touch. To help retain moisture, you can add a layer of mulch on top of the soil. This also helps regulate the soil temperature.

Step 6: Fertilizing Your Ginger

Ginger benefits from a balanced, slow-release fertilizer. You’ll want to apply it when the ginger shoots start appearing and continue every 6-8 weeks during the growing season. Be careful not to over-fertilize, as this can lead to excessive leaf growth at the expense of the ginger rhizomes.

Step 7: Managing Pests and Diseases

Just like any plant, ginger can have its share of pests and diseases. Common culprits include aphids and spider mites. You can use neem oil or insecticidal soap to keep these pests in check. Also, make sure your ginger plants have good air circulation and drainage to prevent fungal diseases.

Step 8: Pruning and Thinning

As your ginger plants grow, you might notice some shoots are stronger than others. It’s a good idea to thin out the weaker ones to give the stronger shoots more space to grow. Also, prune any dead or yellowing leaves to keep your ginger healthy.

Step 9: Harvesting Ginger

Your patience will pay off in about 8-10 months when your ginger is ready to harvest. You’ll know it’s time when the leaves start turning yellow and withering away. Gently dig up the ginger rhizomes, being careful not to damage them. You can harvest just a portion of the rhizome, leaving the rest to continue growing.

Step 10: Storing Fresh Ginger

Once you’ve harvested your ginger, you can store it in a cool, dry place. If you have more ginger than you can use right away, you can freeze it or dry it for later use.

Step 11: Using Your Homegrown Ginger

Now comes the fun part – using your very own homegrown ginger! You can grate it into stir-fries, make a soothing cup of ginger tea, or even brew your own ginger ale. The possibilities are endless, and the taste is unbeatable.

Ginger-Plantation

Common Mistakes to Avoid

Here are a few common mistakes to watch out for:

  • Overwatering: Ginger doesn’t like to sit in waterlogged soil, so avoid overwatering.
  • Crowding: Plant your ginger rhizomes with enough space to grow.
  • Neglecting Pest Control: Keep an eye out for pests and diseases and address them promptly.

Ginger Varieties to Explore

Did you know that there are different types of ginger? Besides the common culinary ginger, you can explore ornamental and medicinal varieties. Experimenting with different types can add diversity and beauty to your garden.

Troubleshooting Tips

If you encounter issues like yellowing leaves or slow growth, don’t worry. Check our troubleshooting section for solutions to common ginger-growing problems.

Conclusion

Growing your own ginger can be a rewarding experience. You don’t need to be an expert gardener to do it – just a bit of patience and care. Once you taste the difference between store-bought and homegrown ginger, you’ll never want to go back. So, start your ginger plantation today and enjoy the flavors and benefits of your very own ginger oasis.

FAQs

1. How long does it take to grow ginger at home?

Growing ginger at home takes about 8-10 months from planting to harvest.

2. Can I grow ginger indoors in a colder climate?

Yes, you can! Just make sure it gets enough sunlight.

3. What are the health benefits of ginger?

Ginger is known for aiding digestion, reducing inflammation, and soothing nausea.

4. Can I use ginger from the grocery store to grow my own?

Yes, you can use store-bought ginger rhizomes to grow your own ginger plants.

5. Are there any plants that go well with ginger in my garden?

Plants like turmeric, basil, and lemongrass make great companions for ginger and can help deter pests.

Container-gardening

Unlock the Secrets of Bountiful Blooms: Container Gardening Made Easy

Introduction

Container gardening is a delightful and rewarding way to cultivate a lush garden even if you have limited space. In this guide, we will unlock the secrets to achieving bountiful blooms and a thriving garden with ease. From choosing the right containers to selecting the perfect plants, we’ve got you covered. So, let’s dive in and discover the art of container gardening.

Container-gardening

Unlock the Secrets of Bountiful Blooms: Container Gardening Made Easy

Container gardening is a versatile and accessible method for anyone to nurture beautiful plants and flowers. Whether you’re a gardening novice or a seasoned pro, these insider tips will help you make your garden flourish.

Getting Started

Choosing the Right Containers

Selecting the appropriate containers is crucial for successful container gardening.

Container gardening starts with choosing the right pots. Opt for containers made of materials such as ceramic, terracotta, or plastic. Ensure they have proper drainage holes to prevent overwatering. The size of the container should correspond to the plant’s mature size. This ensures ample space for root growth.

Ideal Soil Mix

The right soil mix is essential for container gardening.

Use high-quality potting soil enriched with organic matter. You can further enhance it with compost or perlite for improved aeration. Don’t forget to add slow-release fertilizer to provide essential nutrients to your plants throughout the growing season.

Choosing the Perfect Plants

Selecting the right plants is key to a vibrant container garden.

Consider the amount of sunlight your garden receives when choosing plants. Some popular container plant options include vibrant petunias, fragrant herbs like basil and rosemary, or even cherry tomatoes for a tasty treat. Mix and match for a visually appealing garden.

Care and Maintenance

Watering Wisely

Proper watering is vital for container gardening success.

Establish a regular watering schedule and adjust it based on the weather. Self-watering containers can be a great help, but always monitor soil moisture. Stick your finger into the soil; if it feels dry, it’s time to water.

Pruning and Deadheading

Pruning and deadheading are essential tasks for a neat and flourishing garden.

Regularly remove dead or wilted leaves and spent flowers. This not only keeps your garden looking tidy but also encourages new growth and more blooms.

Pest and Disease Management

Protecting your plants from pests and diseases is crucial.

Monitor your plants for signs of pests or diseases. Use organic remedies like neem oil or garlic spray to deter pests. Quarantine affected plants to prevent the spread of diseases.

Seasonal Considerations

Seasonal Transitions

Container gardens require seasonal adjustments.

In colder climates, move your containers indoors or provide insulation during winter. In spring, refresh your garden with new plants and fresh soil.

Blooms All Year Round

Achieving year-round blooms is possible with strategic planting.

Choose a mix of perennial and annual plants to ensure continuous blooms throughout the year. Plants like daffodils in spring and mums in fall can keep your garden lively.

( For more small space Gardening Idea: https://bonsainurserybd.com/5-small-space-rooftop-garden-ideas/ )

FAQs

How often should I water my container garden?

Watering frequency depends on several factors, including the type of plant, container size, and weather conditions. Generally, water when the top inch of soil feels dry.

Can I grow vegetables in containers?

Absolutely! Many vegetables, such as tomatoes, peppers, and lettuce, thrive in containers. Just ensure they receive adequate sunlight and nutrients.

What is the best location for my container garden?

Choose a spot that receives at least 6-8 hours of sunlight daily. South or west-facing balconies or patios are ideal.

How do I prevent over-fertilizing my plants?

Over-fertilizing can harm your plants. Follow the recommended dosage on the fertilizer label, and avoid excessive applications.

What are some low-maintenance container plants for beginners?

For beginners, try hardy plants like succulents, marigolds, or mint. They require minimal care and still offer beautiful results.

How do I protect my container garden from pests naturally?

Use natural remedies like garlic spray or introduce beneficial insects like ladybugs to keep pests at bay.

Conclusion

Container gardening is a delightful and rewarding hobby that anyone can enjoy. By following these tips and secrets, you can create a lush and thriving garden in the confines of your own space. So, start unlocking the secrets of bountiful blooms through container gardening today and watch your garden flourish.

Pineapple-Gardening

Unlock the Secrets of Pineapple Gardening: Your Path to Homegrown Tropical Bliss

Are you a pineapple enthusiast, dreaming of harvesting sweet, juicy pineapples from your own garden? Well, get ready for a tropical adventure! Pineapple gardening may appear daunting at first, but fear not—with the right guidance, you can cultivate your very own tropical delight. In this comprehensive guide, we will take you through the step-by-step process of pineapple gardening, sharing expert insights to ensure your success.

Pineapple

1. Pineapple Gardening: A Tropical Delight at Your Fingertips

Pineapple gardening is an immensely rewarding pursuit, allowing you to relish the exotic flavors of this tropical fruit right in the comfort of your home. Whether you possess a spacious garden or a petite balcony, you can grow your own pineapples with a bit of knowledge and dedication.

2. Choosing the Perfect Pineapple Variety

Embarking on your pineapple gardening journey necessitates the selection of the ideal pineapple plants. For most home gardeners, the “Smooth Cayenne” variety takes center stage due to its delectable taste and manageable size. If space is limited, consider the dwarf pineapple variety, perfect for container gardening.

3. Crafting the Optimal Garden Bed

Pineapples thrive in well-draining soil. Prepare a garden bed featuring sandy loam soil, ensuring efficient water passage. To prevent waterlogged roots, which pineapples abhor, promote proper drainage. Alternatively, opt for large containers filled with suitable potting mix for your pineapple-growing venture.

4. Initiating Pineapple Growth from Tops

One of the distinctive aspects of pineapple cultivation is the ability to start from the tops of store-bought pineapples. To do this, excise the crown of a ripe pineapple, leaving about an inch of fruit attached. Allow the crown to air dry for a day to minimize the risk of rot.

5. Nurturing Young Pineapple Plants

5.1. Sunshine and Temperature Essentials

Young pineapple plants crave ample sunlight for their well-being. Ideally, they should bask in 6-8 hours of direct sunlight daily. Position them in a sunny locale, such as a south-facing window or a sun-drenched corner of your garden. Pineapples also favor a warm, humid atmosphere, with temperatures ranging from 65°F to 95°F (18°C to 35°C). Safeguard them against cold drafts and frost.

5.2. Watering Wisely

Regularly hydrate your pineapple plants to maintain consistent soil moisture, avoiding waterlogging. Pineapples are sensitive to overwatering, so permit the top inch of soil to dry between watering. Rainwater or distilled water proves ideal for irrigation, sidestepping mineral deposit buildup.

5.3. Soil Composition and Fertilization

Preserve well-draining soil with a slightly acidic pH level between 5.5 and 6.5. During the growing season (spring and summer), administer a balanced, slow-release fertilizer to your pineapple plants every 6-8 weeks. Exercise caution with nitrogen, as excessive use can spur excessive foliage growth at the expense of fruit production.

5.4. Vigilant Pest and Disease Management

Maintain a watchful eye on your pineapple plants for pest indications, such as mealybugs and scale insects. Address these issues by wiping them off with a damp cloth or employing organic pest control methods like neem oil or insecticidal soap. While pineapples are generally hardy against diseases, scrupulous care and hygiene are your allies in prevention.

6. Transplanting Young Pineapple Seedlings

As your pineapple plants flourish, they will outgrow their containers or seedling pots. When they reach a height of approximately 8-12 inches and boast a robust root system, it’s time for their transition into larger containers or your garden bed. Handle the fledgling plants with gentleness to avoid harming their delicate roots.

7. Sustaining Mature Pineapple Plants

7.1. Prudent Pruning

Pruning stands as a vital practice to promote healthy growth and thwart the spread of disease. Routinely eliminate dead or yellowing leaves to maintain a clean, disease-free canopy. Employ sharp pruning shears for precise cuts, ensuring sterilization between plants to prevent disease transmission.

7.2. Harness the Power of Mulch

Mulching around the base of your pineapple plants aids in moisture retention, temperature regulation, and weed suppression. Spread a layer of organic mulch, like straw or wood chips, ensuring it avoids direct contact with the plant’s base to prevent rot.

7.3. Providing Adequate Support

As your pineapples progress in their fruiting journey, they may become top-heavy and susceptible to toppling. Counter this by offering support through bamboo sticks or other robust supports. This practice safeguards both the plant and its burgeoning pineapples.

8. Harvesting Pineapples with Precision

Pineapples are ripe for harvesting when their color transitions to a lustrous golden yellow. A gentle squeeze should yield slightly, and a sweet, pineapple fragrance should emanate from the fruit. To harvest, utilize a sharp knife to sever the pineapple from the plant, leaving a small portion of the stem attached to the fruit.

9. Unlocking Pineapple Sweetness

Following harvest, position the pineapples in a warm, sunlit location for a few days to elevate their sweetness. This process, known as “curing,” empowers the fruit to attain its full flavor potential.

10. Savor the Fruits of Your Labor

Few pleasures rival the satisfaction of relishing a pineapple grown with your own hands. Revel in your homegrown tropical delight by incorporating it into various culinary creations, from refreshing fruit salads to pineapple-infused cocktails. Pineapples also lend themselves to savory dishes, such as grilled pineapple salsa or pineapple-glazed chicken.

11. Tackling Common Pineapple Growing Hurdles

Encountering challenges like stunted growth, yellowing leaves, or pest invasions? Consult our troubleshooting section for comprehensive solutions to common pineapple gardening issues. Armed with knowledge and proper care, you can triumph over these obstacles and secure a bountiful pineapple harvest.

Pineapple-Gardening

Frequently Asked Queries

How long does it take for a pineapple to grow?

Pineapples typically take approximately 18-24 months to mature and produce fruit. Patience is key when growing pineapples, but the reward is well worth the wait.

Can I grow pineapples indoors?

Yes, you can grow pineapples indoors with sufficient sunlight and proper care. Ensure they receive the right conditions, including bright light and consistent temperatures.

What is the best time to plant pineapples?

Spring or early summer is the optimal time to plant pineapple tops. This timing allows them to establish strong roots and grow during the warmer months.

Do pineapples require a lot of water?

Pineapples prefer slightly moist conditions but should not be waterlogged. Overwatering can lead to root rot, so it’s crucial to strike the right balance in watering.

Can I plant pineapple crowns directly in the ground?

Yes, you can plant pineapple crowns directly in well-draining soil. However, ensure that the soil is prepared with good drainage to prevent waterlogging, which can harm the plants.

In conclusion, embarking on the journey of growing your own pineapples promises a delightful and fulfilling experience. Armed with the right guidance and a dash of patience, you’re on the cusp of savoring the tropical sweetness of homegrown pineapples. Roll up your sleeves, delve into the realm of pineapple gardening, and prepare to reap the rewards of your very own tropical paradise!

Watermelon

Mastering Watermelon Farming: Your Step-by-Step Guide

Introduction

Watermelons, the quintessential summer delight, grace picnics and backyard barbecues with their juicy sweetness. To embark on your journey from seed to slice, gaining expertise in watermelon farming is the first and most crucial step. In this comprehensive guide, we will delve into every aspect of watermelon cultivation, equipping you with valuable insights and actionable tips to cultivate the perfect watermelons.

Watermelon

Table of Contents

Chapter 1: The Beginning

1.1 Picking the Perfect Spot

The foundation of successful watermelon farming is selecting the right location. Watermelons thrive in well-drained soil with a pH level between 6.0 to 6.8. They demand ample sunlight, ideally basking in 6-8 hours of sunshine daily, with temperatures ranging from 70°F to 90°F (21°C to 32°C). Adequate water sources are non-negotiable due to their high water needs.

1.2 Varietal Versatility

Watermelons come in diverse sizes, flavors, and characteristics. Options include the sweet and seedless “Sugar Baby” and the classic, sizable “Crimson Sweet.” When choosing a variety, factor in disease resistance, yield potential, and the suitability of your local climate.

1.3 Sourcing Superior Seeds

The cornerstone of a bountiful harvest lies in high-quality watermelon seeds. You can procure them from local suppliers, agricultural stores, or reputable seed companies. Ensure your seeds are fresh, disease-free, and boast a high germination rate to optimize your results.

Chapter 2: Soil Preparation

2.1 The Soil Spectrum

Before planting, ascertain your soil’s nutrient content and pH level through a soil test. If necessary, adjust the pH to fall within the ideal range of 6.0 to 6.8. Correct nutrient deficiencies by incorporating suitable fertilizers or organic matter, such as compost.

2.2 Cultivating the Earth

Proper soil preparation is paramount for watermelon cultivation. Begin by tilling the soil to a depth of at least 8 inches, enhancing aeration and root penetration. Enrich the soil with organic matter and compost to bolster fertility, moisture retention, and overall quality.

Chapter 3: Planting Watermelon Seeds

3.1 Nurturing Seedlings

Kickstart your journey by germinating watermelon seeds indoors in seedling trays or pots. This process typically spans 7-10 days. Once your seedlings reach an optimal size, transplant them into your meticulously prepared garden or field, ensuring the threat of frost has passed.

3.2 Spacing and Arrangement

Prudent plant spacing is key to robust watermelon growth. Depending on the variety, allocate 3-4 feet of space between each plant and maintain 6-8 feet between rows. For vining varieties, explore trellising or support structures to economize space and boost air circulation.

Chapter 4: Nurturing Your Watermelon Crop

4.1 Hydration Strategy

Watermelons have an unquenchable thirst, especially during scorching, arid spells. Maintain consistent moisture levels, striving for soil that remains damp but not waterlogged. Drip irrigation or soaker hoses offer efficient watering solutions.

4.2 Nutrient Enrichment

Watermelon plants crave essential nutrients such as nitrogen, phosphorus, and potassium. Administer a balanced fertilizer based on your soil test findings and the plant’s growth stage. Exercise caution with nitrogen, as overindulgence can lead to excessive foliage at the expense of fruit development.

4.3 Warding off Pests and Diseases

Aphids, cucumber beetles, and spider mites are common watermelon foes. Implement pest management strategies like introducing beneficial insects or deploying organic insecticides when necessary. Vigilantly monitor for diseases like powdery mildew and take prompt measures to curtail their impact.

watermelon-farming

Chapter 5: Pruning and Training Techniques

5.1 Precision Vine Pruning

Trimming watermelon vines is a strategic move to regulate growth and channel energy toward fruit production. Eliminate surplus lateral vines and leaves to enhance air circulation and ensure adequate sunlight reaches developing fruit. Employ sharp pruners for precision.

5.2 Elevate with Trellises and Supports

For vining watermelon varieties, trellising or providing sturdy supports is a game-changer. Elevating fruit prevents ground contact, reducing the risk of spoilage and pest infestation. Train vines to ascend trellises or employ slings to cradle hefty fruit.

Chapter 6: The Art of Pollination

6.1 Unveiling Watermelon Pollination

Watermelon development hinges on successful pollination. While bees are primary pollinators, you can also take matters into your own hands. Transfer pollen from male to female flowers using a small brush or cotton swab to ensure fruitful results.

Chapter 7: Harvesting Mastery

7.1 Recognizing Ripeness

The key to exquisite flavor and texture lies in harvesting watermelons at the right moment. Keep an eye out for signs such as a dull skin hue, a textured fruit surface, and a resonant thud when tapped. Additionally, the tendril near the stem should be dry or transitioning to a brown hue.

7.2 The Harvesting Ritual

Employ a sharp knife or pruning shears to sever watermelons from the vine, leaving a short stem intact. Handle these treasures with care during harvesting and transportation to prevent bruising or damage.

Chapter 8: Preservation and Delight

8.1 Savvy Storage Solutions

Post-harvest, safeguard your watermelons in a cool, dry locale or within the refrigerator to extend their shelf life. Adequate ventilation is key to thwart moisture buildup. For optimal taste and quality, consume within a week.

8.2 Culinary Watermelon Adventures

Watermelons dazzle in the culinary realm, offering endless possibilities. Experiment with refreshing watermelon salads, invigorating smoothies, or delectable sorbets to relish the sweet, juicy essence of your homegrown bounty.

Frequently Asked Questions:

What is the best time to plant watermelon seeds?

Watermelon seeds should be planted when the soil temperature reaches at least 70°F (21°C), which typically corresponds to the late spring or early summer months. Ensure that the threat of frost has passed before transplanting seedlings outdoors.

How do I prevent common pests from damaging my watermelon crop?

To deter pests like aphids, cucumber beetles, and spider mites, consider introducing beneficial insects like ladybugs or using organic insecticides. Maintaining good garden hygiene, such as removing debris and weeds, can also help reduce pest populations.

Can I grow watermelons in containers or small spaces?

Yes, you can cultivate watermelons in containers or small spaces. Opt for compact or bush-type watermelon varieties and use trellises or vertical supports to save space. Ensure the containers are sufficiently large and provide proper drainage for successful growth.

How can I tell if a watermelon is ripe for harvesting?

Several indicators signal the readiness of a watermelon for harvest. Look for a dull skin color, a rough texture on the fruit’s surface, and a hollow sound when tapping it. Additionally, the tendril near the stem should be dry or turning brown.

What are some common issues that can affect watermelon plants, and how can I address them?

Watermelon plants may encounter problems like powdery mildew, nutrient deficiencies, or overwatering. To address these issues, implement proper watering practices, apply suitable fertilizers based on soil tests, and monitor your plants for signs of disease, taking prompt action if needed, such as applying fungicides for mildew control.

Conclusion

Armed with this meticulous guide, you’re now poised to master the art of watermelon farming, from pinpointing the ideal spot and selecting the finest seeds to nurturing your crop and indulging in the harvest. Cultivating watermelons is a rewarding endeavor, and with the knowledge bestowed here, you’re well-equipped to cultivate succulent watermelons from seed to slice. Happy farming and even happier savoring!

( To get idea about Rooftop Fruits Gardening: https://bonsainurserybd.com/rooftop-fruit-plantation/ )

Lemon-and-Coffee-weight-loose

Exploring the Incredible Synergy of Lemon and Coffee for Swift Weight Loss

When you’re on a mission to shed those extra pounds swiftly, it can often feel like solving a complex puzzle. However, a captivating strategy that has been gaining traction is the fusion of lemon and coffee. Individually, these ingredients offer unique benefits for weight loss, but when combined, their potential seems to soar. In this article, we will delve deep into the dynamic partnership between lemon and coffee and how it can accelerate your weight loss journey.

Lemon and Coffee

Introduction

Many individuals are in pursuit of rapid weight loss, a journey often filled with challenges. One intriguing concept that has captured attention is the combination of lemon and coffee. This blend has garnered popularity due to its perceived effectiveness in aiding weight loss.

Table of Contents

Unveiling the Power of Lemon and Coffee

1. The Marvel of Lemon

Lemons are like miniature powerhouses of health. Packed with vitamin C, they provide significant benefits to your body. Lemons are also renowned for their capacity to rebalance your body’s internal chemistry, enhancing its overall functionality. Furthermore, they have a reputation for promoting digestion and detoxification, facilitating food processing and toxin elimination within your body.

2. The Merits of Coffee

Coffee is celebrated for its caffeine content, a natural energy booster. Caffeine has the remarkable ability to rev up your metabolism, causing your body to burn calories at an accelerated rate.

Synergizing Lemon to Elevate Coffee’s Effects

3.1 Alkalizing Properties of Lemons

Lemons boast natural alkalizing properties that counteract the acidity of coffee. This harmonizes the coffee’s impact on your stomach, minimizing the likelihood of discomfort.

3.2 Detoxification and Enhanced Digestion

Lemon plays a pivotal role in the detoxification process, aiding your body in the removal of harmful substances. Additionally, it promotes efficient digestion, synergizing with coffee’s metabolism-boosting capabilities.

Coffee’s Role in Facilitating Weight Loss

4.1 Supercharging Metabolism

Caffeine, a key component of coffee, acts as a turbocharger for your metabolism, elevating the rate at which your body burns calories, even during periods of rest.

4.2 Appetite Suppression

Coffee possesses the remarkable ability to curb your appetite, resulting in reduced calorie intake. This can significantly contribute to your weight loss endeavors.

Embracing the Lemon and Coffee Weight Loss Routine

5.1 Crafting the Perfect Lemon Coffee Blend

Discover the art of preparing this unique concoction for maximum effectiveness in your weight loss journey.

5.2 Timing and Consumption Guidelines

Learn about the ideal moments and methods to incorporate lemon coffee into your daily routine to achieve optimal results.

Potential Considerations and Side Effects

6.1 Monitoring Caffeine Sensitivity

For some individuals, excessive caffeine intake can lead to sensitivity issues. We’ll discuss the importance of monitoring your caffeine consumption and making necessary adjustments.

6.2 Safeguarding Dental Health

While enjoying lemon coffee, it’s crucial to be mindful of its potential to stain your teeth. We’ll provide guidance on preserving your dental health.

Real Success Stories and Testimonials

Explore inspiring real-life accounts of individuals who have successfully integrated lemon coffee into their weight loss journeys. Their experiences can serve as a wellspring of motivation and inspiration.

Tips for Seamlessly Incorporating Lemon Coffee

Gain practical insights into seamlessly integrating lemon coffee into your daily life, making it a sustainable component of your weight loss strategy.

Dispelling Myths Surrounding Lemon Coffee

9.1 Lemon Coffee as a Magical Solution

We will debunk the misconception that lemon coffee alone is a miraculous remedy for weight loss. Setting realistic expectations is key to achieving your goals.

9.2 Sustainability and Long-Term Success

We’ll emphasize the significance of establishing achievable long-term goals for enduring success on your weight loss journey.

Seeking Professional Guidance

10.1 Consult a Nutritionist or Dietitian

Consider seeking guidance from nutrition experts who can devise a personalized plan tailored to your unique needs and objectives.

10.2 Medical Advice

If you have underlying health conditions, consulting a healthcare professional is imperative to ensure that your weight loss approach is both safe and appropriate.

Conclusion

In conclusion, the fusion of lemon and coffee offers an exciting avenue for those seeking swift weight loss. However, it is essential to approach this regimen thoughtfully, taking into account your individual requirements and seeking professional guidance when necessary.

Lemon-and-Coffee-weight-loose

Frequently Asked Questions

Is it Safe to Consume Lemon Coffee Daily?

In general, daily consumption is safe, but monitoring your body’s response is crucial. If you have concerns, consult a healthcare provider.

Can I Opt for Decaffeinated Coffee?

Decaffeinated coffee is a viable option for those sensitive to caffeine, although its weight loss effects may be less pronounced.

Are Specific Lemon Varieties Recommended?

Any fresh lemon will suffice; there is no need for a particular type.

Can I Sweeten My Lemon Coffee?

It’s acceptable to add a touch of natural sweetness, but exercise caution with added sugars.

When Can I Expect to Witness Results?

Results may vary, but maintaining consistency and adhering to a balanced diet are fundamental to achieving success.

Unlocking the secrets of lemon and coffee synergy for rapid weight loss is an exhilarating journey that demands careful consideration and unwavering dedication.

( To explore Lemon Gardening in home : https://bonsainurserybd.com/lemons-galore-the-ultimate-diy-guide/ )

Garden-design-interior

Elevate Your Outdoor Space: Unveiling Garden Design Ideas for Your Personal Oasis

In today’s fast-paced world, the allure of a tranquil and picturesque garden space has never been more enticing. Garden design inspiration holds the power to transform your outdoor area into a serene retreat, capable of revitalizing your spirit, tantalizing your senses, and forging a stronger connection with the natural world. Whether you possess an expansive backyard or a cozy balcony, this article will serve as your compass, guiding you through the process of crafting a garden that harmonizes with your unique personality and style.

Garden-design

Introduction

Visualize yourself stepping into your garden, enveloped by the sweet fragrance of blooming blossoms, the gentle murmur of trickling water in the backdrop, and the sun’s warm embrace. A well-thought-out garden transcends the realm of mere greenery; it manifests as a sanctuary where you can escape the rigors of daily life and draw inspiration from the boundless beauty of nature.

Table of Contents

Deciphering Your Garden Space

2.1 Analyzing Size and Layout

Before embarking on your quest to realize your dream garden, it is imperative to grasp the precise dimensions and layout of your outdoor space. Accurate measurements will empower you to maximize the potential of every available inch. The shape of your garden—whether rectangular, square, or irregular—will significantly influence your design choices.

2.2 Sunlight and Shade Assessment

Sunlight exposure stands as a pivotal factor in garden design. Dedicate time to observe the sun’s journey across your garden throughout the day. This astute observation will elucidate which areas bask in full sunlight, experience partial shade, or immerse in deep shade. Different plant varieties thrive under distinct light conditions, making this information indispensable for your plant selections.

Defining Your Garden Style

Your garden should be an authentic reflection of your personal tastes and inclinations. Consider these prevalent garden styles:

3.1 Formal Elegance

Formal gardens exude refinement through clean lines, symmetrical arrangements, and meticulously manicured hedges. They frequently showcase geometric patterns and cultivated plantings like roses and topiaries.

3.2 Charming Cottage Gardens

Cottage gardens possess an informal and enchanting allure, featuring a medley of flowers, herbs, and often, edible plants. Their relaxed, “wild” appearance resonates with those who gravitate towards a more naturalistic garden style.

3.3 Zen Serenity

Zen gardens epitomize minimalism and tranquility. They typically incorporate gravel or sand, strategically positioned rocks, and sparse plantings. Zen gardens are the embodiment of simplicity and are ideal for individuals seeking inner serenity.

Choosing the Right Flora

4.1 Embrace Native Plant Varieties

Opting for native plants is an environmentally conscious decision, as they are acclimated to your region’s climate and necessitate minimal maintenance. Moreover, native plants contribute to the local ecosystem by supporting indigenous wildlife.

4.2 Perennials vs. Annuals

Perennials grace your garden year after year, while annuals provide bursts of vibrant, seasonal color. A harmonious blend of both can bestow upon your garden a continuous kaleidoscope of blossoms throughout the seasons.

4.3 Crafting Color Schemes

Contemplate the colors that resonate most harmoniously with your persona and garden style. Thoughtfully coordinated color schemes can yield a unified and visually appealing landscape.

Elevate Your Outdoor Haven: The Quest for Garden Design Inspiration

As you embark on your garden design odyssey, remember that your outdoor space serves as an extension of your home—a canvas awaiting your artistic touch. It offers you the opportunity to express yourself through the medium of plants, colors, and design elements. Whether you possess the green thumb of a seasoned gardener or are a fledgling enthusiast, your garden has the potential to become a perpetual source of inspiration and delight.

Garden-design-interior

Conclusion

The process of designing your garden is an immensely gratifying venture. It enables you to establish a profound connection with nature, channel your creativity, and craft a haven of tranquility. By adhering to the principles delineated in this article, you possess the means to transform your garden into an oasis of beauty and inspiration.

( To know more about Gardening Idea: https://bonsainurserybd.com/gardening-ideas/ )

FAQs

What are the ideal plants for novice gardeners?

For individuals new to gardening, beginner-friendly plant options include marigolds, pansies, and zinnias for floral charm, as well as tomatoes, basil, and mint for delectable edibles.

How can I cultivate an eco-friendly garden?

To foster an eco-conscious garden, adopt organic fertilizers, implement water-saving techniques such as drip irrigation, and embrace native plant species to bolster local wildlife

What are the mental health benefits of gardening?

Gardening has been scientifically proven to alleviate stress, enhance mood, and nurture an overall sense of well-being. It fosters a therapeutic communion with the natural world.

Are there low-maintenance garden design alternatives?

Absolutely! You can opt for low-maintenance plant varieties and incorporate hardscape elements like gravel pathways and stone features to curtail upkeep demands.

How can I create an economically feasible garden?

Commence with modest aspirations, cultivate plants from seeds, and contemplate the use of recycled materials for garden structures and embellishments. Diligent planning and do-it-yourself ingenuity can significantly economize your garden endeavors.