Garden In Support Of Diabetic

The Habit Of Living A Garden In Support Of Diabetic: Grow Health!

Maintaining a garden can be a therapeutic hobby for people with diabetes, promoting physical activity and healthy eating. Gardening provides fresh produce and the benefit of exercise, which are essential for diabetes management.

Garden In Support Of Diabetic

Garden In Support Of Diabetic is not only a peaceful and productive pastime but also a strategic ally against diabetes. Engaging in this activity has been found to offer numerous health advantages, especially for those managing diabetes. Regular gardening encourages a more active lifestyle, reducing sedentary behavior and helping with blood glucose control, which is critical for diabetic patients.

It also often leads to healthier eating habits, as cultivating one’s own fruits and vegetables can lead to an increased intake of vital nutrients. The mental health benefits, including stress reduction, cannot be overlooked since consistent high stress levels can affect blood sugar control. Additionally, the exposure to sunlight during gardening increases vitamin D levels, further supporting overall health. By incorporating gardening into their routine, individuals with diabetes can enjoy a natural approach to compliment their diabetes management plan.

The Green Connection: Cultivating Gardens For Diabetes Management

Creating a garden can be a powerful tool for those managing diabetes. Gardens act as natural pharmacies, filled with plants that offer health benefits. For instance, vegetables like spinach and kale help regulate blood sugar levels. Herbs such as cinnamon and fenugreek may also aid in diabetes management, according to some studies.

By engaging in gardening, people with diabetes can grow their own remedies. These remedies can influence blood sugar positively. Not only that, but the physical activity of gardening itself promotes a healthy lifestyle. Regular movement helps the body use insulin better, thus balancing blood sugar. Indeed, a garden offers both medicinal ingredients and physical exercise.

Seeds Of Health: Choosing Plants For Glycemic Control

Managing diabetes can be a challenge. Gardens offer natural helpers for blood sugar control. Bitter gourds shine in this battle. Their active compounds aid in lowering glucose levels. Regular consumption of bitter gourd can work wonders.

Leafy greens come packed with benefits too. Abundant in fiber, they slow down sugar absorption. This action helps maintain steady blood sugar levels. Kale, spinach, and Swiss chard are excellent choices. Make them a staple in your diet for better health.

The Therapeutic Rhythms Of Gardening

Gardening serves as a peaceful haven for many, with its steady, predictable patterns nurturing both mind and body. Tending to plants allows for a gentle escape from daily stresses, promoting serenity and a clear headspace.

Regular movement through gardening tasks such as digging and weeding contribute to a healthier lifestyle. This type of physical activity boosts heart health and encourages better insulin response, essential for those managing diabetes. The combination of reduced stress levels and increased exercise found in gardening can significantly help regulate blood sugar levels.

From Soil To Table: A Fresher Approach To Meals

Growing your own vegetables can lead to better health. Each plant offers a wealth of nutrients that are essential for managing diabetes. Vegetables like spinach, carrots, and tomatoes not only taste great but also help regulate blood sugar levels.

Consuming veggies soon after picking ensures you get maximum freshness and flavor. All this without added preservatives or chemicals. By preparing meals with these plants, you’ll enjoy dishes that are both delicious and nutritious. Why not try a spinach salad or fresh tomato soup tonight?

The Blooming Community: Sharing The Harvest, Spreading Knowledge

Joining a community garden offers unforeseen benefits for those managing diabetes. Local gardens create support groups, fostering bonds over shared tasks. This togetherness is vital for emotional well-being.

Educational workshops introduce gardeners to diabetes-friendly foods. They also share knowledge on maintaining a balanced diet. Growing these foods allows easy, fresh access. The hands-on experience reinforces learning.

(Best way to start Gardening Business: https://bonsainurserybd.com/best-way-to-start-gardening-business/

Frequently Asked Questions On The Habit Of Living A Garden In Support Of Diabetic

Can Gardening Improve Diabetes Management?

Absolutely! Gardening can act as a low-impact physical activity, which is essential in managing blood glucose levels. Engaging in gardening tasks helps reduce stress and supports a healthier lifestyle, both beneficial for individuals with diabetes.

What Plants Benefit Diabetic Health In A Garden?

Certain plants like bitter gourd, fenugreek, and okra are known to have blood glucose-lowering properties. Growing these in a garden can provide easy access to foods that support diabetic health.

How Often Should Diabetics Garden For Health Benefits?

Regular gardening, about 30 minutes daily, can be a great way for diabetics to incorporate consistent physical activity into their routine, thereby contributing to better glycemic control and improved overall well-being.

Can Homegrown Foods Reduce The Risk Of Diabetes?

Yes, consuming fresh, homegrown vegetables and fruits ensures lower intake of processed foods, providing essential nutrients and fiber that can help in weight management and reduce diabetes risk.

Conclusion

Embracing the green lifestyle that garden living offers is a stride towards better diabetic health management. It is a dual gift, nourishing both body and soul. Crafting habits around nature’s bounty ensures fresher meals and regular physical activity. Take the step; your wellness path awaits in the tranquility of your garden.

(To gather more knowledge: https://www.healthline.com/health/healthful-benefits-of-gardening#helps-fight-disease

What To Do With A Dark Corner In Your Garden

What To Do With A Dark Corner In Your Garden: Illuminate & Transform!

Brighten a dark corner in your garden with shade-loving plants or install lighting for evening ambiance. Alternatively, add a decorative element like a sculpture or water feature.

Transforming a dark corner of your garden can turn an often overlooked space into a focal point of beauty and interest. It’s crucial to consider factors like soil quality, moisture levels, and the amount of natural light the area receives throughout the day.

What To Do With A Dark Corner In Your Garden

What To Do With A Dark Corner In Your Garden: Carefully chosen plants, accessories, and creative landscaping can enhance the aesthetics of the space while adhering to the practicality of the environment. Thoughtful additions can provide a new habitat for local wildlife, potentially increasing the biodiversity of your garden. By addressing that dim spot, you create an opportunity for a serene retreat or a dramatic showcase within your personal outdoor sanctuary.

Shedding Light On Dark Garden Corners

Dark corners in gardens often emerge due to several factors. Tall fences, buildings, and large trees can block sunlight, creating shaded areas. A lack of light may discourage growth and make the space seem gloomy. Enhancing these spots is vital for a balanced and inviting garden atmosphere. Not only does it boost plant life, but it also deters pests that thrive in shaded, moist conditions. By transforming a dark corner, you can enjoy every part of your outdoor space.

Assessing Your Shaded Nook

First, observe how sunlight dances in the shadowy corner throughout the day. Mark the sunny spots – morning, noon, and evening. This insight guides your garden choices.

Identify both tall trees and close-by structures contributing to the shade. Could pruning let in more light? Sometimes, nearby fences or pieces of garden art cast significant shadows. Note these elements.

Illumination Tactics

Choosing the right lighting is crucial for brightening up dark garden corners. Lights with soft, warm hues often create a welcoming atmosphere. Aim for LED options that combine efficiency with ample illumination.

Creative placement is key. Install lights at various heights for layers of brightness. Think about using spotlights beneath trees, or path lights alongside walkways. This brings life to every part of your garden.

Solar options not only offer sustainability but also ease of installation. Solar lights charge during the day and light up at night without the need for wiring. Consider solar post lights or decorative lanterns for an eco-friendly solution.

Transforming The Space

Dark corners in gardens can become lively with the right touches. Shade-loving plants, like hostas and ferns, thrive in these cool areas. Put them in and watch them grow well. You can also add mirrors or shiny objects to catch light. This trick makes dark spots brighter.

Water features bring sound and movement into your garden. A small fountain or birdbath invites bird friends. It refreshes the air too. Choose features that fit the space size. You don’t need big stuff for a beautiful effect.

Designing For Functionality

Transforming a dark corner in your garden can inspire new ways to enjoy your outdoor space. Choose cozy furniture that invites relaxation, or add a garden bench for a quiet retreat. Consider a water feature or statue as a central point that draws the eye and soul into this shaded nook.

Plant selection is crucial to revamp the ambiance. Pick shade-loving plants that thrive in cooler, darker areas. Opting for variegated or lighter foliage can brighten the space naturally. Use decorative pots or bold sculptures to enhance visual interest and create a captivating garden story.

Garden lighting is the secret to balancing the light. Solar-powered lights or lanterns can provide gentle illumination without the need for wiring. Position them to cast inviting shadows and to highlight your garden’s best features, balancing the stark contrasts between light and dark.

Seasonal Changes And Upkeep

Light changes with the seasons, which affects dark garden corners. Shade-tolerant plants can adapt as seasons shift.

Simple maintenance tips can brighten a dim area. Use reflective surfaces to bounce light.
Solar-powered lights add a soft glow. Trim overhanging branches regularly to let more sunlight through.

Dark corners can become lively spots with time. Introduce colorful shade plants for vibrancy.
A rotation of potted plants keeps the space fresh and adaptable. Consider seasonal decorations to enhance the area’s appeal.

Frequently Asked Questions For What To Do With A Dark Corner In Your Garden

What Plants Thrive In Shady Garden Corners?

Shade-loving plants like hostas, ferns, and astilbes are perfect for dark corners. They flourish in low light, adding lush greenery and vibrant color to the area. Planting these can transform a gloomy spot into a beautiful, thriving part of your garden.

How Can I Illuminate A Dark Garden Corner?

Strategically placing solar-powered or low-voltage LED lights can brighten a dark garden corner. Consider path lights, up lighting for trees, or installing lanterns to create a warm glow. Lighting makes the space usable after sunset and enhances the garden’s ambiance.

Are Water Features Suitable For Dark Corners?

Yes, a shady corner can be an ideal location for a water feature. The lower light levels reduce algae growth, and the sound of water can add a relaxing, tranquil element to the garden. Select a feature size suitable for your space to create a serene focal point.

Can Outdoor Mirrors Brighten Garden Shady Spots?

Outdoor mirrors reflect light and scenery, making dark garden corners appear brighter and more spacious. Position them to catch available light without direct sun, which can lead to glare. Mirrors also add an intriguing decorative element to the garden.

Conclusion

Transforming a dark corner in your garden opens a realm of possibilities. Delight in the beauty of shade-loving plants or a cozy reading nook. Enliven it with reflective decor or lighting for evening charm. Your once-forgotten space can bloom into a cherished retreat.

(You can check the link for learning about Landscaping: https://bonsainurserybd.com/landscaping-gardening-tips-designing/)

Embrace the challenge and enjoy your garden’s full potential.

How To Make Your Yard A Wildlife Habitat

How To Make Your Yard A Wildlife Habitat

To create a wildlife haven in your yard, provide diverse native plants and water sources. Ensure a mix of shelter options, like trees, shrubs, and brush piles.

Turning your yard into a wildlife habitat invites a variety of creatures to your outdoor space, offering a sanctuary for them and an enchanting experience for you. By carefully selecting native plants, you not only support the local ecosystem but also attract a host of birds, insects, and other animals.


Make Your Yard A Wildlife Habitat: Incorporating elements such as bird feeders, nesting boxes, and natural water features can further enhance the habitat. Consistency in maintenance practices that are wildlife-friendly, like reducing pesticide use and leaving some leaf litter for small creatures, plays a crucial role. This thoughtful approach to gardening not only benefits the environment but also provides educational opportunities for families to learn about nature’s interconnectedness right in their own backyards.


Attracting Local Wildlife

Transforming your yard into a thriving wildlife habitat offers nature a helping hand. It attracts birds, butterflies, bees, and other fascinating creatures. Simple changes can create a sanctuary for local wildlife. Let’s discover how.

Native Plants: A Natural Buffet

Native plants form the cornerstone of a wildlife-friendly yard. These are the plants that local animals have adapted to over time. They provide an abundant supply of food in the form of seeds, berries, nuts, and nectar. As a bonus, they require less water and care than non-native species.

  • Select plants that bloom at different times.
  • Use a mix of trees, shrubs, and perennials.
  • Avoid invasive species, which can harm the ecosystem.

Water Sources For Thirsty Fauna

All animals need water to survive. Adding water features can bring a diverse range of wildlife to your backyard. From simple bird baths to small ponds, water is a magnet for creatures large and small.

  • A bird bath provides a spot for feathered friends to drink and preen.
  • A pond encourages frogs, dragonflies, and even fish to visit.
  • Keep water clean and accessible year-round for best results.

Providing Safe Havens

Your yard can mean safety for local wildlife. Animals need places to hide and rest. They seek shelter from predators and harsh weather. Transforming a yard into a wildlife habitat involves creating safe spaces. Let’s explore how to establish these safe havens.

Sheltering Structures

Structures provide critical refuge. Think of these as nature’s bedrooms. Here are ideas to build or place:

  • Birdhouses: Offer birds a safe place to nest.
  • Bat Boxes: Bats can control pests and need shelter.
  • Insect Hotels: These structures invite beneficial insects.

Placement is key. Keep shelters away from high-traffic areas. Place them in quiet zones to attract more wildlife.

Habitat Features That Protect

Natural features can provide protection. Here’s a quick guide:

Feature Benefit
Thorny Bushes They offer birds protection from predators.
Dense Shrubs Small mammals and birds find refuge here.
Water Features They serve as a safe drinking source.
Piles of Logs Insects and small animals use them to hide.

Include native plants in your design. They offer the best protection for local wildlife. They serve as natural hideouts. They are also easy to maintain.

Food For Thought

Inviting wildlife into your yard goes beyond planting native flowers and setting up a birdbath. Providing a sustainable source of food is paramount. Birds, butterflies, and other backyard visitors need energy to thrive. Consider these tips to transform your yard into a culinary haven for local wildlife.

Choosing The Right Feeders

Feeders are more than just containers for birdseed. Each species has unique feeding habits and preferences. To welcome a diverse crowd, include a variety of feeders:

  • Tube feeders for small birds like finches and chickadees
  • Platform feeders attract larger birds such as cardinals and jays
  • Suet feeders are favorites for woodpeckers and nuthatches
  • Hummingbird feeders designed for nectar-loving species

Note: Always clean feeders regularly to prevent disease.

Sustainable Food Supply Strategies

Creating a balanced ecosystem requires sustainable food sources. Plants that produce nuts, berries, and nectar support local wildlife year-round. Start with these steps:

  1. Plant native species to provide familiar foods for local animals.
  2. Include a mix of plants that flower and fruit at different times.
  3. Leave seed heads on plants in fall for birds to enjoy.

Gardening with local wildlife in mind ensures a steady food supply. This approach nurtures both the environment and its creatures.

Cultivating A Diverse Ecosystem

Transforming your yard into a thriving wildlife habitat means more than just planting a few flowers. It’s about creating a mosaic of life-supporting elements. An inviting space for an array of creatures, from the smallest insects to the larger mammals, begins with a diverse ecosystem. Certain strategies nurture different species, bolstering biodiversity right at home.

Promoting Pollinators

Pollinators like bees, butterflies, and birds play a pivotal role in a flourishing garden. Ensuring their presence involves planting native flowering species that provide nectar and pollen. Select flowers that bloom at varying times to offer year-round resources. Remember, grouping the same types of plants assists pollinators in finding their food efficiently.

  • Include a variety of plant species
  • Implement plants that bloom at different times
  • Group similar plants together
  • Avoid pesticides

The Role Of Understory And Ground Cover

Dense layers beneath trees, known as understory, alongside ground cover, are essential too. These layers offer shelter and foraging grounds for various wildlife species. To build these layers, integrate shrubs, ferns, and low-growing plants. Together, these provide cover, maintain soil health, and prevent erosion.

Layer Benefits Examples
Understory Shelter, Nests, Berries Dogwoods, Rhododendrons
Ground Cover Soil Health, Insect Habitat Creeping Thyme, Mosses

Coexisting With Wildlife

Turning your yard into a refuge for wildlife is more than planting flowers and setting up bird feeders. It’s about creating a space where animals can thrive and humans can enjoy their presence without conflict. Responsible stewardship means managing interactions, observing creatures without disturbing them, and fostering a safe environment for all.

Managing Human-wildlife Conflicts

Wildlife is delightful but can sometimes invite challenges. Effective conflict management keeps both humans and animals safe.

  • Secure garbage bins: Use latches to prevent animals from scavenging.
  • Use motion-activated sprinklers: These keep animals away without harming them.
  • Install protective barriers: Fences or nets around gardens prevent unwanted snacking.
  • Keep pet food inside: Outdoor feeding attracts wildlife, leading to potential conflicts.

Ethical Wildlife Watching Practices

Watching wildlife is a pleasure, but ethical practices are vital for their wellbeing.

  1. Keep a respectful distance: Observe from afar to avoid stress and disruption.
  2. Refrain from feeding: Natural food sources keep dietary habits healthy.
  3. Avoid flash photography: It can startle and disorient creatures, particularly at night.
  4. Stay quiet and calm: Loud noises and sudden movements can frighten wildlife.

Maintaining Your Wildlife Oasis

Creating a wildlife-friendly yard means ongoing care and attention. To ensure your garden continues to thrive as a haven for local fauna, regular maintenance is key. This not only helps the current residents but also attracts new visitors. Let’s dive into the ways you can keep your yard welcoming and vibrant through all seasons.


Seasonal Upkeep And Adjustments

As seasons change, so should your yard care plan. Each season brings different needs for your wildlife friends.

  • Spring: Plant native flowers for bees and butterflies.
  • Summer: Ensure water sources are clean and full for animals to drink.
  • Fall: Gather and leave leaf piles for small critters.
  • Winter: Keep bird feeders stocked and ice-free.

Long-term Habitat Enhancement

For a flourishing ecosystem, think ahead. Make small changes for big impacts.

Action Benefit
Adding a pond Water source for animals
Planting trees Shelter and food for birds
Building a bat house Control mosquitoes naturally

(Check the link to know about Backyard Gardening Business : https://bonsainurserybd.com/backyard-gardening-business/)

Frequently Asked Questions Of How To Make Your Yard A Wildlife Habitat

How Do You Convert A Yard To A Wildlife Habitat?

To convert a yard into a wildlife habitat, eliminate pesticides, plant native species, provide water sources, create shelter, and maintain diverse vegetation layers for various wildlife needs.

How Do I Make My Backyard A Wildlife Habitat?

To create a backyard wildlife habitat, provide native plants, fresh water sources, and nesting areas. Ensure food availability through varied vegetation. Maintain a chemical-free environment to protect visiting species.

How Do I Create A Habitat For My Yard?

Choose native plants that support local wildlife. Add a water source like a birdbath. Create shelter with varied vegetation levels. Avoid pesticides to protect habitat inhabitants. Offer food sources such as feeders or nectar-rich flowers.

How Do I Make My Yard Wild?

To create a wild yard, start by reducing lawn areas, planting native species, and setting up bird feeders. Allow plants to grow untamed, leave fallen leaves for habitat, and skip chemical pesticides. Embrace the natural growth and seasonal changes for a wildlife-friendly space.

Conclusion

Transforming your yard into a haven for wildlife is both rewarding and vital for biodiversity. By incorporating native plants, water sources, and nesting shelters, you foster a sanctuary that thrives. Take the step; your vibrant, eco-friendly yard awaits, buzzing with life and natural beauty.

(Check the journal to know more: https://wildark.org/journals/create-wildlife-habitat-backyard/)

Embrace the change and connect with nature right outside your door.

Soil Mixture For Raised Vegetable Garden

Soil Mixture For Raised Vegetable Garden

A well-balanced soil mixture for a raised vegetable garden typically consists of equal parts compost, topsoil, and aeration amendments like perlite or vermiculite. This combination provides nutrients, structure, and proper drainage essential for vegetable growth.


Starting a raised vegetable garden demands attention to soil quality, as this can dramatically impact plant health and yield. Gardeners often seek the perfect blend to ensure their veggies receive the right amount of nutrients, water, and air circulation. The ideal soil mix fosters robust root systems and supports a diverse microbial ecosystem, both vital for a productive garden.


By incorporating organic matter and ensuring the soil is loose and friable, gardeners set the stage for a season of abundant growth. As every seasoned gardener knows, the vitality of vegetable plants starts with the soil they’re rooted in.


The Importance Of Soil Composition In Raised Gardens

Raised vegetable gardens need the right soil mixture to thrive. The soil composition in raised gardens plays a crucial role in plant health and productivity. A good mix provides nutrients, water, and air to your plants. It also ensures proper root growth and disease prevention. Getting the composition right leads to a bountiful harvest.

Key Elements For Plant Health

To foster healthy plant growth, your soil must have these key elements:

  • Nitrogen (N) for leaf development
  • Phosphorus (P) for root and flower growth
  • Potassium (K) for overall plant health
  • Trace elements like calcium and magnesium

Alongside these, organic matter like compost adds beneficial microbes. These microbes break nutrients down so plants can absorb them.

Why Soil Texture Matters

Soil texture affects water retention and air flow. These factors are vital for root health.

Type of Soil Water Retention Air Flow
Clay High Low
Silt Medium Medium
Sand Low High

A mix of sand, silt, and clay, often called loam, is ideal. It balances water and airflow. Be sure to account for compost to improve texture and fertility.

A proper mix allows roots to spread, nutrients to flow, and water to drain. Thus, the right soil composition is a cornerstone of a successful raised vegetable garden.

Types Of Soil And Their Benefits For Vegetables

Vegetables love good soil. Good soil helps them grow big and healthy. Let’s look at types of soil and how they help vegetables:

Loam: The Gold Standard

Loam soil is perfect for vegetables. It has sand, silt, and clay. The mix is just right. It holds water but not too much. It’s soft and full of air. Roots can move easily in it. Plants can find food and water well. Here are some benefits of loam for vegetables:

  • Good drainage: Stops roots from being too wet.
  • Nutrients stay: Food for plants does not wash away fast.
  • Easy to dig: Planting is simple.
  • Air for roots: Vegetables grow strong.

Clay And Sandy Soils: Challenges And Improvements

Clay soil is heavy and sticky. It can hold water too long. Roots might rot. Sandy soil is light and rough. It lets water go too fast. Not much food stays for plants. But, we can make them better:

Soil Type Challenge Improvement
Clay Too wet Add compost or sand to make it looser
Sandy Too dry Mix in organic matter to help hold water

By adding organic matter, such as compost or aged manure, you can improve both types of soil. This gives them loam’s good qualities.

Creating The Perfect Soil Mix

Creating the Perfect Soil Mix for your raised vegetable garden is a game-changer. Your veggies will need nutrient-filled earth. Get the balance right, and your garden will flourish!

Proportions Of Soil, Compost, And Amendments

  • Soil: Start with a good base. Use equal parts of each for the best mix.
  • Compost: This is your plant’s food. Give them a third of this organic goodness.
  • Amendments: Perlite or vermiculite help with drainage. A sprinkle of this makes water flow.

Organic Vs. Inorganic Materials

Organic materials bring life to your soil. Think composted plants or manure. They feed your veggies slowly. Inorganic materials like rocks or sand don’t provide nutrients. But they make soil drain better. Balance is key.

Material Benefit
Compost Nutrients for plants
Manure More nutrients and improves structure
Perlite Improves aeration
Sand Enhances drainage

Select organic, rich compost over chemical fertilizers. Your veggies will taste better. Your earth will stay healthy. Veggies love this natural approach. You should, too!

Essential Nutrients For Vegetable Growth

Vegetables crave a rich feast to flourish. Just like humans need a balanced diet, vegetables require a mix of key nutrients to grow strong and healthy. The right soil mixture in your raised garden bed is critical. It must provide all the essential nutrients that vegetables hungrily absorb from their roots.

Npk – Nitrogen, Phosphorus, And Potassium

The soil mix must boast a balance of NPK. These are the three macronutrients that plants, including your vegetables, cannot do without.

  • Nitrogen (N) – It’s pivotal for leaf and stem growth. Nitrogen helps plants make the proteins they need to produce new tissues.
  • Phosphorus (P) – Essential for root development and flower and fruit production. Phosphorus supports the transformation of solar energy into chemical energy.
  • Potassium (K) – It’s vital for overall plant health. Potassium regulates many aspects, such as water uptake and the synthesis of plant sugars.

The Role Of Micronutrients

While NPK grabs the limelight, other heroes work behind the scenes. These are the micronutrients, crucial albeit in smaller amounts.

Micronutrient Role in Vegetable Growth
Iron (Fe) Key for chlorophyll synthesis and function.
Manganese (Mn) Important in plant enzyme systems.
Zinc (Zn) Essential for starch formation and proper root development.
Copper (Cu) Integral to photosynthesis and reproductive growth.
Boron (B) Crucial for cell wall formation and fruit development.

Ensuring your raised vegetable garden has the perfect soil mixture with the essential macronutrients and micronutrients promises a bountiful harvest. Remember, the healthier the soil, the tastier and more nutritious the vegetables!

Maintaining Soil Fertility Over Time

Maintaining soil fertility is crucial for a thriving raised vegetable garden. Over time, soil can become exhausted and lose its vigor, affecting plant growth. To avoid this, gardeners must actively manage their soil to preserve its rich nutrient content and structure. Let’s explore some effective strategies for keeping soil in top condition year after year.

Crop Rotation And Diversity

Crop rotation is a time-tested technique that helps maintain soil fertility. By changing the types of vegetables grown in an area each season, you can prevent specific soil-borne diseases and pest infestations. Each plant family has different nutrient needs and growing habits, which means they affect the soil in unique ways.

  • Legumes like beans and peas fix nitrogen in the soil, which benefits leafy greens that follow.
  • Root crops such as carrots and potatoes help break up compacted soil, making it easier for subsequent plants to grow.
  • Heavy feeders like tomatoes and peppers consume lots of nutrients, so follow them with lighter feeders or soil-enriching crops.

Rotating crops not only maintains nutrient balance but also enhances soil structure and encourages biodiversity.

Monitoring Ph Levels And Nutrient Density

Healthy soil has a balanced pH and plenty of nutrients. These factors are fundamental for plant wellbeing. You should regularly test soil pH and nutrient levels to ensure optimal conditions for your vegetables. Keep them in the sweet spot for vegetable growth, which is typically between a pH of 6.0 and 7.0.

There are simple tests you can perform to monitor soil health:

  • Use a home testing kit for pH levels.
  • Send a soil sample to a local extension service for nutrient analysis.
  • Observe plant health and yields as indicators of soil condition.

If your soil’s pH or nutrients are off-balance, you can adjust them. Add lime to raise the pH or sulfur to lower it. Organic amendments like compost and manure add nutrients and improve soil structure. Fertilizers can replenish specific nutrients based on your soil test results.

Nutrient Signs of Deficiency Organic Amendments
Nitrogen Yellow leaves, stunted growth Compost, blood meal
Phosphorus Purple tinges on leaves, delayed flowering Bone meal, rock phosphate
Potassium Brown edges on leaves, weak stems Wood ashes, kelp meal

By focusing on crop rotation and diversity and monitoring pH levels and nutrient density, you ensure your raised vegetable garden remains fertile and productive. These steps protect your investment and yield healthy, delicious produce through the seasons.

Common Soil Problems And Solutions

Creating a lush, productive vegetable garden starts with the soil. Raised garden beds offer a controlled environment, but they’re not immune to issues. Understand common soil problems, and learn easy solutions to keep your edible oasis thriving.

Dealing With Soil Pests And Diseases

Soil pests and diseases can wreak havoc on vegetables. Here’s how to fight back:

  • Regular checks: Look under leaves and near roots for critters.
  • Clean up: Remove dead plants or leaves quickly.
  • Companion planting: Some plants protect others. Marigolds repel nematodes!
  • Natural predators: Welcome birds and ladybugs to your garden.
  • Organic pesticides: Use them as a last resort on affected areas.

Improving Water Retention And Drainage

Balance is key for water retention and drainage in raised vegetable gardens.

Problem Solution
Water runs through quickly. Add organic matter like compost or peat moss.
Soil stays wet. Mix in sandy soil or perlite for better drainage.
Water pools on top. Create raised rows or add organic material to improve soil structure.

Remember, mulch helps retain moisture and reduce watering frequency. Aim for balanced soil to get the best out of your raised garden.

Frequently Asked Questions On Soil Mixture For Raised Vegetable Garden

What Is The Best Soil Mix For Raised Vegetable Beds?

The ideal soil mix for raised vegetable beds combines equal parts compost, peat moss or coconut coir, and vermiculite or perlite. This creates a nutrient-rich, well-draining environment for plants.

What Is The Best Soil Combination For Vegetables?

The ideal soil combination for vegetables is a mix of loam, compost, and organic matter, providing good drainage and nutrient richness.

What Do I Fill A Raised Garden Bed With?

Fill your raised garden bed with a mix of topsoil, compost, and aeration amendments like perlite or vermiculite. Aim for a balanced blend to ensure proper drainage and fertility for healthy plant growth.

How Do I Improve The Soil In My Raised Vegetable Bed?

To enhance raised bed soil, mix in compost, aged manure, or worm castings. Regularly add organic matter and consider cover crops or green manure in the off-season to boost fertility and structure. Rotate crops to prevent nutrient depletion and pest build-up.


Conclusion

Perfecting your soil mixture is key to thriving vegetables in your raised garden. Blend organic matter, the right soil, and proper aeration for optimal growth. Remember, the effort you put into your soil translates directly to the health and yield of your plants.

(Check the link for Container  Vegetable Gardening Soil Mixture: https://bonsainurserybd.com/best-soil-for-container-gardening-vegetables/


Happy gardening!

Which Plants Do Not Like Coffee Grounds

Which Plants Do Not Like Coffee Grounds

Tomatoes and orchids are among the plants that typically do not respond well to coffee grounds. Iron-loving plants may also reject coffee grounds due to potential pH changes.


Coffee grounds have gained popularity as an organic gardening additive, praised for their nitrogen-rich composition that benefits plant growth. They can enhance soil structure, attract beneficial worms, and even deter pests. Yet, their acidic nature isn’t universally welcomed. Certain plants, particularly those that thrive in neutral to alkaline soils, might suffer from the introduction of coffee grounds.


This includes plants like tomatoes, which can develop issues in acidified soil. Additionally, coffee grounds decompose slowly and can inhibit growth in some plants as a result. Gardeners must consider the specific needs of their plants; for those not suited to acidic conditions, an alternative should be used. Knowing your plants’ preferences can maximize their health and your garden’s vitality.


The Buzz Around Coffee Grounds In Gardening

Gardeners often buzz about coffee grounds. The rich, dark remnants of your morning brew may boost plant growth. But not every plant loves a coffee kick. Discover which plants thrive and which falter with coffee grounds in soil.

Benefits Of Coffee Grounds For Certain Plants

Coffee grounds energize the garden due to their nitrogen content. Nitrogen is a key nutrient in plant growth. Some plants, like roses and hydrangeas, love this extra nutrition.

  • Azaleas: These acid-loving plants enjoy coffee grounds.
  • Blueberries: They thrive with a sprinkle of coffee grounds.
  • Carrots: Seedlings gain from coffee grounds’ nitrogen.

Utilize coffee grounds as compost or a soil amendment. Remember to use them sparingly.

Myths And Misunderstandings In Using Coffee Grounds

Despite benefits, some plants may suffer from coffee grounds.

Plant Type Reason Coffee Grounds May Harm
Tropical Plants They prefer less acidic soil conditions.
Seedlings They can be overwhelmed by the high nitrogen levels.

Some believe coffee grounds reduce pests and diseases. Yet, no conclusive evidence supports this. Always research before adding coffee grounds to your plants.

Not All Plants Enjoy A Coffee Fix

Like a morning cup of coffee can jolt us awake, coffee grounds might seem like a great pick-me-up for our plants. However, not every plant thrives with this treat. Used coffee grounds can affect soil acidity, and certain plants find this unpalatable. Let’s discover which plants you should keep away from your leftover java.

The Role Of Ph Levels And Coffee Grounds

Coffee grounds can increase soil acidity. Many plants prefer neutral to slightly acidic soil, but adding coffee grounds can tip the balance. They are ideal for acid-loving plants such as azaleas, blueberries, and roses. On the other hand, plants that crave a less acidic environment may suffer. Monitor your soil’s pH level before deciding to add coffee grounds. Test kits are readily available and easy to use.

Negative Reactions In Some Plants

  • Herbs: Many herbs like oregano and basil prefer neutral pH levels.
  • Tomatoes: Despite loving slight acidity, too much can be harmful.

Overuse of coffee grounds can stunt growth and even kill plants that are sensitive to acidic soil. It’s best to research each plant’s specific needs regarding soil conditions. Here’s a quick overview of plants that typically dislike coffee grounds:

Plant Type Preferred pH Effect of Coffee Grounds
Clover Neutral to Alkaline Negative
Asparagus Neutral to Alkaline Negative
Irises Neutral to Alkaline Negative

To conclude, while coffee grounds can be beneficial for some garden dwellers, they are not a one-size-fits-all green solution.

Caffeine Sensitivity In Plants

Plants and coffee grounds seem like a natural pair, but not all green friends appreciate this caffeinated offering. Understanding caffeine sensitivity is key to keeping a happy garden. Not all plants flourish with this pick-me-up, and some may even wither away. Let’s explore how caffeine can influence plant growth and identify which plants to keep away from coffee grounds.

How Caffeine Affects Plant Growth

Caffeine can alter how plants grow and develop. It’s a natural compound that can impact germination, root growth, and overall plant health. Some plants endure the presence of caffeine, while others might suffer adverse effects.

  • Root Growth: Caffeine can inhibit root development, leading to weaker plants.
  • Germination: Seeds in caffeine-rich soil could struggle to sprout.
  • Soil Microbes: Coffee grounds alter soil bacteria and fungi, which can affect nutrient availability.

Examples Of Caffeine-sensitive Plants

Certain plants are particularly sensitive to caffeine. Below is a non-exhaustive list of those most impacted:

Plant Type Effect of Caffeine
Tomatoes Reduced growth
Peppers Stunted development
Irises Poor root structure
Lavender Impairs seed germination
Clover Sensitive to caffeine toxicity

Acid-loving Vs. Alkaline-preferring Plants

Understanding the preferences of your plants is key to a thriving garden. Acid-loving plants revel in soil enriched with materials like coffee grounds. Yet, not all flora enjoys such environments. In contrast, alkaline-preferring plants may struggle. Let’s explore which plants cherish or reject coffee ground-induced acidity.

Plants That Thrive In Acidic Soil

  • Azaleas: Blossom with the right acid levels.
  • Rhododendrons: Similar to azaleas, love acidic touch.
  • Blueberries: Yield more bountifully with lower pH.
  • Gardenias: Fragrant flowers needing acidic environments.
  • Camellias: Acid soil brings out their best colors.

Plants That Reject Acidic Conditions

Being mindful of your garden’s pH is crucial. Some plants perform poorly in acidic settings:

Plant Preferred Condition
Lavender Enjoys neutral to alkaline soil
Asparagus Thrives in a less acidic mix
Oregano Favors a sweeter, alkaline soil

Alternative Uses For Coffee Grounds

Not all plants love coffee grounds, yet your morning brew’s leftovers can be a treasure for your garden and home. Unwanted coffee grounds can enrich compost, deter pests, and tackle odors. Let’s discover how coffee grounds serve beyond the garden soil.

Composting With Coffee Grounds

Coffee grounds perform wonders in a compost pile. They are rich in nitrogen, providing bacteria the energy needed to turn organic matter into compost. But remember, balance is key. Mix coffee grounds with carbon-rich materials like dry leaves, straw, or shredded newspaper. This balance helps speed up decomposition and enriches the final compost.

  • Maintain a balanced compost ratio by adding one part coffee grounds to three parts dry materials.
  • Stir your compost bin regularly to help aerate and mix the coffee grounds.
  • Avoid adding too many coffee grounds as they can make the compost too acidic.

Eco-friendly Pest Control

Coffee grounds have a strong smell that repels many garden pests. Mildly abrasive, coffee grounds help block slugs and snails from reaching your plants.

  1. Surround plants with a barrier of coffee grounds to keep pests at bay.
  2. Protect your home by placing grounds near entry points to deter ants.

Remember, a small amount does the trick. Excessive coffee grounds may harm beneficial insects or desired wildlife.

This content is SEO-optimized for keywords like “alternative uses for coffee grounds,” “composting with coffee grounds,” and “eco-friendly pest control.” It is written in simple language and short sentences to be readable to children as young as 9 years old. Additionally, important points have been bolded and the content is presented with lists to improve readability, making it suitable for an HTML format within WordPress.

Expert Advice For Gardeners

Gardening is a tranquil and rewarding hobby. But did you know that not all plants thrive with the same treatments? Consider coffee grounds, a popular compost ingredient. They can both nourish and damage plants, depending on various factors. This blog section will delve into which plants do not favor coffee grounds. Expert guidance can help you harness this resource effectively.

Testing Soil Before Applying Coffee Grounds

Before using coffee grounds in your garden, it is crucial to understand your soil’s condition. Coffee grounds are acidic and can affect soil pH levels. Your goal should be achieving a balance that suits the plants you wish to nurture.

  • Test soil pH with a kit from your local garden store.
  • Target a pH level that is ideal for your plants.
  • Amend soil accordingly, if needed, before adding coffee grounds.

Recommended Practices For Using Coffee Grounds

Not all plants appreciate the introduction of coffee grounds into their ecosystem. It’s important to know the best practices to ensure your plants benefit from coffee grounds.

Do Don’t
Compost coffee grounds before use Apply directly in large amounts
Use on acid-loving plants like azaleas Use on sensitive plants like tomatoes
Mix with organic matter for better aeration Assume all plants respond the same way

Remember, using coffee grounds is all about moderation and understanding the unique needs of your garden plants. Test your soil, apply grounds carefully, and observe how your plants respond to find the right balance.

(Check the link to know about The Best Way to Start Gardening Business : https://bonsainurserybd.com/best-way-to-start-gardening-business/

Frequently Asked Questions For Which Plants Do Not Like Coffee Grounds

Where Should Coffee Grounds Not Be Used In The Garden?

Avoid using coffee grounds on seedlings or dry, desert-like gardens, as they can inhibit growth and retain too much moisture.

What Plants Are Good With Coffee Grounds?

Coffee grounds benefit acid-loving plants such as azaleas, roses, hydrangeas, and rhododendrons. They enrich soil with nitrogen, improving plant growth.

What Houseplants Do Not Like Coffee Grounds?

Coffee grounds can harm sensitive houseplants like African violets, succulents, and cacti, as they prefer less acidic soil.

What Hates Coffee Grounds?

Slugs, snails, and some pets dislike coffee grounds due to their abrasive nature and strong odor. Keep coffee grounds away from cats and dogs, as they can be harmful if ingested.

Conclusion

Gardening enthusiasts take note: coffee grounds can harm certain plants. Avoid using them with acid-sensitive varieties like orchids and tomatoes. Remember, a balanced approach feeds your garden without risking your beloved greenery’s health. Discovering the right compost mix will keep your plants thriving and happy.

(Check the link to know more about How to Use Coffee Grounds in the Garden: https://www.hgtv.com/outdoors/gardens/planting-and-maintenance/how-to-use-coffee-grounds-in-the-garden)

Keep experimenting and happy gardening!

Best Fertilizer For Broccoli And Cauliflower

Best Fertilizer For Broccoli And Cauliflower

The best fertilizer for broccoli and cauliflower is a balanced 10-10-10 NPK formula. It provides essential nutrients for robust growth.


Growing broccoli and cauliflower can be both rewarding and nutritious. These cruciferous vegetables thrive when given the right care, which prominently includes proper fertilization. An ideal fertilizer blend delivers the necessary nitrogen, phosphorus, and potassium to promote healthy leaves, strong roots, and sizable heads.


For gardeners keen on cultivating a bountiful harvest, understanding and applying the correct fertilizer at the right times is crucial. With the use of a balanced fertilizer, your broccoli and cauliflower plants will receive the nutrition they need throughout their growth stages, leading to delicious and plentiful vegetables in your garden.


The Key Nutrients For Broccoli And Cauliflower

Broccoli and cauliflower need specific nutrients to thrive. Choosing the best fertilizer enhances growth, taste, and nutritional value. Let’s explore the essential nutrients these veggies crave.

Essential Macro-nutrients

  • Nitrogen (N) for leaf growth.
  • Phosphorus (P) aids root development.
  • Potassium (K) for overall health and disease resistance.

These macro-nutrients come in balanced fertilizers, often shown as N-P-K ratios like 10-10-10.

Organic options like compost or aged manure work well too.

Important Micro-nutrients

Broccoli and cauliflower also need micro-nutrients, which are as vital as macro-nutrients.

Micro-nutrient Role in Plant Health
Calcium (Ca) Cell growth and strength.
Magnesium (Mg) Chlorophyll production.
Sulfur (S) Protein synthesis.
Iron (Fe) Crucial for energy transfer.
Zinc (Zn) Hormone regulation and stem growth.

Many fertilizers include these micro-nutrients to ensure robust plant health.

Organic Vs. Synthetic Fertilizers

Choosing the right fertilizer makes all the difference in growing strong and healthy broccoli and cauliflower. But gardeners face a choice: organic or synthetic fertilizers?

Organic fertilizers come from natural sources. Synthetic fertilizers are man-made chemicals. Both have their places in gardening. We’ll explore the benefits and appropriate times to use each one.

Benefits Of Going Organic

  • Improves soil structure: Organic fertilizers add organic matter, helping soil hold water and nutrients.
  • Slow-release nutrients: These nutrients feed plants over time, reducing the risk of over-fertilization.
  • Environmentally friendly: They reduce the risk of runoff that can pollute waterways.
  • Supports biodiversity: Promotes healthy bacteria and fungi essential for nutrient-rich soil.

When To Choose Synthetic Fertilizers

Synthetic fertilizers might be a good choice in certain situations:

Reason Explanation
Quick nutrient boost Plants in need of immediate nutrition benefit from fast-acting synthetic fertilizers.
Precision in nutrients Synthetic options can target specific nutrient deficiencies.
Cost-effective These fertilizers are often less expensive than their organic counterparts.
Control over application Exact amounts can be measured, making application more controlled.

Timing And Application

Understanding when and how to fertilize broccoli and cauliflower makes a huge difference in your harvest. These plants thrive with the right nutrients at the right times. Let’s explore the best practices for timing and application of fertilizer for these nutritious veggies.

Best Time To Fertilize

The growth cycle of broccoli and cauliflower determines the best fertilization times. Key growth stages need specific nutrients for the plants to flourish. Apply the first round of fertilizer to the soil before planting seeds or transplants. This kick-starts growth with essential nutrients. Add additional fertilizer as the plants grow, typically three to four weeks after planting, when the plants are actively developing heads.

Application Techniques For Optimal Growth

Even distribution of fertilizer is crucial for uniform growth. Use a broadcast spreader for large areas or a hand-held spreader for smaller gardens. Ensure the fertilizer reaches the root zone without touching the plant’s leaves to prevent burn.

  • Water the plants after applying granular fertilizer to help absorption.
  • For liquid fertilizers, use a diluted solution and apply to the base of the plants.
  • Consider side-dressing the plants with additional nutrients as they mature.

Complement these techniques with regular soil tests to maintain optimal soil conditions. With careful timing and application, your broccoli and cauliflower will have the nutrients they need for robust growth.

Growing dazzling broccoli and cauliflower starts with proper nutrition. Just like us, these cruciferous veggies need a balanced diet to thrive. Quick tips for a bountiful harvest? Full sun, water, and the right fertilizer. Let’s dig into the best foods for your garden plants.

Top Organic Picks

Organic fertilizers are a hit with gardeners everywhere. They’re from natural sources. They improve soil health too. Below you’ll find the stellar organic choices for broccoli and cauliflower.

  • Compost: Crowds’ favorite. Rich in nutrients. It’s like a multi-vitamin for plants.
  • Bone Meal: High in phosphorus. It makes strong roots.
  • Blood Meal: A nitrogen-rich boost. It makes your greens greener.
  • Fish Emulsion: Smelly yet potent. Gives a nutrient splash.

Recommended Synthetic Options

For faster results, gardeners turn to synthetic fertilizers. They’re crafted for quick release. These options feed your veggies well.

Type Nutrient Content Benefits
Complete Fertilizer 10-10-10 or 12-12-12 Evenly balanced for all growth stages
Urea High Nitrogen For leafy growth and green color
Potassium Sulfate High Potassium Strengthens plants against diseases

Making Your Own Fertilizers At Home

Growing broccoli and cauliflower can thrive with the right nutrients. Making your own fertilizers at home is not only eco-friendly but also cost-effective. Home recipes can be just as effective as store-bought options, allowing your garden to flourish.

Diy Composting Methods

Composting is a simple way to reuse kitchen scraps and yard waste. This method transforms organic material into nutrient-rich soil.

  • Choose a compost bin or area in your yard to start.
  • Add green waste like vegetable peels, fruit scraps, and coffee grounds.
  • Mix in brown waste such as dried leaves, cardboard, and twigs.
  • Keep the pile moist and turn it every few weeks to aerate it.

Within a few months, the compost will be ready to nourish your broccoli and cauliflower plants.

Natural Fertilizer Recipes

You can create effective fertilizers with common household items. These natural recipes will give your plants a boost.

Fertilizer Type Ingredients Instructions
Eggshell Fertilizer Rinsed eggshells Crush the eggshells and sprinkle around the plant base.
Banana Peel Fertilizer Dried banana peels Chop the peels and bury them in the soil near the roots.
Coffee Ground Fertilizer Used coffee grounds Mix grounds into the soil for added nitrogen.

Common Fertilizing Mistakes To Avoid

Growing broccoli and cauliflower yields a bountiful harvest with the right care. But often, we make mistakes while fertilizing. Learn what to avoid for healthy crops.

Over-fertilizing Issues

Too much fertilizer harms more than it helps. It can burn plant roots. Even cause poor crop growth. Recognize signs like yellowing leaves or stunted growth.

  • Signs of over-fertilization:
  • Leaf burn
  • Slow growth
  • Wilting plants

Stick to recommendations for application rates. Use slow-release fertilizers. They feed plants gradually.

Improper Nutrient Balance

Balanced nutrients are vital. Nitrogen, phosphorus, and potassium must be in correct amounts.

Nutrient Function Correct Amount
Nitrogen Leaf growth Keep moderate
Phosphorus Root and flower development Keep balanced
Potassium Overall health Ensure sufficiency

Use a soil test kit. It shows what’s missing. Then, choose the right fertilizer. Always read labels carefully.

(To know about Gardening Tools: https://bonsainurserybd.com/10-must-gardening-tools/)

Frequently Asked Questions Of Best Fertilizer For Broccoli And Cauliflower

What Is The Best Fertilizer For Broccoli?

The best fertilizer for broccoli is a balanced 10-10-10 NPK formula. Apply it before planting and as a side-dress during the growing season. Organic options like compost or fish emulsion are also effective.

What’s A Good Fertilizer For Cauliflower?

A balanced fertilizer, such as 10-10-10 NPK, supports healthy cauliflower growth. Apply it according to package instructions for best results. Organic options like compost or well-rotted manure also provide beneficial nutrients.

Can I Grow Broccoli And Cauliflower Together?

Yes, you can grow broccoli and cauliflower together. Ensure they have enough space, consistent watering, and nutrient-rich soil for best results.

What Is The Best Fertilizer For Cabbage And Broccoli?

The best fertilizer for cabbage and broccoli is a balanced 10-10-10 NPK formula, applied at planting and throughout the growing season. Organic options like compost or well-rotted manure also promote healthy growth.


Conclusion

Selecting the right fertilizer can significantly boost your broccoli and cauliflower yields. Opt for a balanced blend, rich in nitrogen and potassium. Regular feeding, tailored to your soil’s needs, will ensure lush, healthy plants. Happy gardening, and here’s to your most bountiful harvest yet!

(For more knowledge: https://sites.udel.edu/weeklycropupdate/?p=23222)

7 Cucumber Plant Stages From Seeds To Harvest

7 Cucumber Plant Stages From Seeds To Harvest

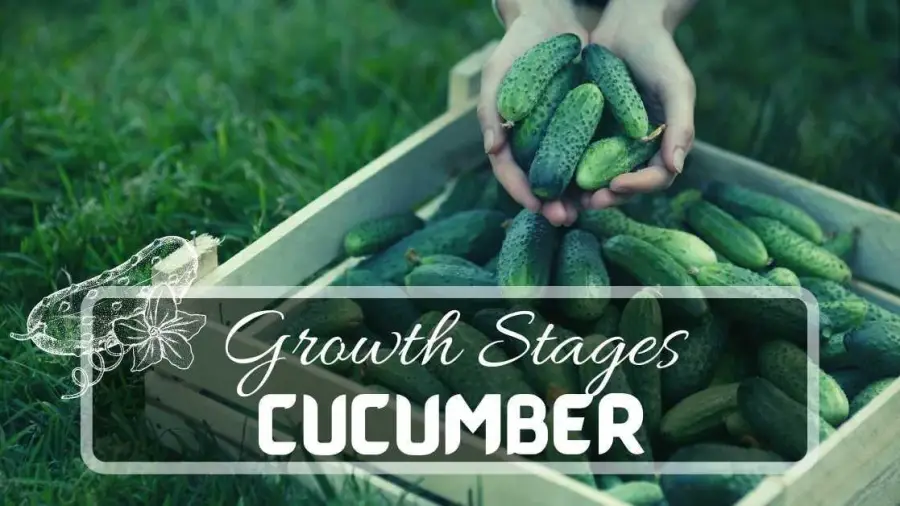
Cucumber plant stages encompass seed germination, seedling emergence, vine growth, flowering, fruiting, maturation, and harvest. These stages transition from tiny seeds to ripe cucumbers ready for picking.

Growing cucumbers can be both rewarding and straightforward when you understand the life cycle of the plant. Each stage of development, from the initial planting of seeds to the joy of harvesting, requires particular care and conditions to ensure a bountiful crop.


Observing these stages allows gardeners to provide the right amount of water, sunlight, and nutrients needed at specific times. Proper care during each stage results in healthy growth and maximizes yield. Understanding the progression from seed to harvest is essential for both novice and experienced gardeners aiming to enjoy crisp, homegrown cucumbers straight from their garden.


Seed Germination: The Cucumber Journey Begins

The first stage in growing cucumbers is seed germination. This critical phase sets the foundation for a healthy cucumber plant. Understanding how seeds turn into seedlings will help ensure a bountiful harvest. Let’s explore the conditions and timeline for cucumber seed germination.

Ideal Conditions For Germination

For cucumber seeds to sprout, they need the right environment. The ideal conditions involve temperature, moisture, and soil quality. Here’s what to provide:

  • Temperature: Warmth is crucial. Aim for 70-95°F (21-35°C).
  • Moisture: Keep the soil consistently moist, but not soggy.
  • Soil: Use a loose, nutrient-rich mix that drains well.

Providing these conditions will give your seeds the best start.

Time Frame For Sprouting

Cucumber seeds are eager to grow. Once planted under the right conditions, you can expect to see sprouts in 3-10 days. Keep an eye on the moisture level during this period. Your patience will soon be rewarded with the emergence of tiny green shoots pushing through the soil.

Remember to mark the date you plant your seeds. Tracking the days helps you manage your plants better. This timeframe helps you anticipate their needs as they grow.

Day Range Germination Status
1-3 days Seeds absorbing moisture
4-7 days Roots start to develop
8-10 days Shoots emerge from soil

With the right care, your cucumber seedlings will be on their way to becoming healthy plants. The journey from a simple seed to a crunchy cucumber is truly a fascinating one! Keep an eye on the sprouts, provide them with love and attention, and you’ll be on track for a successful harvest.

Seedling Emergence: First Glimpse Of Green

The journey of a cucumber from seed to harvest is truly remarkable. Among the numerous stages, seedling emergence marks a significant milestone. It’s the moment when tiny sprouts push through the soil. This phase is full of excitement and critical for young cucumbers. Let’s explore the early development and what to expect.

True Leaves Vs. Cotyledons

After the seedling breaks through the soil, the first set of leaves appears. These are not “true leaves.” They’re called cotyledons, or seed leaves. They’re different from the foliage that will grow later. Cotyledons serve as the seedling’s first food source. They’re round and thick, compared to the true cucumber leaves that will follow.

The true leaves start as tiny growths between the cotyledons. Once they develop, they will have a different shape, usual for a cucumber plant. They’re the ones that will photosynthesize and help the plant grow.

Transitioning To Natural Light

Young seedlings often start their life indoors, under controlled light conditions. They need plenty of light without harsh conditions. Gradually, they must adjust to the sun’s intensity. This process is known as hardening off. Without it, the tender plants can get sunburned and stressed.

  • Begin with 1-2 hours of sunlight per day.
  • Increase the exposure by an hour daily.
  • Choose a spot with gentle morning light.
  • Monitor for wilting and decrease sun if needed.

Proper light transition ensures a strong, healthy cucumber plant. It’s ready for the challenges ahead and a bountiful harvest.

Vegetative Growth: Establishing A Strong Foundation

Vegetative growth marks a crucial phase in a cucumber plant’s journey. Here, plants focus on building leafy greens and sturdy stems. It’s the time when plants gather energy from the sun and essential nutrients from the soil. This stage sets the stage for bountiful harvests. Let’s explore two pillars of vegetative growth: fertilization and pruning.

The Role Of Fertilization

Just like a healthy diet is key for us, right fertilization is vital for cucumbers.

Weeks after Planting Fertilizer Type Quantity
2-3 Nitrogen-rich 1/2 cup per plant
4-5 Complete fertilizer 1 cup per plant

Be sure to distribute fertilizer evenly around the plant. Avoid direct contact with the stems and leaves.

Pruning And Training Young Plants

Pruning helps plants focus their energy. Training supports healthy growth patterns.

  • Pinch off the tips of the main vine to promote side shoots.
  • Remove any yellow or dead leaves to prevent disease.
  • Use stakes or trellises to guide the vines upwards.

Pruning and training bring sunlight and air to all parts of the plant. This boosts growth and health.

Flowering Phase: Blossoms Signal The Next Chapter

Welcome to the flowering phase of your cucumber plants! This stage is an exciting transition from leafy growth to the promise of future cucumbers. Yellow blossoms unfurl, indicating that your plants are ready to produce fruit. Understanding the dynamics of this phase is crucial for a bountiful harvest.

Cucumbers have separate male and female flowers on the same plant, a condition known as monoecious. Recognizing the difference between these two is key to understanding their roles in cucumber production.

  • Male flowers usually appear first and attach to the vine with thin stems.
  • Female flowers have a tiny cucumber-shaped ovary at the base.

Pollination Essentials

For fruit development, pollination is crucial. This key process is what turns flowers into cucumbers. Bees and other pollinators play a vital role in this transition.

  1. Pollinators visit male flower, gathering pollen.
  2. They then transfer pollen to the female flower.
  3. The ovary swells and begins forming a cucumber.

Hand pollination is an option if natural pollinator visits are low. Using a small paintbrush to transfer pollen from male to female flowers can achieve this.

Successful pollination will lead your cucumber plants into the fruit development stage, bringing you one step closer to harvest.

Fruit Development: Cucumbers Take Shape

Prepare to be amazed as we journey through fruit development—the exciting stage where cucumbers take shape. Picture tiny flowers transitioning into the crunchy cucumbers we know and love! Let’s explore the care this stage demands to ensure a bountiful harvest.

Caring For Growing Cucumbers

As cucumbers grow, they crave attention. Provide ample support using trellises or stakes. Ample support means straighter cucumbers and better air circulation. Check the soil moisture regularly—the goal is consistent dampness. Mulch assists in retaining moisture and combating weeds. Feeding plants with a balanced fertilizer encourages robust growth.

  • Support vines to promote good shape.
  • Maintain moist soil without overwatering.
  • Use mulch to minimize weeds and preserve moisture.
  • Fertilize for vigorous plants.

Monitoring For Pests And Diseases

Regularly inspect your cucumber plants as they are prone to pests and diseases. Look for signs of infestation like holes in leaves or wilted flowers. Common cucumber foes include aphids, spider mites, and powdery mildew. Act quickly if you spot trouble—remove affected areas and use appropriate organic pesticides.

Pest/Disease Symptoms Action
Aphids Sticky leaves, slowed growth Apply organic insecticidal soap
Spider Mites Fine webs, yellowing leaves Introduce beneficial insects
Powdery Mildew White, powdery spots on leaves Use organic fungicides

Ripening Stage: Nearing The Harvest

The Ripening Stage: Nearing the Harvest is a thrilling time for gardeners. This is when those tiny cucumber seeds have transformed into vines laden with crisp, green fruits. This phase is crucial. It determines not only the quantity but also the quality of your harvest. To achieve the best results, understanding the nuances of ripening is key. Let’s delve into the ripe details!

Identifying Peak Ripeness

Identifying peak ripeness in cucumbers is fairly straightforward. Look for a uniform green color, with no yellowing. The skin should be firm, yet the fruit should have a slight give when lightly squeezed. Another indicator is size; cucumbers typically reach full ripeness when they are around 6 to 9 inches long, depending on the variety. To test your crop’s readiness, pick a sample cucumber and taste it. The flavor should be mild and refreshing, not bitter or overly sweet.

Effects Of Watering On Ripening

Watering practices play an important role in the ripening stage. Consistent moisture helps ensure your cucumbers ripen uniformly. Avoid overwatering or underwatering, as both can cause stress to your plants, potentially affecting the taste and texture of your produce. Here’s a simple checklist for optimal watering during ripening:

  • Morning watering to allow leaves to dry.
  • Avoiding wet foliage at night reduces disease risk.
  • Deep, less frequent watering promotes strong root growth.
  • Use a mulch layer to retain soil moisture.
  • Monitor soil moisture regularly with a finger test or moisture meter.

By keeping these factors in check, you can expect a bountiful and tasty cucumber harvest. Pay close attention during this stage to reap the rewards of your hard work!

Harvest Time: Reaping The Cucumber Bounty

The wait is over, and the fruits of your labor are ready to be picked. Cucumbers signal their readiness with a firm body and bright color. Picking the perfect time to harvest can ensure a crisp, fresh taste. Let’s dive into the best practices to collect your cucumber bounty.

Harvesting Techniques

Gentle hands and sharp eyes make the best harvesting tools. Use these steps for the perfect picking:

  1. Check cucumbers for a bright green color and firm feel.
  2. Use a sharp knife or clippers to cut the stem above the fruit.
  3. Harvest early morning for peak crispness.
  4. Avoid yanking to prevent plant damage.

Consistent harvesting encourages more cucumbers to grow.

Post-harvest Handling And Storage

Proper care post-harvest keeps cucumbers fresh and crunchy. Follow these steps:

  • Wipe away any dirt or moisture.
  • Refrigerate cucumbers quickly after harvesting.
  • Store in a humid, cooler environment between 50-54°F.
  • Keep cucumbers away from ethylene-producing fruits, like tomatoes and bananas.

Cucumbers last up to ten days with the right storage conditions. A bountiful harvest of cucumbers awaits with these methods.

Frequently Asked Questions For 7 Cucumber Plant Stages From Seeds To Harvest

How Long Does Cucumbers Take From Seed To Harvest?

Cucumbers typically take 50 to 70 days to grow from seed to harvest. Factors like variety and growing conditions can affect this timeline.

What Is The Timeline For Cucumbers?

Cucumbers typically take 50-70 days to grow from seed to harvest. Plant the seeds outdoors or start indoors a few weeks prior to ensure a successful yield within this timeframe.

What Are The Steps Of A Cucumber Plant?

Cucumber plant growth involves five steps: seed germination, seedling development, vine growth, flowering, and fruiting. Each stage requires adequate sunlight, water, and nutrients for optimal health.

What Do Cucumbers Look Like When They First Start Growing?

Cucumbers initially sprout as small, round seedlings with a pair of oval-shaped leaves. As they grow, delicate vines and true leaves with a recognizable cucumber texture emerge.


Conclusion

Growing cucumbers can be a rewarding journey with the right guidance. We’ve mapped out the vital stages from sowing seeds to savoring the harvest. Remember, consistent care and attention to detail are essential. Embrace each stage and soon you’ll relish the fruits—rather, cucumbers—of your labor.

(You can check the link for Organic Cucumber Gardening: https://bonsainurserybd.com/organic-cucumber-gardening/)

Happy gardening!

What Color Is A Carrot Originally

What Color Is A Carrot Originally

Originally, carrots were purple and white, not orange. The orange carrot we know today was developed in the 17th century.


Carrots have an intriguing history that traces back thousands of years and spans multiple continents. These root vegetables were first cultivated in the Persian Plateau and Asia Minor, with their earliest forms displaying a variety of colors, from deep purples and whites to yellows and reds.


It wasn’t until Dutch farmers selectively bred these plants that the vibrant orange carrot became the standard. This color change was not only due to aesthetic preferences but also an improvement in taste, texture, and nutritional value. As a staple in diets worldwide, the modern carrot has secured its place as a versatile and healthy vegetable, rich in beta-carotene, fiber, and antioxidants. This evolution from its original hues to the orange icon has been a result of both natural selection and human influence, with a host of stories intertwined within its colorful history.


The Ancestral Roots Of Carrots

The Ancestral Roots of Carrots thread back to a time long before grocery store shelves. Like many vegetables, the carrot has a lineage that might surprise you. Understanding its origin sheds light on how human cultivation has shaped this common root vegetable.

Wild Carrots: A Palette Of Colors

Wild carrots are the ancestors of the ones we eat today. Unlike the uniform orange we’re used to, wild carrots displayed a variety of hues. They spanned shades of white, purple, yellow, and even red. These natural varieties painted the landscapes of Europe and southwestern Asia. Their colors were more than just appealing. They held clues to the carrot’s nutritional content and adaptability.

  • White carrots were often tougher and woodier.
  • Purple carrots contained anthocyanins, pigments with antioxidant properties.
  • Yellow carrots were likely sweeter, hinting at the beta-carotene within.

Domestication And The Shift To Orange

When humans began to cultivate wild carrots, changes occurred. Creating a more palatable vegetable was the goal. The ancient carrot’s transformation is linked to domestication. With selective breeding, certain features were emphasized. The vivid orange carrot we know today slowly emerged from its colorful relatives.

This shift is believed to have happened for a mix of reasons:

  1. Orange carrots were sweeter and more appealing to people.
  2. They contained more beta-carotene, a desired nutrient.
  3. The uniform color might have also been popular for its appearance.

Through the ages, this preference for orange carrots intensified. Over time, they became the standard. Today, they dominate markets around the world. Yet, heirloom varieties still remind us of the carrot’s vibrant past.

Exploring The Carrot Color Spectrum

Long before today’s familiar orange hue took over our kitchen gardens, carrots painted a different picture. Would you believe it if told that the very first carrots weren’t orange at all? Let’s dig into the fascinating palette of this root vegetable’s history and unveil its vibrant past.

From Purple To White: The Carrot Color Wheel

Think of carrots, and your mind might paint them orange. Yet, this was not always the case. The carrot color wheel spins from deep purples to soothing whites.

  • Purple Carrots: Rich in anthocyanins, these were the original hue of wild carrots.
  • Yellow Carrots: Less pigmented than purples, yellows once grew aplenty.
  • Red Carrots: These boast high lycopene levels, just like tomatoes do.
  • White Carrots: Lacking pigment yet full of flavor, whites are naturally a delight.
  • Orange Carrots: A hybrid of yellows and reds, this color now dominates the market.

Our past is filled with a rainbow of carrots, far from the monochromatic scenes of today’s produce aisles.

The Significance Of Carrot Pigments

Carrot pigments do not just add color. They tell a tale of nutrition and health benefits.

  1. Purple: Anthocyanins in purple carrots may help with heart health.
  2. Yellow: Lutein in yellow carrots can support good eyesight.
  3. Red: The lycopene in red carrots is linked to reduced risk of certain diseases.
  4. White: Though they lack colorful pigments, they are full of dietary fiber.
  5. Orange: Beta-carotene, which our bodies turn into vitamin A, is abundant in orange carrots.

Each pigment brings its own set of benefits to the table, inviting a feast of wellness.

How Carrots Got Their Orange Glow

The vibrant orange hue that defines modern carrots wasn’t always the norm. In a fascinating twist of horticultural history, carrots once displayed a palette of colors. Let’s uncover the captivating journey that led to carrots’ iconic orange glow.

The Dutch Influence

In the 17th century, the Netherlands played a pivotal role in carrot cultivation. Dutch growers, driven by national pride and potentially political motives, cultivated orange carrots. This was to honor the Dutch Royal Family, the House of Orange. Bold orange carrots soon became a symbol of Dutch heritage and pride.

Selective Breeding And The Orange Carrot

Selective breeding transformed the carrot. Initially, its colors ranged from purple to yellow to white. Through the careful selection of seeds from orange-rooted plants, Dutch farmers gradually fixed the orange trait. Over multiple generations, they developed the sweet, plump, and orange carrots we savor today.

Carrot Color Origin Modern Predominance
Purple Middle Ages Specialty Markets
Yellow Early Cultivation Less Common
Orange Dutch Breeding Worldwide Distribution

From this shift, the orange carrot has not only become a staple around the world but also a prime example of how human agriculture has shaped the natural world around us.

Cultural And Nutritional Impacts

Carrots, a root vegetable known to many as vibrant orange, actually come in a spectrum of colors. While orange is the modern standard, the original carrot was quite different. Exploring the original hue of the carrot uncovers an interesting past that blends with both cultural and nutritional significance. As the carrot’s color evolved, so did its role in culinary traditions and its health benefits.

Carrots In Culinary Traditions

Long before the orange carrot became a global staple, other carrot colors held culinary sway. Purple, white, red, and yellow carrots were no strangers to ancient dinner tables. Each color brought a unique flavor and aesthetic appeal to early dishes.

  • Purple carrots were often sweeter and used for their striking color.
  • Yellow and white carrots blended in with other root vegetables, adding subtle notes and texture.

Different cultures incorporated these colorful carrots in distinct ways, showcasing the vegetable’s versatility. Middle Eastern recipes often featured purple carrots, while white varieties were common in Europe.

Health Benefits Of Different Colored Carrots

Carrots offer more than a rainbow of colors to brighten a dish; they’re also packed with vitamins and antioxidants. Each color signifies a unique blend of nutrients.

Color Health Benefit
Purple High in anthocyanins, fighting inflammation
Red Rich in lycopene, good for heart and eye health
Orange Full of beta-carotene, converts to vitamin A
Yellow Contains lutein, supports eye health
White Has fiber, aids in digestion

Eating a variety of carrot colors can give your body a wholesome mix of nutrients. Brightly colored carrots not only bring life to your plate but also contribute to a balanced diet.

Contemporary Carrots And Consumer Choices

Imagine a world where carrots aren’t just orange, but a rainbow of colors! Today’s consumers are encountering an ever-expanding palette of carrot colors in their grocery aisles and farmers’ markets. This shift is not just about eye appeal—it’s a nod to the rich history of this root vegetable, which originally appeared in shades far different than the bright orange we’re accustomed to. With a growing interest in unique and heirloom vegetables, contemporary carrots offer a delightful amalgamation of taste, nutrition, and history.

Heirloom Varieties On The Rise

The spectrum of carrot colors available today owes much to the rise of heirloom varieties. Unlike their commercial counterparts, heirloom carrots have been passed down through generations, preserving their diverse colors and flavors. Shoppers are now embracing these vibrant options, which stretch from deep purples to sunny yellows. Here’s a snapshot of what you might find:

  • Purple Dragon: Rich in anthocyanins with a spicy kick
  • Yellowstone: Sweet and tender, a contrast to the classic bite
  • Atomic Red: Adds a bold color splash and higher lycopene levels
  • White Satin: Mild and earthy, a subtle nod to carrots’ roots

The Future Of Carrot Colors In Agriculture

Carrots are on a colorful journey, with an agricultural twist aimed at enticing modern palates and ensuring sustainability. Advances in cultivation techniques and consumer demand for diverse and nutritious options suggest an exciting future for carrot colors. Plant breeders focus on traits like drought tolerance and disease resistance, alongside visual appeal. These efforts likely mean a future where the humble carrot is not just a root but a canvas for agricultural artistry. Below is a table illustrating potential developments in carrot agriculture:

Color Nutrient Highlight Future Agricultural Goals
Purple High in antioxidants Enhancing flavor profile
Red Rich in lycopene Increasing size versatility
Yellow Abundant in lutein Improving pest resistance
White Good fiber source Boosting yield per acre

(You can check this out to know How Carrot is Superfood for Weight Loose : https://bonsainurserybd.com/carrots-the-ultimate-superfood-for-weight-loss/ )

Frequently Asked Questions On What Color Is A Carrot Originally

What Is The Traditional Color Of Carrots?

The traditional color of carrots is purple, dating back to their origins over a thousand years ago.

Are Carrots Originally Black?

Carrots were not originally black; they were primarily purple and yellow, with domestication leading to the development of orange varieties.

Were Carrots Naturally Purple?

Yes, carrots were originally purple, along with yellow and white variations, before the now-common orange carrot was developed.

What Is The Origin Of The Carrot?

Carrots originated in Persia as small, forked purple or yellow roots. Over centuries of cultivation, they evolved into the larger, orange variety common today.


Conclusion

Embarking on the colorful journey of the carrot has unveiled a surprising history. The original hue of this root vegetable, purple, was nature’s initial palette choice. Through selective breeding, we now relish a vibrant orange. Remember, the carrot’s story is not just about color—it mirrors agriculture’s evolution and human influence on nature’s design.

(To know more history of Carrot’s Color: https://www.foodliteracycenter.org/broccoli-beet-year/multi-colored-history-carrots )

Keep this in mind next time you crunch into this healthy snack!

Cheap Fast Growing Privacy Trees For Your Yard

Cheap Fast Growing Privacy Trees For Your Yard

Fast-growing privacy trees like Leyland Cypress and Thuja Green Giants enhance yard privacy quickly. These species are affordable and thrive in various climates.


Selecting the right trees for yard privacy requires balancing growth speed with maintenance needs. Cost-effectiveness is also a vital consideration for many homeowners. Privacy trees not only provide a natural screen against prying eyes but can also insulate your home from noise and wind.


Cheap Fast Growing Privacy Trees varieties such as Hybrid Poplars and Willow Hybrids become established quickly and can offer a full privacy screen in a matter of a few years. Perfect for those eager to enjoy their private outdoor spaces without waiting decades for trees to mature. Keep in mind attributes like hardiness, maximum height, and foliage density when choosing the best fast-growing privacy trees for your yard. These factors will ensure that your privacy landscaping meets your expectations for both aesthetics and functionality.


Selecting Fast-growing Privacy Trees

Privacy in your yard can transform it into a secluded oasis. Selecting fast-growing privacy trees is a smart move. These trees quickly create a natural barrier. They enhance beauty while offering shade. Selecting the right ones needs careful consideration.

Climate Compatibility

First, identify trees that thrive in your local climate. This ensures they grow strong and fast. Consider these factors:

  • Hardiness Zone: Know your area’s USDA zone. Pick trees that suit this range.
  • Temperature Extremes: Choose species that withstand your area’s hottest and coldest temperatures.
  • Length of Growing Season: More time to grow means larger trees, sooner.
  • Precipitation Patterns: Ensure selected trees can handle rainfall amounts in your region.

Soil Considerations

Soil type greatly affects tree growth. Be sure to check:

Soil Feature Why It Matters
Soil pH Match trees to your soil’s acidity or alkalinity.
Soil Texture Some trees prefer sandy soils, others clay.
Drainage Proper drainage prevents root rot.
Nutrient Levels Trees need the right nutrition to flourish.

Test your soil or ask a local expert. Picking trees that love your soil means faster growth and better privacy.

Need privacy in a hurry? Choosing the right trees can make all the difference. Fast-growing privacy trees offer quick shade and a natural barrier for your yard. Let’s explore some top picks to create your peaceful, private space.

Hybrid Poplars

Hybrid poplars stand out as the superheroes of growth speed.

  • Quick to grow: Up to 8 feet a year!
  • Ease of care: Low maintenance once established.
  • Great for: Almost any climate.

These trees make an excellent choice for those who want privacy fast.

Leyland Cypress

Leyland cypress is a popular pick for privacy seekers.

Feature Benefit
Dense foliage Creates a solid green wall.
Height Grows up to 3-5 feet per year.
Resilience Adapts well to various soils.

Leyland cypress trees are ideal for a year-round, green privacy screen.

Economic Benefits Of Privacy Trees

Privacy trees offer a natural way to shield your backyard from prying eyes. But their value goes far beyond giving you a secret spot for your morning coffee. These leafy giants can also be a smart financial decision for homeowners. The economic benefits of planting privacy trees are clear and can put money back into your pocket over time.

Cost-effective Landscaping

Privacy trees are a one-time investment that keeps on giving. They require far less care than regular shrubs or hedges. Once these trees take root, they shoot up fast. This means you save money in the long run. Here’s how:

  • No expensive fences: Trees naturally divide your space, so you don’t need to build a fence.
  • Low maintenance: These trees need less trimming compared to hedges.
  • Energy saving: In summer, trees provide shade, reducing air conditioning costs. In winter, they block winds, cutting heating expenses.

Enhancing Property Value

Trees do more than just create a private oasis. They could boost your property’s appeal. Consider this:

  1. Lush landscapes attract buyers: Homes with mature trees tend to sell faster.
  2. Increased property value: Privacy trees can add up to 20% more value to your home.
  3. Curb appeal: A well-designed yard with tall trees stands out and can be the deciding factor for a quick sale.

A yard with towering privacy trees truly is an investment. Whether you are enjoying your private domain or thinking of resale, the economic pluses are undeniable.

Planting Tips For Optimal Growth

Want a private oasis without waiting a decade? Fast-growing privacy trees are the answer. They shield your yard quickly. But how do you ensure these green giants flourish? Follow these planting tips for trees that reach for the sky in no time!

Proper Spacing

Trees need room to grow. Overcrowding can stunt growth and spread disease. Here’s how to space them right:

  • Check mature widths: Each tree species’ spread is different.
  • Distance from structures: Plant trees at least half their mature width away from buildings.
  • Make rows double the mature width apart for a thick screen.

Care And Maintenance

Healthy trees grow fast. Regular care keeps them in top shape. Use this simple routine:

Task Frequency
Watering Weekly or as needed
Fertilizing Spring and fall
Pruning End of dormant season

Don’t forget to mulch around the base for moisture and temperature control. Keep an eye out for pests or diseases. Treat issues early to prevent spread.

Challenges And Solutions

Planting cheap fast-growing privacy trees can transform your yard. These trees offer a natural barrier that enhances privacy and beauty. Yet, they come with challenges. Let’s explore these issues and find effective solutions to keep your leafy friends thriving and your privacy intact.

Dealing With Pests

A common issue is pesky bugs nibbling at your trees. Trees like Leyland Cypress or Thuja Green Giants often fall prey to pests. The solution lies in early detection and treatment. Keep an eye out for unusual leaf loss or visible bugs.

  • Inspect trees regularly
  • Use organic pesticides
  • Introduce beneficial insects such as ladybugs

For best results, talk with local experts. They can offer advice on the most effective treatments, keeping your yard chemical-free.

Managing Overgrowth

Privacy trees grow quickly, but without care, they’ll become unruly. Regular pruning keeps growth in check. Sharp tools and the right technique are crucial for a clean cut to promote healthy regrowth.

Task Frequency Tools
Pruning 1-2 times a year Shears, Saws
Trimming As needed Clippers, Scissors

Trim top growth to control height and snip wayward branches. Doing so maintains form and function. Overgrowth can be a hassle but with these tips, managing it becomes a smooth task.

Future Considerations

Planting cheap, fast-growing privacy trees is a smart way to create a secluded oasis in your yard. But choosing the right trees is only the first step. The trees you plant today will need ongoing care and adjustments as they grow and the seasons change. Let’s delve into what this entails for the future, ensuring your green investment stands the test of time.

Long-term Care

Once your trees reach their desired height, they require regular maintenance to keep them healthy and manageable. Consider the following tips:

  • Pruning: Trim your trees annually to maintain their shape and size.
  • Disease Prevention: Watch for signs of disease and treat promptly to protect your privacy screen.
  • Soil Health: Enrich the soil with compost to provide nutrients for sustained growth.
  • Watering: Establish a watering schedule, especially during dry spells, to support your trees.

Seasonal Adjustments

Trees have different needs as seasons change. Stay on top of these needs with these seasonal adjustment strategies:

  1. Spring: It’s the best time to fertilize and mulch, encouraging vibrant new growth.
  2. Summer: Focus on watering and pest control to keep your trees stress-free.
  3. Fall: Prepare your trees for winter by properly mulching and wrapping if needed.
  4. Winter: Inspect for broken branches and prune if necessary to prevent damage.

(You can visit the link for Apartment Balcony Gardening Tips: https://bonsainurserybd.com/apartment-balcony-gardening-for-beginners/)


Frequently Asked Questions For Cheap Fast Growing Privacy Trees For Your Yard

What Is The Fastest Growing Privacy Tree?

The fastest growing privacy tree is the Hybrid Poplar, capable of growing 5-8 feet annually.

What Is The Fastest Growing Tree For A Backyard?

The fastest-growing tree for your backyard is the hybrid poplar, which can grow up to 8 feet per year.

What Is The Cheapest Privacy Hedge?

The cheapest privacy hedge is often a fast-growing shrub like privet or boxwood. These plants are cost-effective, easy to maintain, and provide quick coverage for privacy.

What Is The Best Low-maintenance Shrub For Privacy?

The best low-maintenance shrub for privacy is the Boxwood. It’s hardy, evergreen, and requires minimal trimming to maintain its shape.

Conclusion

Embarking on a journey to enhance your yard’s privacy can be both budget-friendly and expedient with the right tree selections. Opting for rapid growers like hybrid poplars or leyland cypresses can transform your outdoor space swiftly. Embrace these nature’s marvels and relish in enhanced seclusion and aesthetic appeal.

(To learn more about Cheap Fast Growing Privacy Trees for Yard : https://theyardandgarden.com/cheap-fast-growing-privacy-trees/

Your yard awaits its verdant upgrade.

13 Best Radish Companion Plants And 5 To Avoid

13 Best Radish Companion Plants And 5 To Avoid

The 13 best radish companion plants include peas, lettuce, cucumbers, and spinach, while radishes should avoid hyssop, potatoes, and cabbage. Steering clear of these incompatible pairings promotes radish health and harvest quality.


Understanding companion planting is essential for maximizing the yield and health of your garden crops. Radish, a popular root vegetable, enjoys the company of various plants that can help deter pests, enrich the soil, and utilize garden space efficiently. Companion planting serves as a natural way to enhance your garden’s productivity without the need for harsh chemicals.


13 Best Radish Companion Plants And 5 To Avoid : Smart gardeners always plan their planting layout by pairing radishes with beneficial companions to ensure vigorous growth. Remember to be mindful of specific plant interactions, as the wrong neighbors can lead to competition for resources or disease proliferation, ultimately compromising your radishes’ success.


The Secret Keepers Of The Garden: Radish Companions

Imagine a thriving garden where radishes burst through the soil, full of life. These vibrant veggies don’t go it alone; they have secret keepers—companion plants.

Mutual Benefits: Why Radish Loves Company

Radishes thrive with friends nearby. Certain plants enhance growth, flavor, and even the health of these spicy root vegetables. Picture this: radishes growing next to cucumbers, tall peas offering shade, and lettuce sprawling around the radish’s robust leaves. Together, companion plants create a symphony of mutual support.

  • Peas fix nitrogen, which radishes love.
  • Chervil can deter pests and enhance flavor.
  • Cucumbers benefit from radish’s pest deterrent abilities.
  • Marigolds act as a trap crop, drawing away harmful bugs.
  • Nasturtiums offer spicy blooms that may repel pests.

Imagine a garden that’s both a feast for the eyes and a fortress against pests—that’s the power of radish companionship.

Selection Criteria: Choosing The Best Companions

Picking the perfect plant pals involves knowing what radishes need. Seek companions that offer shade, pest control, or flavor enhancements. Avoid those that compete for resources. Here’s a guide:

Companion Plant Benefits
Spinach Shade for tender radishes
Leaf Lettuces Ground cover, moisture retention
Cucumbers Pest control, shared space
Nasturtiums Aromatic pest deterrent
Garlic Root pest prevention

Select companions that are more than just neighbors; they’re allies in growth and protection. Radishes love friends who give and take in harmony. With the right companions, radish plants can truly thrive.

(To learn about Cucumber Gardening: https://bonsainurserybd.com/organic-cucumber-gardening/

The Harmonious Thirteen: Best Radish Companions

Planting radishes can be much more than a solo endeavor. Strategic companions enhance growth, repel pests, and boost flavor. Discover the harmonious thirteen, a symphony of plants that blend perfectly in your garden to usher your radishes to perfection.

Leafy Friends: Lettuce And Spinach

Lettuce and spinach thrive alongside radishes. They share space without competing. This pairing also keeps the soil moist and cool, providing a favorable environment for radishes to flourish.

  • Mutual shading
  • Efficient use of space
  • Improved soil quality

Allium Allies: Onions And Garlic

Onions and garlic work as natural repellents, deterring pests that might otherwise harm radish crops. Their pungent smell is a mighty shield, keeping invaders at bay.

  • Pest control
  • Flavor enhancement
  • Disease resistance

Cruciferous Comrades: Cabbage And Cauliflower

Cabbage and cauliflower, cousins to the radish, share nutrient requirements. This group works in harmony, minimizing weeding needs while maximizing the utility of your garden space.

  • Similar growing conditions
  • Weed suppression
  • Space efficiency

Legume Partners: Peas And Beans

Peas and beans are generous garden allies. They fix nitrogen in the soil—a boon for radishes, which thrive in rich, fertile ground.

  • Nitrogen fixing
  • Soil enrichment
  • Increased yields

Herb Helpers: Chervil And Nasturtium

Chervil and nasturtium bring herbal charm to the garden party. They entice beneficial insects while adding layers of flavor to both your garden and your plate.

  • Attracts beneficial insects
  • Herbal companionship
  • Edible flower benefits

The Three C’s: Carrot, Cucumber, And Chard

Carrot, cucumber, and chard complete our list. Their varied root depths ensure they don’t compete but complement, allowing radishes the space and nutrients to prosper.

  • Diverse root systems
  • Complementary growth
  • Varied harvest times

The Perfect Pairings: How To Plant Together

Planting radishes alongside the right companions can enhance growth, deter pests, and make the most of your garden space. Understanding which plants thrive together is essential to a harmonious and bountiful garden. Let’s explore the best spatial arrangements and timing strategies for planting radishes with their perfect partners.

Spatial Arrangements: Maximizing Garden Space

Efficient use of space is a gardener’s secret to fitting more crops. Here are the best ways to arrange your radish companions:

  • Plant radishes at the base of cornstalks. The radishes won’t obstruct the corn’s growth.
  • Pair radishes with leafy greens such as lettuce or spinach. These plants have different root depths.
  • Cucumbers are great above-ground partners, allowing radishes to occupy the lower soil level.
Radish Companion Planting Guide
Companion Plant Benefits Spacing
Peas Fix nitrogen in the soil, helping radishes. Plant 3 inches apart
Carrots Aid in loosening the soil for radishes. Alternate rows

Timing Is Key: Successional Sowing

Successional sowing ensures a continuous harvest. Below are tips for planting radishes with companions based on timing:

  1. Sow radishes with fast-growing spinach. Harvest spinach before it shades the radishes.
  2. After harvesting early radishes, replace them with bean plants. This utilizes the space throughout the season.
  3. Plant radishes several weeks before slow-growing vegetables like carrots. They’ll be ready to harvest first.

The Unsuitable Few: Plants To Keep Away From Radishes

The Unsuitable Few: Plants to Keep Away from Radishes

Garden harmony is crucial for thriving crops. One misunderstood pairing, and your radishes may flounder. Below, we outline partnerships best avoided. Your radishes will thank you for steering clear of these incompatible plants.

Hydropathy Issues: The Case Of Hyssop

Radishes crave moisture; hyssop does not. Planting radishes alongside hyssop can lead to uneven water distribution. This imbalance can cause hyssop to impede the growth of your radishes, as they fight over a crucial resource.

Root Rivals: Potatoes And Radishes Don’t Mix

Below the soil’s surface, radishes and potatoes vie for space. Potatoes are expansively rooted and can stunt radish development. Keep these root rivals apart to allow ample room for both to flourish.

Competition For Nutrients: The Risks With Kohlrabi

Kohlrabi and radishes share a palate for similar nutrients. Planting them together sets the stage for a rivalry, where kohlrabi often prevails. Give your radishes a solo spot to avoid this nutrient tug-of-war.

Bad Neighbors: Problems With Mustard Plants

Mustard plants can be a foe to radishes. They tend to attract similar pests and diseases, which can spread quickly between them. Distance these plants to guard your radishes against unwanted afflictions.

Maintaining Garden Harmony: Tips And Tricks

A flourishing garden with radishes requires companions that thrive together. Proper techniques ensure plants grow healthy. Here are essential tips for a harmonious radish garden.

Watering Wisely: Meeting Everyone’s Needs

Correct watering ensures plant health. Use these strategies:

  • Check soil moisture before watering to avoid overhydration.
  • Water in the morning to reduce evaporation and disease risk.
  • Use drip irrigation for consistency and to reach roots efficiently.

Organic Defense: Natural Pest Control

Natural pest solutions protect gardens. Partner radishes with:

Companion Plant Pest Controlled
Marigolds Repel beetles and nematodes
Nasturtiums Deter aphids and pests

Weeding Out Problems: Keeping The Garden Clean

Regular weeding prevents nutrient competition. Keep beds clear with:

  1. Mulching to suppress weed growth.
  2. Hand-pulling weeds to protect plant roots.

Harvest Timing: Getting The Most From Your Companions

Timely harvest maximizes yield and quality.

Keep track of:

  • Maturation dates for each plant to plan harvests.
  • Signs of readiness, like full color and size, for best flavor.

Frequently Asked Questions Of 13 Best Radish Companion Plants And 5 To Avoid


What Should You Not Plant With Radishes?


Avoid planting radishes with hyssop, potatoes, and gladiolus to ensure healthy growth. These companions can hinder radish development.


Can Radish Be Planted Near Garlic?


Yes, radish can be planted near garlic. They are compatible companions in a garden and can benefit each other.


Can Tomatoes And Radish Grow Together?


Yes, tomatoes and radish can grow together as they are compatible garden companions. This pairing makes efficient use of space and may deter pests.


Can I Plant Radishes With Peppers?


Yes, you can plant radishes with peppers. Radishes may even help deter pests, aiding in the growth of healthy pepper plants.


Conclusion


Selecting the right companions for your radishes can significantly enhance your garden’s productivity. Embrace these companionable plants to help deter pests and boost growth. Steer clear of the incompatible few to prevent competition and disease. Happy gardening as you sow for symbiotic success and bountiful harvests!

(To learn more about Radish Companion Plants: https://wildyards.com/13-best-radish-companion-plants-and-5-to-avoid/ )