Aquaponic Gardening

Aquaponic Gardening: Raise Fish & Veggies Together Effortlessly

“Aquaponic Gardening” guides individuals on cultivating both vegetables and fish interdependently. The step-by-step guide presents a sustainable method combining aquaculture with hydroponics.

Embracing innovative solutions for growing food, “Aquaponic Gardening” offers a comprehensive exploration of combining fish farming and soilless plant cultivation in one integrated system. This method is gaining popularity among gardeners and farmers who are concerned about space efficiency and sustainability.

The guide provides readers with practical advice on setting up their own aquaponic systems, selecting compatible plants and fish, maintaining a balanced environment, and troubleshooting common issues. Aimed at both beginners and experienced growers, the book simplifies the science of aquaponics into clear, manageable steps. It encourages growers to embrace a self-sustaining ecosystem that produces fresh vegetables and fish, right in their backyard. This environment-friendly approach to agriculture reduces waste, conserves water, and exemplifies cutting-edge food production techniques.

Introduction To Aquaponic Gardening

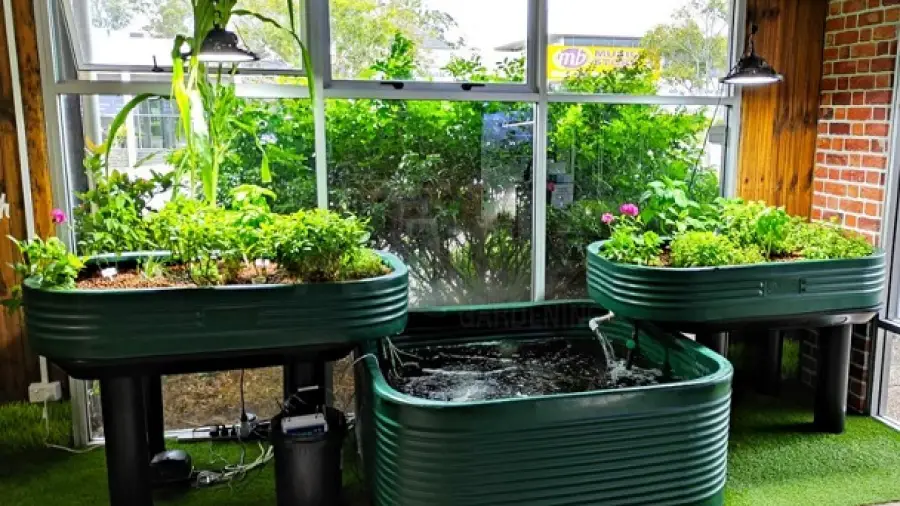
Welcome to the sustainable world of aquaponic gardening, where the symbiosis between fish and plants provides bountiful harvests. This method combines the best of two worlds: aquaculture (raising fish) and hydroponics (growing plants without soil). Harvest fresh vegetables and raise healthy fish right from your home or backyard.

The Harmony Of Aquaculture And Hydroponics

Aquaponics mirrors the natural water cycle, bridging aquaculture and hydroponics into a single, closed-loop system. Fish waste provides organic nutrients for plants, which in turn clean the water for the fish. It’s a win-win partnership that reduces waste and maximizes efficiency.

Benefits Of Integrating Fish And Plant Cultivation

  • Reduces the need for chemical fertilizers and pesticides
  • Conserves water by recycling it within the system
  • Supports plant growth with rich, natural nutrients
  • Provides the joy of raising both vegetables and fish in harmony
  • Maximizes space, making it ideal for urban environments

Planning Your Aquaponic System

Embarking on aquaponic gardening leads to a harmonious relationship between fish and plants. This guide breaks down the essentials of setting up your own system. Let’s dive into the factors that will create a thriving aquaponic garden.

Key Considerations For System Design

Designing an aquaponic system requires careful thought. The right balance ensures healthy plants and fish. You must consider:

  • System Type: Media-filled beds, Nutrient Film Technique (NFT), or Deep Water Culture (DWC)?
  • Size: How much space can you dedicate to your system?
  • Species: Select fish and plants that thrive together.
  • Water Quality: Test and maintain proper pH, ammonia, nitrates, and nitrites levels.

Choosing The Right Location And Equipment

Where you place your aquaponic system impacts its success. Here are elements to ensure optimal growth:

  • Light: Natural sunlight or artificial grow lights?
  • Temperature: Keep both fish and plants in their comfort zone.
  • Protection: Shields from pests and harsh weather conditions are vital.

Selecting equipment is just as crucial. It includes:

  1. Quality fish tanks and grow beds
  2. Reliable water pump and filtration system
  3. Proper grow media (clay pebbles, gravel)


Selecting Your Aquaponic Fish And Plants

Setting up an aquaponic system is an adventure in itself. But the real excitement lies in selecting the right fish and plants for your garden. Your choice will affect the health and output of your system, so it’s essential to make an informed decision. Let’s dive into the best options for creating a thriving aquaponic ecosystem.

Best Fish Species For Your Aquaponics System

The fish are the powerhouse of your aquaponic system. They provide the nutrients that help your plants grow. Here are the top contenders for your home system:

  • Tilapia – Adaptable and hardy, they are perfect for beginners.
  • Goldfish – Easy to care for and ideal for smaller systems.
  • Catfish – Fast-growing with a strong immune system.
  • Koi – Attractive and can endure various climates.

When choosing fish, consider factors like growth rate, temperature preference, and legal restrictions in your area.

Top Plant Choices And Their Requirements

Plants in an aquaponic system clean the water for fish. Choose plants that match well with the fish environment. Here’s a table listing some top plant choices:

Plant Light Requirements Water Preferences
Lettuce Moderate Cool
Spinach Low to Moderate Cool to Moderate
Tomatoes High Warm
Herbs (Basil, Mint) Moderate Varied

Plants have diverse light and water needs. Match them to your system’s capabilities for best results. Consider growth habits, space requirement, and compatibility with fish.


Managing The Aquaponic Ecosystem

An aquaponic ecosystem is a delicate balance between fish, plants, and bacteria. It mimics natural aquatic ecosystems and requires careful observation and management to thrive. This guide will explore how to maintain optimal water quality and nutrient balance, and the best practices for monitoring the health of both fish and plants.

Water Quality And Nutrient Balance

Maintaining stellar water quality and a balanced nutrient profile is crucial. Testing water parameters regularly is a must. Check for pH, ammonia, nitrite, and nitrate levels. Optimal ranges ensure fish and plants are healthy.

  • pH: 6.5 – 7.5
  • Ammonia: less than 0.25 ppm
  • Nitrite: less than 1 ppm
  • Nitrate: 5 – 150 ppm

Use a water test kit weekly. Adjust levels using natural methods like water changes or by adding calcium carbonate for pH balance.

Fish Health And Plant Growth Monitoring

Regular check-ups are key for fish and plants. Look out for signs of stress or disease in fish. Check their appetite and activity levels. For plants, look for nutrient deficiencies or pest issues. Prune dead leaves and manage pests using organic methods when possible.

Log observations in a journal or database. This helps track progress and notice patterns over time. Balance feeding rates with plant needs.

Checklist Item Description Frequency
Water Testing Measure pH, ammonia, nitrite, and nitrate levels. Weekly
Fish Observation Check for stress, disease, and normal behavior. Daily
Plant Inspection Look for growth issues, pests, and nutrient deficiencies. Daily

In conclusion, active management and regular maintenance are the cornerstones of a successful aquaponic garden.

Harvesting Your Aquaponic Bounty

Delving into the world of aquaponics offers a thrilling adventure from setup to harvest. Gathering the fruits of your labor marks a pivotal point in the aquaponic cycle. It cascades excitement and fulfills the promise of sustainable living. Whether you’re a green thumb or a beginner, harvesting from your own system delivers a unique satisfaction. Let’s explore the art of harvesting both aquaponic plants and fish.

When And How To Harvest Plants And Fish

Timing and technique are crucial in harvesting your aquaponic garden. Here’s a simple guide to help you harvest at the peak of freshness:

  • Plants: Harvest leafy greens when they reach full size, typically 4-6 weeks after planting. Look for firm leaves and deep colors.
  • Fish: Harvest fish such as tilapia when they are plate-sized, usually after 9-12 months of growth.

To harvest plants:

  1. Cut the base of the plants using a sharp knife.
  2. Collect leaves or fruits without disturbing the roots.

To harvest fish:

  1. Lower the water level to concentrate the fish.
  2. Use a net to catch gently.

Maximizing Yield And System Productivity

Optimize your aquaponic system’s output with these tips:

  • Monitor water parameters regularly to maintain plant and fish health.
  • Prune regularly to promote new growth and prevent over-crowding.
  • Feed your fish high-quality food to improve their growth and the system’s nutrients.

Rotate crops and introduce new plants after each harvest to keep the system dynamic and constantly producing.

Harvesting Checklist
Action Details
Check Plant Size 4-6 weeks for leafy greens
Check Fish Size 9-12 months for fish like tilapia
Water Testing Weekly to maintain health


Troubleshooting Common Aquaponic Issues

Running an aquaponic system is a delicate dance between fish and plants. Sometimes, things can go offbeat. Recognizing and resolving issues swiftly will keep your green companions and aquatic friends thriving. Let’s tackle some common glitches you might encounter in your aquaponic journey.

Dealing With Pests And Diseases

Pests and diseases can worry any gardener. In aquaponics, natural solutions work best. Let’s explore how to protect your garden:

  • Monitor regularly for early signs of trouble.
  • Introduce beneficial insects like ladybugs to combat pests.
  • Apply organic neem oil for a safe, effective remedy.
  • Prevent diseases with good airflow and water quality.
  • Quarantine affected plants to stop the spread of diseases.

Maintaining System Balance During Challenges

Keeping your aquaponic system balanced is key. When challenges arise, maintain harmony with these tips:

Challenge Action
High Ammonia Levels Reduce feed and check for overstocking.
pH Fluctuations Test water regularly. Use pH adjusters sparingly.
Plant Nutrient Deficiencies Add minerals like iron or calcium as needed.
Low Oxygen Ensure adequate aeration and water circulation.


Frequently Asked Questions On Aquaponic Gardening A Step-by-step Guide To Raising Vegetables And Fish Together

What Is The Method Of Raising Both Fish And Vegetables?

Aquaponics combines fish rearing (aquaculture) with soilless plant cultivation (hydroponics).

What Types Of Fish And Vegetables Can Be Grown Using Aquaponics?

Common fish grown in aquaponics include tilapia, bass, and carp, while popular vegetables are lettuces, herbs, tomatoes, and peppers.

How Do You Grow Fish And Plants Together?

To grow fish and plants together, use an aquaponic system where fish waste provides nutrients for plants, and plants filter and clean the water for fish. Maintain a balanced environment for both to thrive.

How Many Fish Do You Need Per Plant For Aquaponics?

Generally, you need one fish for every 5 to 10 gallons of water to support plant growth in aquaponics.

Conclusion

Embracing aquaponic gardening means joining a sustainable future in food production. This guide has illuminated the symbiotic power of combining fish and vegetable cultivation. Remember, starting small and expanding as you learn ensures a smoother journey. Whether as a hobby or a step towards self-sufficiency, the know-how you’ve gained sets the stage for a thriving aquaponic system.

Dive in, grow, and relish the harmony between aquaculture and horticulture!

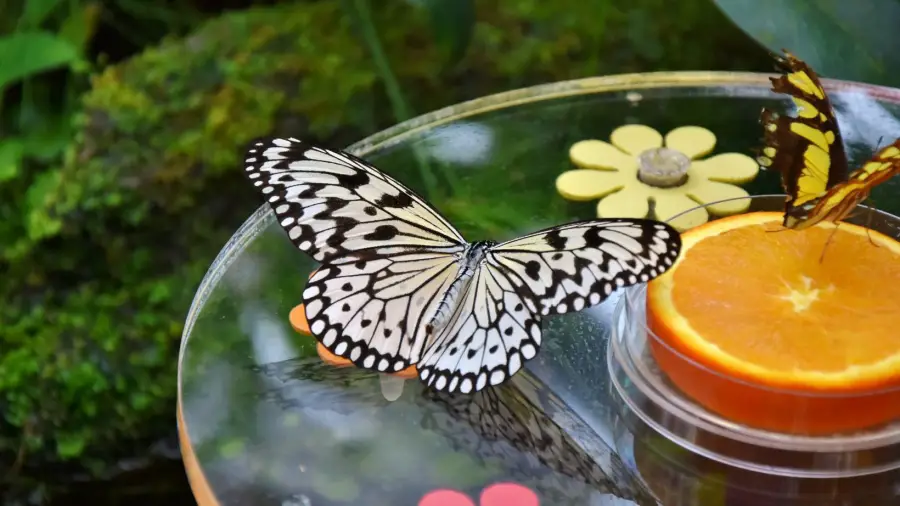
(Check this out for Butterfly Gardening Ideas: https://bonsainurserybd.com/best-practices-for-creating-a-butterfly-garden/)

Garden soil and Potting Soil

What is the difference between Garden soil and Potting Soil

Garden soil is denser and designed for outdoor use, while potting soil is lighter and formulated for containers. Potting soil typically includes materials like peat moss, perlite, and vermiculite to promote aeration and drainage, which are crucial for potted plant health.

Understanding the difference between garden soil and potting soil is essential for any gardening enthusiast or homeowner who wants to ensure the best growth conditions for their plants. Garden soil is meant for in-ground use and can improve the texture and fertility of your yard’s soil composition.

Garden soil and Potting Soil

On the other hand, potting soil is a specialized medium for container gardening, offering a balanced environment that manages moisture and nutrients efficiently. These two soil types are crafted to meet different requirements and shouldn’t be used interchangeably, as doing so can lead to poor plant health and growth issues. Whether you’re cultivating a lush backyard garden or nurturing indoor potted plants, choosing the right type of soil is paramount to your gardening success.

What Makes Them Distinct

Understanding the difference between garden soil and potting soil is crucial for any plant enthusiast. Each has unique characteristics that cater to different needs of plants. Let’s dive into the details of what sets them apart.

Key Components Of Potting Soil

Potting soil is a carefully crafted mix that provides plants with their ideal living environment when they’re not in the ground. It’s lightweight and designed to hold moisture without becoming waterlogged. Here are its key components:

  • Perlite – Enhances aeration, drainage.
  • Vermiculite – Retains water and nutrients.
  • Compost – Rich in organic matter.
  • Peat moss or Coir – Aids in moisture retention.
  • Sand – Improves drainage.

Together, these ingredients create a balanced environment for roots to grow strong and healthy.

Typical Composition Of Garden Soil

Garden soil, on the other hand, is meant for outdoor use. Unlike potting soil, it’s denser because it’s made up of the native soil found in your garden. It includes:

  • Clay, silt, and sand – Provides structure.
  • Decomposed Organic Matter – Offers nutrients.
  • Native microorganisms and worms.

This composition is ideal for outdoor gardens where the soil ecosystem is vast and intricate.

Physical Properties

Understand the physical properties of garden soil and potting soil to make the right choice for your plants. The texture, drainage, and aeration are crucial for root growth and plant health.

Texture And Density

Garden soil is dense, with particles that stick together. It’s made from decomposed plant matter and minerals.

  • Clay: Heavy with a sticky texture when wet.
  • Silt: Smooth texture that retains water.
  • Sand: Coarse granules that drain quickly.

Potting soil, on the other hand, is light and fluffy. It has peat, pine bark, and perlite or vermiculite to stay loose.

Here’s a comparison:

Soil Type Texture Density
Garden Soil Varies (clay, silt, sand) High
Potting Soil Uniform, light Low

Drainage And Aeration

Good drainage and aeration are vital to prevent root diseases. Potting soil ensures excess water drains away fast.

Garden soil may hold water too long and suffocate plant roots. Potting soil allows roots to breathe and absorb nutrients efficiently.

  • Potting Soil:
    • Designed for excellent water flow.
    • Prevents water-logging.
  • Garden Soil:
    • Varies greatly in composition.
    • May compact and restrict airflow.


Nutritional Content And Fertility

Understanding the nutritional content and fertility of soil is vital for any gardener. Each type of soil, garden soil and potting soil, has unique nutritional properties. Let’s dig into the details.

Organic Matter And Nutrients

Garden soil and potting soil vary in organic matter. Garden soil is often rich in organic materials, as it accumulates decaying plant matter and microorganisms over time. This breakdown releases nutrients slowly into the soil, creating a nutrient-rich environment for plants.

  • Garden Soil: Typically has diverse organic matter from its natural setting.
  • Potting Soil: Often contains added composted materials to simulate a rich environment.

Soil Ph And Plant Growth

pH levels play a crucial role in plant growth. They affect the availability of nutrients in the soil. Potting soil is formulated to have a pH that’s ideal for most container plants.

Soil Type pH Level Effect on Plants
Garden Soil Variable May need adjustment for specific plants
Potting Soil Neutral to slightly acidic Optimized for nutrient uptake

Adjusting the pH of garden soil can be laborious. Potting soil is a go-to for consistent growth results in containers.


Appropriate Applications

Different plants thrive in different types of soil. Choosing the right soil is crucial for the health and growth of your garden. Outdoors, plants can spread their roots and seek nutrients in the ground. In pots, plants rely entirely on the soil they’re planted in. Understanding when to use garden soil and potting soil is key to gardening success.


Best Uses For Potting Soil

Potting soil, designed for containers, is rich in nutrients and promotes good drainage and aeration. It often contains a mix of peat moss, perlite, and vermiculite. Here’s where potting soil excels:

  • Indoor plants: It keeps roots healthy.
  • Container gardens: It prevents waterlogging.
  • Seed starting: It’s sterile and promotes germination.
  • Specialty plants: Such as orchids or succulents.


When To Choose Garden Soil

Garden soil is heavier and typically used outdoors. It’s best when combined with native soil. Its benefits are clear in the following applications:

  • Raised beds: Blend with potting soil for a nutrient-dense mix.
  • Landscape planting: It supports robust root development.
  • Vegetable gardens: It enriches the native soil with organic matter.
  • Foundational plants: It provides stability and nutrients for shrubs and trees.


Transformation And Adaptation

Understanding the difference between garden soil and potting soil is crucial for any gardener. Whether tending a vast garden or cultivating indoor plants, soil serves as the foundation of plant life. Yet, not all soils are created equal, and knowing when to use each can significantly impact plant health and growth.
This section dives into the nuances of transforming garden soil into a potting mix and amending soil for specific plant needs.

Converting Garden Soil Into Potting Mix

Garden soil is often too dense for container plants. It can be transformed into a potting mix with the right ingredients. Here’s how:

  1. Start with sterilized garden soil to eliminate pests and diseases.
  2. Mix in porous materials such as perlite, vermiculite, or sand to improve drainage.
  3. Add organic matter like peat moss or composted bark to retain moisture.
  4. Blend thoroughly to create a uniform mix suitable for pots.

Amending Soil For Specific Needs

Plants have individual needs, and tailoring the soil to meet those is key.
Here are steps to amend soil:

  • Determine what your plant needs – more drainage or water retention.
  • Add organic materials like compost to boost nutrient levels.
  • For drainage, incorporate gravel or grit.
  • For moisture, mix in coir or peat moss.

Purchasing And Sustainability

Understanding the difference between garden soil and potting soil is crucial for successful gardening. The ‘Purchasing and Sustainability’ aspect significantly impacts a gardener’s choices. Quality soil promotes healthy plant growth, but the selection process involves weighing environmental considerations.

Selecting Quality Soil Products

Gardeners should prioritize quality when choosing soil products. Not all soils are created equal; the best choices are those tailored to specific plant needs. Garden soil is generally denser and suited for outdoor use, while potting soil is lighter and designed for containers.

  • Check for soil composition – The mixture should include organic matter such as compost or peat moss for nutrients and structure.
  • Confirm soil pH levels – Different plants require different pH levels; choose soil that aligns with your plant’s needs.
  • Look for reputable brands – They often provide consistent quality and are more reliable.

Environmental Considerations And Organic Options

Eco-friendly gardening is becoming a priority. Select environmentally responsible soil products. Here’s what to look for:

  1. Recycled or renewable ingredients – These reduce the environmental impact.
  2. Packaging – Opt for soils in biodegradable or recyclable packaging.
  3. Certifications – Look for organic certifications indicating the soil is free from synthetic chemicals.

Consider making your own mix using locally sourced compost and natural ingredients. This supports sustainability and reduces your carbon footprint.

Frequently Asked Questions For What Is The Difference Between Garden Soil And Potting Soil

Can You Use Garden Soil As Potting Soil?

Garden soil should not be used as potting soil because it is too heavy and may not drain well when used in containers. Potting soil is specifically designed to be porous and provide adequate aeration and moisture retention for potted plants.

Which Is Better Potting Soil Or Garden Soil?

Potting soil is generally better for container gardening due to its lightweight and well-draining properties. Garden soil is best for outdoor use.

How Do I Turn My Garden Soil Into Potting Mix?

To transform garden soil into potting mix, blend equal parts sterilized garden soil, peat moss or coconut coir, and perlite or sand. This creates a well-draining, nutrient-rich medium suitable for potting.

Is Bagged Garden Soil Good?

Bagged garden soil can be beneficial as it’s generally sterilized, weed-free, and formulated for specific gardening needs.

Conclusion

Understanding the nuances between garden soil and potting soil is crucial for successful planting. Select the right soil to provide your plants with optimal growing conditions, whether in-ground or in containers. Remember, garden soil anchors and nurtures your plants directly in the garden, while potting soil offers a specialized environment for container gardening.

Nurture your green thumb by choosing the soil that best fits your gardening needs, and watch your plants thrive.

(To know about Gardening 10 Essential Tools: https://bonsainurserybd.com/10-must-gardening-tools/)

Butterfly Garden

Best Practices for Creating a Butterfly Garden: Tips & Tricks

To create a butterfly garden, integrate native flowering plants and avoid pesticides. Ensure diverse plant selection to offer food and habitat throughout the butterflies’ life cycle.

Creating a butterfly garden is not only a rewarding gardening project but also a delightful way to support local ecosystems. By incorporating a variety of nectar-rich blooms and caterpillar host plants, gardeners can attract an array of butterfly species. The key is choosing the right mixture of plants that will provide continuous blooms throughout the season, catering to the needs of both adult butterflies and their larvae.

Butterfly Garden

Sun exposure, shelter, and pesticide-free maintenance are paramount for a successful butterfly haven. A well-planned butterfly garden not only becomes a hub for these beautiful insects but also brings a dynamic burst of life and color to any outdoor space.

Selecting The Perfect Spot

Creating a butterfly garden is a delightful way to attract these winged beauties to your yard. The right location is critical for a thriving butterfly habitat. Let’s explore how to choose the best spot that offers everything butterflies need to flourish.

Assessing Sunlight And Exposure

Butterflies bask in the sun to warm their wings for flight. Ideal butterfly gardens receive ample sunshine, about six hours daily. Observe potential garden spots and note the hours of direct sunlight. A sunlit area means more butterflies and a greater variety of blooms.

  • Record sunlight hours in different garden areas.
  • Ensure no shade during peak butterfly activity, usually mid-morning to afternoon.
  • Select plants that thrive in full to partial sun.

Considering The Microclimate Conditions

Microclimates affect how plants and butterflies experience your garden. These small-scale climate variations can make a huge difference. Observe your yard’s microclimate by considering the following:

Aspect Factors to Consider
Wind Protection Choose spots shielded from harsh winds that can harm butterflies.
Water Access Include a water feature for butterflies to drink and cool themselves.
Temperature Avoid areas prone to frost which can damage host and nectar plants.

Take notes on these conditions over several days to determine the best site for your butterfly paradise.

Plant Selection Fundamentals

Creating a butterfly garden transforms your space into a vibrant oasis. It brings life, color, and beauty to your backyard. To achieve this paradise, you must understand the fundamentals of plant selection. The right flowers and plants not only attract butterflies but also support their lifecycle. Begin with two key elements: nectar-rich flowers for butterflies and host plants for caterpillars.

Choosing Nectar-rich Flowers

Butterflies need energy to fly and mate. They get this from nectar-rich flowers. These flowers should bloom at different times so butterflies enjoy food all season.

  • Milkweed – Attracts Monarchs and provides nectar.
  • Coneflowers – Available in many colors, loved by numerous butterfly species.
  • Zinnias – Easy to grow with long-lasting blooms.
  • Lantana – Vibrant and drought-resistant.
  • Butterfly Bush – Aptly named, a favorite for many butterflies.

Incorporating Host Plants For Caterpillars

Butterflies start as caterpillars and need specific host plants. These plants are where butterflies lay their eggs.

Butterfly Species Host Plant
Monarch Milkweed varieties
Swallowtail Fennel, Parsley, Dill
Painted Lady Thistles, Hollyhock
Red Admiral Nettles
Viceroys Willow trees

Designing For Diversity And Appeal

A butterfly garden is a canvas of biodiversity, attracting various species with its vibrant palette of flora. To entice these delicate creatures, a garden must cater to their diverse needs and aesthetic preferences. Creating a habitat rich in different plant species not only adds visual appeal but also ensures a steady supply of food for butterflies throughout their life stages. Let’s explore how to design a garden that is both diverse and appealing.

Creating Layers And Heights

Layered planting mimics the natural habitat butterflies thrive in. Each layer serves a unique purpose in their lifecycle, from larvae to full-grown adults.

  • Canopy Layer: Tall trees like Oaks and Willows
  • Understory Layer: Shrubs like Blueberries and Azaleas
  • Herbaceous Layer: Perennials such as Coneflowers and Milkweed
  • Ground Layer: Ground covers like Thyme and Phlox

Each layer is crucial, providing shelters, nectar, and host plants for caterpillars.

Combining Colors And Textures

A fusion of color and texture makes the garden a visual masterpiece as well as a haven for butterflies. Bold, bright flowers draw attention, while varied textures encourage longer visits.

Color Texture Plant Examples
Purples and Blues Spiky Lavender, Salvia
Yellows and Oranges Fuzzy Butterfly Weed, Goldenrod
Reds and Pinks Smooth Bee Balm, Zinnias

Select plants not just for their colors, but also their textures that appeal to the senses of butterflies.

Building A Butterfly Oasis

Building a Butterfly Oasis is about transforming gardens into delightful havens for butterflies. These graceful creatures bring life and color, making every outdoor space a living tableau. To achieve this, certain elements must interplay harmoniously, attracting these winged visitors to your green sanctuary.

Installing Water Features

Butterflies need water just like any other living creature. However, their delicate frames require shallow sources to perch on safely. Incorporate watering stations by using dishes or shallow birdbaths. Add a few stones or pebbles for them to land on, ensuring water is always accessible. An occasional misting over foliage gives butterflies a refreshing drink without the risk of drowning.

Providing Resting And Basking Sites

Basking in the sun helps butterflies warm their wings for flight. To assist, arrange flat stones in sunny spots for them to rest. Add benches or garden ornaments where they can pause and soak in the warmth. These spots serve as perfect resting and basking sites for the weary traveler, offering a moment of respite before they flutter on.

Eco-friendly Maintenance Practices

Creating a butterfly garden is not only about planting the right flowers but also about the ongoing care. Sustainable maintenance practices keep your garden healthy for butterflies. Let’s explore how to do this without harming the environment or the delicate ecosystems within your garden.

Avoiding Pesticides And Chemicals

Butterflies are sensitive to chemicals. Chemical-free gardens are vital.

  • Use natural predators to control pests. Ladybugs and birds eat harmful insects.
  • Plant diversity can help. Different plants attract pest-eating insects.
  • Manual intervention, like hand-picking pests, can keep plants healthy.

Promoting A Self-sustaining Habitat

A self-sustaining garden works with nature, not against it. Here’s how to promote balance:

  1. Native plants support the local wildlife and need less care.
  2. Water sources, such as shallow dishes, keep butterflies hydrated.
  3. Layer plants for diversity. This creates shelter and food sources at different levels.


Observation And Adaptation

Observation and adaptation stand as key pillars in nurturing a flourishing butterfly garden. Paying close attention and responding to the unique dynamics of your garden enriches the habitat, enticing more winged visitors. Let’s delve into how tracking visits and adjusting the landscape can create a butterfly haven.

Tracking Butterfly Visits And Preferences

To understand the preferences of your fluttering guests, begin with monitoring their patterns. Observation logs facilitate insights into which flowers and plants they favor. This data becomes an invaluable guide for future enhancements to your garden’s layout.

  • Note down recurring visitors and their favored plants.
  • Monitor the time of day when butterflies are most active.
  • Identify which nectar sources are hotspots for diverse species.
Date Butterfly Species Favored Plant Visit Frequency
April 1 Monarch Milkweed High
April 2 Swallowtail Coneflower Medium


Adjusting The Garden Based On Activity

Your garden should evolve with the findings from your butterfly observations. Make informed decisions to alter your garden’s design and plant selection, catering to the preferred tastes and behaviors of your visitors.

  • Add more of the plants that attract the most butterflies.
  • Introduce new plants to offer a varied diet across species.
  • Reposition plants to maximize exposure to sunlight or shade, as needed.

Implementation could look like the following:

  1. Plant additional milkweed for Monarchs.
  2. Set up a shallow water bath for hydration.
  3. Plant a row of bushes to create a windbreak.


Frequently Asked Questions Of Best Practices For Creating A Butterfly Garden

How Do You Layout A Butterfly Garden?

Select a sunny spot with minimal wind. Include diverse plants that cater to all life stages of butterflies. Incorporate nectar-rich blooms and caterpillar host plants. Offer shelter with shrubs and trees. Ensure a water source like a shallow dish or puddle.

What Are Three Things A Butterfly Garden Should Have?

A butterfly garden should have nectar-rich flowers, host plants for caterpillars, and sunny, sheltered spots.

How Do You Make A Good Butterfly Garden?

Select a sunny location and choose native flowering plants. Include diverse nectar sources for continuous blooms. Provide water with shallow dishes or mud puddles. Avoid pesticides and incorporate host plants for caterpillars.

Where Is The Best Place To Plant A Butterfly Garden?

The best place to plant a butterfly garden is in a sunny area where nectar-rich plants thrive and butterflies can bask and fly with ease.

Conclusion

Embracing the tips outlined, your butterfly garden can become a vibrant habitat. Remember, choosing the right plants and avoiding pesticides are key. Include a water source and shelters for a complete sanctuary. By nurturing these delicate creatures, you contribute to biodiversity.

Your garden will not only be a haven for butterflies but a delight for all who visit. Welcome to a world where beauty takes flight on the wings of butterflies.

Best Tools for Carving Bonsai

Best Tools for Carving Bonsai: Master Precision Art!

The best tools for carving bonsai are the concave cutter and the knob cutter. Precision shears and wire cutters are also essential.

Carving bonsai requires not just skill, but also the right set of tools. Crafted specifically for shaping these miniature trees, the concave cutter allows for the removal of branches, leaving a hollow that heals with minimal scarring. Similarly, the knob cutter is designed to work on thicker branches and roots, creating a smooth cut that promotes better healing.

Best Tools for Carving Bonsai

Precision shears offer meticulous control for trimming leaves and smaller twigs, ensuring the bonsai maintains its aesthetic form. Lastly, wire cutters are indispensable for applying and removing wires without damaging the tree. Together, these instruments empower enthusiasts and professionals alike to sculpt their bonsai trees with finesse and accuracy. Using the proper tools not only enhances the health and appearance of the bonsai but also makes the carving process more enjoyable and efficient.

Essentials Of Bonsai Carving

Bonsai carving is an art that transforms trees into miniature living sculptures. It requires patience, skill, and the right set of tools. Precision and care are vital to ensure the health and beauty of these delicate trees. Whether you’re a seasoned artist or a beginner, understanding the essentials of bonsai carving is the first step to creating a mesmerizing miniature landscape.

Choosing The Right Tools

The foundation of bonsai creation lies in selecting appropriate instruments. Tools should be comfortable to hold and made from high-quality materials to provide clean cuts and minimal stress to the plant.

  • Concave cutters: Create smooth wounds that heal faster.
  • Knob cutters: Remove unsightly knobs from the trunk.
  • Bonsai saws: Necessary for cutting thicker branches.
  • Carving tools: Add detail and texture to the wood.
Tool Type Use
Scissors Trimming leaves and fine branches
Wire cutters Removing training wires without damaging branches

Defining Bonsai Carving

Bonsai carving is more than cutting and shaping. It involves meticulous techniques that mimic natural growth patterns. Artists often create illusions of age and weathering in their bonsai, turning each tree into a unique piece of living art.

  1. Study tree anatomy and growth patterns.
  2. Visualize the final shape before starting.
  3. Carve gradually, assessing the impact on the tree’s health.

With the right tools and an understanding of bonsai carving principles, anyone can start their journey into the world of miniature trees.

Top Bonsai Carving Knives

The art of bonsai is refined by the tools used to shape them. Choosing the right carving knives is crucial for any bonsai enthusiast. Precise, sharp, and durable tools make intricate work much easier. This section reviews the top bonsai carving knives available to ensure your bonsai looks its best.

Traditional Japanese Knives

Bonsai masters often use traditional Japanese knives. Their reputation for excellence comes from centuries-old forging techniques. These knives boast a sharpness that can last a lifetime with proper care.

  • Kaneshin: Known for its balanced grip and control.
  • Masakuni: Celebrated for premium quality and longevity.
  • Ryuga: Offers affordability without compromising on quality.

Modern Carving Knives

Modern knives blend traditional styles with new materials and design principles. Innovation in steel types and ergonomic handles make these knives popular among newer bonsai artists.

  1. X-Acto: Razor-sharp blades perfect for fine cuts.
  2. Flexcut: Versatile tools ideal for detailed work.
  3. Joshua Roth: Top-tier knives combining Japanese tradition with modern flair.

Maintenance And Care

Keeping your knives sharp and rust-free is essential. Regular care extends the life of the knives and the beauty of your bonsai creations.

Task Frequency
Cleaning After each use
Sharpening As necessary
Oil Application Monthly

Remember: Store your knives in a dry place and avoid cutting wire with the blade. A dull knife can damage your bonsai as much as it can hurt the tool itself.

Precision With Power Tools

Precision with Power Tools elevates the art of bonsai carving. Mastery combines with technology to bring intricate designs to life. For hobbyists and professionals alike, these tools offer control and efficiency. An exciting fusion of tradition and innovation awaits.

Mini Grinders

Mini grinders are essential for sculpting bonsai. They remove wood quickly. Users achieve smooth curves and hollows with ease. Their compact size allows for detailed work without strain.

  • Variable speed for diverse tasks
  • Ergonomic design for comfort
  • Durable bits for all wood types

Rotary Tools

Rotary tools provide a finer touch. These versatile instruments define bonsai aesthetics. They engrave, polish, and cut with high precision. Users enjoy a wide selection of attachments.

Attachment Use
Carving Bits For wood removal
Diamond Wheels For cutting and shaping
Buffing Pads For polishing surfaces

Safety And Handling

Safety is key when using power tools. Proper handling ensures a risk-free environment. Always wear safety gear. Follow the manufacturer’s instructions. Keep tools clean and maintained.

  1. Wear protective eyewear and gloves
  2. Read the manual thoroughly
  3. Maintain a firm grip on the tool
  4. Store tools in a dry, safe place

Chisels And Gouges For Detailing

Bonsai artists use special tools for creating masterpiece trees. Among these, chisels and gouges play a vital role. They help in detailing, which gives bonsai their unique beauty. Let’s explore the types and uses of these tools and learn techniques for the most refined cuts.

Types And Uses

Both chisels and gouges shape the wood of a bonsai tree. They are used for carving trunks and branches.

  • Flat Chisels: for smooth cuts and shaping flat areas.
  • U-Gouges: to scoop out wood, leaving a rounded cut. Great for hollows.
  • V-Gouges: for sharp lines and adding definition. Perfect for veins.
Tool Use
Straight Chisels General carving, creating straight edges
Skew Chisels Cleaning up junctions, reaching tight spots
Fishtail Gouges Flared cuts, working corners

Techniques For Refined Cuts

  1. Maintain Sharp Tools: Always keep chisels and gouges sharp for clean cuts.
  2. Controlled Strokes: Use light, controlled strokes for precision.
  3. Direction of Grain: Carve in the direction of the wood grain to avoid splintering.
  4. Support the Wood: Clamp the bonsai or hold it steady to prevent slips.

With these tools and techniques, intricate details on bonsai come to life. The patience and skill in using chisels and gouges can be seen in every precise cut.

Innovative Bonsai Carving Equipment

Bonsai trees are miniature masterpieces. Their carving requires precision. Delicate branches demand the gentlest touch. Traditional tools are great. But innovation brings new tools. We explore cutting-edge carving equipment. These innovations upgrade bonsai artistry.

Laser Engravers

Laser engravers are remarkable. They transform bonsai carving. These devices are highly accurate. Precision is their strength. They can etch detailed patterns into wood. They do so with ease and speed. Here’s why they shine:

  • Less Physical Effort: Carve without hand strain.
  • Unique Designs: Produce complex patterns.
  • Consistency: Replicate designs perfectly.
  • Safety: Less risk than traditional tools.

3d Printers For Custom Tools

3D printers are game-changers in bonsai carving. Create tools tailored to specific needs. Print precise jigs or grips. Customization is endless. Enjoy benefits like:

  1. Tool adaptation for unique bonsai shapes.
  2. Material choice flexibility.
  3. Rapid prototype creation.

3D printers empower carvers. They allow you to dream up and realize new tools. This was never possible before.

Enhancing Your Craft With Accessories

Every bonsai artist knows the tree shapes itself. But the right tools bring its beauty to life. Accessories play a vital role. They make the process smoother. They refine your skills. Let’s explore the best bonsai carving tools. And how they elevate your craft to the next level.

Sharpening Stones

A sharp tool is a bonsai artist’s best friend. Here’s why sharpening stones are essential:

  • Maintain edged tools: Chisels and knives stay sharp.
  • Longevity: Proper care extends tool life.
  • Accurate cuts: Sharp tools ensure clean, precise cuts.

Match the stone’s grit to the tool’s need. Fine grit polishes. Coarse grit reshapes. Sharp tools create stunning bonsai masterpieces.

Tool Storage Solutions

Organize your workspace with these storage solutions:

Storage Type Benefits
Tool Rolls Portable, protective, and space-saving.
Cabinets Large capacity. Keeps tools dust-free.
Magnetic Bars Easy access. Tools at a glance.

Right storage shields tools from damage. It maintains their sharpness. And it improves your workflow.

Workshop Lighting For Precision

Bright, focused lighting matters. Here’s why:

  1. It cuts down on straining your eyes.
  2. Lights with adjustable brightness and angle are the best.
  3. Shadow-free lights ensure detail work is precise.

Choose LED lights. They’re energy-efficient. They offer a range of color temperatures. Perfect lighting means flawless carving outcomes.

Frequently Asked Questions On Best Tools For Carving Bonsai

What Are Essential Bonsai Carving Tools?

Bonsai carving tools are specialized instruments designed to shape and detail bonsai trees. Essential tools include concave cutters, knob cutters, and bonsai carving chisels, each serving a specific purpose in creating precise cuts and promoting proper healing.

How Does A Bonsai Carving Tool Kit Benefit Enthusiasts?

A bonsai carving tool kit offers enthusiasts a comprehensive set of instruments for intricate work. It ensures that they have the right tool for every step of the bonsai styling process, which is crucial for the tree’s aesthetic and health.

Can You Use Regular Wood Carving Tools On Bonsai?

Regular wood carving tools are not recommended for bonsai. Bonsai tools are uniquely designed for delicate work and provide the precision needed for the small scale of bonsai trees. Using inappropriate tools can damage the tree.

What’s The Best Way To Maintain Bonsai Carving Tools?

Maintaining bonsai carving tools involves regular cleaning after use, proper storage away from moisture, and sharpening blades to ensure precise cuts. Oiling the tools can also prevent rust and prolong their lifespan.

Conclusion

Selecting the right tools is crucial for bonsai artistry. With the options we’ve covered, you’re set to refine your bonsai creations. Remember, quality counts—invest in the best to craft with precision and care. Embrace the journey of bonsai carving, where each tool is a step towards mastery.

Happy carving!

(Learn more about Bonsai Tools & Supplies: https://bonsainurserybd.com/bonsai-tools-and-supplies-essentials/)

Best Way to Fertilize Bonsai

Best Way to Fertilize Bonsai: Essential Tips for Growth

The best way to fertilize a bonsai is by applying a balanced, slow-release fertilizer during its growing season. Choose a fertilizer with an equal NPK ratio for optimal growth and health.

Bonsai trees captivate with their miniature majesty, reflecting the beauty of nature on a tiny scale. To thrive, these intricate plants require precise care, including proper fertilization. Cultivating bonsai involves not just shaping but nurturing the tree through every season of its life.

Best Way to Fertilize Bonsai

Best Way to Fertilize Bonsai: A successful bonsai grower knows that fertilizer is not merely about boosting growth – it’s about maintaining the delicate balance of nutrients in the soil. For those passionate about bonsai, understanding and implementing the right fertilization technique is essential. It ensures that their miniature trees not only survive but flourish, showcasing lush foliage and strong branches that mirror their full-sized counterparts.

Essentials Of Bonsai Fertilization

Fertilizing a bonsai is key to its health. Let’s unwrap the essentials of bonsai fertilization. A bonsai can’t search for nutrients like full-sized trees. So, proper feeding is a must for these miniature wonders.

The Role Of Nutrients In Bonsai Care

Bonsais need a balance of Nitrogen (N), Phosphorus (P), and Potassium (K). These boost leaf growth, root development, and overall health. Let’s break these down:

  • Nitrogen: Essential for leaf and stem growth.
  • Phosphorus: Helps roots and flowers grow strong.
  • Potassium: Increases disease resistance and strength.

Besides N, P, and K, bonsais need other elements too. Elements like magnesium, calcium, and sulfur are also crucial.

Organic Vs. Synthetic Fertilizers

Choosing between organic and synthetic fertilizers matters. Each has its pros and cons. See the comparison:

Type Pros Cons
Organic
  • Improves soil structure
  • Releases nutrients slowly
  • Less risk of root burn
  • Can attract pests
  • Nutrient levels vary
Synthetic
  • Precise nutrient composition
  • Fast-acting
  • Can lead to salt buildup
  • Possible root damage if overused

Go organic for long-term health or synthetic for quick fixes. Remember, over-fertilization can harm your bonsai. Use the right amount at the right time.

Assessing Your Bonsai’s Needs

Assessing Your Bonsai’s Needs is crucial for maintaining its health and vigor. Just as a chef must taste a dish before adding more seasoning, a gardener should evaluate their Bonsai’s condition before fertilizing. Understanding what your Bonsai needs is the first step to ensuring it gets the correct nutrients in the right amounts.

Soil Testing For Nutrient Levels

The foundation of a healthy Bonsai begins with its soil. A soil test reveals much about the current nutrient content. You can purchase a soil test kit from a garden store or through an online retailer. Follow the instructions precisely to get accurate results.

Essential Nutrients and Ideal Soil Composition for Bonsai
Nutrient Ideal Amount
Nitrogen (N) Medium
Phosphorus (P) Low
Potassium (K) Medium
pH level 5.5 – 6.5

Recognizing Deficiency Symptoms

Bonsai leaves can tell you a lot. Watch out for signs that might indicate your Bonsai is struggling. Here are common symptoms:

  • Yellow leaves might mean a nitrogen deficit.
  • Weak stems can signal a lack of phosphorus.
  • Discolored leaf edges often suggest a potassium shortage.

After identifying any issues, adjust your fertilization plan accordingly. Use a fertilizer with the correct N-P-K ratio suited for your Bonsai’s needs. A balanced fertilizer could help when in doubt, but always consider the specific symptoms you’ve observed. Your Bonsai will thank you with strong growth and beautiful foliage.

Timing And Techniques

Fertilizing your bonsai is critical to its health and growth. The right timing and techniques can boost your bonsai’s vigor. Bonsai trees need nutrients to produce lush foliage and strong roots. Unlike plants in nature, bonsai rely on their caretakers for these nutrients. Note the tree species, growth stage, and season when deciding on the fertilization schedule.


Seasonal Fertilizing Strategies

Bonsai trees have different needs with the change of seasons. Here’s a simple timeline:

  • Spring: High-nitrogen mix to support growth.
  • Summer: Balanced fertilizers maintain development.
  • Autumn: Low-nitrogen mix to prepare for dormancy.
  • Winter: Little to no fertilizer needed.


Application Methods

Choose the right method to ensure your bonsai gets the full benefit:

Method Description Frequency
Liquid Fertilizers Easy to control and apply. Every two weeks.
Granular Fertilizers Slow release, long lasting. Once a month.
Organic Options Improve soil health gradually. Varying schedules.

Choosing The Right Fertilizer

Bonsai trees, like all living things, thrive with proper nutrition. Selecting the ideal fertilizer for a bonsai is crucial. It impacts the tree’s growth, health, and beauty. The right fertilizer ensures a balance of essential nutrients.

Npk Ratios For Bonsai

NPK stands for nitrogen (N), phosphorus (P), and potassium (K). Each element serves a specific purpose. Nitrogen promotes leaf growth, phosphorus develops roots, and potassium improves overall health. Bonsai trees require a balanced NPK ratio. This often looks like a balanced mix such as 10-10-10. Younger trees may need more nitrogen for growth, while mature trees require less.

Element Function Recommended Ratio
N (Nitrogen) Leaf Growth High for young trees
P (Phosphorus) Root Development Consistent for all
K (Potassium) Overall Health Consistent for all

Liquid Vs. Granular: Pros And Cons

Liquid fertilizers are fast-acting, providing quick nutrition. Their application is straightforward but requires frequent feeding.

  • Pros: Easy to mix, immediate effect
  • Cons: Short-lived, need for regular application

Granular fertilizers break down slowly. This offers a steady food supply. They prove less labor-intensive but more difficult to control.

  • Pros: Long-term nutrition, less frequent application
  • Cons: Slower to take effect, potential for overfeeding

Application Best Practices

Correct fertilizer application ensures a healthy bonsai. Knowing the best way to fertilize is key. We discuss dilution rates and how to avoid over-fertilization.

Dilution Rates For Optimal Growth

Optimal growth depends on precise fertilizer dilution.

  • Use manufacturer’s guidelines.
  • Mix with water accurately.
  • Test soil before application.
Fertilizer Dilution Table
Fertilizer Type Dilution Rate
Liquid 1:10 ratio
Granular 1:20 ratio
Organic Varies

Avoiding Over-fertilization

Too much fertilizer can harm bonsai.

  1. Stick to recommended doses.
  2. Look for signs of excess.
  3. Reduce if foliage yellows.

Regular check-ups prevent over-fertilization. Carefully monitor growth patterns and soil health. Change application as needed to avoid damage.

Monitoring And Adjusting

Monitoring and Adjusting your bonsai’s fertilization routine is crucial. Bonsai trees, being miniature versions of their full-sized counterparts, require special attention to their nutritional needs. Consistently observing your bonsai’s response to fertilization enables you to maintain its health and achieve optimal growth. It’s about careful tracking and fine-tuning the feeding schedule to align with your bonsai’s unique requirements.

Tracking Growth And Health

Keeping a close eye on your bonsai’s growth patterns and health indicators will pave the way for successful nourishment. Look for new leaves, branch growth, and root development, all signs that your bonsai is thriving.

  • Leaf color: Indicates nutrient levels
  • Bud development: Signifies healthy growth
  • Root visibility: A peek into your bonsai’s health

Regularly inspect for any signs of distress, such as leaf yellowing or dropping, which could signal an imbalance in nutrition.

Fine-tuning Fertilization Routines

Fine-tuning your bonsai’s fertilization routine is essential. Observe how your bonsai reacts to different types of fertilizers and feeding schedules.

Season Fertilizer Type Frequency
Spring Balanced NPK Every two weeks
Summer High Nitrogen Weekly
Autumn Low Nitrogen Monthly
Winter None Dormant period

Adjust the routine based on your bonsai’s species-specific needs and environmental factors. Should the growth be too rapid, cut back on the fertilizer. Conversely, increase feeding slightly if growth seems sluggish.

Frequently Asked Questions For Best Way To Fertilize Bonsai

What Is The Best Fertilizer For Bonsai Trees?

Bonsai trees thrive with fertilizers high in nitrogen, phosphorus, and potassium. A balanced, slow-release, organic mix is often recommended. Applying it during the growing season ensures robust health.

How Often Should You Fertilize Bonsai?

Fertilize your bonsai every two to four weeks during the growing season. In winter, reduce application as growth slows down. Over-fertilizing can damage the tree, so follow a schedule.

Can You Use Coffee Grounds To Fertilize Bonsai?

Yes, coffee grounds can be used as a mild fertilizer for bonsai. They add organic matter to the soil, improving drainage and fertility. However, use them sparingly to avoid over-acidifying the soil.

What Are Signs Of Bonsai Needing Fertilizer?

Signs include stunted growth, yellowing leaves, and a lack of vigor. If your bonsai shows these symptoms during the growing season, it may need fertilizer to boost its nutrient intake.

Conclusion

Cultivating a bonsai requires precision and care, especially when fertilizing. By selecting the right fertilizer, understanding the timing, and applying the correct amounts, your miniature tree can flourish. Embrace these best practices to nurture your bonsai’s growth and ensure its long-term health and aesthetic appeal.

Remember, a thriving bonsai is a product of attentive care and knowledge—start fertilizing wisely today.

(Check this out for Bonsai Soil Mix: https://bonsainurserybd.com/best-bonsai-soil-mix/)

Best Bonsai Plant for Home

Best Bonsai Plant for Home: Cultivate Serenity!

The Ficus Bonsai is an ideal choice for the home due to its resilient nature and aesthetic appeal. It thrives indoors and offers an impressive miniature tree-like appearance.

Bonsai, the Japanese art of growing miniature trees, is a practice that combines horticultural ingenuity with artistic expression. As a living element, bonsai brings a serene and calming effect into the home, making it a desirable feature for home decor enthusiasts and plant lovers.

Best Bonsai Plant for Home

Best Bonsai Plant for Home: Selecting the right bonsai is crucial for both the health of the plant and the enjoyment it can provide. The Ficus Bonsai stands out among the many varieties available; it adapts well to indoor environments, requiring less sunlight and humidity than some of its counterparts. With its robust nature, it forgives minor care mistakes, making it perfect for novices. The Ficus also offers an added bonus of air purification, contributing to a healthier home atmosphere.

The Art Of Bonsai: A Gateway To Tranquility

Bonsai trees are more than just plants. They’re a form of art. Each one invites peace into your home. With careful pruning and love, these miniature trees reflect nature’s beauty on a tiny scale. They bring a sense of calm and focus to any room. The practice of cultivating bonsai is a journey that rewards patience. In great silence, a simple bonsai can help calm the mind and spirit.

Origins In Ancient Cultures

Bonsai has deep roots in ancient history. The tradition began over a thousand years ago. It first blossomed in China before spreading to Japan. The art form was known as “penjing” in China. It involved creating miniature landscapes. The Japanese refined this into what we know as bonsai today. Bonsai means “planted in a container.” This art highlights the harmony between nature and humans.

Bonsai As A Modern Meditation

In our fast-paced world, bonsai cultivation stands as a quiet rebellion. It’s a meditation practice that demands presence and patience. Focusing on the gentle shapes, the delicate leaves, and the patient training leads to mindfulness. Owning a bonsai combines the cultivation of both beauty and tranquillity.

As a beginner, consider these bonsai trees:

  • Ficus Bonsai: Tough and adaptable, perfect for beginners.
  • Juniper Bonsai: Expressive forms, requires a bit more care.
  • Chinese Elm Bonsai: Beautiful leaves, hearty and forgiving.

Choose a bonsai that resonates with your style:

Plant Type Characteristic Level of Care
Ficus Robust, can survive in low light Low
Juniper Needs bright light, dramatic appearance Medium
Chinese Elm Adaptable to various climates, intricate foliage Medium

Remember, selecting the best bonsai is a personal journey. Find the one that speaks to tranquility in your life.

Choosing Your Bonsai: Factors To Consider

Welcome to the serene world of bonsai. Selecting the perfect bonsai plant for your home is an art form in itself. There are several factors to think about. This guide serves to help beginners and enthusiasts find their ideal bonsai companion. Let’s consider the environment, size, and care needs before choosing your miniature tree.

Assessing Your Living Environment

Your home’s condition plays a huge role in a bonsai’s health. Bonsai trees need the right light, temperature, and humidity. Bright, indirect sunlight is best for most varieties. Check for draughts as they can harm some bonsai species. Ensure you can provide a stable environment to keep your bonsai thriving.

Understanding Bonsai Sizes

Bonsai plants come in various sizes, from tiny ones to larger, outdoor specimens. Here are some common sizes:

  • Keshitsubo: up to 3 inches
  • Shito: 2 to 4 inches
  • Mame: up to 6 inches
  • Shohin: 6 to 8 inches
  • Chumono/Chuhin: 10 to 18 inches
  • Dai: about 30 inches

Consider the space where you want to place the bonsai. Make sure there’s enough room for it to grow without blocking pathways or becoming cramped.

Maintenance And Care Requirements

Regular care is essential for all bonsai trees. Some species need more attention than others. Watering, pruning, and repotting are critical to their survival. Water when the soil feels dry. Pruning helps control growth and maintain shape. Repotting is needed every few years. To decide if a bonsai fits your lifestyle, think about your daily routine and the time you can commit.

Bonsai Type Watering Frequency Pruning Frequency
Jade Every 1-2 weeks Annually
Ficus Every week Biannually
Maple Twice a week As needed during growing season

Choose a bonsai that matches your ability to provide care. This ensures a long and healthy life for your bonsai.

Top Bonsai Varieties For Home Environments

Bring life and serenity to any room with the right bonsai plant. For enthusiasts and newcomers alike, selecting the ideal bonsai for home environments is a delightful journey. Some varieties thrive indoors, bringing peace, beauty, and a sense of nature to your living space. Explore the top bonsai varieties that promise to transform your home into an oasis.

Japanese Maple: Delicate Beauty

The Japanese Maple, with its graceful foliage and vibrant colors, is a living artwork. It prefers bright, indirect light and can enhance any room’s aesthetic. An ideal choice for those who appreciate seasonal changes within their home.

  • Location: Near a window with filtered light
  • Water: Keep soil consistently moist
  • Care: Prune to maintain shape and health

Ficus Bonsai: Versatile And Hardy

A Ficus bonsai is a stellar pick for its low maintenance and ability to adapt. It can flourish in a variety of conditions. Plus, it’s known for its glossy leaves and robust structure, making it a popular choice for indoor gardens.

Attribute Detail
Light Can handle low-light conditions
Growth Supports frequent trimming
Resilience Tolerates less-than-ideal environments

Juniper Bonsai: A Gesture Of Elegance

The Juniper bonsai stands out with its rich greenery and intricate branches. It’s an embodiment of elegance and tradition. Caring for a Juniper bonsai can be a gateway to mastering the art of bonsai for both beginners and experienced cultivators.

  1. Keep outdoors if possible for best growth
  2. Mist regularly to maintain its vibrant needles
  3. Winter care: Protect from extreme cold

Caring For Your Bonsai: Tips And Tricks

Welcome to the serene world of bonsai trees, where patience meets artistry. Bonsai are much more than just potted plants; they are living sculptures that bring nature into your home. They require attention and a gentle touch, but don’t worry! Here, we’ll guide you through the basics of bonsai care, ensuring your miniature tree thrives.

Watering Your Miniature Tree

Bonsai trees need water, just like all plants. However, their unique needs make watering them an art. Here are some tips:

  • Check soil moisture: Ensure the soil is slightly dry before watering.
  • Water thoroughly: When the soil is dry, soak it until water runs out of the drainage holes.
  • Avoid over-watering: Standing water can cause roots to rot.

Soil And Fertilization Essentials

Bonsai soil and fertilization are key to maintaining a healthy tree. Consider these essentials:

Aspect Recommendation
Soil Type Use a well-draining bonsai mix.
Fertilization Frequency Fertilize every few weeks during the growing season.
Fertilizer Type Select a balanced bonsai fertilizer.

Pruning: The Art Of Shaping

Pruning is essential for a bonsai’s shape and health. Follow these simple steps:

  1. Select the right time: Prune during the tree’s dormant season.
  2. Use proper tools: Clean, sharp shears make precise cuts.
  3. Maintain balance: Trim branches to create a miniature version of a full-sized tree.

(To learn about Bonsai Wiring: https://bonsainurserybd.com/when-is-the-best-time-to-wire-a-bonsai/)

Designing Your Space With Bonsai

Bonsai plants transform spaces into peaceful retreats. It’s not just about choosing the plant but creating an atmosphere.

Creating Harmony With Bonsai Placement

Positioning a bonsai is key to harmony in your space. For balance, center the bonsai on a table or shelf.
Choose a spot with natural light but no direct sunlight. Ensure the bonsai remains the clear focal point.

Complementary Plants And Accessories

  • Pair bonsais with subtle, low-height plants to enhance their stature.
  • Use rocks and moss to create a landscape effect around the bonsai.
  • Ceramic pots contribute to a bonsai’s elegance.

Incorporating Bonsai Into Feng Shui

Bonsai Type Location Feng Shui Benefit
Jade Plant Eastern Sector Wealth and Prosperity
Ficus Bonsai Southwest Area Relationship Harmony
Pine Bonsai Northern Zone Career Growth

Overcoming Challenges With Bonsai Cultivation

Embracing the art of bonsai can transform your home. Yet, challenges do arise when nurturing these miniature marvels. Recognizing and surmounting these hurdles is key to thriving in the bonsai world.

Pest And Disease Management

Bonsai trees, like all plants, can encounter pesky invaders. Vigilance and prompt action are paramount in protecting their health.

  • Inspect regularly for early signs of trouble.
  • Use organic pesticides to shield both plant and environment.
  • Isolate affected plants to prevent spread.

Dealing With Environmental Stress

Environmental factors deeply influence bonsai success. Crafting the right surroundings fosters strong, beautiful bonsai.

  1. Maintain stable temperatures to avoid shock.
  2. Adjust watering in response to humidity.
  3. Shield from harsh elements, like strong winds or direct sun.

Advancing Your Practice Through Community

Growth flourishes with support. Connections with fellow enthusiasts can enrich your bonsai journey.

Join local clubs or online forums to exchange tips.

Attend workshops to sharpen skills.

Share experiences and celebrate successes together.

Frequently Asked Questions Of Best Bonsai Plant For Home

What Are The Top Bonsai Plants For Beginners?

Bonsai newcomers often start with the Ficus or Jade plant. These are hardy, forgiving, and adapt well to indoor environments. They require minimal maintenance, making them ideal for novices in bonsai cultivation.

Can Bonsai Trees Purify Indoor Air?

Yes, bonsai trees like the Ficus bonsai have air-purifying qualities. They can absorb toxins and provide oxygen, improving indoor air quality. However, they offer limited impact due to their small size compared to regular houseplants.

How To Water Bonsai Plants At Home?

Optimal watering depends on the bonsai type, but general advice is to water when the topsoil feels dry. Use a watering can or hose with a fine-spray nozzle to moisten the soil thoroughly without disturbing it.

What Bonsai Is Best For Indoor Decor?

The Hawaiian Umbrella tree is excellent for indoor decor due to its lush foliage and attractive, umbrella-shaped canopy. It thrives in low-light conditions and adds a tropical feel to any room.

Conclusion

Selecting the perfect bonsai plant for your home boils down to personal preference and care commitment. Whether you opt for the resilient Juniper or the charming Cherry Blossom, each plant adds a unique touch of serenity and artistry. Embrace the bonsai journey; let its miniature splendor enhance your space.

(Check this out for more info : https://thursd.com/articles/10-best-bonsai-plants-for-your-home-according-to-bonsai-specialists)

Best Time to Repot Bonsai

When is the Best Time to Repot Bonsai: Key Seasons Revealed!

The best time to repot bonsai is during the late winter or early spring. This period precedes the onset of the new growth season.

Bonsai enthusiasts often seek the ideal timing for repotting their miniaturized trees to ensure a thriving growth and maintain their tree’s health. Repotting at the appropriate time allows the plant to recover and establish its roots before the growing season begins.

Best Time to Repot Bonsai

Root pruning, an essential part of the repotting process, becomes safer to do when the tree is still dormant, reducing the risk of stressing the plant. Careful attention to the bonsai’s repotting schedule can result in a more robust and aesthetically pleasing specimen. Remember, the perfect repotting moment varies for different species, so it’s important to understand your bonsai’s specific needs.

The Lifespan Of Bonsai Soil

Understanding the lifespan of bonsai soil is pivotal to the health of your miniature tree. Just like any plant, bonsai rely on their soil for nutrients, water, and breathability. Over time, the soil degrades, losing its ability to support your bonsai’s life effectively.

Why Soil Health Matters

Bonsai trees soak up their life from the ground they grow in. The right soil mix means everything for these dwarfed plants, offering the perfect balance of drainage, aeration, and nutrition. Unlike typical houseplants, bonsai trees have very limited space in their pots. This makes maintaining soil quality even more critical. Healthy soil fosters strong roots and, by extension, a thriving bonsai.

Signs It’s Time For Change

  • Compacted Soil: Over time, soil becomes hard. This makes water flow tough.
  • Poor Drainage: When water sits on top, it’s a clear sign. The soil is not working right.
  • Root Overgrowth: If roots circle the pot or poke out, they need more space.
  • Slow Growth: When your bonsai slows or stops growing, the soil might be the cause.

Checking these signs yearly helps you decide when to repot. Typically, bonsai need repotting every two to five years. Younger bonsai may need it more often; older ones, less so. The best time is usually spring, as the tree wakes from winter rest.

Seasonal Bonsai Care

Understanding the rhythms of nature is vital for bonsai care. Plants, like animals, have natural cycles, and bonsai are no exception. Repotting at the right moment in these cycles can ensure your bonsai not only survives but thrives. In this section, we will explore the optimal times for bonsai repotting throughout the year, marked by the changing seasons.

Spring Awakening

Spring is the season of growth. As warmer weather arrives, bonsai trees shake off winter dormancy. This is the best time to repot most bonsai species. The period before new buds break is perfect because the tree can recover quickly and start growing immediately.

  • Inspect the roots for any damage or rot.
  • Choose a well-draining soil mix specialized for your bonsai type.
  • Prune the roots carefully, retaining healthy root structure.

Summer Vigor

As temperatures rise, bonsai trees enter a phase of vigorous growth. Summer is not ideal for repotting, as the heat can stress the plants. Focus on maintenance during these months:

  • Stay on top of watering needs.
  • Position your bonsai to receive ample but indirect sunlight.
  • Defoliate if necessary, but only for healthy, mature trees.

Autumn Preparation

Autumn brings a gradual slow-down in growth as bonsai trees prepare for the coming cold. In milder climates, early autumn can be a second chance for repotting, but the window closes quickly as temperatures drop.

  • Prepare your bonsai for the decrease in temperature.
  • Minimize pruning to allow the tree to store energy.
  • Adjust watering to the plant’s reduced needs.

Winter Rest

Winter is a time for rest for both the bonsai and the gardener. It is not a time for repotting, as the tree’s growth has paused. Instead, focus on protection:

  • Protect your bonsai from extreme cold and frost.
  • Shift the plant to a sheltered location if needed.
  • Water sparingly, as the tree’s water needs are minimal.

Ideal Seasons For Repotting

The best time to repot bonsai trees is crucial for their health and growth. Like moving to a new home, bonsai need care in choosing when to transition.

Spring Repotting Benefits

Spring ushers in new beginnings for flora.

  • Optimal growth cycle: Trees awaken from winter dormancy.
  • Better root recovery: Warm temperatures promote healing.
  • Seasonal timing: Trees can adjust before harsh weather.

Repotting during spring aligns with nature’s cycle, ensuring stronger bonsais.

Potential Risks In Other Seasons

Repotting outside of spring can be risky.

Season Risks
Summer Heat stress hampers healing.
Fall Pre-dormancy period; energy is low.
Winter Roots are dormant; recovery is slow.

Strong roots are vital. Avoid other seasons to prevent damage.

Repotting Process And Best Practices

Caring for a bonsai involves timely repotting to ensure its health and growth. Understanding the best practices for repotting is crucial. This section details each step and what to do after repotting.

Steps For Successful Repotting

Follow these steps carefully to repot your bonsai:

  1. Select the right time. Spring is best when the tree has energy to recover.
  2. Prepare before you start. Have all tools and materials ready.
  3. Gently remove your bonsai. Ease it out of its current pot.
  4. Prune the roots. Trim with care to promote new growth.
  5. Refresh the soil. Use specific bonsai soil for better results.
  6. Secure the tree. Place it in its new pot and add soil around it.
  7. Water thoroughly. Ensure the roots have enough moisture.

Post-repotting Care

After repotting, follow these tips to help the bonsai recover:

  • Avoid direct sunlight. Keep the tree in a shaded area.
  • Maintain moisture. Water regularly but don’t soak the bonsai.
  • Observe growth. Watch for new shoots as a sign of recovery.
  • Don’t fertilize immediately. Wait for a month before using fertilizer.

Factors Influencing Repotting Frequency

The frequency of repotting a bonsai is pivotal to maintain its health and beauty. Several factors determine the ideal time for this task, and ignoring these can lead to a bonsai’s poor development or even its demise. Understanding these influencing aspects ensures the bonsai thrives in its miniature landscape.

Bonsai Species And Growth Rates

Different bonsai trees exhibit varying growth speeds. Generally, fast-growing species require more frequent repotting compared to their slower-growing counterparts. For example, a ficus bonsai, known for its vigorous growth, might need repotting each year. In contrast, a juniper, with a slower pace, can often go longer, possibly two to three years before needing a change.

Pot Size And Root Constraints

A bonsai’s health is deeply rooted in its pot size. Smaller pots limit root development, necessitating more frequent repotting to prevent root-bound conditions. On the other hand, a slightly larger pot can offer more room for the roots and reduce the need for frequent repotting. Observing root growth during regular watering helps gauge the need for a new home for your bonsai. If the roots circle the pot’s bottom or start growing through drainage holes, it’s repotting time.

Important Phrases:

  • Different bonsai trees have varying growth speeds.
  • Fast-growing species need more frequent repotting.
  • Smaller pots can lead to root-bound conditions.
  • Repot when roots circle the pot’s bottom.

Monitoring Bonsai For Repotting Cues

Knowing the right time to repot a bonsai tree is key to its health and beauty. Much like a chef tastes their food, bonsai enthusiasts must closely watch for their tree’s signals. One does not simply mark the calendar and repot; the tree tells you when it’s time. By paying attention to certain cues, you ensure your bonsai thrives. Let’s explore the signs that indicate your bonsai is ready for a new home.

Root Circulation

Roots are the lifeline of your bonsai. They should circulate freely to absorb water and nutrients. Here are signs your bonsai might need repotting:

  • Roots circling the inside of the container
  • Roots peeking out of the drainage holes
  • A root ball that’s solid and congested

These cues suggest it’s time to consider giving your bonsai some breathing room.

Soil Moisture Levels

The soil’s moisture retention can tell a lot about the repotting needs.

Observation Action
Soil dries out quickly Time to repot
Water pools on the surface Check root health

When water behavior changes, it’s a symptom that repotting could be near.

(Check this out for more knowledge: https://bonsainurserybd.com/bonsai-repotting-maintaining/

Frequently Asked Questions For When Is The Best Time To Repot Bonsai

When Should You Repot Your Bonsai Tree?

Bonsai trees generally need repotting every 2-5 years. The best time to repot is during the tree’s dormant season, usually late winter or early spring. This timing reduces stress on the tree and encourages a surge of new growth in the growing season.

What Signs Indicate A Bonsai Needs Repotting?

Signs a bonsai needs repotting include slow growth, roots circling the pot’s bottom, soil that drains poorly, and water that sits on top. Yellowing leaves can also suggest it’s time. Check annually to determine if your bonsai requires repotting.

Does Repotting Time Vary By Bonsai Species?

Yes, repotting time can vary by species. Deciduous trees are often repotted in late winter, while tropical species prefer late spring or summer. It’s crucial to research your specific bonsai’s needs for the optimal repotting schedule.

Can Repotting A Bonsai Harm The Tree?

Repotting, if done correctly and at the right time, shouldn’t harm your bonsai. It’s essential to handle the tree gently and provide proper aftercare. This includes timely watering and protection from extreme temperatures to ensure recovery and growth.

Conclusion

Determining the optimal time to repot your bonsai is critical. Aim for late winter or early spring, before the growth season starts. Always monitor your tree’s health for signs it may need sooner attention. By following these guidelines, your bonsai will thrive and grow beautifully in its new home.

(To know more about Bonsai Repotting from expert: https://www.bonsaiempire.com/basics/bonsai-care/repotting)

Fit Trees and Shrubs Into A Small Garden

How To Fit Trees and Shrubs Into A Small Garden: Space-Saving Tips

To fit trees and shrubs into a small garden, select dwarf varieties and utilize vertical space. Employing creative pruning and container planting can maximize space.

Fit Trees and Shrubs Into A Small Garden

Lush greenery and vibrant flowers aren’t just for sprawling landscapes; even the most compact of gardens can host a variety of trees and shrubs. With the right approach, a small garden space can become a leafy retreat or a floral haven.

Choosing the correct plant species is crucial; dwarf and slow-growing varieties that require less room to spread are ideal. Utilizing vertical space by incorporating climbing plants or tiered planters can add depth and height without overcrowding the ground. Creative pruning can also help to maintain the size of trees and shrubs, ensuring they complement rather than dominate your garden. Thinking outside the box and embracing container gardening can also offer flexibility, allowing you to move plants around as needed to suit your evolving outdoor aesthetic. Tailoring your choices to the scale of your space doesn’t have to curb your garden’s potential—it’s all about strategic selections and inventive layout planning.

The Challenge Of Small Garden Spaces

Small gardens pose a unique challenge for planting trees and shrubs. The key is to choose plants wisely and utilize space effectively. Opt for slow-growing species or those that can be trained upward against walls or fences, such as espalier fruit trees. Integrate multi-functional plants that provide more than just aesthetics, like those offering shade or acting as natural borders. Consider vertical gardening techniques to maximize your limited area.

There’s also a crucial need to consider biodiversity. Introducing a variety of species can encourage local wildlife to visit and thrive. Select plants that offer a range of benefits for different species, for instance, berry-producing shrubs for birds and flowering plants that support pollinators. By thoughtfully planning, your small garden can still contribute significantly to local ecosystems.

Choosing The Right Trees And Shrubs

Choosing the right trees and shrubs for a small garden is crucial. It’s important to consider both size and mature growth.

Smaller gardens benefit significantly from dwarf varieties. These plants stay compact, making them ideal for limited spaces. Dwarf varieties often require less pruning, which means less work for gardeners.

Other benefits of dwarf varieties include:

  • Easier maintenance due to reduced size.
  • They can be planted closer together for a fuller look.
  • Less root competition, which is good for small areas.

Design Strategies For Small Gardens

Vertical gardening is a smart choice for those with limited ground space. Climbing plants like ivy and clematis grow upward, not outward. This means you get a lush garden without eating up square footage. Use trellises, wall-mounted planters, or hanging baskets to start your vertical garden.

Layering techniques add depth and make a garden appear bigger. Plant tall shrubs at the back and shorter flowers in front. Each plant gets seen and the garden looks full. Mix up textures and colors for the best effect. This simple trick fools the eye into seeing more space.

Back Layer Mid Layer Front Layer
Tall Shrubs Medium Plants Low Growing Flowers
Creates Background Adds Fullness Offers Variety

Cultivation Tips For Restricted Areas

Pot culture enables trees and shrubs to thrive in restricted spaces. Use containers that give roots room to grow. Prune roots gently during repotting to encourage healthy development. These steps ensure plant vitality.

Soil for small gardens must be rich in nutrients. It should drain well yet hold moisture. Mix in compost to improve soil quality. Fertilizers maintain nutrient levels, but avoid over-fertilizing. Use organic options to feed your plants safely.

Pot Culture Soil Needs
Containers with growth space Nutrient-rich, well-draining
Root pruning during repot Add compost for quality
Ensures plant vitality Use organic fertilizers

Maintenance And Pruning Practices

Maintaining a small garden requires regular trimming to manage tree and shrub sizes. Pruning should be gentle, as harsh cuts can harm the plants. Gardeners need to ensure appropriate tools are used for clean cuts that promote healthy growth.

Seasonal care is crucial for keeping trees and shrubs vibrant and flourishing. In spring, focus on removing dead or damaged branches. Summer may call for light pruning to shape the plants. During fall, prepare plants for winter by removing any overgrowth. Lastly, winter is the time for major structural pruning when plants are dormant.

Season Care
Spring Clean up, remove dead branches
Summer Shape and maintain form
Fall Pre-winter trim, remove overgrowth
Winter Major pruning, structure focus

Innovative Solutions And Case Studies

Small gardens can flourish with the right tree and shrub choices. Utilizing vertical space is key; think climbing plants on walls. City dwellers often use raised planters for shrubs. Compact species thrive in tight spots, providing greenery and privacy. Living walls are also effective, mingling different plant types vertically. Tables below offer examples and strategies for petite green spaces.

Garden Type Tree/Shrub Strategy
Urban Balcony Dwarf fruit trees in containers
Small Front Yard Columnar or fastigiate shrubs
Tiny Backyard Multi-purpose plants (e.g., privacy & fruit)
Miniature Patio Vertical planters with trailing species

Pocket gardens utilize every available nook. Underplanting beneath trees maximizes greenery. Bonsai techniques help fit larger trees into small plots. Roof gardens are becoming popular in cities. They use lightweight soil for tree health and building safety.

Frequently Asked Questions Of How To Fit Trees And Shrubs Into A Small Garden

What Are Suitable Trees For Small Gardens?

Small gardens benefit from trees like Amelanchier, Japanese Maple, and Crabapple. These species grow vertically with moderate canopies that provide shade without overwhelming the space. Their relatively shallow root systems minimize disruption to nearby structures and plants.

How To Select Shrubs For Limited Space?

Choose dwarf shrub varieties with slow growth rates for minimal maintenance. Look for those that offer multi-season interest, such as flowering in spring or vibrant fall foliage. Assess the shrub’s mature size to ensure it will fit comfortably in your garden without overcrowding.

Can I Grow Fruit Trees In A Small Yard?

Yes, fruit trees can thrive in small yards with proper selection and pruning. Dwarf and columnar fruit trees are ideal, taking up less space while still providing a yield. Regular pruning helps manage their size and promotes healthier fruit production.

What Landscaping Techniques Maximize Small Garden Space?

Vertical gardening, tiered planters, and espaliered trees are key techniques to maximize space. These methods allow you to grow plants upwards, making the most of vertical space. Also, consider using companion planting to efficiently use ground space.

Conclusion

Transforming a small garden space with trees and shrubs is not just possible, it’s a creative journey. Choose the right species, employ vertical planting, and embrace regular pruning for a lush, spacious feel. Your petite garden can boast big character and tranquility.

(To know more, you can check this out too: https://bonsainurserybd.com/grow-your-green-oasis/)

Happy gardening!

Gardening With The Environment In Mind

Why Should I Gardening With The Environment In Mind: Eco-Wise Tips

Gardening with the environment in mind preserves biodiversity and sustains soil health. It reduces pollution and conserves vital resources like water.

Gardening With The Environment In Mind

Gardening holds a special place in the heart of many homeowners and nature enthusiasts. It’s an activity that not only beautifies your home but can also play a pivotal role in supporting local ecosystems. Adopting eco-friendly gardening practices helps in reducing your carbon footprint, limiting the use of harmful chemicals, and supporting pollinators.

By choosing native plant species, employing composting techniques, and using organic pest control, gardeners can create a thriving garden that aligns with the rhythms of the natural world. This approach not only nurtures the environment but can also result in a more resilient and productive garden. As our awareness of ecological concerns grows, so too does the importance of gardening in a way that respects and protects our planet.

Gardening With The Environment In Mind: The Roots Of Eco-friendly Gardening

Eco-friendly gardening restores balance to our planet’s ecosystems. Native plants attract beneficial insects and wildlife. These species support biodiversity and soil health. Eco-gardens conserve water with rain barrels and drought-resistant plants.

Sustainable horticulture is not new. Ancient civilizations practiced crop rotation and composting. These methods enriched the soil without chemicals. They understood the importance of working with nature, not against it. Today, we continue these traditions to protect our environment.

Environmentally Friendly Practice Benefits
Using organic fertilizers Keeps soil and waterways clean
Planting cover crops Prevents erosion and nurtures soil
Encouraging wildlife Promotes natural pest control

Soil Health And Plant Selection

Nurturing soil naturally boosts plant growth and health. Organic matter, like compost, gives soil nutrients and life. It makes the earth rich and fertile.

Choosing native plants means they are perfect for your area. They need less water and fewer chemicals. This choice helps local wildlife, like bees and birds.

Native species thrive with natural soil conditions. Non-native plants might need extra help. They can also hurt the ecosystem.

(Check the link for Soil Mixture in the Garden: https://bonsainurserybd.com/soil-mixture-for-raised-vegetable-garden/)

Water Wisdom In The Garden

Water is precious for both gardens and the planet. Drip irrigation is a key method for conserving this vital resource. Its system sends water slowly to plant roots. Unlike sprinklers, it reduces water loss from evaporation and runoff. Smart gardeners use timers to further control water use. By doing so, they ensure every drop is used wisely. Conservation techniques in gardening are essential for sustainability.

Natural Pest Control

Gardening with the environment in mind means using natural methods. Promoting beneficial insects is key for natural pest control. These friendly bugs eat harmful pests. Ladybugs, bees, and butterflies help keep your garden healthy.

Using organic alternatives to pesticides protects these insects. You can make sprays from garlic, pepper, or soap. These do not harm the good bugs. Your garden stays safe for wildlife and your family.

Eco-friendly Garden Design

Eco-friendly garden design embraces earth-conscious choices. It helps nature thrive right in your backyard. Diverse plants attract different critters. Think about native flowers, shrubs, and trees to welcome birds, bees, and butterflies.

Feature Benefit
Native Plants Support Local Wildlife
Organic Mulch Enrich Soil Health
Water Features Provide Habitats

Plan your green space for the future. Spaces for wildlife are a must. Did you know sustainable landscapes need less work? They save water and invite helpful insects. A well-planned eco-garden brings joy for years. Start with sustainable materials and go organic!

From Garden To Table

Gardening with the environment in mind helps our planet. It cuts down on transport emissions because we don’t have to buy food from far away. Growing your own food means fewer trips to the store. This lowers your carbon footprint.

Eating what you grow is not only fresh, it’s good for the Earth. Plants take in carbon dioxide and give out oxygen. Home gardens can do this too. This process helps fight climate change.

Frequently Asked Questions For Why Should I Garden With The Environment In Mind

What Are Environmental Benefits Of Gardening?

Gardening naturally supports local ecosystems and biodiversity. By choosing native plants, you provide habitats for indigenous wildlife. Composting reduces landfill waste, while avoiding chemicals preserves soil and water quality.

Can Gardening Reduce Carbon Footprint?

Yes, gardening can significantly lower your carbon footprint. Cultivating plants captures carbon dioxide from the atmosphere. Moreover, growing your own food cuts down on the emissions associated with transporting produce.

How Does Water Conservation Relate To Eco-gardening?

Eco-conscious gardening practices include water conservation measures. Using drought-resistant plants, mulching, and rainwater harvesting are ways to reduce water usage and maintain a sustainable garden.

What Is The Importance Of Soil Health In Eco-gardening?

Healthy soil is crucial for sustainable gardening. It supports plant growth, stores carbon and filters water. Utilize organic matter and avoid synthetic fertilizers to uphold soil’s natural fertility and structure.

Conclusion

Embracing eco-friendly gardening nurtures our planet as much as our souls. By choosing sustainable practices, we support biodiversity, conserve resources, and contribute to a healthier environment. Let’s cultivate our gardens mindfully, knowing each plant we sow is a step toward a greener future.

(For more Eco-Friendly Gardening Tips: https://www.greenmatters.com/p/how-to-keep-your-garden-eco-friendly)

Together, our green thumbs make a world of difference.

Dry Shady Spot

What Can I Grow In A Dry Shady Spot: Oasis Gems Unveiled

In dry, shady spots, hostas and ferns can thrive. These plants tolerate low light and dry soil conditions.

Cultivating a garden in areas with dry shade can be challenging, yet several plants adapt well to these conditions. Selecting the right species is crucial for a thriving garden that requires minimal maintenance. Plants like hostas, known for their lush foliage and hardiness, are excellent for such spots.

Dry Shady Spot

Similarly, ferns offer a variety of textures and forms, enhancing the aesthetic of shaded areas while being drought-resistant. Creating an inviting landscape in dry shady areas is possible by choosing the suitable plants that not only survive but flourish under these specific conditions. With a thoughtful approach to planting, even the most challenging garden spots can transform into an oasis of greenery.

Thriving In The Shadows

Dry shade areas pose a unique challenge for gardeners. Many plants thirst for sunlight and moist soil. Yet, certain plants both thrive and bring life to these seemingly inhospitable spaces. These plants have evolved to manage with less water and minimal light. They generally have deeper roots or leaves that require less sunlight. Unlike their sun-loving counterparts, these shade dwellers conserve water. This ability to store water allows them to wait for rare damp moments. Thus, garden success in dry shade hinges on selecting the right species.

Dry Shade Plant Options

Evergreen choices come with a promise of year-round greenery. Japanese Spurge thrives in dry, shady spots. Its lush leaves persist through all seasons. Cast Iron Plant, true to its name, withstands tough conditions. It’s perfect for shaded areas year-round.

Flowering plants also have low light champions. Try the Bigroot Geranium for summer blooms. Despite shade, it flourishes with striking flowers. The Bleeding Heart is another stunner. It blooms even without much light. Gardeners love its heart-shaped pink flowers. They brighten up any shady corner.

Plant Type Characteristics
Japanese Spurge Lush, year-long green
Cast Iron Plant Survives in tough conditions
Bigroot Geranium Blooms in summer, tolerates shade
Bleeding Heart Pink, heart-shaped flowers

Ground Covers: A Dry Shade Solution

Ground covers thrive even in dry, shady areas. These plants conserve soil moisture and prevent erosion. Their dense growth keeps weeds at bay. For areas beneath trees or along the north side of buildings, these resilient plants are ideal.

Ground Cover Plant Features
English Ivy Evergreen with fast growth
Periwinkle Colorful flowers; spreads quickly
Pachysandra Lush foliage; handles dryness well
Hostas Wide variety; easy to grow

These varieties adapt well to low light and sparse water. They make your garden look full and lively. With these ground covers, dry shade becomes a lush, green space.

Ferns And Perennials: The Shade Specialists

Dry shady spots can still burst with life, thanks to certain ferns and perennials. Christmas ferns and maidenhair ferns love the shade. They need little water. Leatherwood ferns are another great pick for dry, shady areas. These plants thrive with minimal care.

Not just ferns, some perennials also don’t need much water. The bigroot geranium and epimedium are perfect. They both bring color and life to any dry, shaded garden spot. Plant once and enjoy for years. Ready for the shade?

Creating Your Shade Garden Oasis

Creating your shade garden oasis might feel challenging, but with the right plants and design, it can become a beautiful retreat. Texture and color are key to design in dry, shady areas. Consider plants with varied leaf sizes and shapes to add interest. Using ferns, hostas, and hellebores can bring lushness and vibrancy. Bleeding hearts and lungwort add pops of color.

Don’t overlook the role of hardscape elements like stone pathways or decorative rocks. These can create structure and contrast. Integrate benches or sculptures to give character to your garden. A shady garden doesn’t have to be dull. It can be a dynamic and serene space to enjoy.

Care Tips For Dry Shade Gardens

Effective watering strategies are key for dry, shady gardens. Drip irrigation or soaker hoses deliver water directly to plant roots, minimizing waste. Grouping plants with similar water needs together helps conserve water. Water early in the morning to reduce evaporation and allow for deep, infrequent waterings that encourages deeper root growth.

Mulch is essential in improving soil and conserving moisture. Use organic mulches like leaf mold or compost to add nutrients. A 2-3 inch layer of mulch helps keep the ground cool and reduces water loss. Over time, it will also improve soil structure and benefit your plants’ health.

Frequently Asked Questions For What Can I Grow In A Dry Shady Spot

What Plants Thrive In Dry Shade?

Dry shade can be challenging for gardening, but certain plants like Hostas, Ferns, and Hellebores adapt well. These species are known for their ability to grow in low-water and low-light conditions. They are excellent choices for these tricky spots in your garden.

Are There Any Colorful Flowers For Dry Shade?

Yes, there are! Bleeding hearts, Lungwort, and certain varieties of Hydrangea bloom well in dry shade. These plants add a splash of color with their vibrant flowers even in the less hospitable areas of your garden.

Can Ground Cover Plants Grow In Shady Areas?

Absolutely. Ground cover plants such as Vinca, Ajuga, and Pachysandra are perfect for dry shady areas. They spread out to form a living mulch, preventing weed growth and providing a lush, green carpet underfoot.

How Do I Prepare Soil For Dry Shade Garden?

Preparing soil in a dry shade garden involves adding organic matter, such as compost or leaf mold, to improve moisture retention. Ensuring it is well-aerated and fertile will help plants establish roots and thrive even in challenging conditions.

Conclusion

Navigating the challenges of dry, shady spots doesn’t mean compromising on a lush garden. With the right plants—like hostas, ferns, and bleeding hearts—these areas can flourish. Embrace this unique corner of your garden as an opportunity for growth. Happy planting and enjoy the transformation!

(For some more idea: https://bonsainurserybd.com/what-to-do-with-a-dark-corner-in-your-garden/)